Tool Plugins are usually stand-alone elements which don't normally deal with direct user interaction. Examples would be the email plugin which can send email notifications out in the course of your process, and a code generator that can generate serial numbers for invoices. Because of the nature of these plugins, they're normally associated with background tasks rather than those which require direct user intervention. This, however, does not mean that they do not have access to workflow information. Your PluginManager will still provide any and all data (form submissions, package information, assignee details, etc.) that are available at that point of process execution.
Mapping System Tools to Plugins
- Select your application from the "Design Apps" tab and click on the "Processes" menu item. Click on the process you want to update.
- In the process details page, the "Map Tools to Plugins" tab displays the list of tools activities defined in the process.
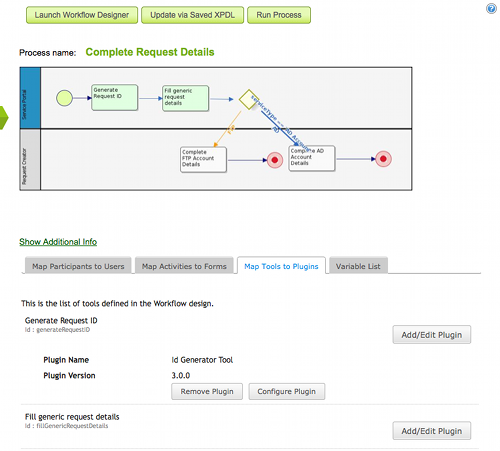
Figure 1: Mapping a Plugin to a Tool
- To map a tool, click on the "Add/Edit Plugin" button on the right of the tool name.
- The resulting popup dialog presents a list of plugins that are available in the system. Click on the desired plugin (e.g. 'Email Tool').

Figure 2: List of Available Plugins
- The Plugin Configuration dialog will be displayed and each plugin will have its own configuration page. Enter the appropriate settings for the plugin.
- Click on the Submit button at the bottom of the dialog to save the configuration settings.

Figure 3: Plugin Configuration Dialog
Available Process Tools