...
The easiest way to see how the Custom HTML works is to use the existing built-in App Expenses Claims. Here are the steps:
...
- Start the Joget Server and open the App Center.
- Log in as admin and click on the pencil icon on the Expenses Claim to open the Design App. (see Figure 1)

Figure 1 - Click on Expense Claim Form and you will be directed to the Form Builder.
Hover the mouse over the Custom HTML element on the canvas and click on Edit to open up the Edit Custom HTML properties. (see Figure 2).
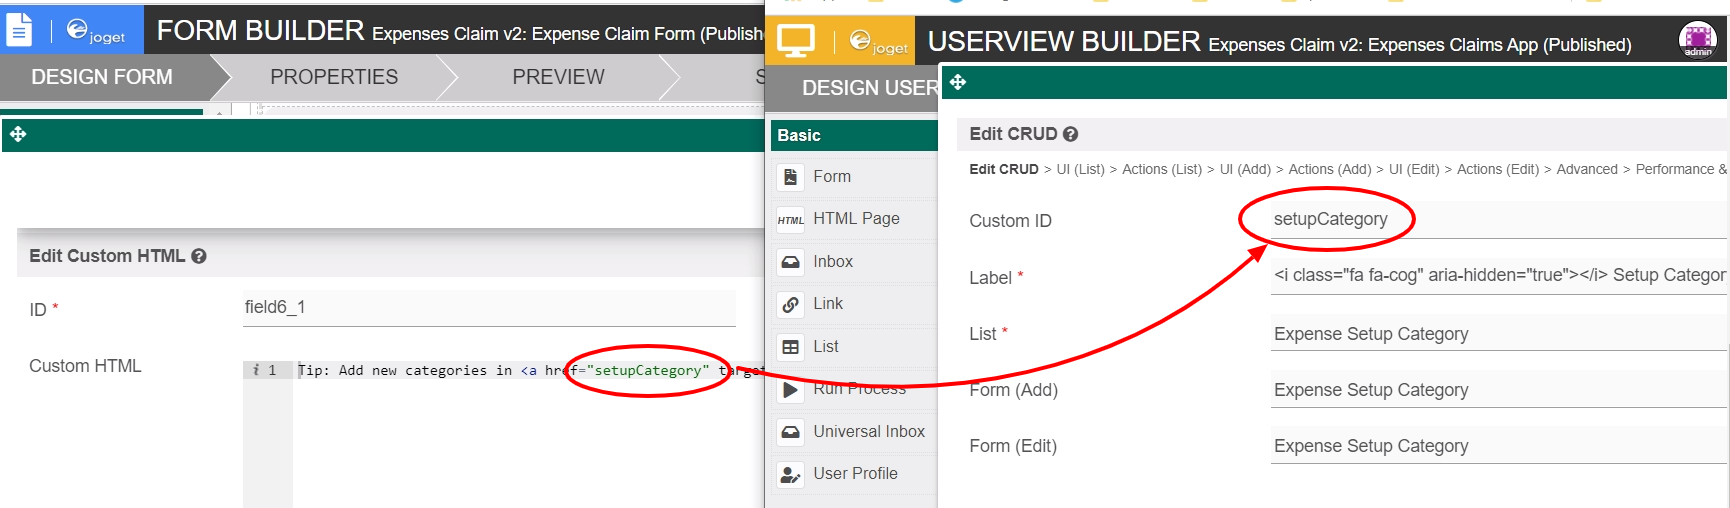
Code Block title Take note! <a href="setupCategory" target="_blank">
Figure 2- This Custom HTML is used to redirect to another page in the App when the user clicks on "Setup Category".
- To see it working, head back to the Design App and click the Launch button in the Userview column.
- Click on Create a New Expense Claim button on the Dashboard, fill up the necessary details and click Continue Next Screen.
- Here you will find the link. Click it to see it redirects you to the Setup Category page.
- Head back to the Design App and open up the Expenses Claims Apps under Userview column.
- In Userview Builder and take a look at the properties of Setup Category. Note that the <a> href attribute used in Custom HTML element was using the CustomID to specify the page the link goes to. (see Figure 3)
...
Figure
...

Figure 2

...
- 3
Custom HTML Properties
Edit Custom HTML
| Name | Description | Screen (Click to view) | ||||||||||||||||||||||||
|---|---|---|---|---|---|---|---|---|---|---|---|---|---|---|---|---|---|---|---|---|---|---|---|---|---|---|
| ID | Element ID (By declaring as "html", a corresponding database table column "c_html" will be created)
| |||||||||||||||||||||||||
| Custom HTML | Custom HTML in Form Builder can be used to achieve advanced form design by putting in any valid -
|


Advanced Options
| Name | Description | Screen (Click to view) | ||||||
|---|---|---|---|---|---|---|---|---|
| Label | Element Label to be displayed to the end-user. | |||||||
| Auto populate saved value? | Toggle to the auto-populate saved value.
|

