Red Hat OpenShift is the industry’s most comprehensive enterprise Kubernetes platform, and operators are the modern way to automate infrastructure management tasks. A new Joget DX Operator has now been released to further simplify and accelerate app development on Red Hat OpenShift. It has achieved Red Hat OpenShift Operator Certification, and is now available in the OpenShift Embedded OperatorHub.
...


| Table of Contents |
|---|
Tutorial Part 1: Install Joget DX Operator from the OperatorHub
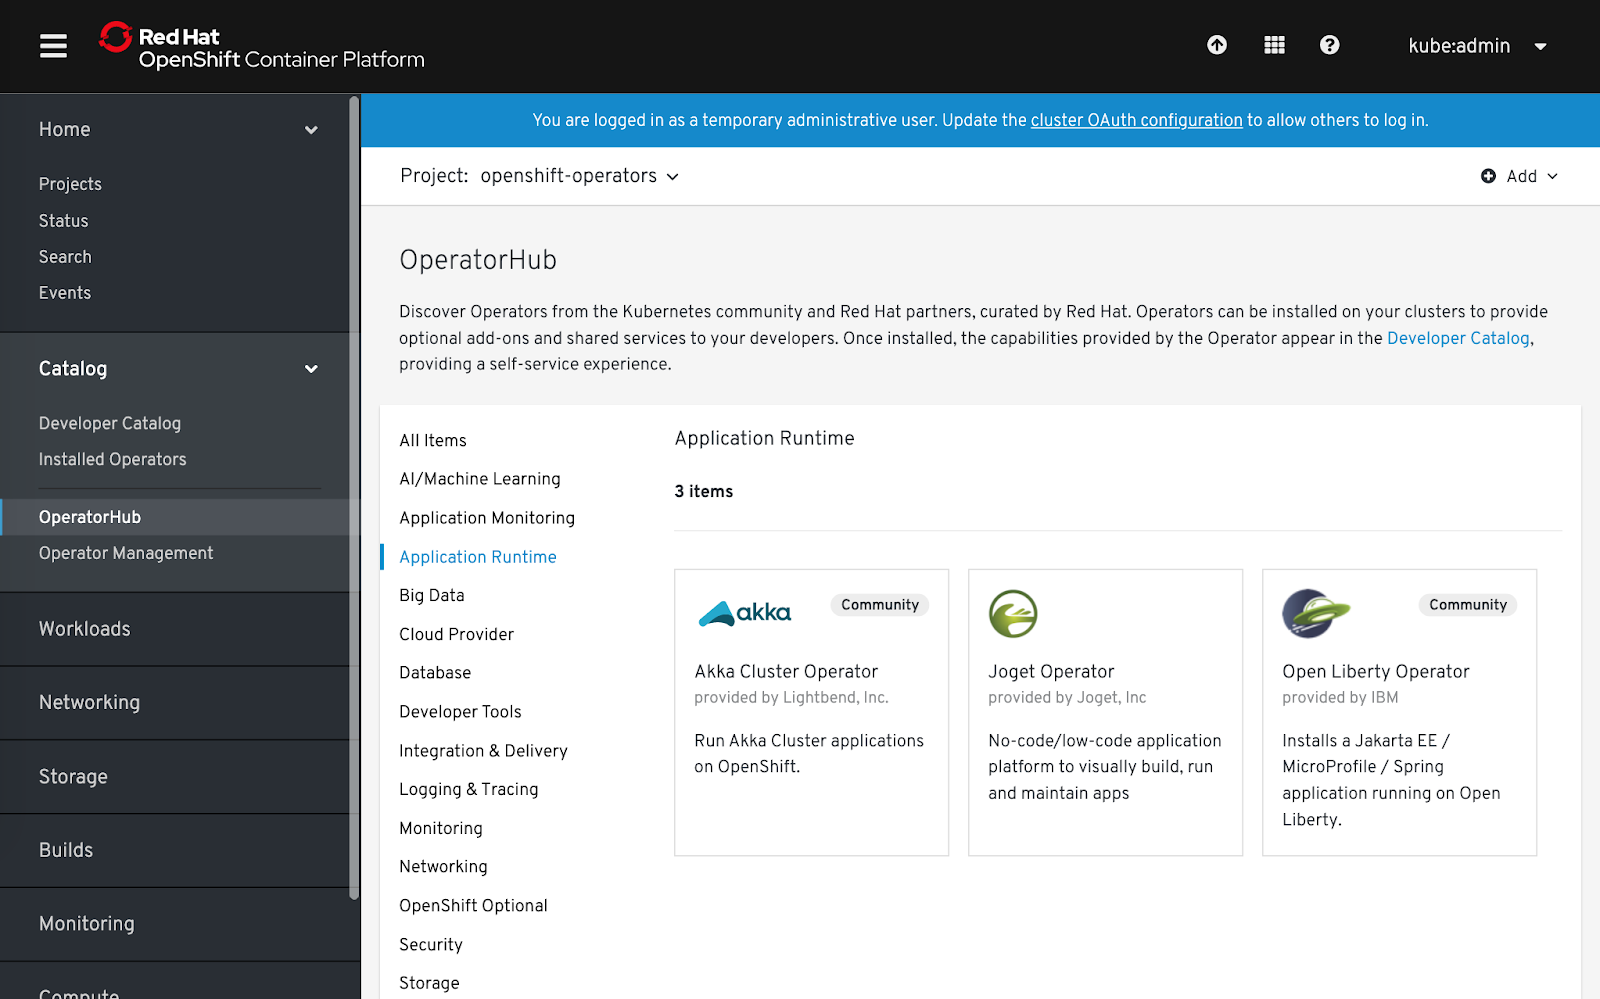
The Joget DX Operator enables customers to rapidly deploy, manage and scale a Joget DX cluster on Red Hat OpenShift. As a certified Operator, it is listed in the OpenShift Embedded OperatorHub catalog. Joget DX is a development platform as well as an application runtime, so the Joget DX Operator is listed under both the Application Runtime and Developer Tools categories.
These steps assume that you already have a running OpenShift 4 cluster. You can access https://try.openshift.com/ and select Openshift 4 playground to setup a new cluster.
1.1 Install Joget DX Operator as Cluster Admin
- Login to the OpenShift console as the cluster admin
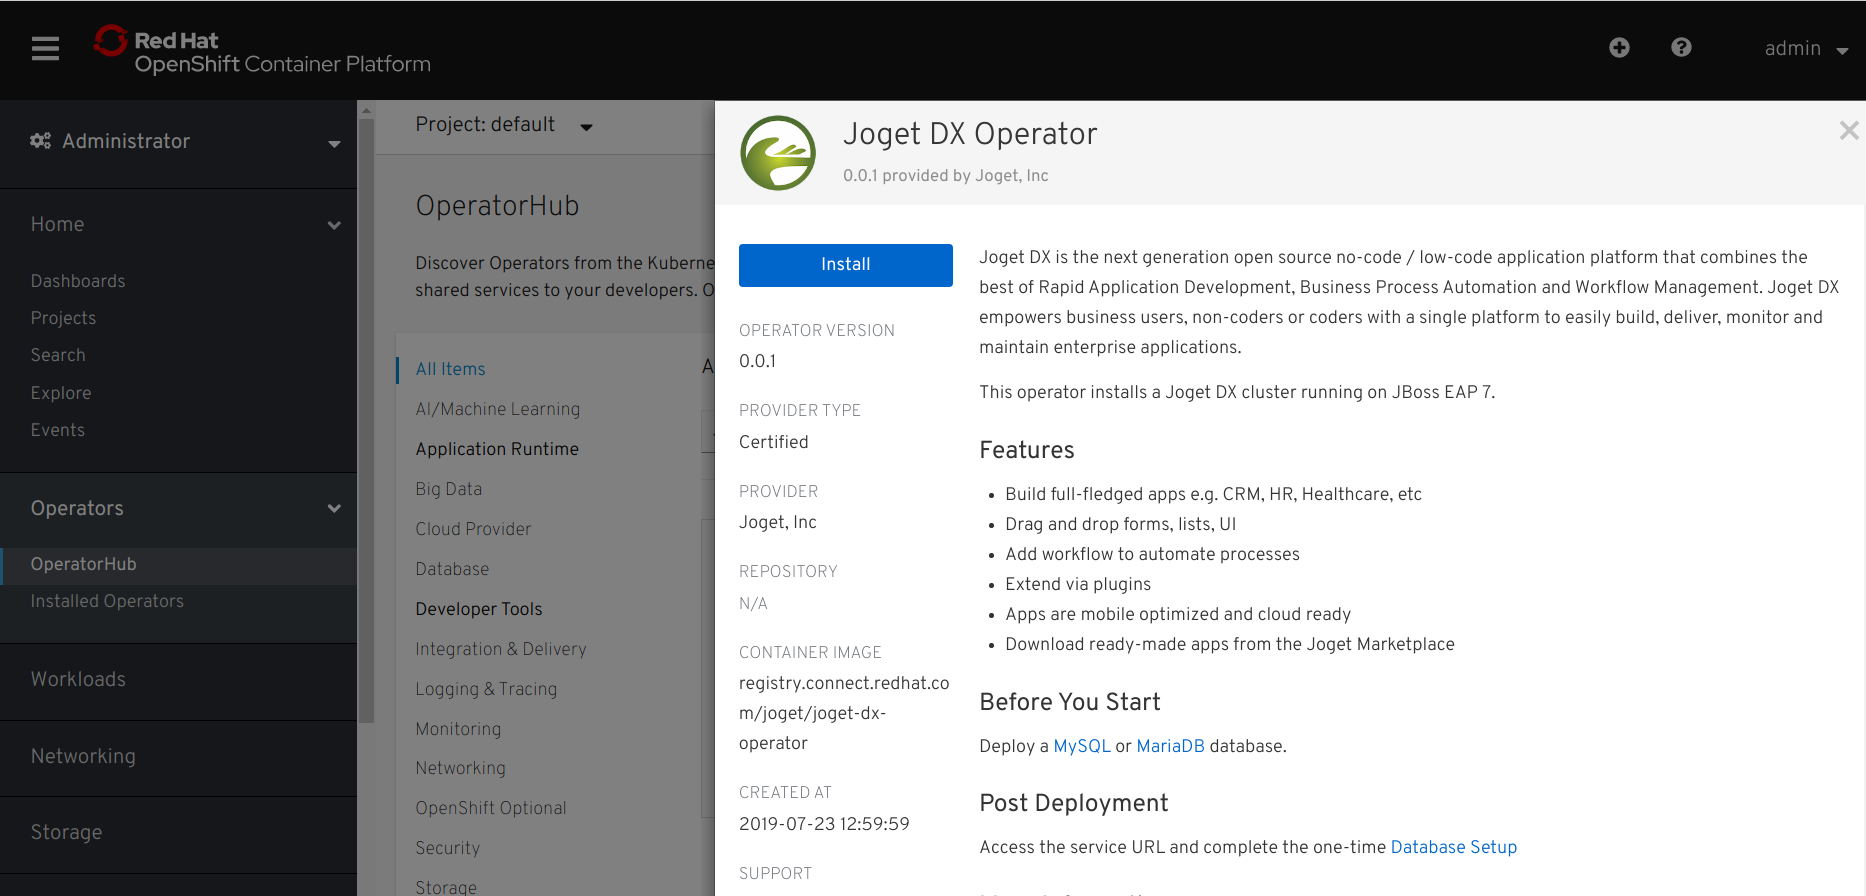
- Browse to Catalog > OperatorHub and search for Joget DX
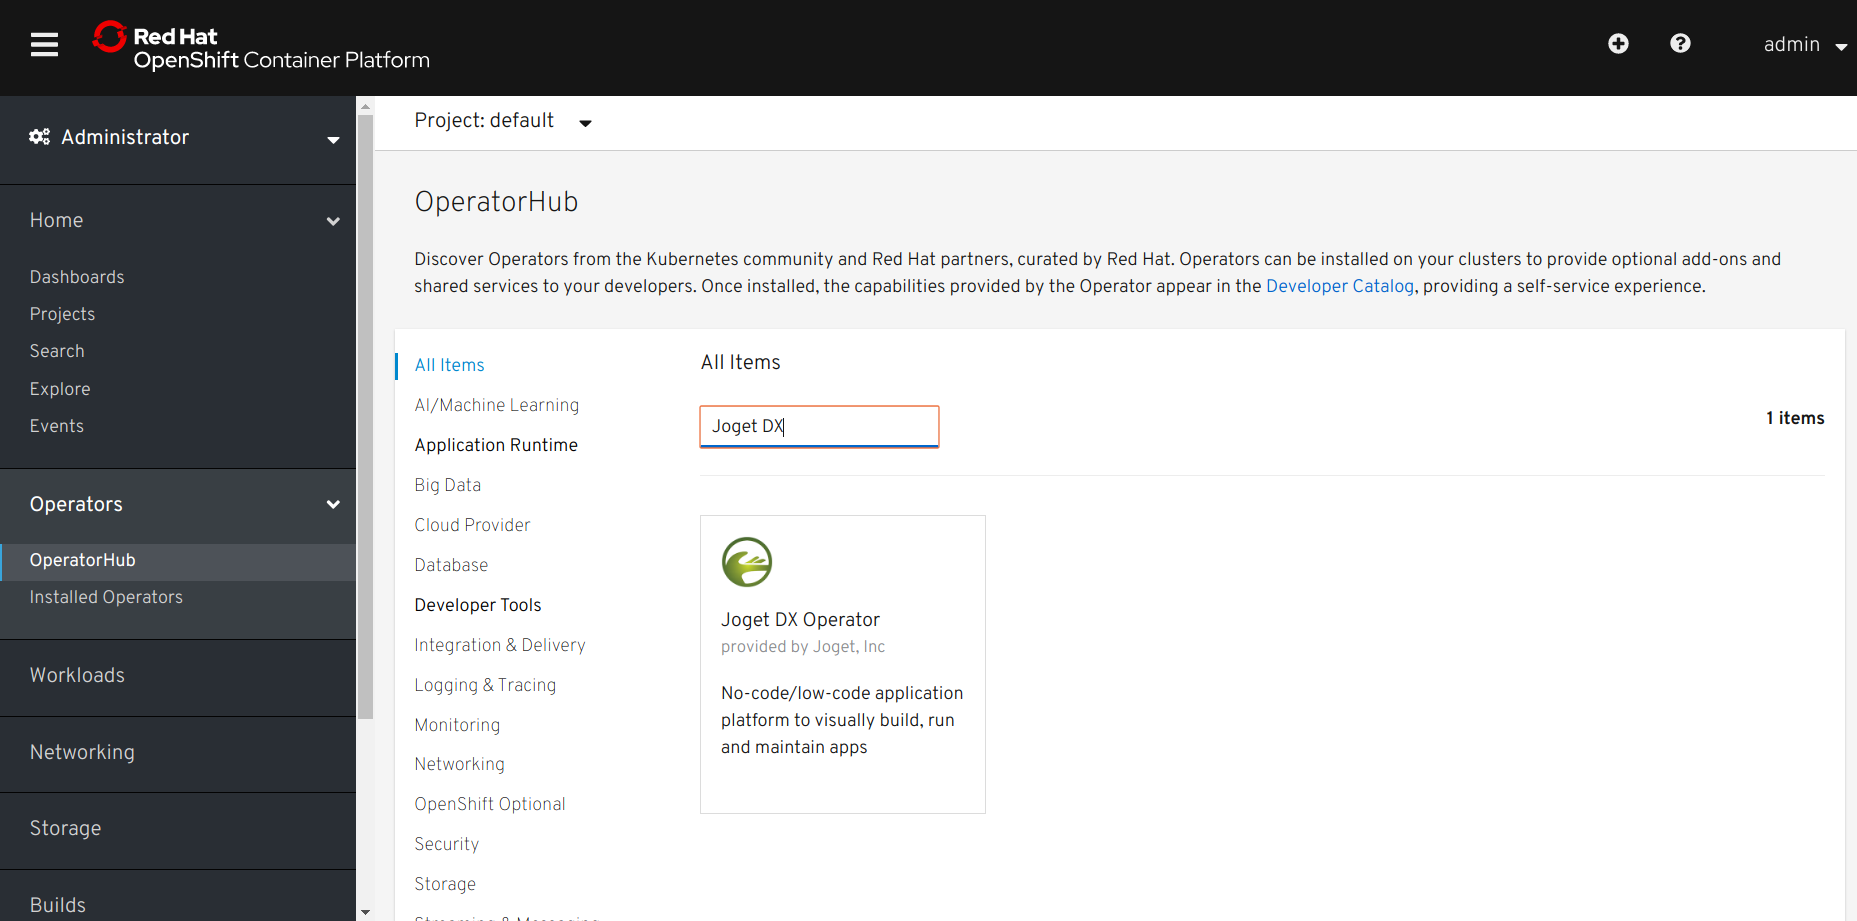
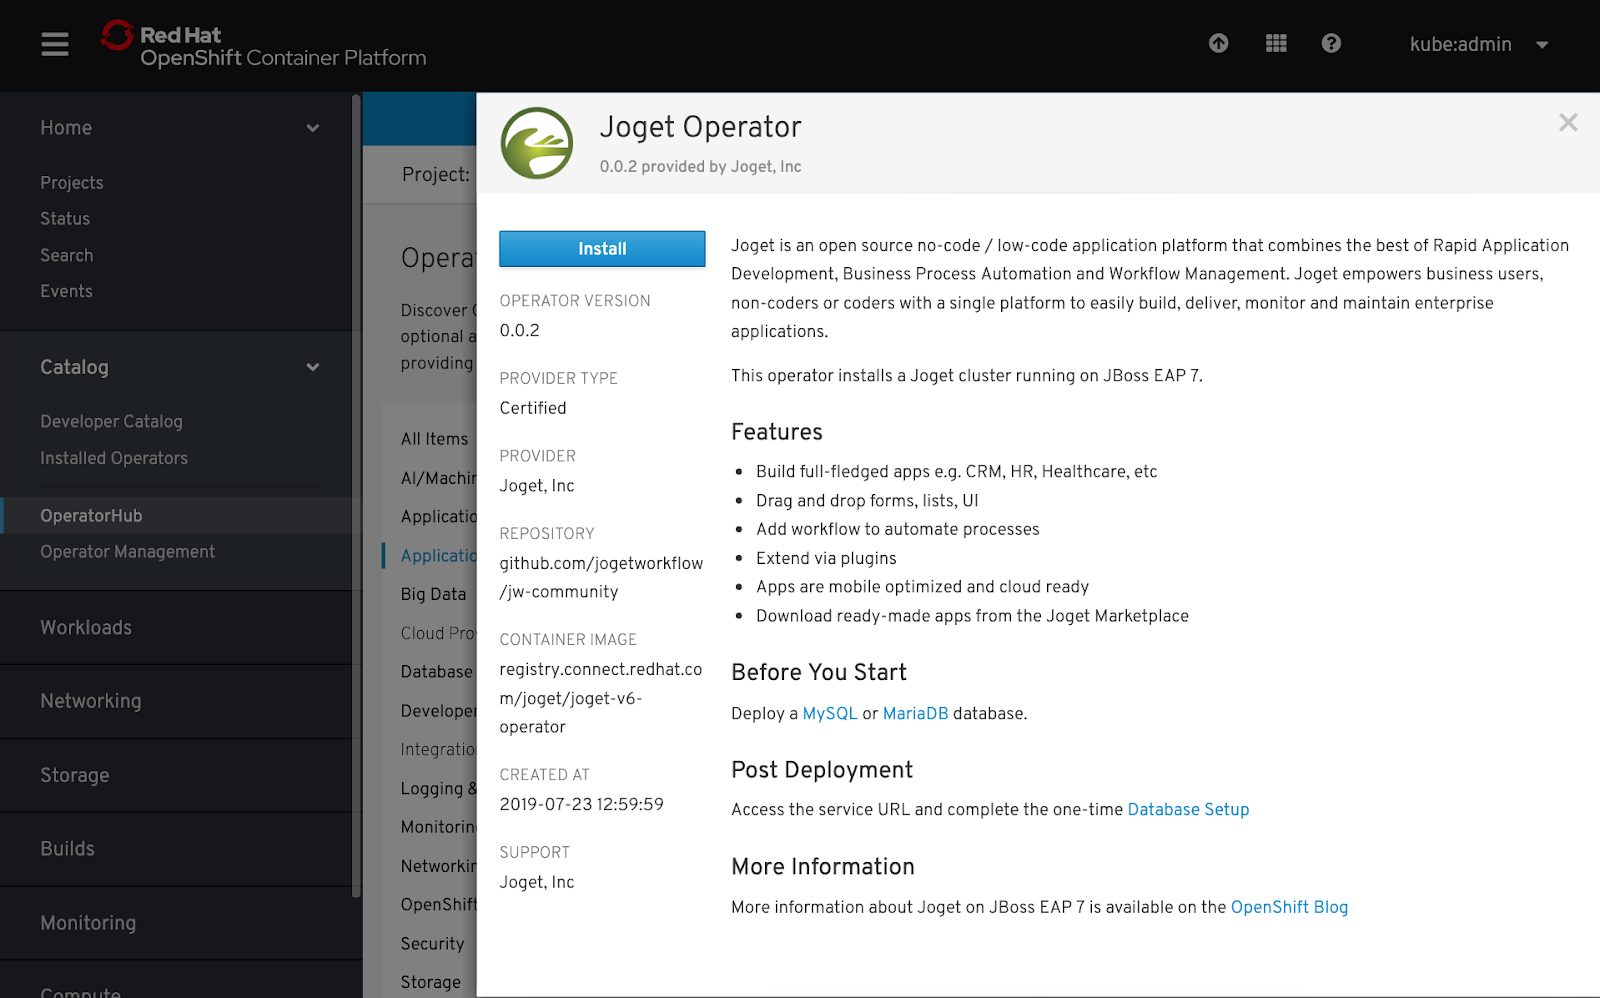
- Select the Joget DX Operator, and click on the Install button
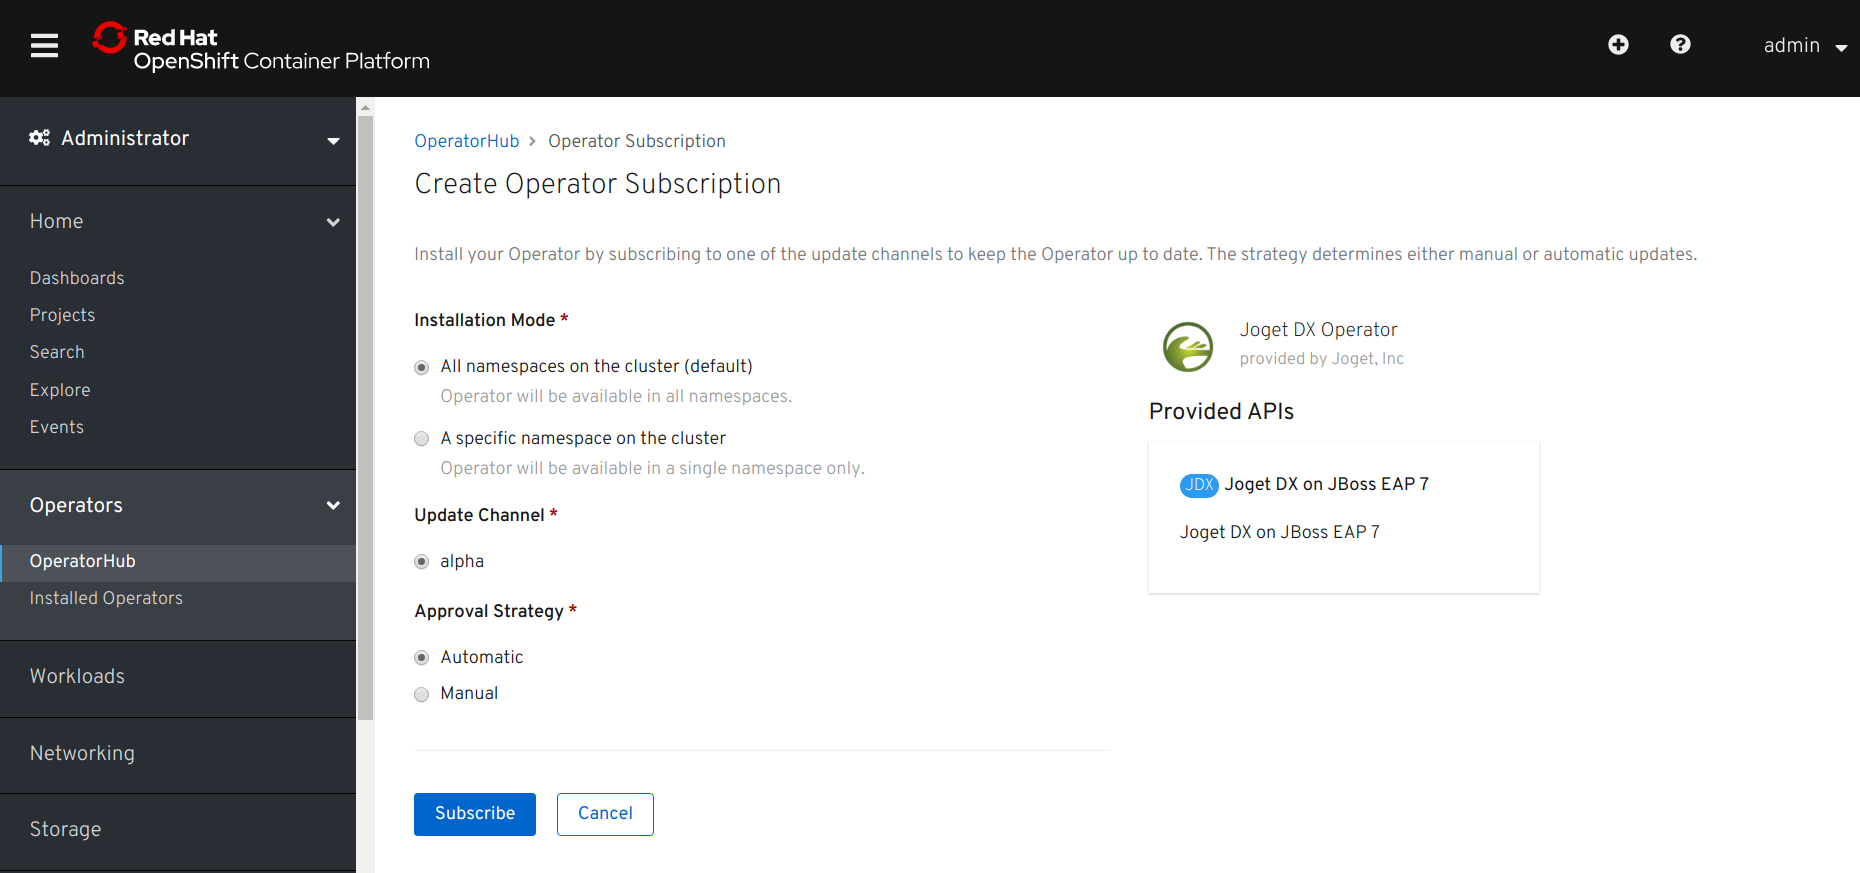
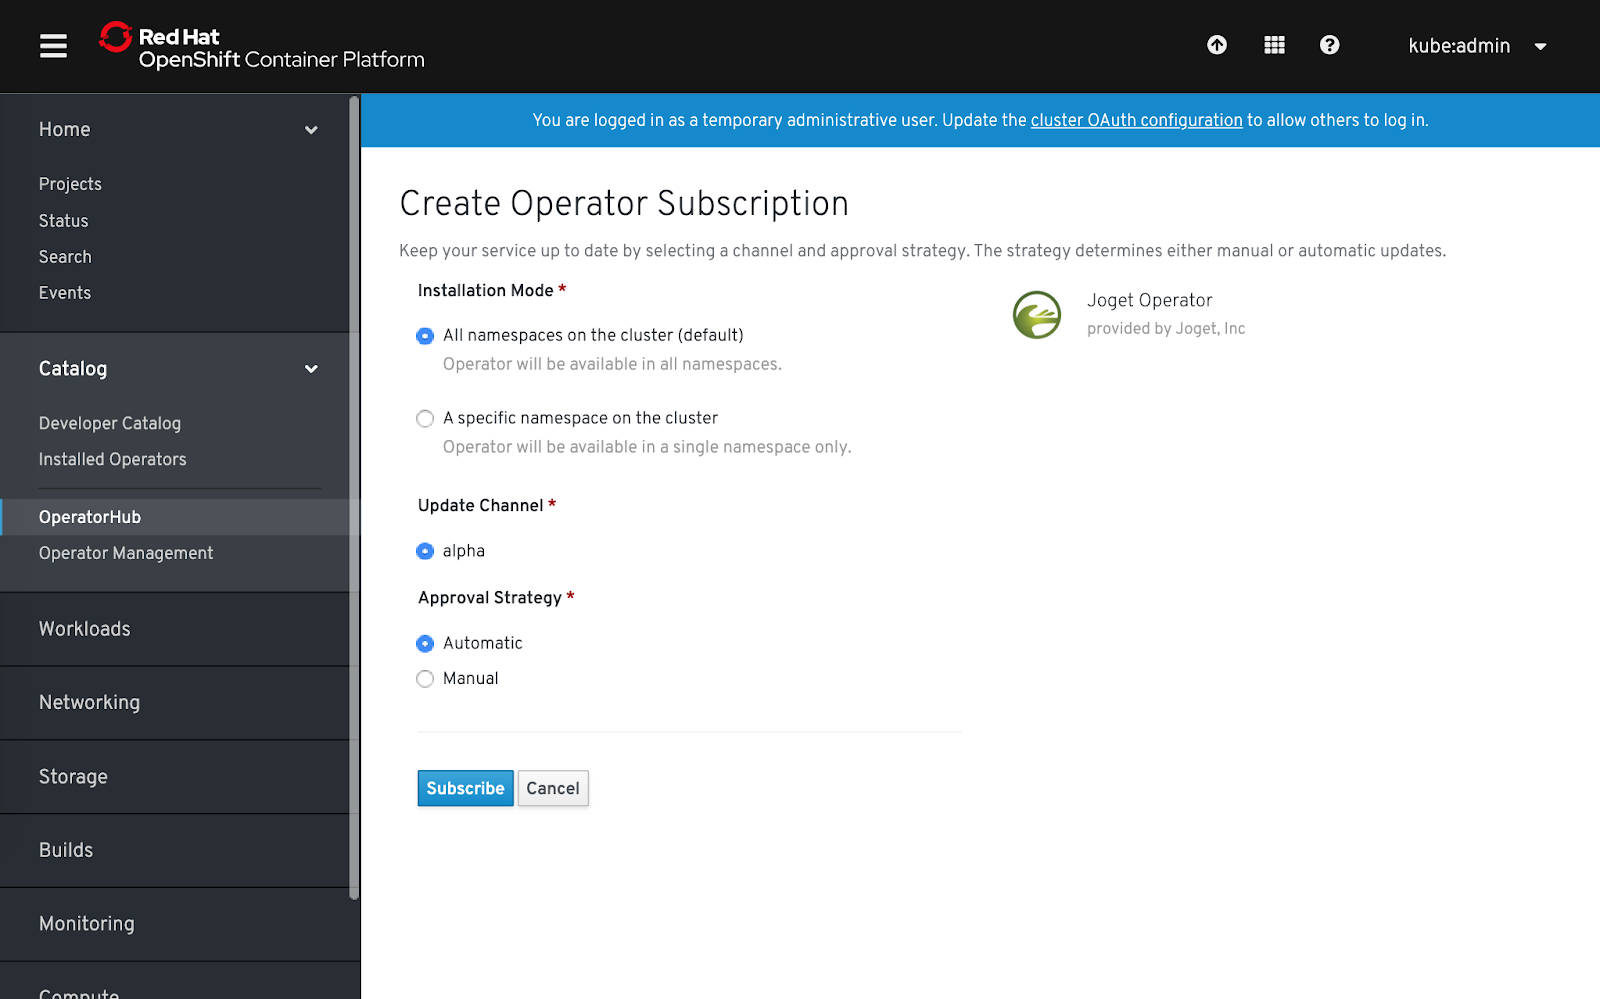
- Click on the Subscribe button to install the Joget DX Operator.
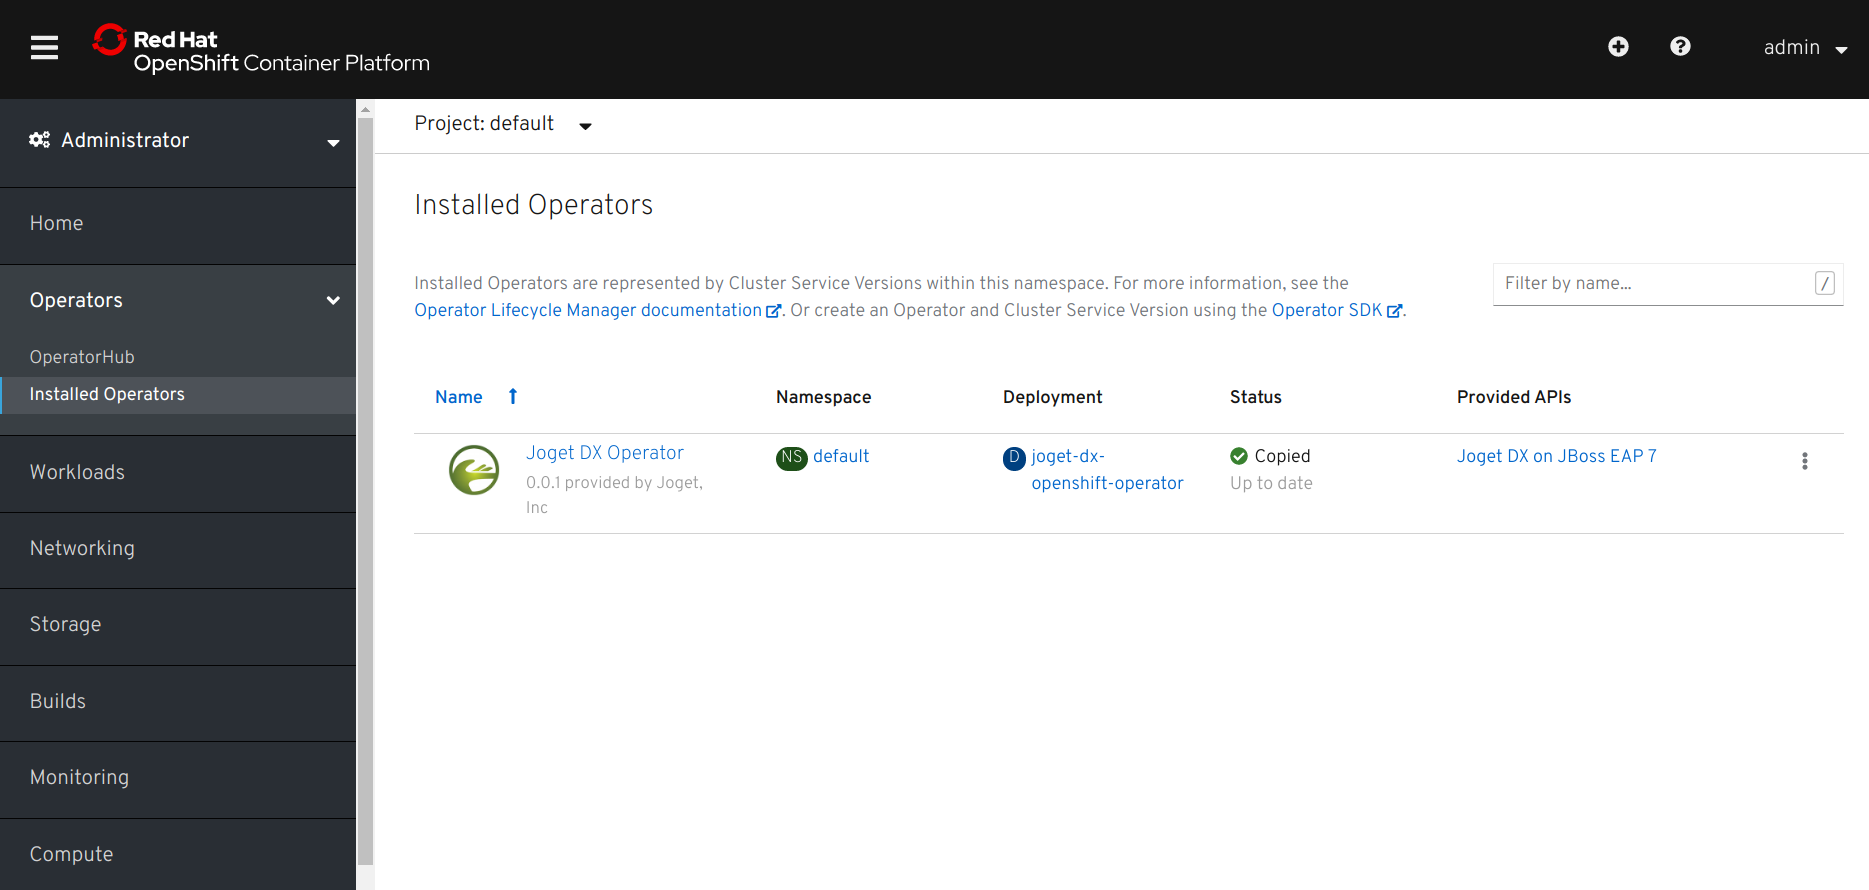
- Browse to Catalog > Installed Operators and select Joget DX Operator to confirm that the operator has been installed successfully.

Tutorial Part 2: Create a Joget Cluster with the Joget Operator
...
- Now that the Joget Operator has been installed, login to the OpenShift console as a normal user.

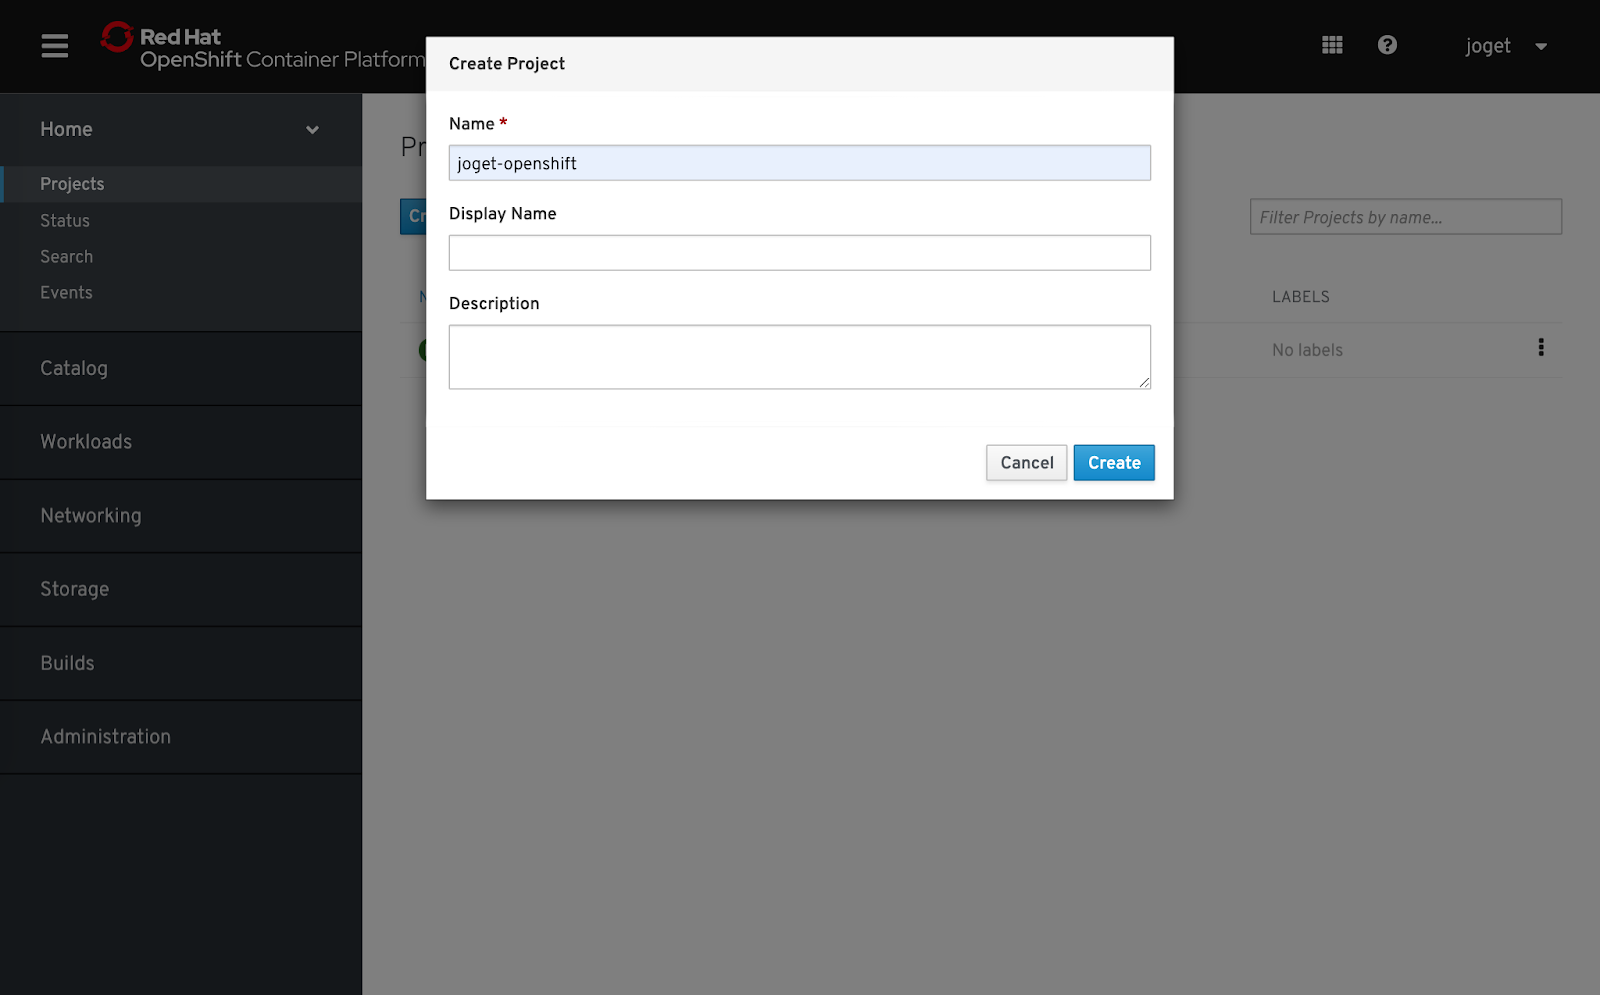
- Browse to Projects and click on the Create Project button. Enter a name and click on Create.

- As a prerequisite, you will need to deploy either a MySQL or MariaDB database in the project.
The fastest way to deploy MySQL would be to use the OpenShift CLI e.g.:
Code Block # deploy persistent mysql export DB_APP_NAME=joget-mysql export MYSQL_DATABASE=jwdb export MYSQL_USER=joget export MYSQL_PASSWORD=joget oc new-app openshift/mysql-persistent --name $DB_APP_NAME -p DATABASE_SERVICE_NAME=$DB_APP_NAME -p MYSQL_USER=$MYSQL_USER -p MYSQL_PASSWORD=$MYSQL_PASSWORD -p MYSQL_DATABASE=$MYSQL_DATABASE
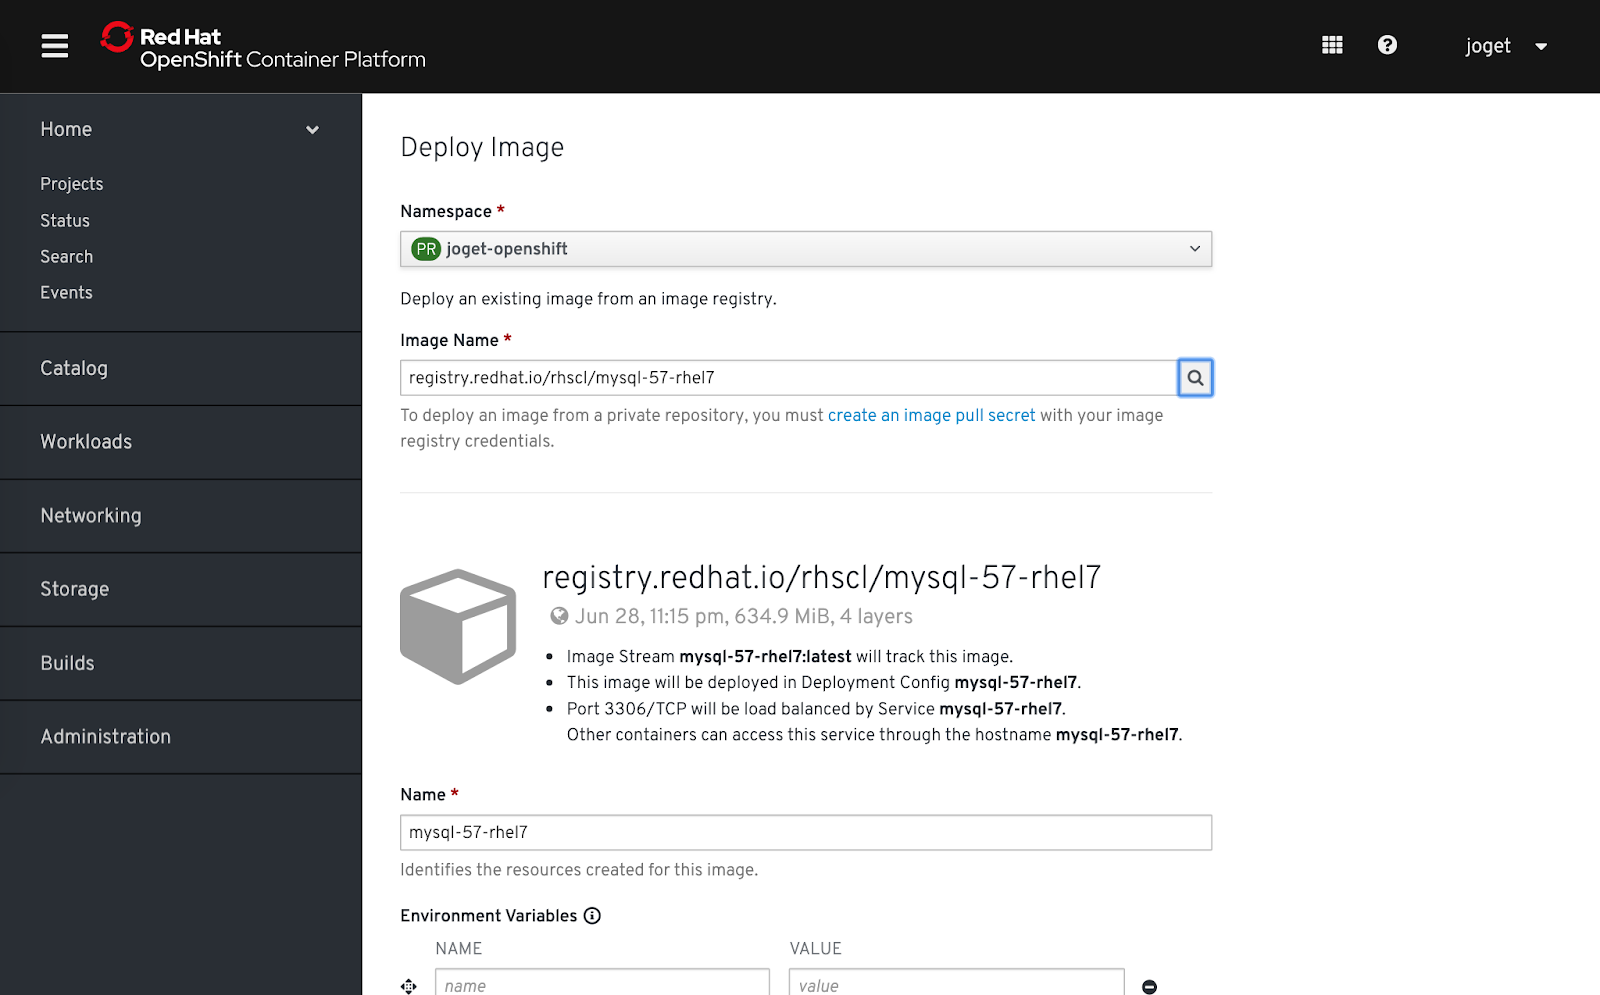
- Alternatively, you can deploy using the OpenShift Console. For MySQL, you can use either the public docker hub image centos/mysql-57-centos7, or the certified one from the Red Hat Registry registry.redhat.io/rhscl/mysql-57-rhel7.
- To access images from the Red Hat Registry, you will need to create a Secret containing a valid Red Hat login. If you do not have an account, you can acquire one by registering for one of the following options:
- Red Hat Developer Program. This account gives you access to developer tools and programs.
- 30-day Trial Subscription. This account gives you a 30-day trial subscription with access to select Red Hat software products.
- Browse to Workloads > Secret, select Image Pull Secret from the Create dropdown and key in the Red Hat registry server and login information e.g.

- Registry Server Address: registry.redhat.io
- Username: Red Hat login username
- Password: Red Hat login password
- Browse to the project, go to Workloads and click on Add > Deploy Imageadd other content.
For MySQL, enter either centos/mysql-57-centos7 or registry.redhat.io/rhscl/mysql-57-rhel7 for the Image Name and click on the Search icon.
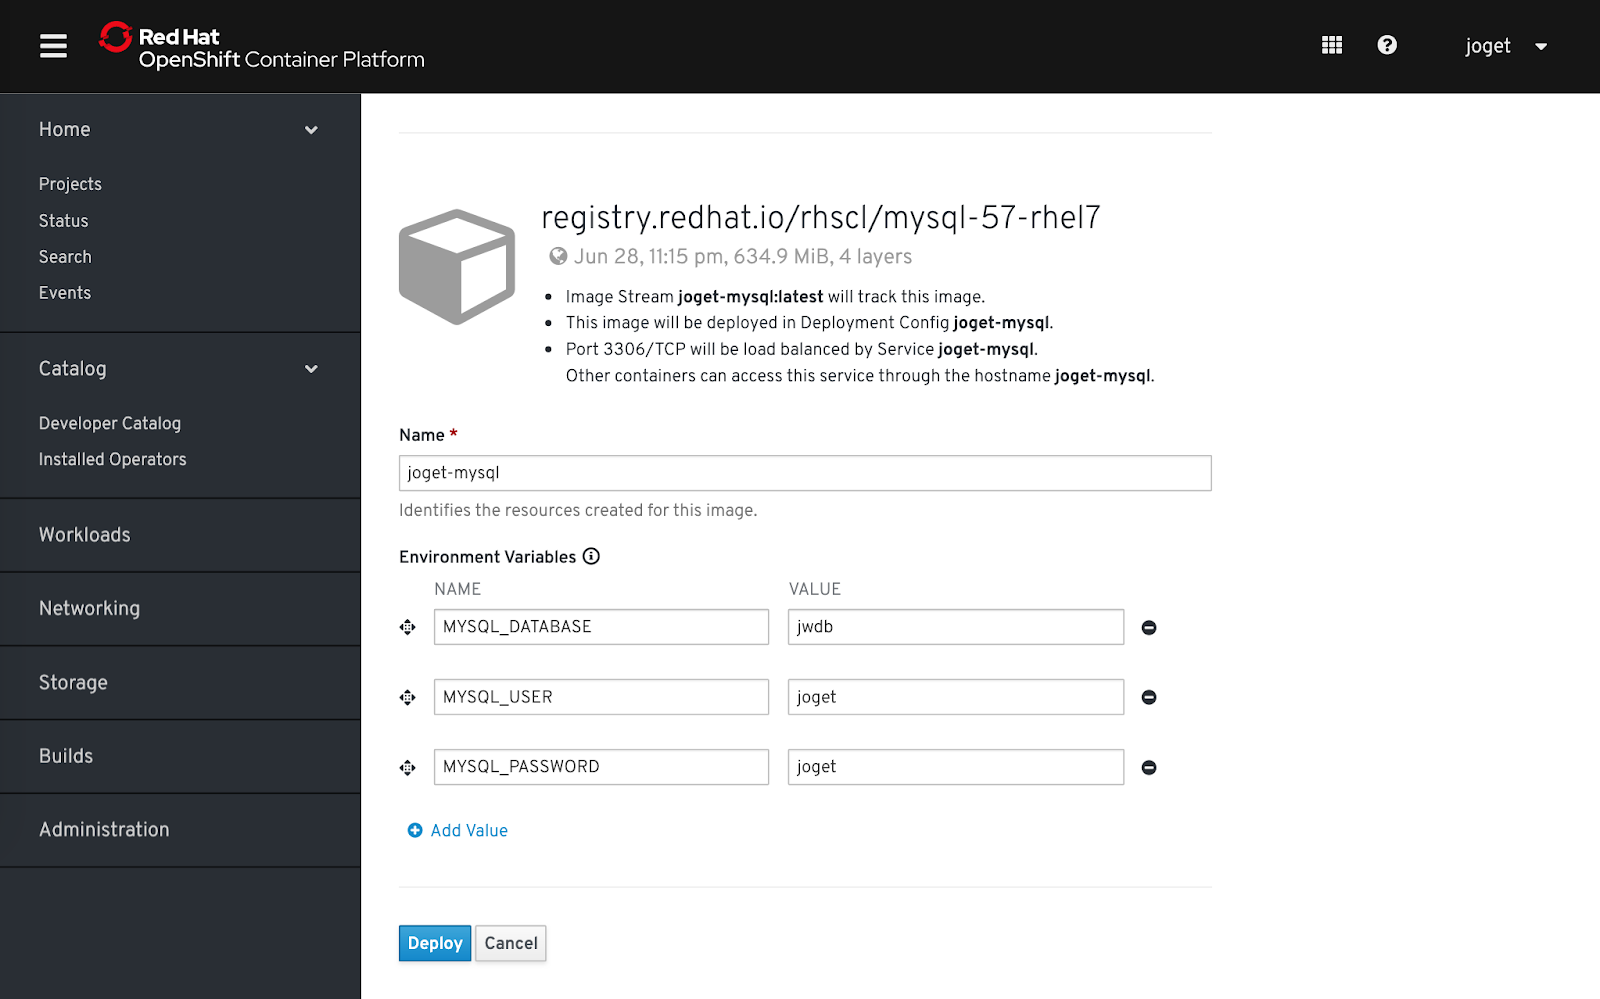
Key in the following configuration and click on Deploy. - Name: joget-mysql
- Environment Variables:

- Select Database.

- Search for MySQL.

- Select MySQL then click on Instantiate Template.

- MYSQL_DATABASE: jwdb
- MYSQL_USER: joget
- MYSQL_PASSWORD: joget
- Name: joget-mysql
- Environment Variables:
- Key in the following configuration and click on Create.

- Database Service Name: jogetdb
- MySQL Connection Username: joget
- MySQL Connection Password: joget
- MySQL Database Name: jwdb
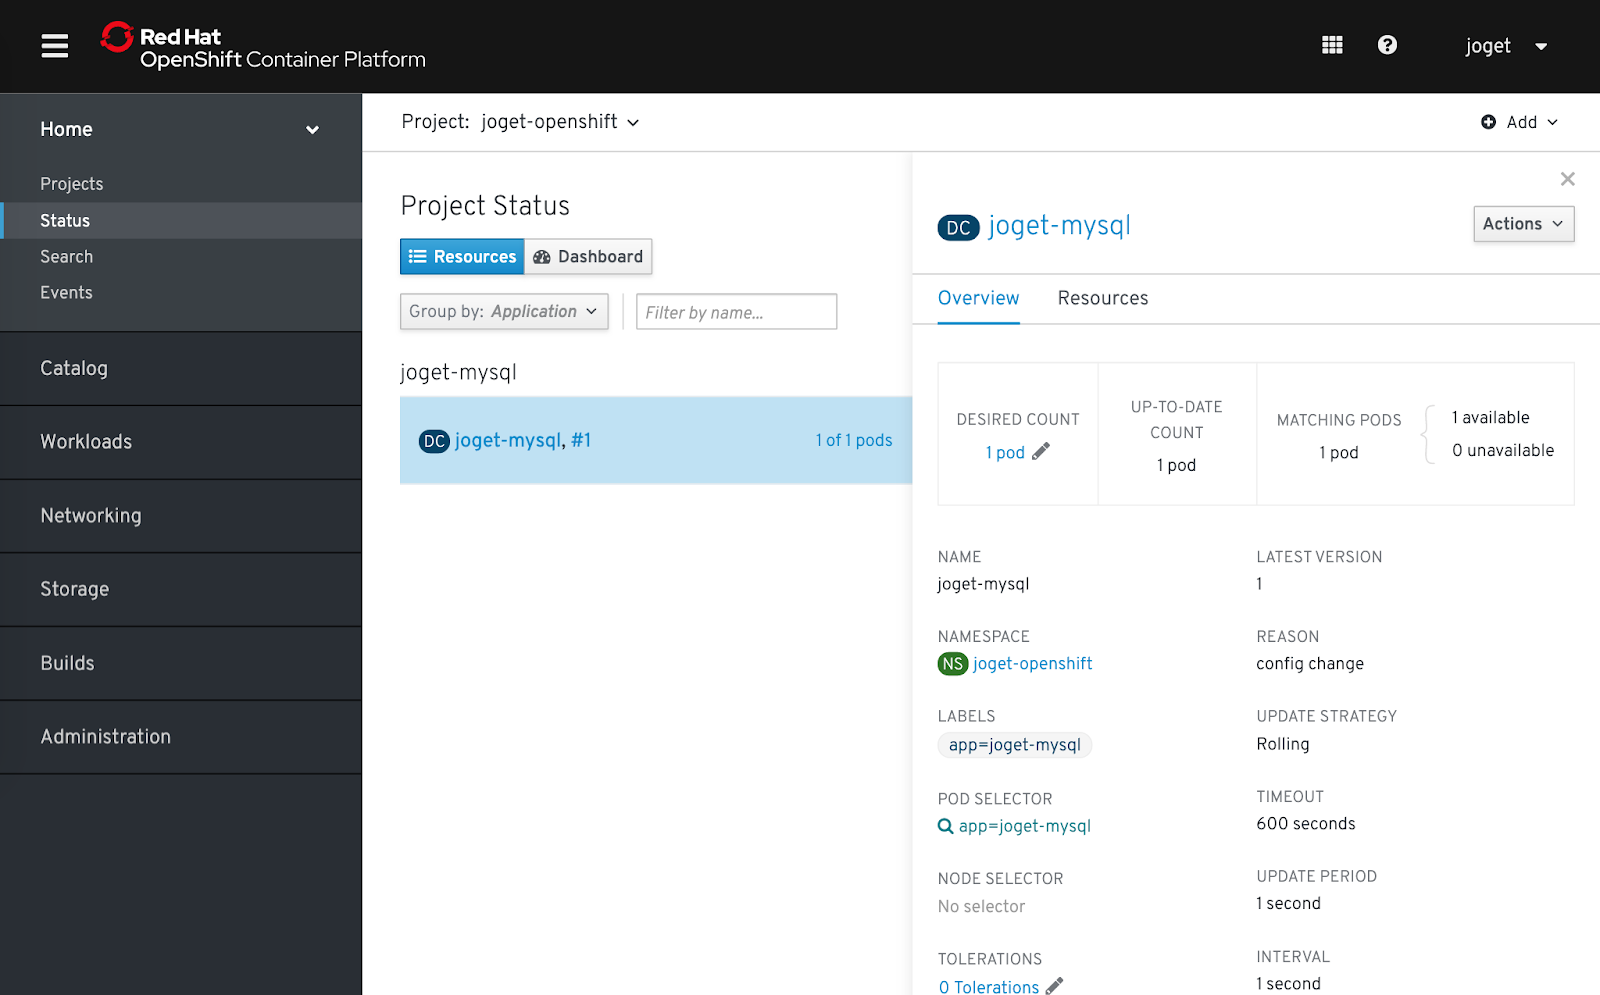
- IMPORTANT NOTE: By default, the data in this MySQL image is not persistent across container restarts. You will need to mount the volume to make the data persistent. Alternatively, deploy a persistent MySQL using a template using the OpenShift CLI described earlier.Go to Workloads → Deployment Configs Click on the name to verify that the MySQL database has been deployed successfully.
Info 


2.2 Deploy Joget DX using the Joget DX Operator
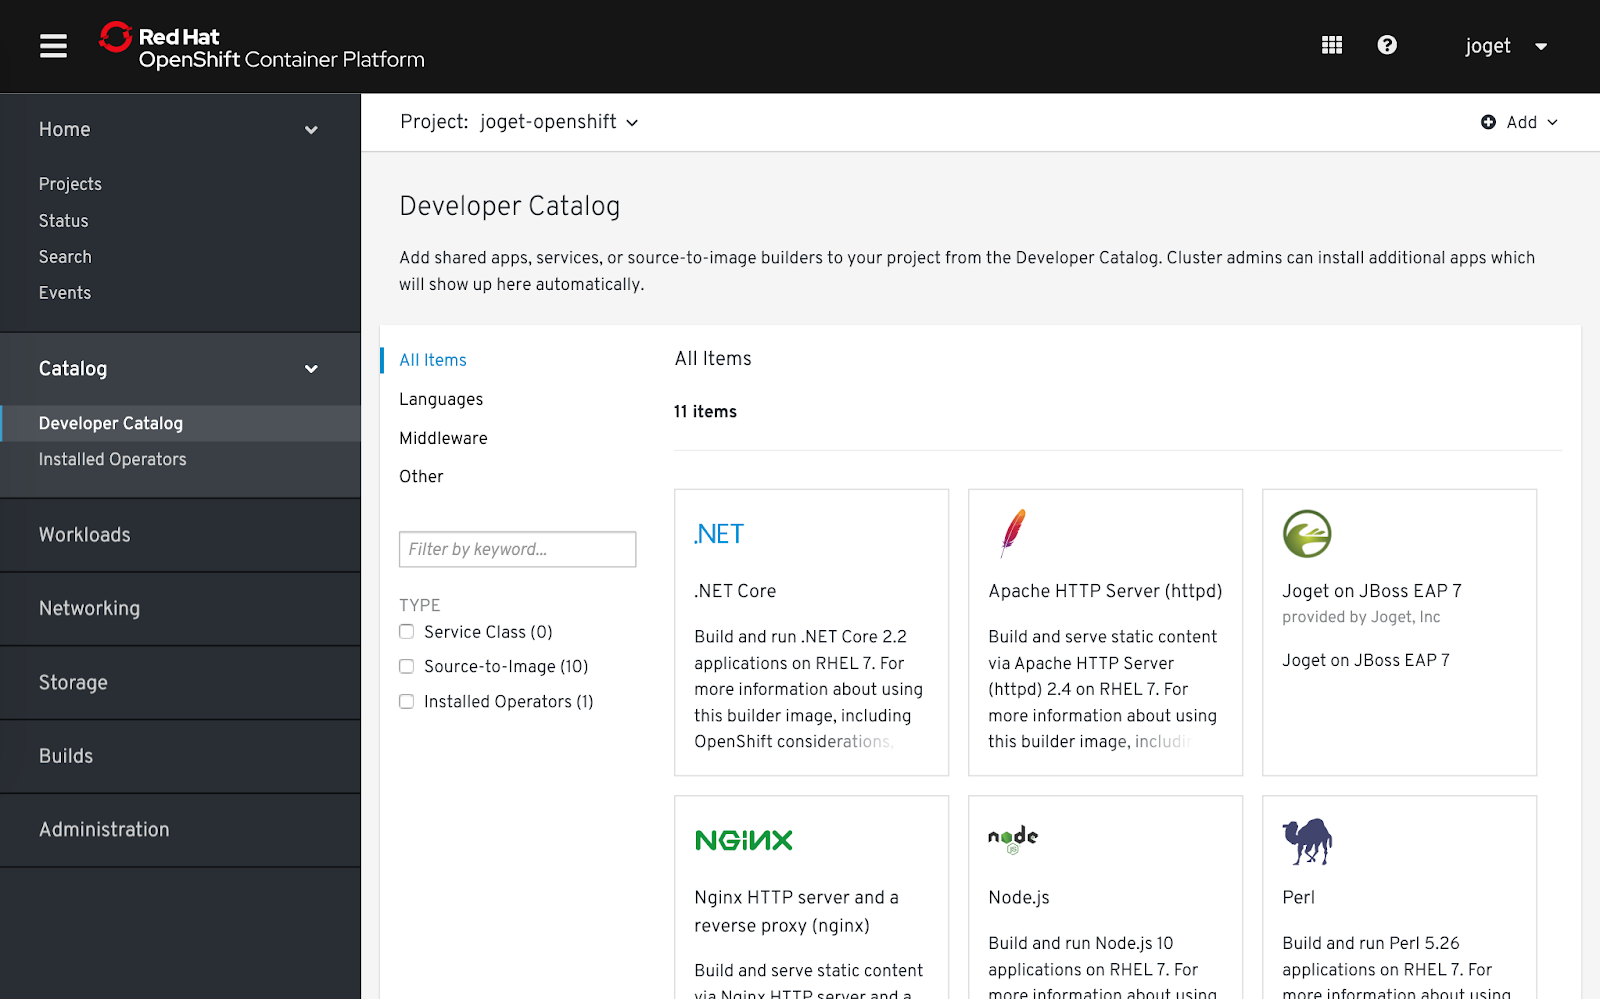
- Browse to Catalog Operators > Developer CatalogInstalled Operators.

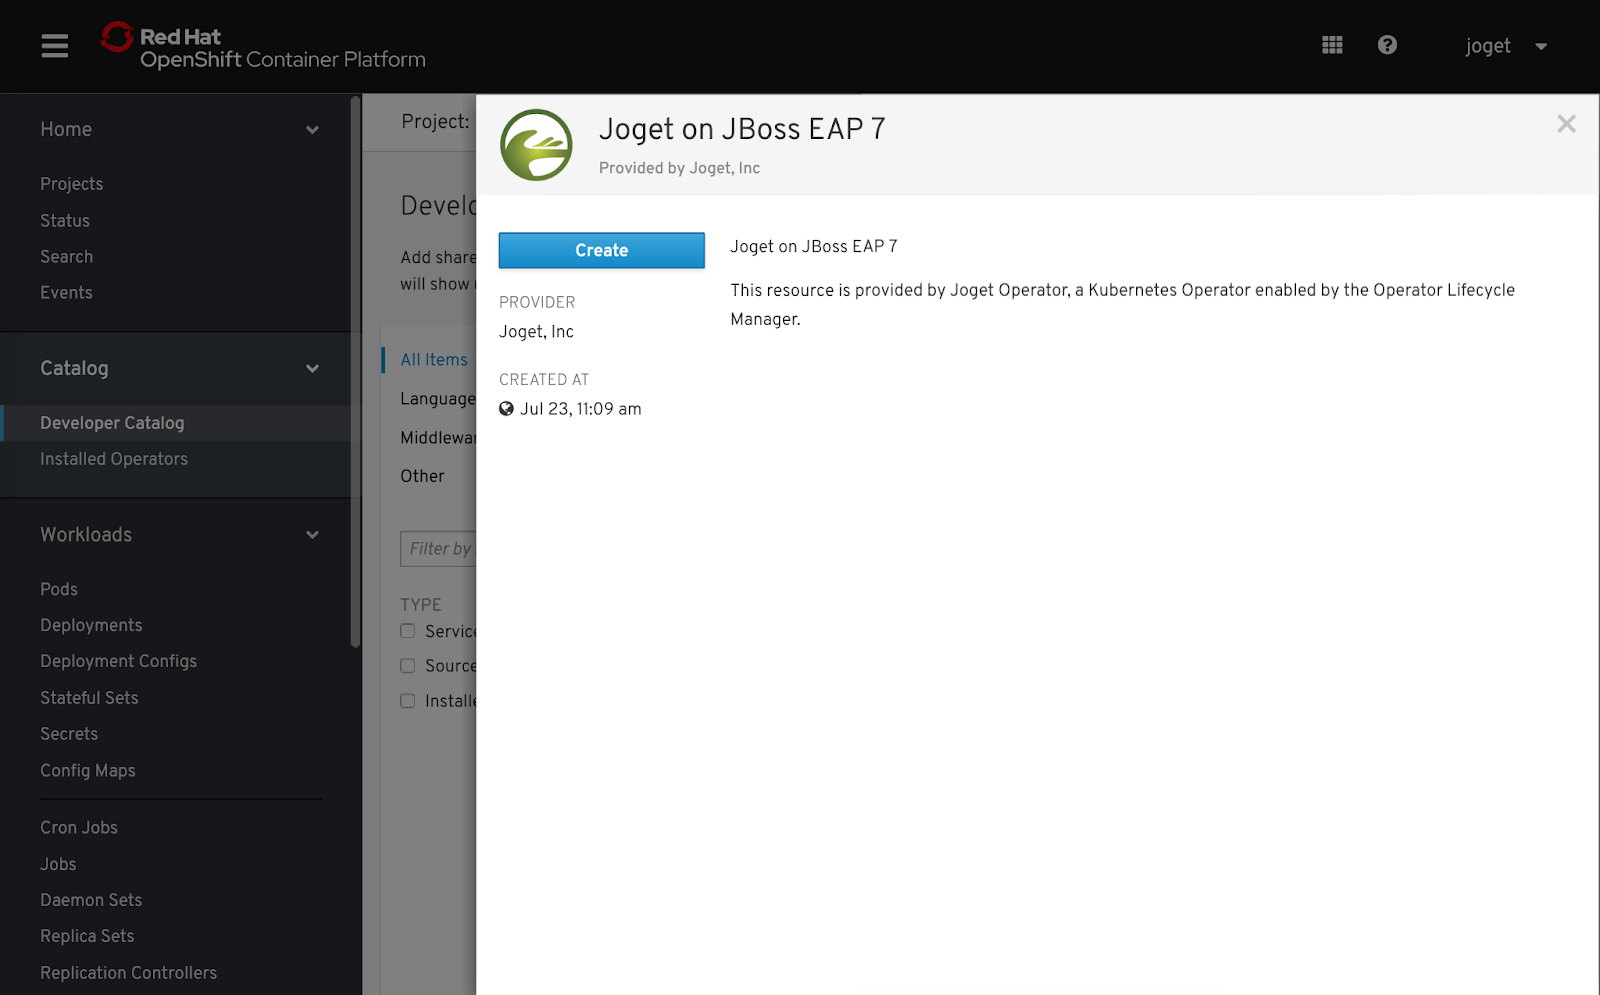
- Select the Joget DX Operator, and click on Create Instance.

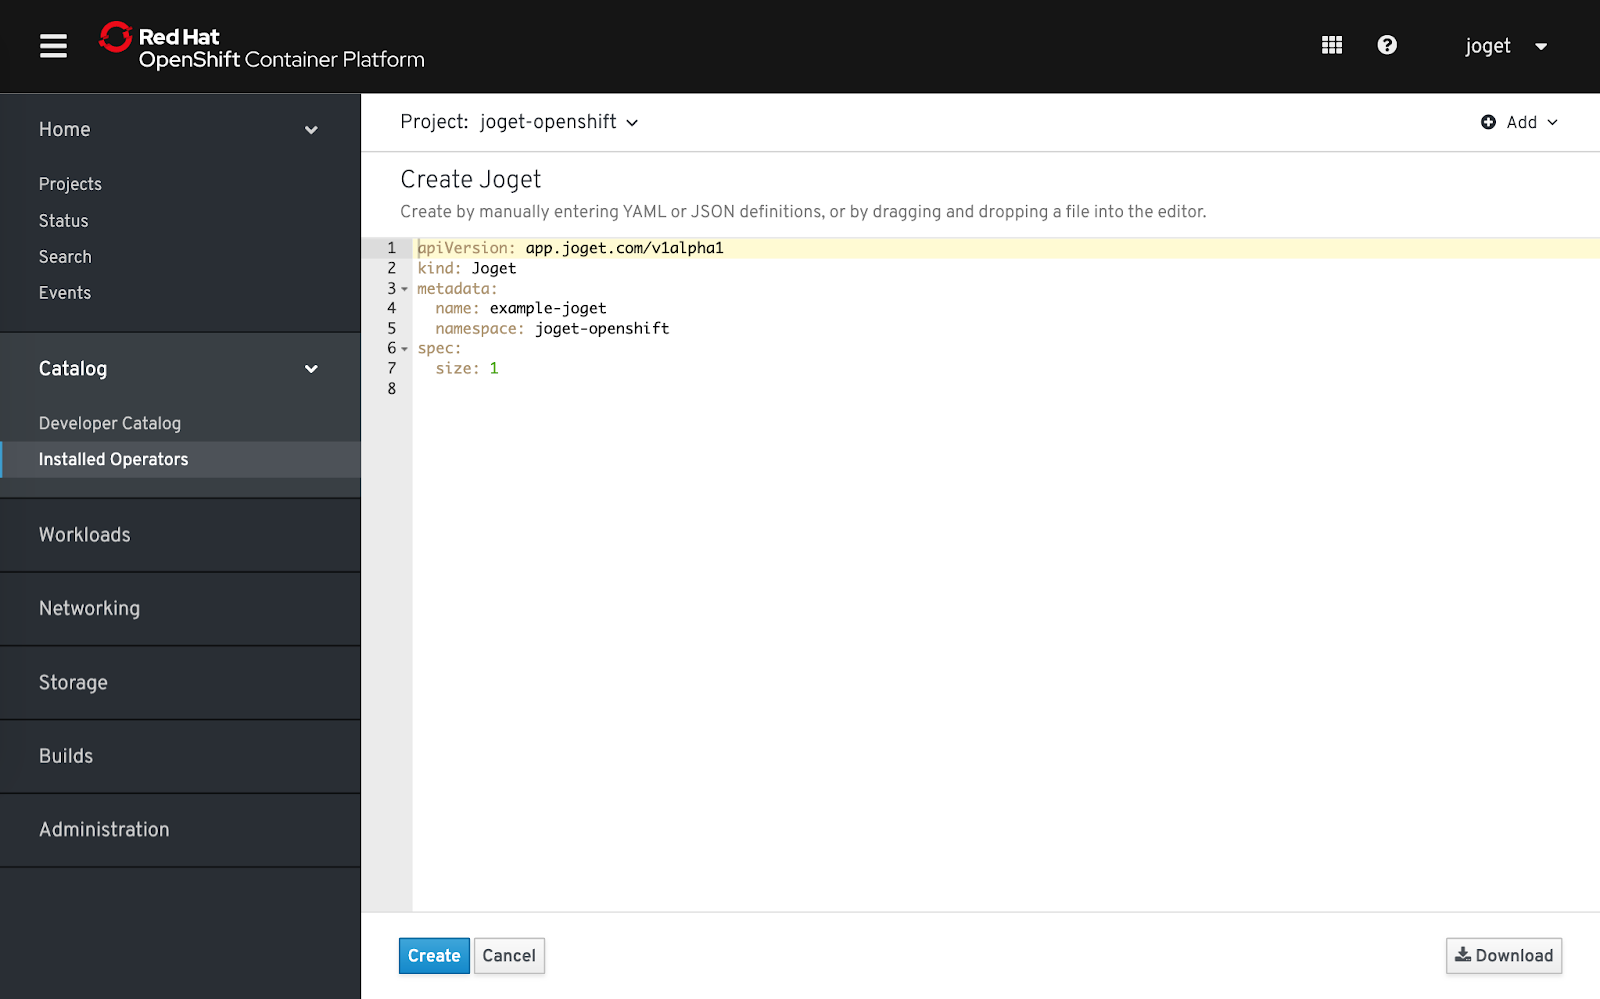
- By default the configuration for “name” is “example-joget” and “size” is 1 (the number of required Joget instances). Modify the values as required, click Create.

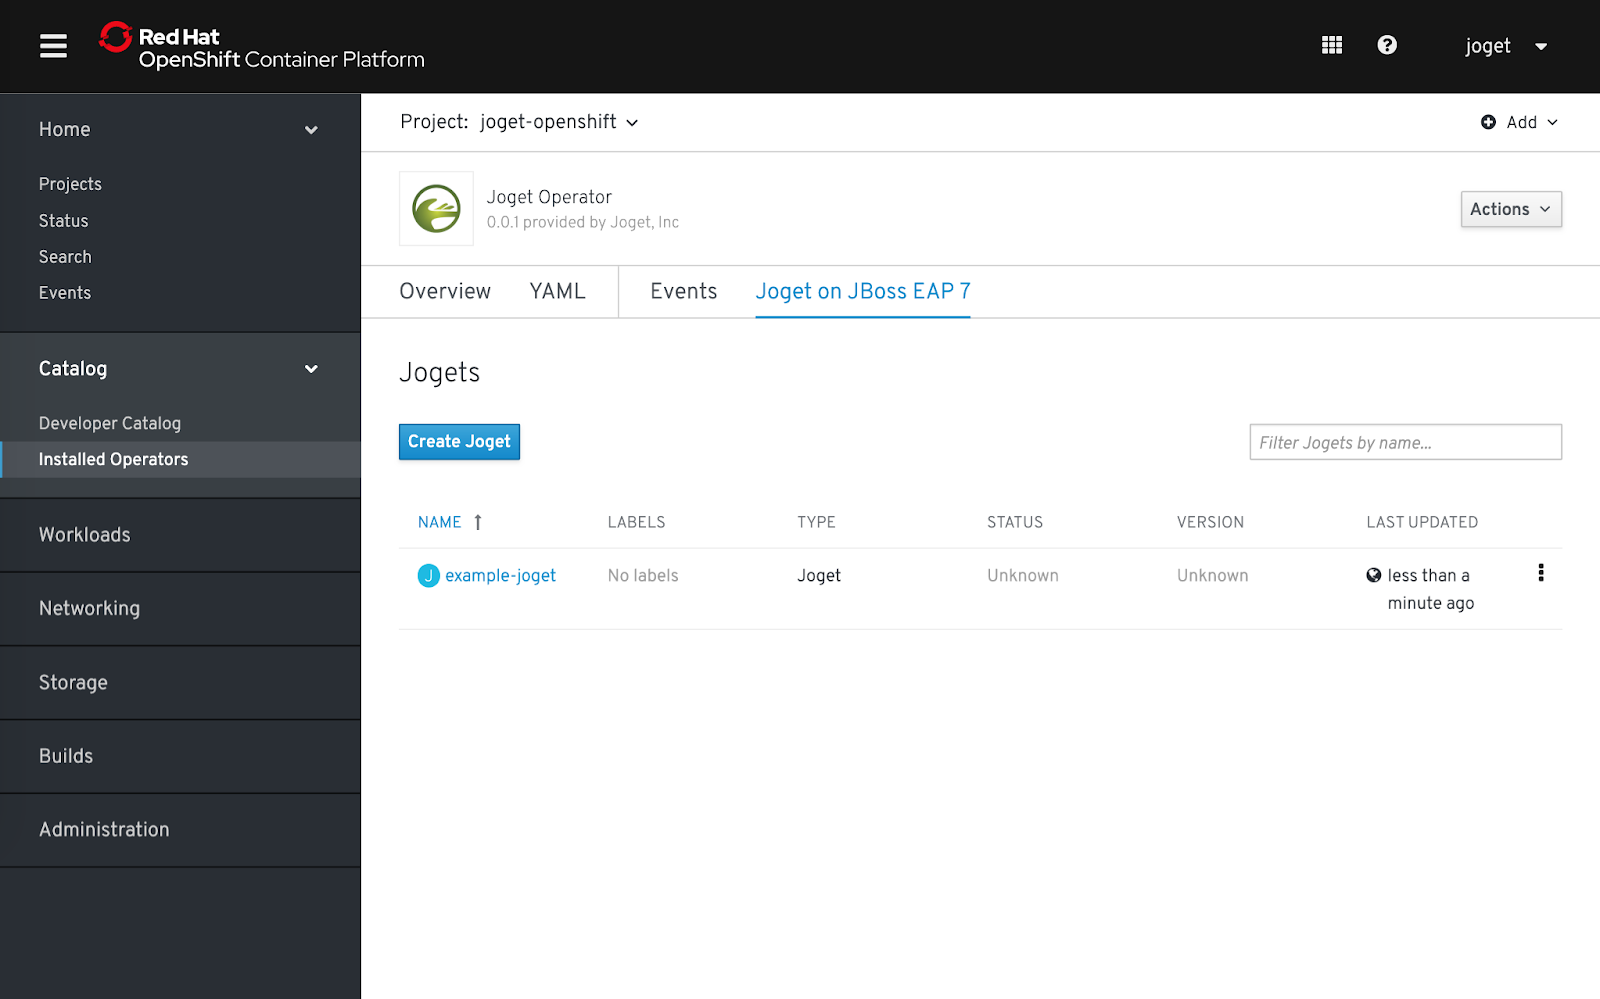
- The Joget DX Operator will automatically start to deploy the required number of Joget DX instances along with all the required resources, which should take a few minutes.

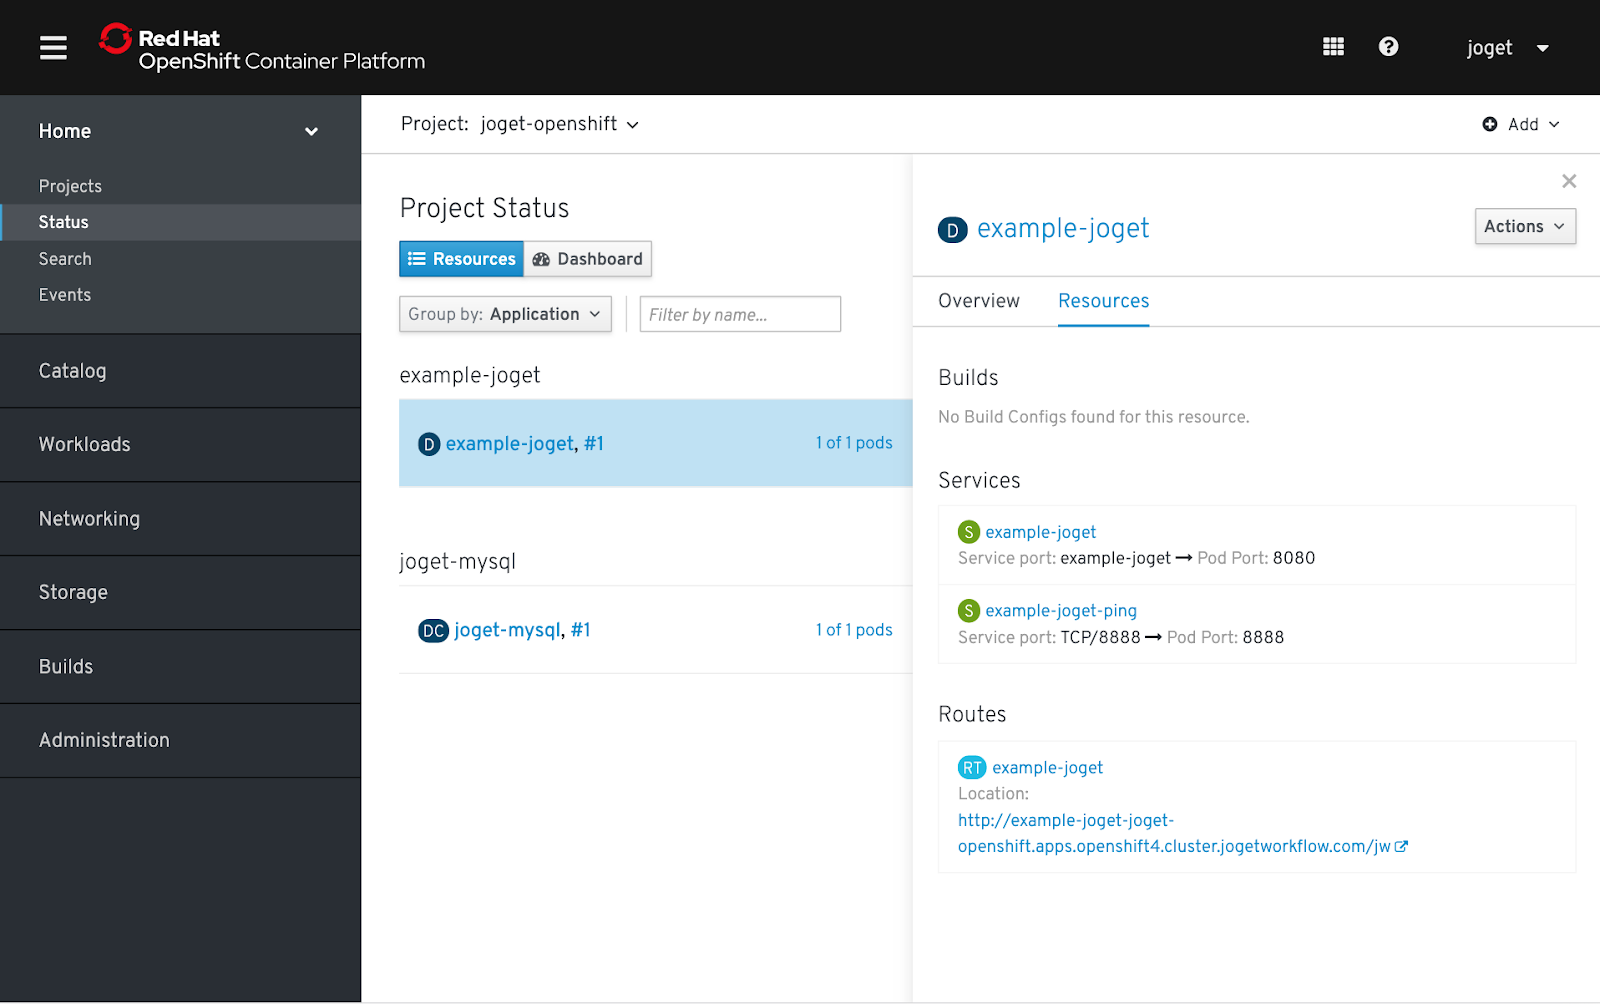
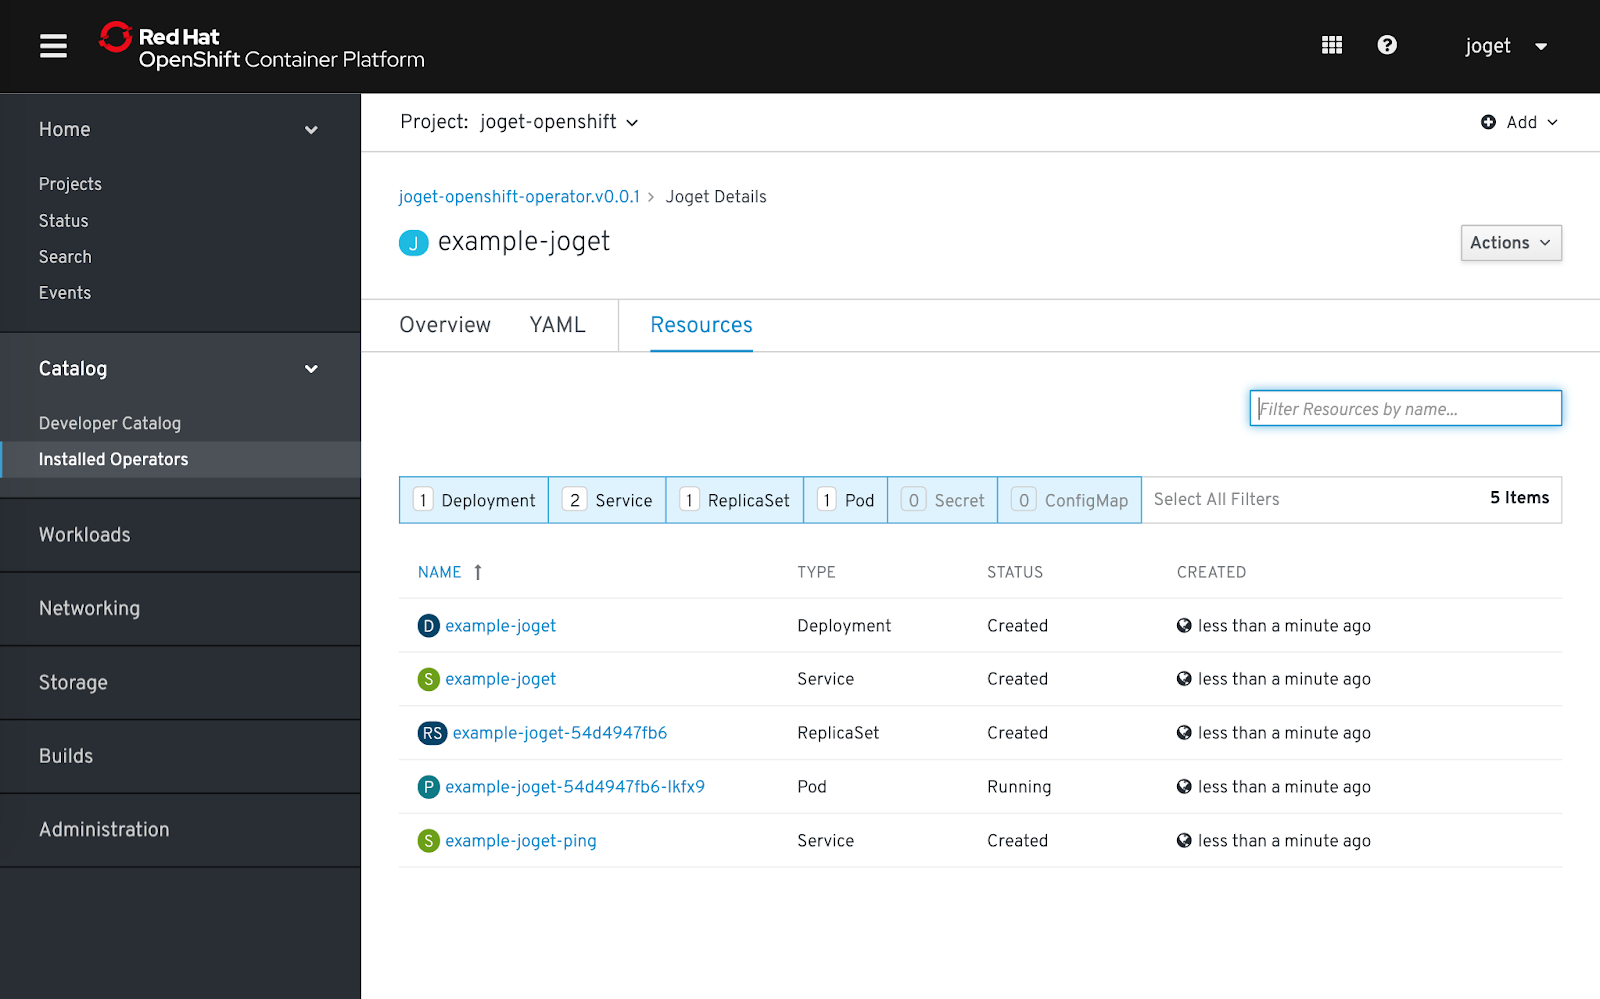
- Select the created Joget name, and click on Resources to see the resources automatically created and managed by the Joget DX Operator.

- Click on Events to see the events as they happen


2.3 Complete One-Time Joget Database Setup
- Browse to Home > Status Projects and select the Joget DX project. Click on Workloads tab and select Joget DX deployment. After a few minutes, you should see at least 1 available MATCHING PODS.

- Select Resources to see the created Services and Routes. Copy the Location in the created Route. That is the URL to access Joget DX from an external browser.

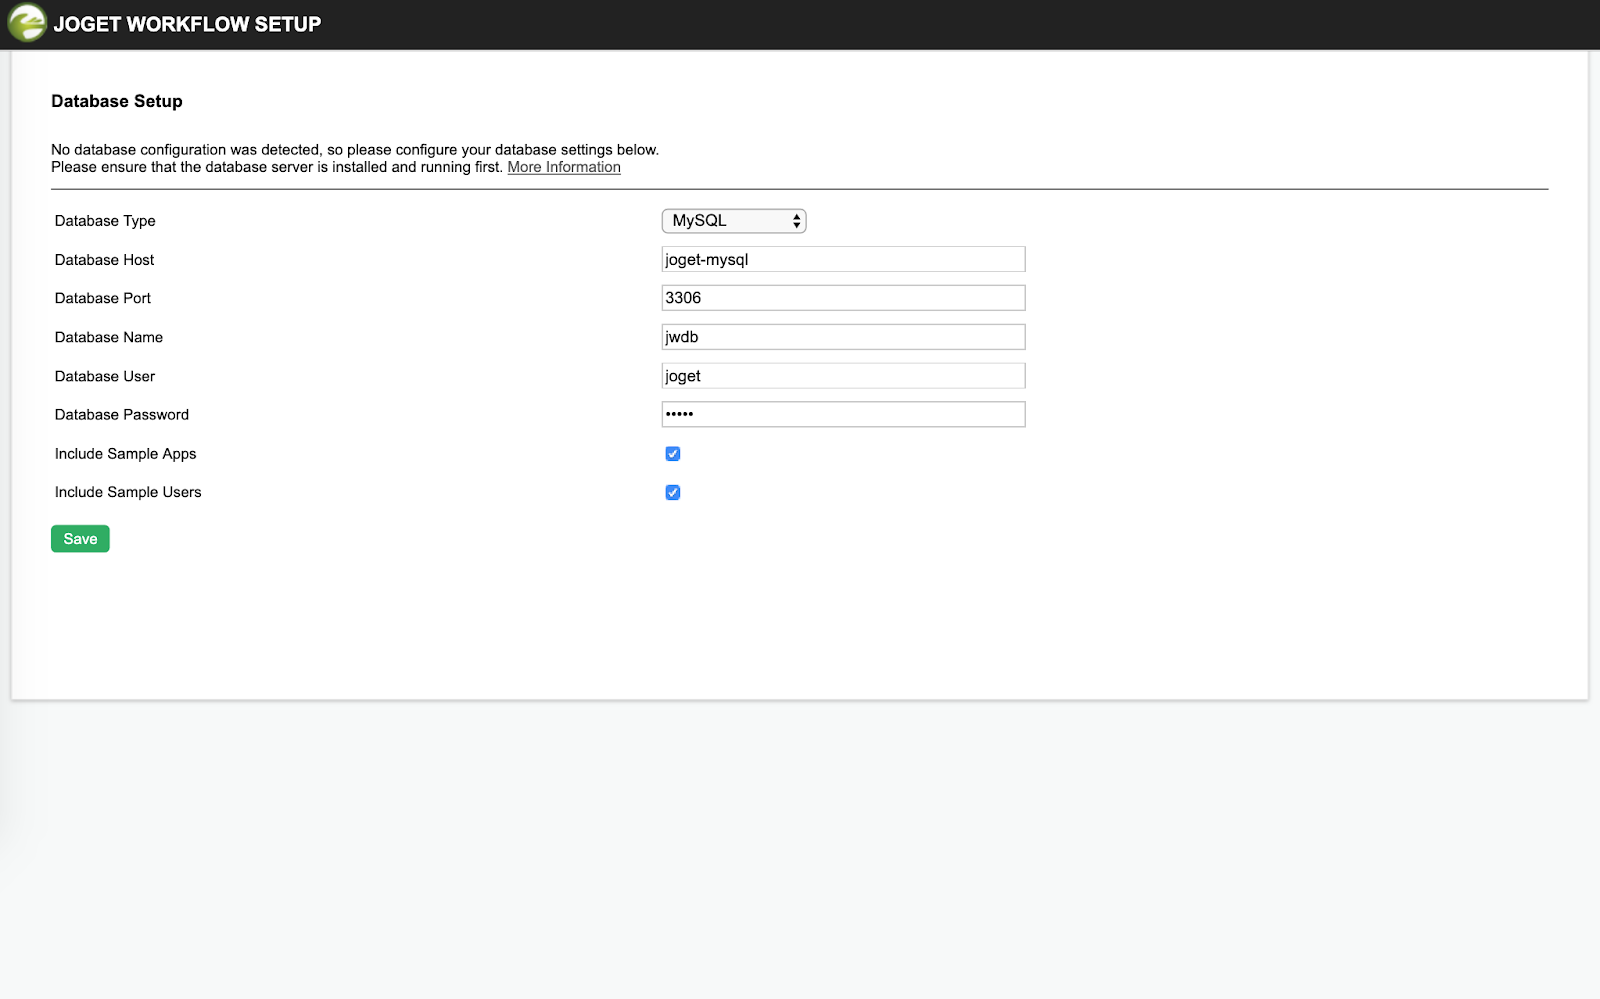
- Access the Joget DX URL and in the Database Setup page, key in the database configuration of the database deployed earlier and click on the Save button.

- Database Type: MySQL
- Database Host: the service name of the database e.g. joget-mysqljogetdb
- Database Port: 3306
- Database Name: the configured database name e.g. jwdb
- Database User: the configured username e.g. joget
- Database Password: the configured password e.g. joget
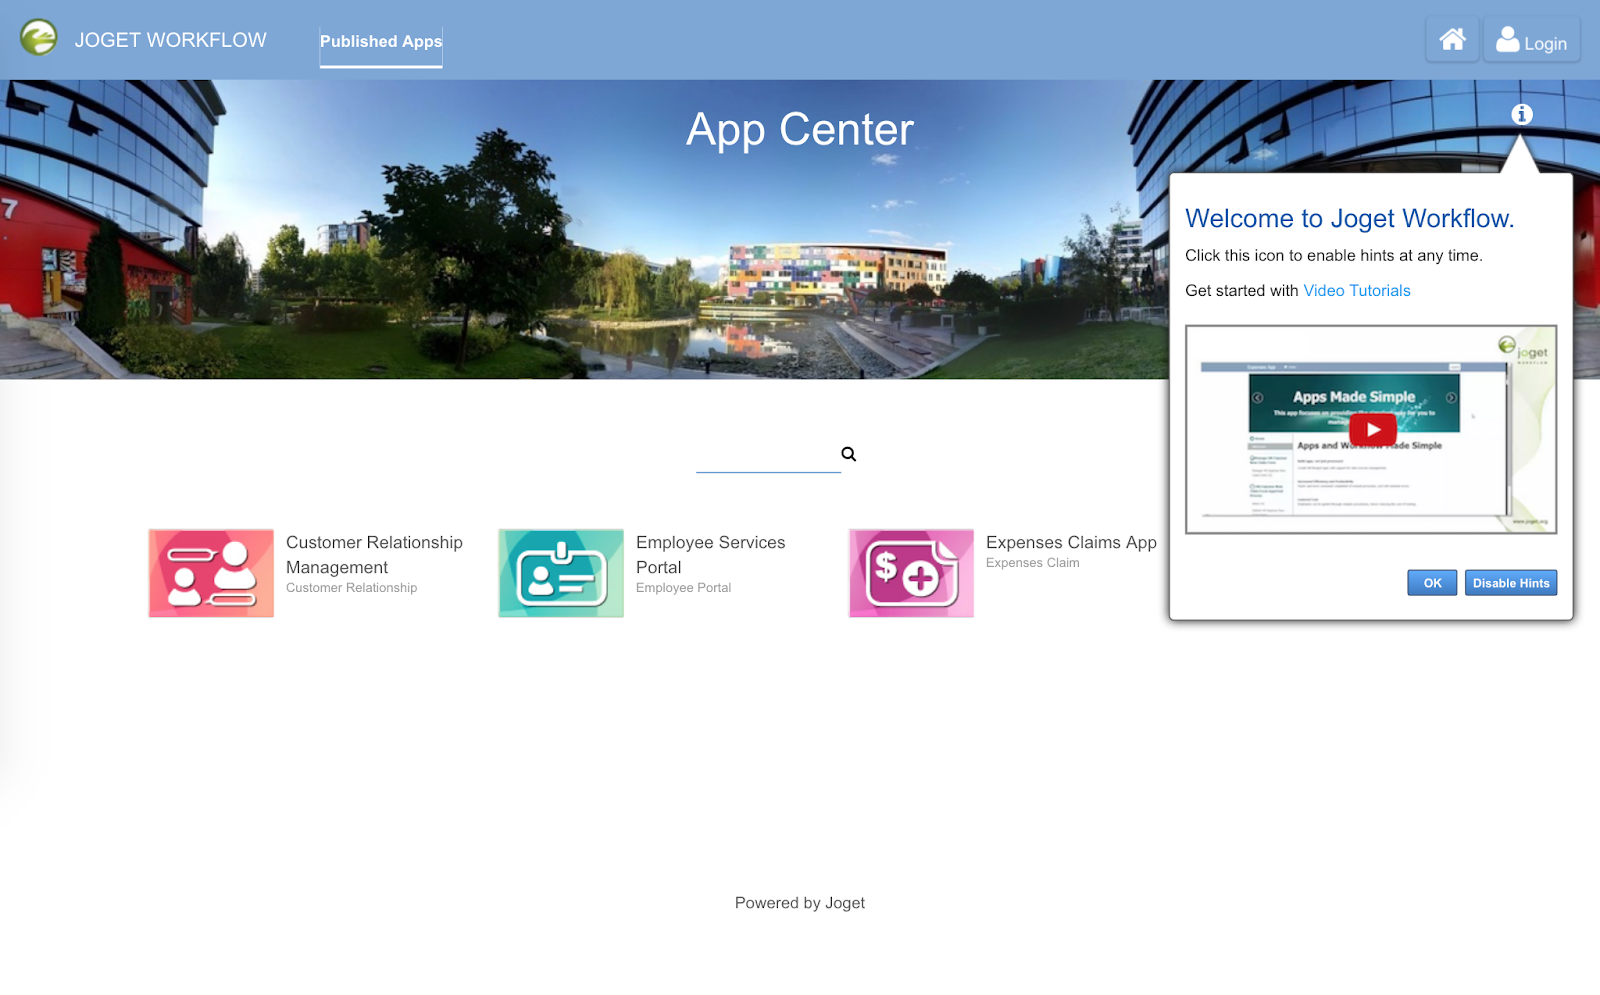
- Once the setup is completed, click on Done and you will be brought to the Joget DX App Center.