There following questions and steps are to help you plan and develop a plugin to fulfill a custom requirement.
| Table of Contents |
|---|
1. 问题是什么?
您有自定义要求,但是您发现Joget Workflow中提供的任何内置插件和Marketplace中提供的插件,都不能满足您的要求。
...
示例3:哈希变量在使用中方便,但不提供进行条件检查的功能。
2. 如何解决问题?
请参阅Joget Workflow支持的 插件类型,找到最适合的插件类型,可以帮助您满足自定义要求。
...
示例3:开发可以执行Bean Shell脚本的Hash Variable插件。
3. 你的插件需要输入什么?
找出插件所需的功能/工作所需的信息。从用户的角度来看; 你将如何使用插件。然后,从开发者的角度来看它; 使插件在更多的用例中可重用。
...
例如#beanshell.EnvironmentVariableKey [name=Joget&email=info@joget.org&message= {form.sample.message?url}]#
4.你的插件的输出和预期结果是什么?
普通用户(不是使用插件提供功能的管理员用户)将如何以及何种方式使用并查看您的插件结果。
...
示例3:Bean Shell Hash Variable插件适用于管理员用户。一旦使用,Hash变量将被Bean Shell解释器的输出返回所替代。
5. 有没有可以重用的资源/ API?
总是参考 现有的插件和教程,以寻找类似的插件/插件类型,尽可能引用它们。Joget团队将尽力丰富教程部分的内容。
...
示例3:要开发Bean Shell Hash Variable插件,我们可以参考所有Hash Variable插件和Bean Shell插件的源代码。特别是,我们可以参考环境变量哈希变量插件关于如何使用变量键检索环境变量。我们还可以参考Bean Shell工具或Bean Shell Form Binder插件,使用Bean Shell解释器执行脚本。
6. 准备你的开发环境
a. 您将需要 准备好构建Joget工作流开放源码. 我们将使用“wflow-plugin-archetype”模块为我们的插件生成一个maven项目。
...
c. Open/Import the maven project with your favorite IDE. Joget team recommends NetBeans IDE.
7. 仅仅是去编码!
a. 扩展插件类型的抽象类
Refer to the document of the plugin type listed in Plugin Types. Find the abstract class and interface that need to be extended and implemented by your plugin.
Example: To develop a Userview Menu plugin, the plugin class need to extends the org.joget.apps.userview.model.UserviewMenu abstract class.
b.实现所有抽象方法
插件必须实现 插件抽象类和接口的抽象方法,以及插件类型的抽象类和接口的抽象方法。
...
- getCategory
- getClassName
- getDecoratedMenu
- getDescription
- getIcon
- getLabel
- getName
- getPropertyOptions
- getRenderPage
- getVersion
- isHomePageSupported
c. 管理插件的依赖库
The generated plugin folder by "wflow-plugin-archetype" module is a maven project. So, we will using the Dependency Mechanism provided by Maven.
d. 使您的插件国际化(i18n)
要使插件i18n准备好,我们需要为插件创建一个消息资源包属性文件。
- 在“[Plugin project directory] / src / main / resources / message”目录中创建一个带有插件类名称的属性文件。
示例:对于名为“GanttChartMenu”的插件,我们需要在“[Plugin project directory] / src / main / resources / message”目录下创建一个“GanttChartMenu.properties”文件。
GanttChartMenu.properties文件的示例内容
Code Block language java org.joget.sample.GanttChartMenu.pluginLabel=Gantt Chart org.joget.sample.GanttChartMenu.pluginDesc=To display form data in Gantt Chart layout userview.ganttChart.label.title=Title userview.ganttChart.label.week=Week
- 在“[Plugin project directory] / src / main / resources / message”目录中创建一个带有插件类名称的属性文件。
- 使用PluginManager或AppPluginUtil的 getMessage(String key,String pluginName,String translationPath) 来检索i18n标签。
示例:在getLabel和getDescription方法中使用getMessage方法返回i18n标签和描述。
Code Block language java public String getLabel() { return AppPluginUtil.getMessage("org.joget.sample.GanttChartMenu.pluginLabel", getClassName(), "message/GanttChartMenu"); } public String getDescription() { return AppPluginUtil.getMessage("org.joget.sample.GanttChartMenu.pluginDesc", getClassName(), "message/GanttChartMenu"); } - 通过一个翻译文件路径readPluginResource(String pluginName, String resourceUrl, Object[] arguments, boolean removeNewLines, String translationFileName) 方法 AppUtil以提供与I18N标签插件属性选项。我们可以在“ 插件属性选项 ”的JSON中使用“@@ message.key @@” 。
示例:对于GanttChartMenu插件的属性选项,以下显示了getPropertyOptions方法和GanttChartMenu.json文件的示例代码实现
Code Block language java public String getPropertyOptions() { return AppUtil.readPluginResource(getClassName(), "/properties/GanttChartMenu.json", null, true, "message/GanttChartMenu"); }Code Block language js [{ title : '@@userview.ganttChart.edit@@', properties : [{ name : 'id', label : 'Id', type : 'hidden' }, { name : 'customId', label : '@@userview.ganttChart.customId@@', type : 'textfield', regex_validation : '^[a-zA-Z0-9_]+$', validation_message : '@@userview.ganttChart.invalidId@@' }, { name : 'label', label : '@@userview.ganttChart.label@@', type : 'textfield', required : 'True', value : '@@userview.ganttChart.label.value@@' }] }] - 在检索HTML模板时,将PluginManager的翻译文件路径传递给getPluginFreeMarkerTemplate(Map数据,最终String pluginName,final String templatePath,String translationPath)方法 。一旦我们通过了翻译文件路径,我们可以在freemarker模板中使用“@@ message.key @@”来检索i18n标签。
示例:对于GanttChartMenu插件的getRenderPage方法,下面显示了getRenderPage方法和“GanttChartMenu.ftl”FreeMarker模板的示例代码实现。
Code Block language java public String getRenderPage() { Map model = new HashMap(); model.put("request", getRequestParameters()); model.put("element", this); PluginManager pluginManager = (PluginManager)AppUtil.getApplicationContext().getBean("pluginManager"); String content = pluginManager.getPluginFreeMarkerTemplate(model, getClasstName(), "/templates/GanttChartMenu.ftl", "message/GanttChartMenu"); return content; }Code Block language xml <div> <h1>@@userview.ganttChart.label.title@@ : ${element.properties.title!}</h1> </div> - 使用下划线和语言代码后缀插件类名,以便为其他语言创建消息资源包属性文件
...
| Code Block | ||
|---|---|---|
| ||
public void start(BundleContext context) {
    registrationList = new ArrayList<ServiceRegistration>();

    //Register plugin here
    registrationList.add(context.registerService(MyPlugin.class.getName(), new MyPlugin(), null));
} |
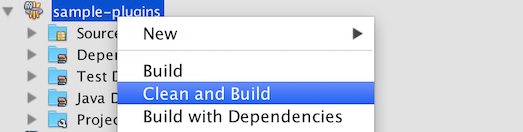
f. 构建和测试
完成上述所有步骤后,您可以使用Maven使用IDE构建项目。您还可以在项目目录中运行“mvn clean install”命令来构建它。构建项目后,在您的插件项目文件夹中的“目标”文件夹下创建一个jar文件。将插件jar上传到 管理插件以测试插件。
示例:在Eclipse中,右键单击项目名称,然后选择"maven clean install".
8. 更进一步,分享或出售
你已经完成了一个非常有用的插件。不要只是把它保存在自己,在Joget Marketplace中分享或销售您的插件, 甚至,您可以在我们的知识库中编写一个教程,以便与他人分享您的工作。要分享或销售您的插件,请发送电子邮件至info@joget.org。
...