| Table of Contents |
|---|
Introduction
| English |
|---|
| The Calendar Menu displays records from your preferred datalist as calendar events, in formats of day/week/month in your app's userview. |
- For this to work, you must map the form and field IDs that stores the calendar records, into the Calendar plugin properties page.
- The Calendar Menu also supports Google API to display your preferred country's public holidays in the calendar.
See Google Calendar Integration for more details.
...
Calendar Menu Properties
Configure Calendar Menu

Figure 1: Calendar Menu Properties
| Name | Description | Screens (Click to view) | |
|---|---|---|---|
| id | Menu element unique id. Userview will use this id in the URL for the menu if the Custom ID is empty. | ||
| Custom ID | Item link slug. Optional field.
| ||
| Label | The userview menu label. | ||
| Page Title | Calendar page title. | ||
| Data Binder | See list of available Datalist Binders, to source the data for calendar entries. | ||
| Auto Handle Date Range | Enable this option to automatically handle range of calendar events to be populated into the calendar, based on event dates and calendar view format. If this option is disabled, you need to manually handle date range via #requestParam.start# and #requestParam.end# request parameter hash variables in your datalist binder configuration. Date format for date range is yyyy-MM-dd. |
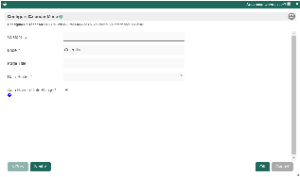
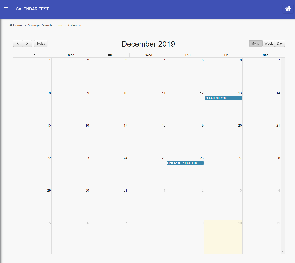

Figure 2: Sample Calendar Menu in runtime
Column to Data Mappings

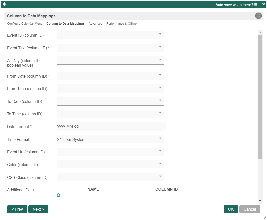
Figure 3: Column to Data Mappings Properties
| Name | Description | Screens (Click to view) | |
|---|---|---|---|
| Event ID (column ID) | Defines individual calendar entry IDs, based on each distinct datalist record. | ||
| Event Title (column ID) | Calendar entry title. | ||
| All Day (column ID, boolean value) | Expects a true or false value, to determine if the calendar entry is an all day event. | ||
| From Date (column ID) | Calendar entry start date value.
| ||
| From Time (column ID) | Calendar entry start time value.
| ||
| To Date (column ID) | Calendar entry end date value.
| ||
| To Time (column ID) | Calendar entry end time value.
| ||
| Date Format | You must specify the actual date format used by the From/To Date values. Date Format in Java is expected here, e.g.: yyyy-MM-dd.
| ||
| Time Format | Available options:
| ||
| Event Url (column ID) | Calendar entry URL. | ||
| Color (column ID) | Calendar entry CSS color code to style the calendar event. | ||
| CSS Class (column ID) | Calendar entry CSS class to style the calendar event. | ||
| Additional Data | Any additional data to be added to the calendar entry. |
Advanced
Google Calendar Integration

FIgure 4: Google Calendar Integration Properties
| Name | Description | Screens (Click to view) |
|---|---|---|
Additional Data | Configurations to load calendar entries from Google Calendar. Notes if you want the Calendar Menu plugin to connect to Google Calendar:
|

Events & UI

Figure
...
5:
...
Events & UI Properties
| Name | Description | Screens (Click to view) | |||||||||
|---|---|---|---|---|---|---|---|---|---|---|---|
Event Rendering Callback (Javascript) | Custom Javascript code to execute upon rendering each calendar event. | ||||||||||
Event After Rendering Callback (Javascript) | Custom Javascript code to execute for each calendar event, after it has been rendered.
See sample app here for more info: APP_calendarTest-sample.jwa | ||||||||||
Event After All Rendering Callback (Javascript) | Custom JavaScript code to execute after all rendering of the calendar menu has been completed. In the sample below, upon clicking on a calendar date, it will redirect to an event form and prepopulate a date field with the clicked date.
| ||||||||||
Event Click Callback (Javascript) | Custom Javascript code to execute when a calendar event is clicked on.
| ||||||||||
Time Display Format | Refer to https://fullcalendar.io/docs/date-formatting-string for formats.
| ||||||||||
Custom Header (HTML) | Custom header in HTML to show on the top of the calendar. | ||||||||||
Custom Footer (HTML) | Custom footer in HTML to show on the bottom of the calendar. |


...