| Table of Contents |
|---|
Introduction
Condition Participant is a plugin that lets you control which user is going to participate in a process with more complex use cases because it allows different types of conditions (in Javascript) which include hash variables and so on.
Get started
The easiest way to see how the Condition Participant plugin is to create a process first. Here are the steps:
Steps
...
To
...
Import This Plugin
1.Go to the
...
website https://marketplace.joget.com/jw/web/userview/mp/mpp/_/vad?id=condition-participant
2. Click "Download" on this plugin screen (It will be a .jar file).
3. Go to your Joget Workflow localhost or server and
...
log in as admin.
4. In Joget Console navigate to "Admin Bar>Systems Settings>Manage Plugins" and click the "Upload Plugins" button.
5. In "Upload Plugin", select the plugin .jar file you just downloaded, then click "Upload".
6. You should be able to view the newly installed plugin under the Installed Plugins tab.
7. This plugin type will show up when you map participants to users.
8. Remember to
...
always uninstall the old plugin before uploading a new version.
9. The Joget Workflow Knowledge Base has more information
...
on managing and developing plugins.
Steps to use the Plugin
...
1. Start the Joget server and open the App Centre.
2. Login as admin and click on Design New App (See Figure 1) or click on existing application.
Figure 1 Design New App
3. For a new application, fill up the App Details and click on the Save button. (See Figure 2)
Figure 2 Fill up App Details
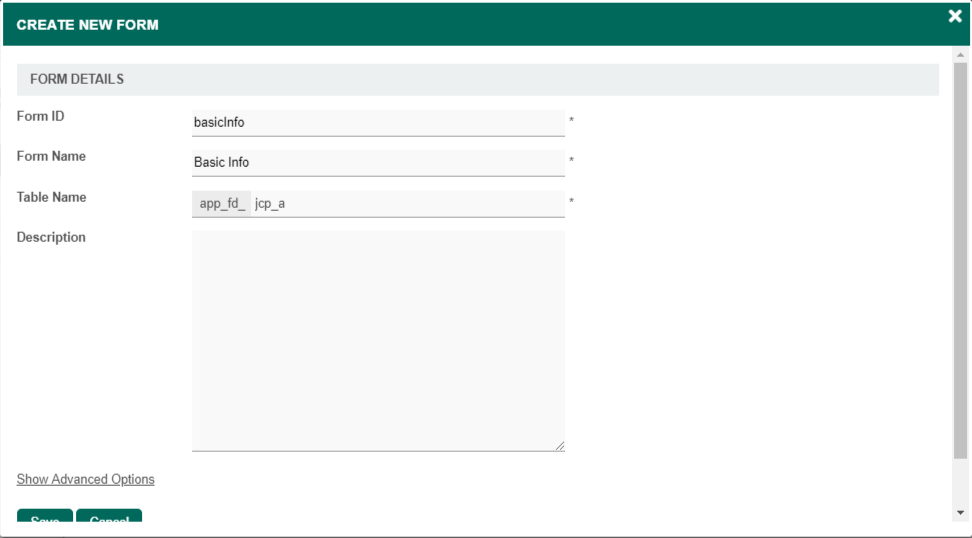
4. Create New Form, fill up Form Details and click on
...
the Save button. (See Figure 3)
Figure 3 Fill up Form Details
5. Generate an approval process app by clicking the generate app button in the form builder.
6. Search for the Map Participants to Users tab in Processes.
7. Click on the Add/Edit Mapping button.
...
(See Figure 4)
Figure 4 Add/Edit Mapping button
8. Select the Map to Plugin tab and search for the Condition Participant plugin.
...
(See Figure 5)
Figure 5 Select Condition Participant plugin
9. For example, fill up the script element with 1==1 because we want the script to always return true and the username element as cat because we want Cat Grant to be the approver for every form submitted.
...
(See Figure 6)
Figure 6 Configure Condition Participant plugin
10. Hash variables can also be used in the script element in order to satisfy more complex use cases. For example, we can
...
use "#currentUser.id#" == "admin" in the script element and
...
Clark so that when the admin submits a form, Clark Kent will be assigned as the approver.
11. Run a new process by clicking the Run Process button
...
on the Processes page.
12. In this case, the approval process will be assigned to Cat Grant and we can confirm this by checking the monitor.
...
(See Figure 7)
...
Figure 1
Figure 2
...
Figure 4
Figure 5
Figure 6
Figure 7 Approver Confirmation
Condition Participant Properties
General
| Name | Description |
|---|
| Javascript* | Javascript condition is used in the script element to determine who will participate in the process. Hash variables are usable here.
|
| Username* | The username of the participant. This is a mandatory field. |
| Debug Mode | Turn on the debug mode to show the plugin details in the system log to find bugs for the script. |
Source Code
| View file | ||||
|---|---|---|---|---|
|
...


