| Info | ||
|---|---|---|
| ||
| ตรวจสอบให้แน่ใจว่าคุณได้ทำบทแนะนำก่อนหน้านี้อย่างสมบูรณ์แบบ Make sure that you have first completed the previous tutorial - Designing a New App |
| Widget Connector | ||||
|---|---|---|---|---|
|
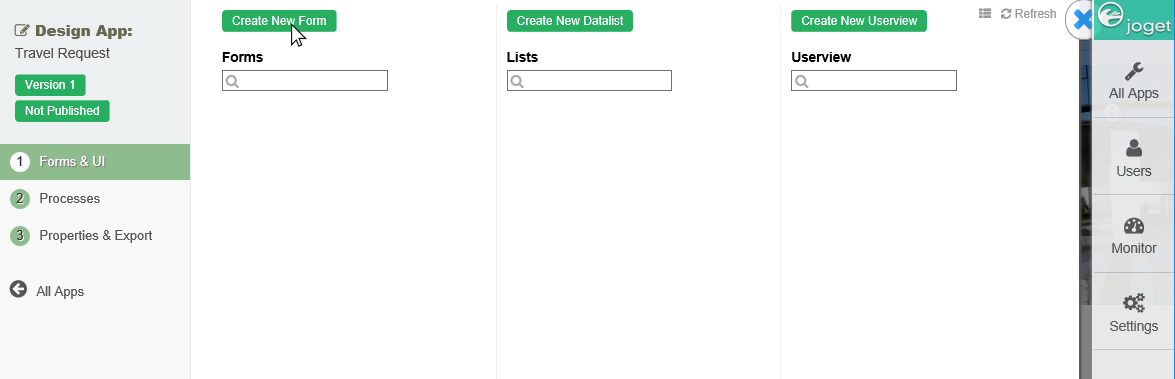
- ในหน้าการออกแบบแอปให้คลิกที่ปุ่ม In the App design page, click on the Create New Form ที่ด้านบน button along the top.
ป้อนรายละเอียดของแบบฟอร์มใหม่Key in the details of the new form.
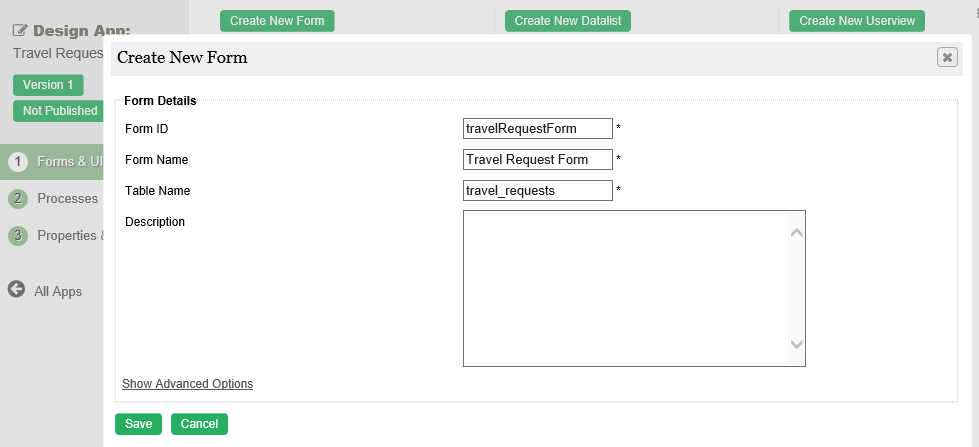
Name Description Form ID รหัสเฉพาะเพื่อระบุถึงฟอร์มนี้Unique ID to represent this entity.
Info title Naming convention ขอแนะนำให้ใช้รูปแบบการตั้งชื่อมาตรฐานในการพัฒนาแอปของคุณเพื่อรักษาความสม่ำเสมอและง่ายต่อการบำรุงรักษาA standard naming convention is highly recommended to be used across the development of your App to maintain consistency and ease maintenance works.
Camel case naming เป็นรูปแบบการตั้งชื่อที่แนะนำสำหรับฟิลด์นี้convention is recommended for this field.
Example: เช่น: travelRequestForm
Warning title Reserved IDs อย่าใช้ ID ที่สงวนไว้ต่อไปนี้เป็นรหัสฟอร์มและฟิลด์ Do not use the following reserved IDs as ID of Form, Section and Field. "appId, appVersion, version, userviewId, menuId, key, embed".
Form Name ชื่อที่อ้างอิงถึงฟอร์มนี้Name to represent this entity.
Info title Example Travel Request Form
Table Name ชื่อตารางฐานข้อมูลที่เก็บข้อมูลฟอร์มThe database table name to store the form data.
Info title Naming convention เนื่องจากชื่อตารางเกี่ยวข้องกับฐานข้อมูล เราขอแนะนำให้ใช้ธรรมเนียมการตั้งชื่อฐานข้อมูล เช่น As the table name is related to the database, we highly recommend the use of database naming conventions, e.g. travel_requests
Tip โปรดทราบว่ารูปแบบต่างๆสามารถแชร์ข้อมูลโดยชี้ไปที่ชื่อตารางเดียวกันได้Note that different forms can share data by pointing to the same table name.
Descriptionคำอธิบายเอนทิตี้ Entity description. Duplicate form settings and elements fromด้วยข้อมูลด้านบนที่มากไป คุณสามารถเลือกคัดลอกฟอร์มจากฟอร์มที่มีอยู่แล้วได้ With the above information filled up, one can choose to clone the design from existing Form entity.
คลิกที่ Save เพื่อบันทึกฟอร์มและเปิด Form Builder ในหน้าต่างใหม่ หากเบราว์เซอร์ของคุณบล็อกป๊อปอัปให้คลิกที่ชื่อแบบฟอร์มเพื่อเปิดใช้งาน
ขั้นตอนแรกในการสร้างฟอร์มคือ ออกแบบหน้าฟอร์ม ด้านซ้ายเป็นส่วนที่มีองค์ประกอบของฟอร์มที่พร้อมใช้งาน ตรงกลางเป็นส่วนการออกแบบ มีหนึ่งหรือหลายเซคชัน และแต่ละเซคชันจะมีหนึ่งหรือหลายคอลัมน์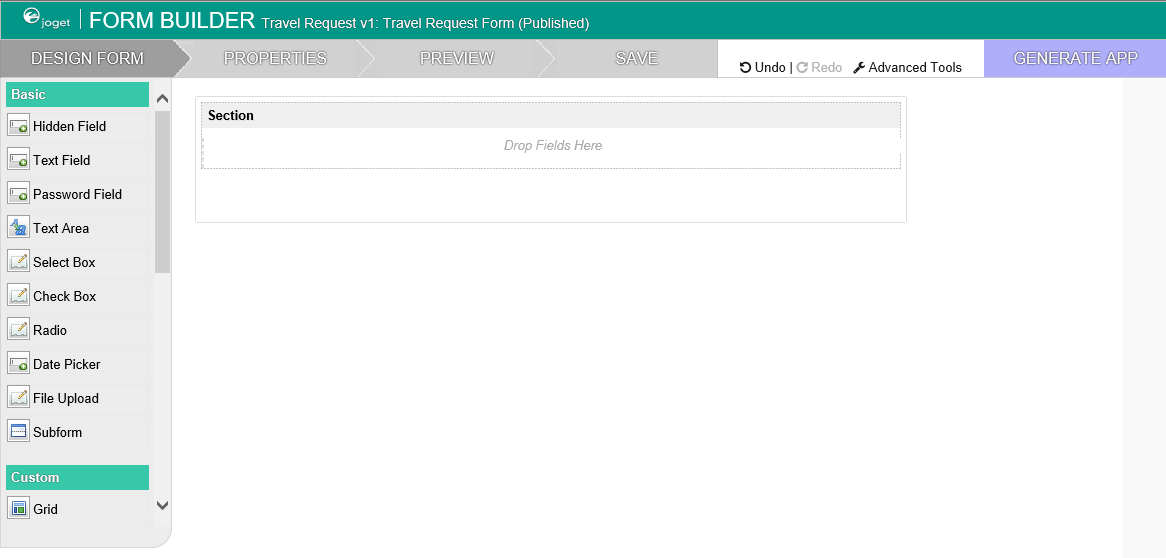
เมื่อคุณวางเมาส์ไว้บนส่วนหัวของเซคชัน (หรือองค์ประกอบอื่นๆของฟอร์ม) ปุ่มต่างๆจะประกฎขึ้นเพื่อให้คุณสามารถเลือกได้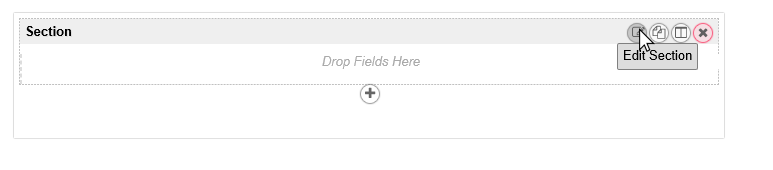
คลิกที่ Edit Section ซึ่งจะเปิด Property Editor ขึ้นมาแสดงคุณสมบัติที่คุณสามารถแก้ไขได้ องค์ประกอบของฟอร์มแต่ละองค์ประกอบมีคุณสมบัติต่างกันซึ่งสามารถกำหนดค่าได้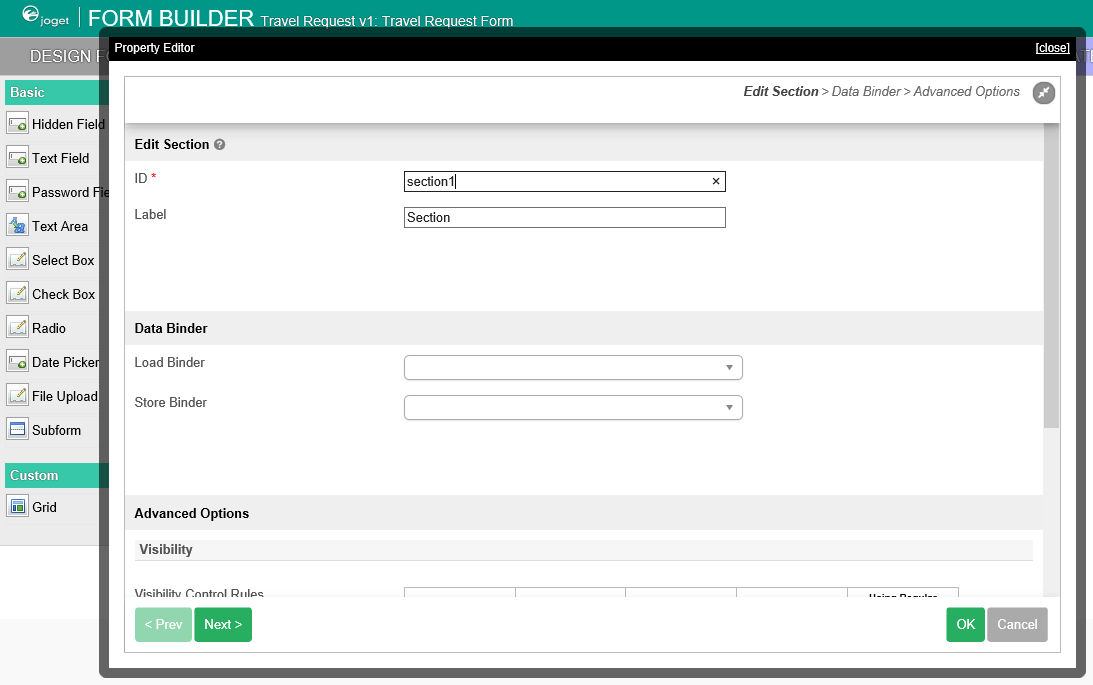
คลิกที่ OK ที่ด้านล่างเพื่อบันทึกการเปลี่ยนแปลงคุณสมบัติ
คุณสามารถเพิ่มเซคชันโดยกด Add Section และย้ายเซคชันโดยการลากไปยังตำแหน่งที่ต้องการ
ลากองค์ประกอบแบบฟอร์มจากส่วนด้านซ้ายลงในเซคชันใดๆ
วางส่วนใดก็ได้เพื่อดูตัวเลือกแก้ไขและลบ คลิกแก้ไขเพื่อแก้ไขคุณสมบัติขององค์ประกอบแบบฟอร์ม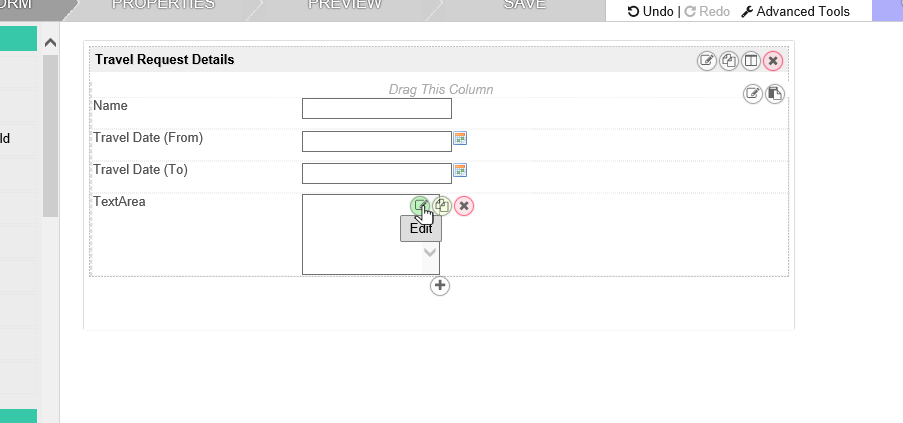
คุณสามารถดูตัวอย่างแบบฟอร์มได้ทุกเมื่อโดยคลิกปุ่ม Preview ขนาดใหญ่ที่ด้านบน
เมื่อเสร็จสิ้นการออกแบบฟอร์มให้คลิกที่ปุ่ม Save ขนาดใหญ่ที่ด้านบนและคุณจะได้รับการยืนยันว่าฟอร์มถูกบันทึกไว้แล้ว จากนั้นคุณอาจออกแบบฟอร์มต่อหรือปิดหน้าต่างตัวสร้างฟอร์มได้- Click on Save to save the form and launch the Form Builder in a new window. If your browser blocks the popup, click on the form name to launch it.
- The first step in the Form Builder is the Design Form page. On the left is the palette containing available form elements. In the middle is the canvas containing one or more sections, and each section may contain one or more columns.
- When you mouseover a section header (or any form element), buttons appear giving you options.
- Click on Edit Section. This opens a Property Editor showing properties that you can modify. Each form element has different properties that can be configured.
- Click on the OK at the bottom to save the property changes.
- You can add sections using Add Section, and move sections around by dragging.
- Drag form elements from the palette into any section.
- Hover any form element to see the Edit and Delete options. Click on Edit to modify the form element properties.
- At any time, you may preview the form by clicking on the large Preview button at the top.
- Once you have finished designing the form, click on the large Save button at the top and you will receive confirmation that the form is saved. You may then continue to design the form, or close the Form Builder window.
ตรวจสอบให้แน่ใจว่าคุณได้ทำบทแนะนำก่อนหน้านี้อย่างสมบูรณ์แบบ – การออกแบบแอปพลิเคชันใหม่