...
| Table of Contents |
|---|
Configure API Access
| Name | Description |
|---|
API Key |
| An automatically generated unique identifier used to authenticate to an API document. |

Figure 1: Manage API Key in a userview

Figure 2: Manage API Key - Log view

| Authentication Method | Methods available:
Required keys in the request header:
|
| ||||||||||
API Secret (API Key & Token method) | A secret string |
| commonly used in the token pattern. |
Token |
Pattern (API Key & Token method) | Token Pattern consists of hash algorithm and variables. Format:
Supported hash algorithm:
Supported variables:
Examples:
| |||||||
Permission Plugin (Basic access authentication method) | Select a permission plugin and configure its properties. Find list of available permission plugins here. | |||||||
| Custom Authenticator Plugin | Select a custom authenticator plugin and configure its properties. This option is shown only if a plugin of that type exist in the system. Learn more about API Authenticator plugin here. | |||||||
| Custom Authentication Method | Methods available:
| |||||||
| Domain Whitelist | Domain whitelist to allow API calls.
| |||||||
| IP Address Whitelist | IP address whitelist to allow API calls.
| |||||||
| Remark | Any remark or description for the created API access. | |||||||
| Save Log? | Display Log View in a popup form. |
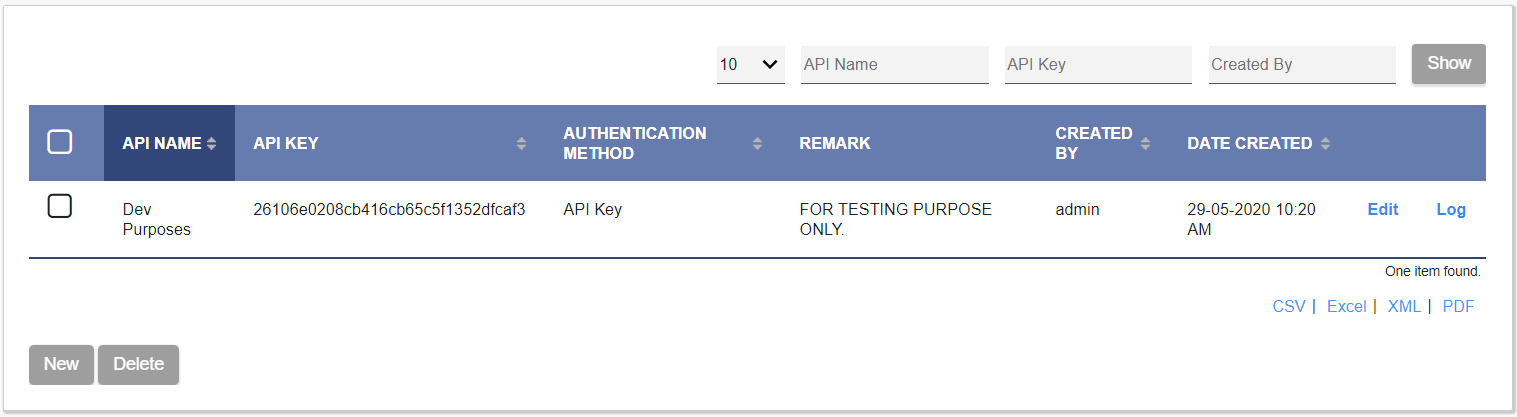
Figure 1: Manage API Key in a userview
Figure 2: Manage API Key - Log view
Figure 3: Manage API Key - New/Edit access
Configure Userview Menu
Manage API Key properties
| Name | Description | Screens (Click to view) | ||||
|---|---|---|---|---|---|---|
| ID | Menu element unique ID. Joget will use this ID in the URL if the Custom ID is empty. | |||||
| Custom ID | Item link slug. Optional field.
| |||||
| Label | Menu label. Mandatory field. | |||||
| API Document Name | Select an API Document that you have created with the API Builder, for configuration of access in runtime. |

Figure 4: Manage API Key properties
UI
List
| Name | Description | Screens (Click to view) |
|---|---|---|
| Button Position |
| |
| Selection Type |
| |
| Selector Position |
| |
New Record Button Label | New record button label to show in listing. | |
Edit Link Label | Edit button label to show in listing. | |
Delete Button Label | Delete button label to show in listing. | |
Custom Header | Custom HTML to show above the listing. | |
| Custom Footer | Custom HTML to show below the listing. |
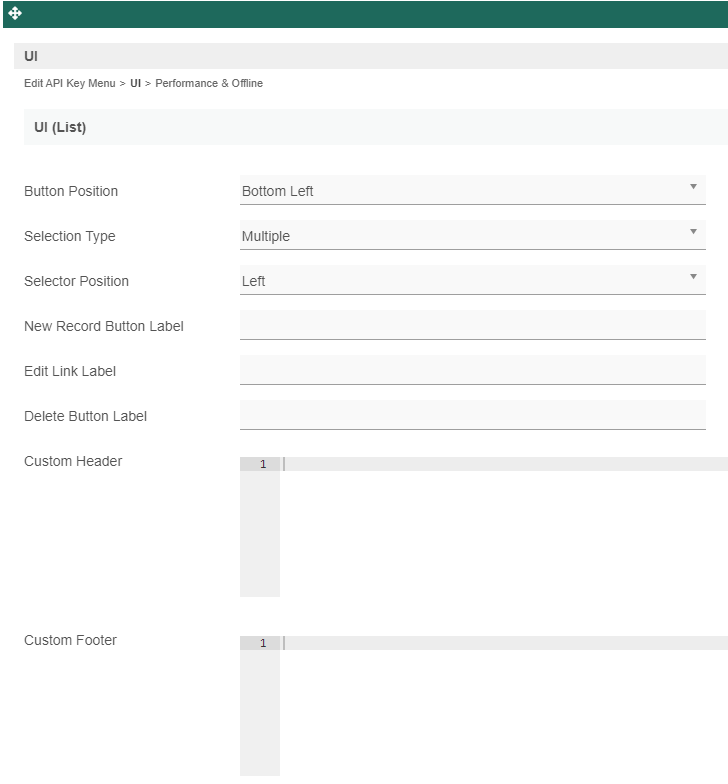
Figure 5: UI (List)
Add
| Name | Description | Screens (Click to view) |
|---|---|---|
| Cancel Button Label | Cancel button label to show in add new record form. | |
| Save Button Label | Save button label to show in add new record form. | |
| Message to show after Form saved | Message to show in a browser popup, after new record is saved. | |
| Custom Header | Custom HTML to show in header of add new record form. | |
| Custom Footer | Custom HTML to show in footer of add new record form. |
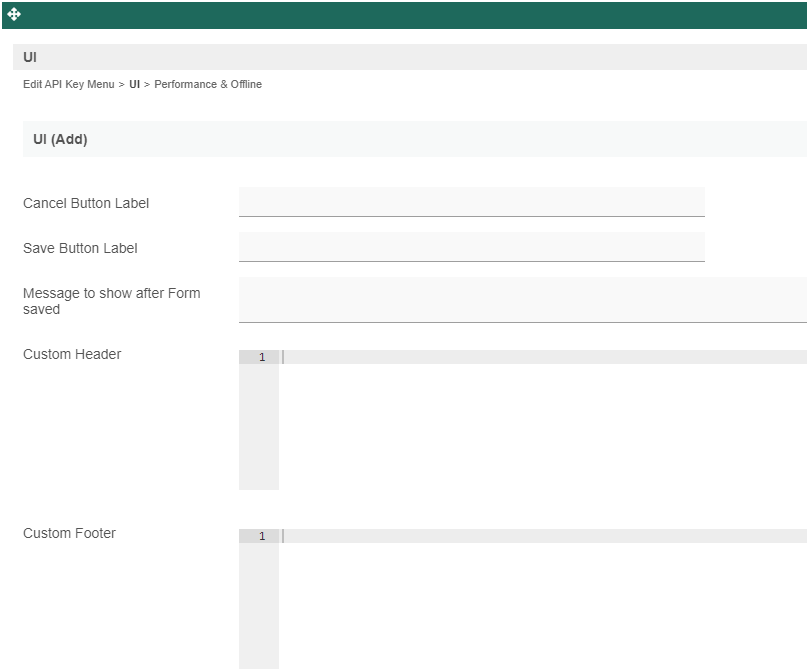
Figure 6: UI (Add)
Edit
| Name | Description | Screens (Click to view) |
|---|---|---|
| Readonly | If checked, the form will be rendered as read-only and not editable anymore. | |
Display Fields as Labels when in Readonly? | When the form is in read-only mode, determines if values should be displayed as is (label form) instead of being shown in original input fields. | |
| Back Button Label | Back button label. Default value: Back | |
Save Button Label | Save button label. | |
| Message to show after Form saved | Message to show in a browser popup, after a record is successfully edited. | |
| Custom Header | Custom HTML to show in header of edit record form. | |
| Custom Footer | Custom HTML to show in footer of edit record form. |
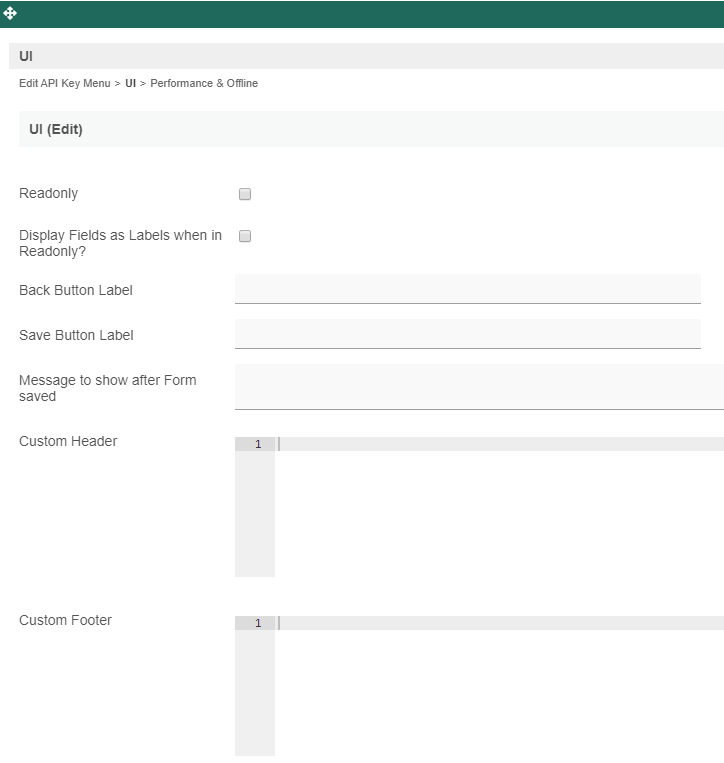
Figure 7: UI (Edit)
Performance & Offline
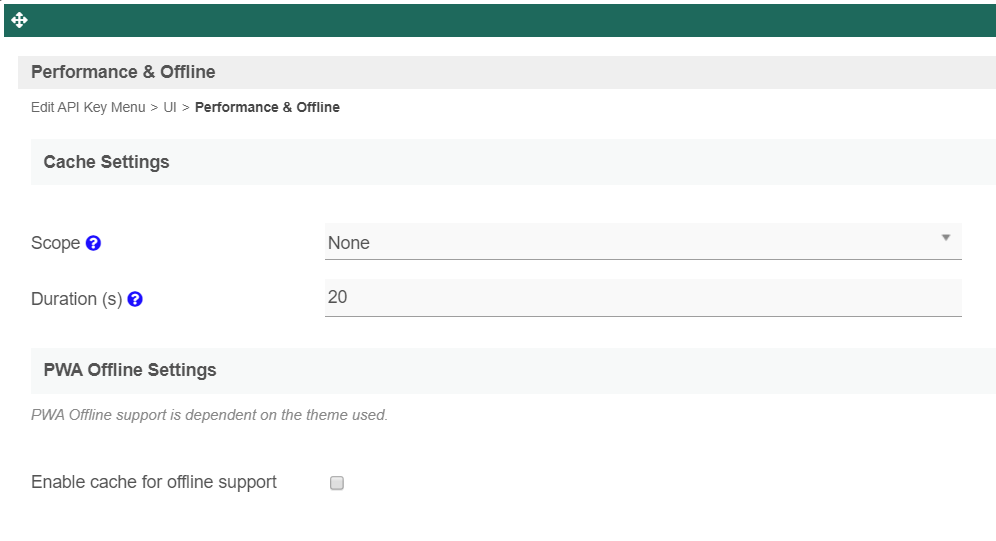
Figure 8: Performance & Offline
...