...
2. Go to the "Releases" page (See Figure 1).

Figure 1 Release page link
3. Click on the .jar file to initiate the download (See Figure 2).

Figure 2 Plugin-template-pack .jar file
4. Go to your Joget Workflow localhost or server and log in as admin.
...
2. Log in as admin and click on Design New App (See Figure 3) or click on existing application.

Figure 3 Design New App
3. For new applications, fill up up the App ID with camel case, and App Name, and click on the "Save" button. (See Figure 4)

Figure 4 Fill up App Details
4. Create a New Form, fill up Form ID in camel case, Form Name, and Table Name then click on the Save button (See Figure 5).

Figure 5 Fill up Form Details
5. Fill up the form with several fields, save it and then click the "Generate App" button (See Figure 6).

Figure 6 Save Form and Generate App
6. After Clicking the "Generate App" button, generate the app with CRUD and Datalist included (See Figure 7).

Figure 7 Generate CRUD and Datalist
8. After generating the app, Launch the UI Builder by clicking on the newly created CRUD. (See Figure 8).
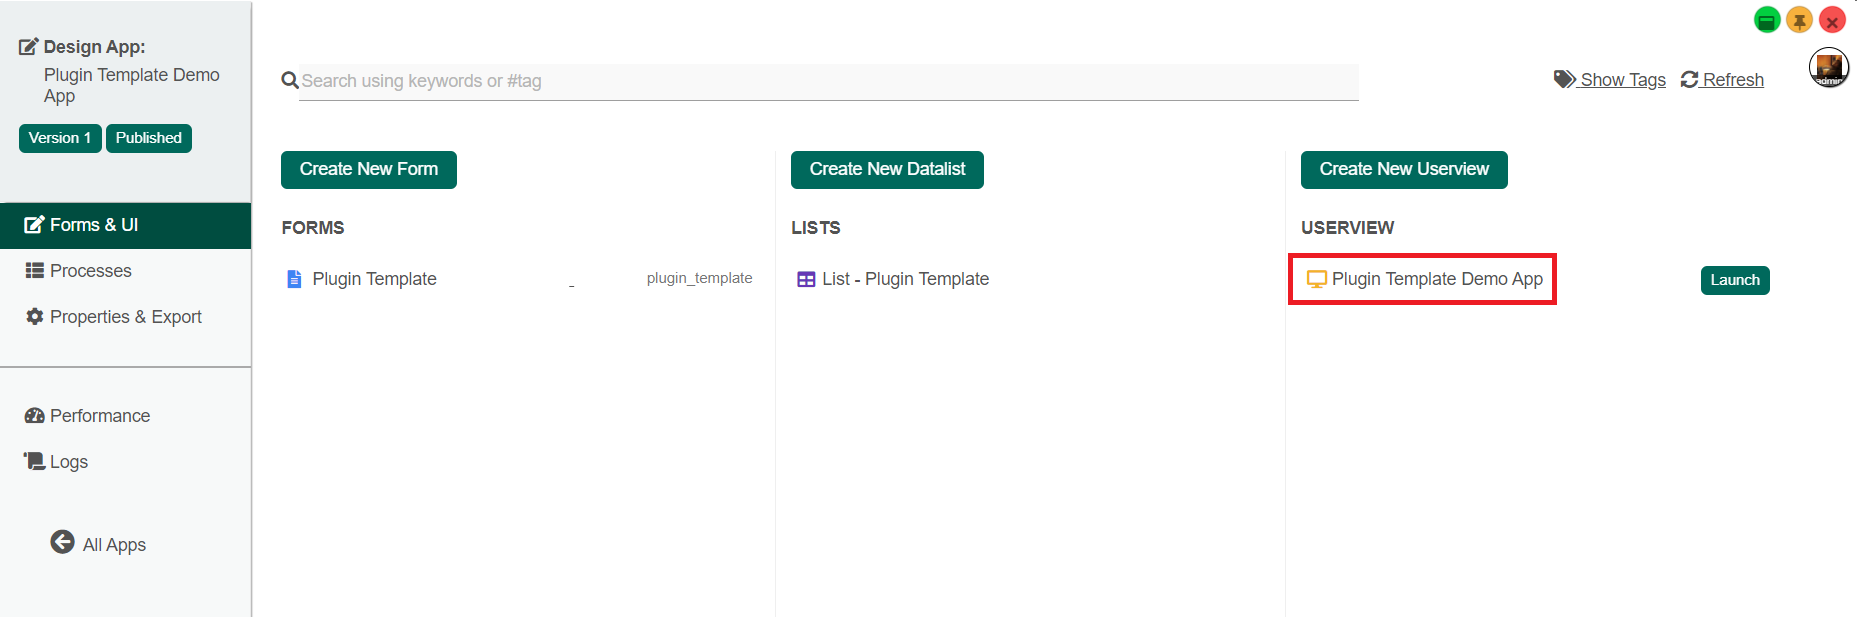
Figure 8 Enter UI builder
9. Navigate the user view menu elements and add the "Plugin Template Management" to the User view Menu. (See Figure 9).

Figure 9 Plugin Template Management
10. Leave the configuration of Plugin Template Management properties as default and save the User view Builder.
...
Edit Plugin Template Management

Figure 10 Edit Plugin Template Management
| Name | Description | |||||
|---|---|---|---|---|---|---|
| ID | The 'ID' in the property editor is a unique identifier. The value of this property is auto-generated. | |||||
| Custom ID | Item link slug. It is an Optional field.
| |||||
| Label | Menu label to be displayed to the end-user. It is a Mandatory field. |
UI

Figure 11 UI (List) properties of Plugin Template Management
| Name | Description |
|---|---|
| Button Position | The position of buttons in the Userview:
|
| Selection Type | The type record selector in the userview:
|
| Selector Position | The position of the record selector in the userview:
|
| New Record Button Label | New Record Button Label to be displayed to the end-user. Default Value: New |
| Edit Link Label | Edit Record Button Label to be displayed to the end-user. Default Value: Edit |
| Delete Button Label | Delete Record Button Label to be displayed to the end-user. Default Value: Delete |
| Custom Header | Custom Header in HTML. |
| Custom Footer | Custom Footer in HTML |

Figure 12 UI (Add) properties of Plugin Template Management
| Name | Description |
|---|---|
| Cancel Button Label | Cancel Button Label to be displayed to the end-user. Default Value: Cancel |
| Save Button Label | Save Button Label to be displayed to the end-user. Default Value: Save |
| Custom Header | Custom Header in HTML. |
| Custom Footer | Custom Footer in HTML |

Figure 13 UI (Edit) properties of Plugin Template Management
| Name | Description |
|---|---|
Back Button Label | Back Button Label to be displayed to the end-user. Default Value: Back |
| Save Button Label | Save Button Label to be displayed to the end-user. Default Value: Edit |
| Custom Header | Custom Header in HTML. |
| Custom Footer | Custom Footer in HTML |
Performance & Offline

Figure 14 Performance & Offline
Cache Settings
Name | Description |
|---|---|
| Scope | Caching options are:
|
| Duration (s) | Duration in seconds to cache content defaults to 20 seconds if applicable. |
...
UI of Plugin Template Management
UI List

Figure 15 UI (List) of Plugin Template Management
UI (Add)

Figure 16 UI (Add) of Plugin Template Management
UI (Edit)

Figure 17 UI (Edit) of Plugin Template Management
Datalist Formatter
Steps to use the Plugin Template - Datalist Formatter Plugin:
1. Launch the app, navigate to the Plugin Template Management menu, and click the "N ewNew" button to create a new Plugin Template (See Figure 10).
...