Red Hat OpenShift is a container application platform that brings Docker and Kubernetes to the enterprise. OpenShift Online is a public Platform-as-a-Service (PaaS) that offers a hosted solution in the cloud. With OpenShift Online, you can quickly build, host, and scale containerized applications in the public cloud–operated and supported by Red Hat.是一个容器应用程序平台,将Docker和Kubernetes引入企业。OpenShift Online是一个公共的平台即服务(PaaS),在云中提供托管解决方案。借助OpenShift Online,您可以快速构建,托管和扩展由Red Hat运营和支持的公共云中的集装箱化应用程序。
作为开源的低代码平台,可视化地为编程人员和非编码人员构建企业网络应用程序,Joget Workflow是OpenShift的一个很好的补充。As an open source low code platform to visually build enterprise web apps for coders and non-coders, Joget Workflow is a good complement for OpenShift.

| Info |
|---|
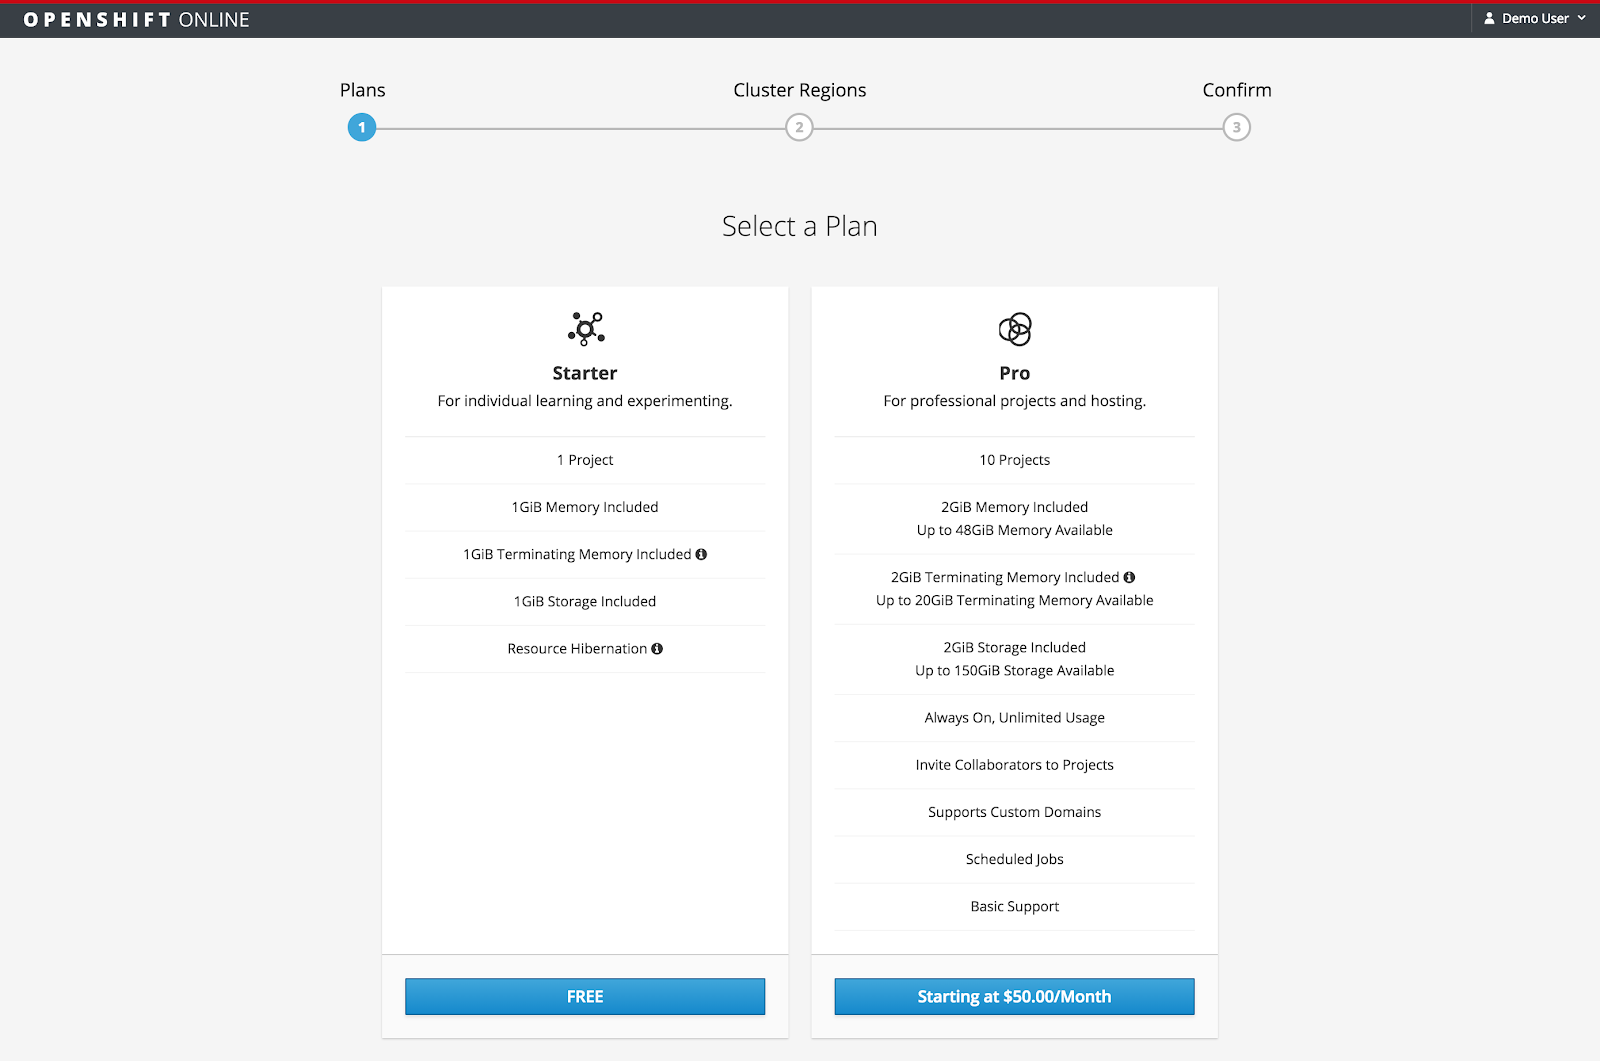
OpenShift Online has a free Starter plan, so you can use it to learn and experiment at no cost. |
...
Online提供免费的Starter计划,因此您可以免费使用它进行学习和实验。 |
在本例中,我们将在一个完整的开源堆栈上部署Joget工作流,其中包括Red Hat JBoss WildFly应用服务器和Linux上的MySQL数据库。WildFly,前身为JBoss,是一个领先的轻量级应用服务器,MySQL是当今最流行的开放源码数据库。
步骤1:在线注册OpenShift
在
Step 1: Sign Up for OpenShift Online
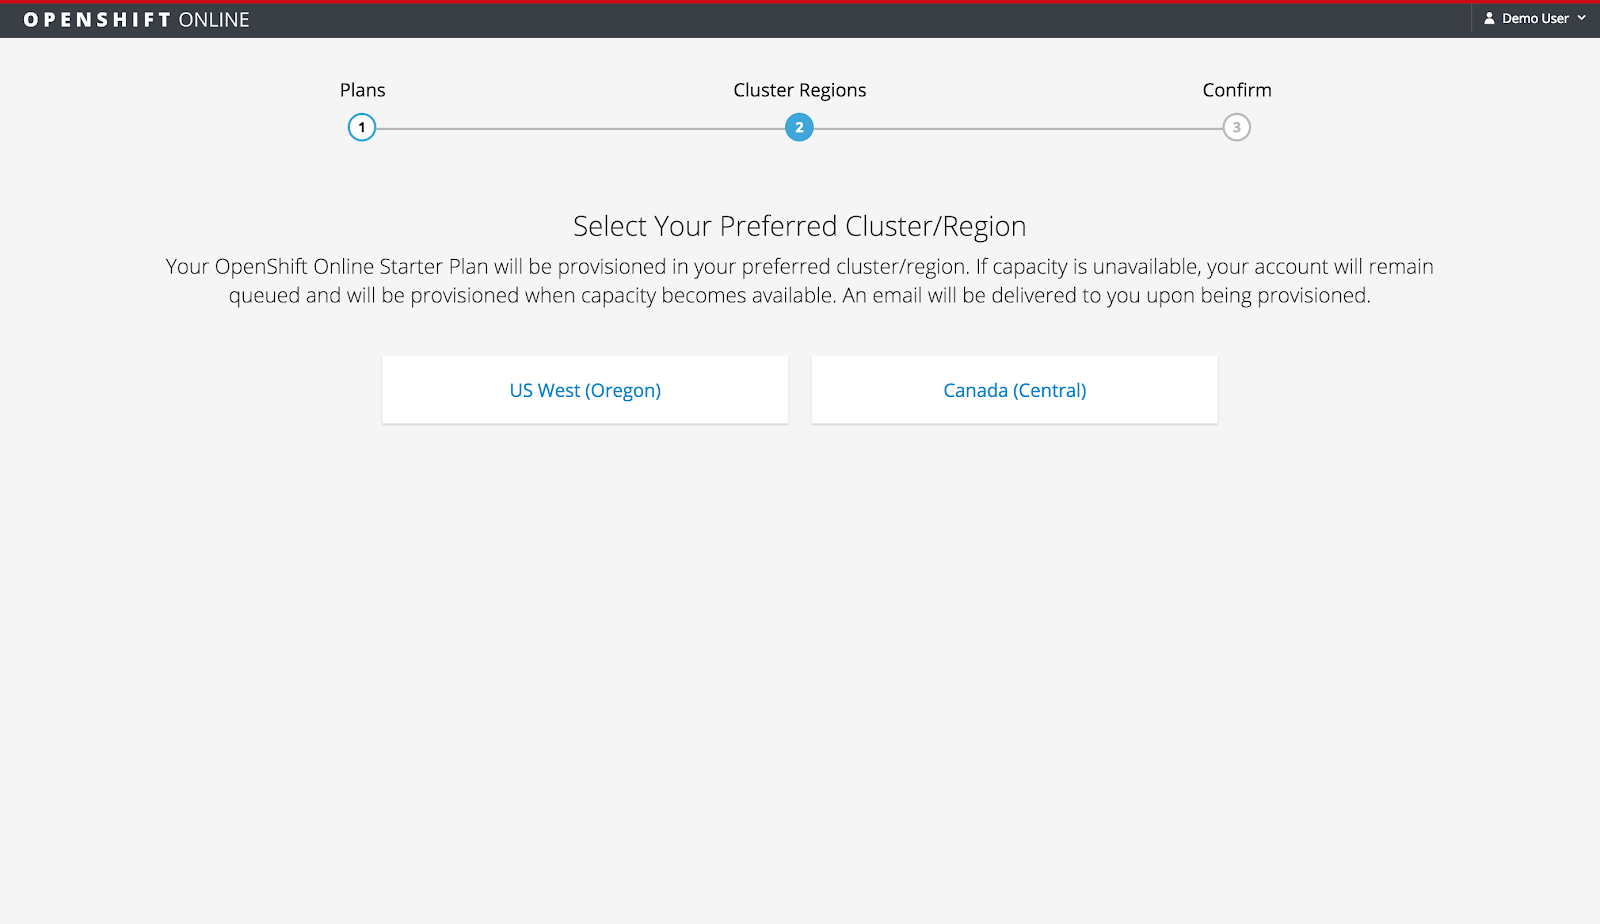
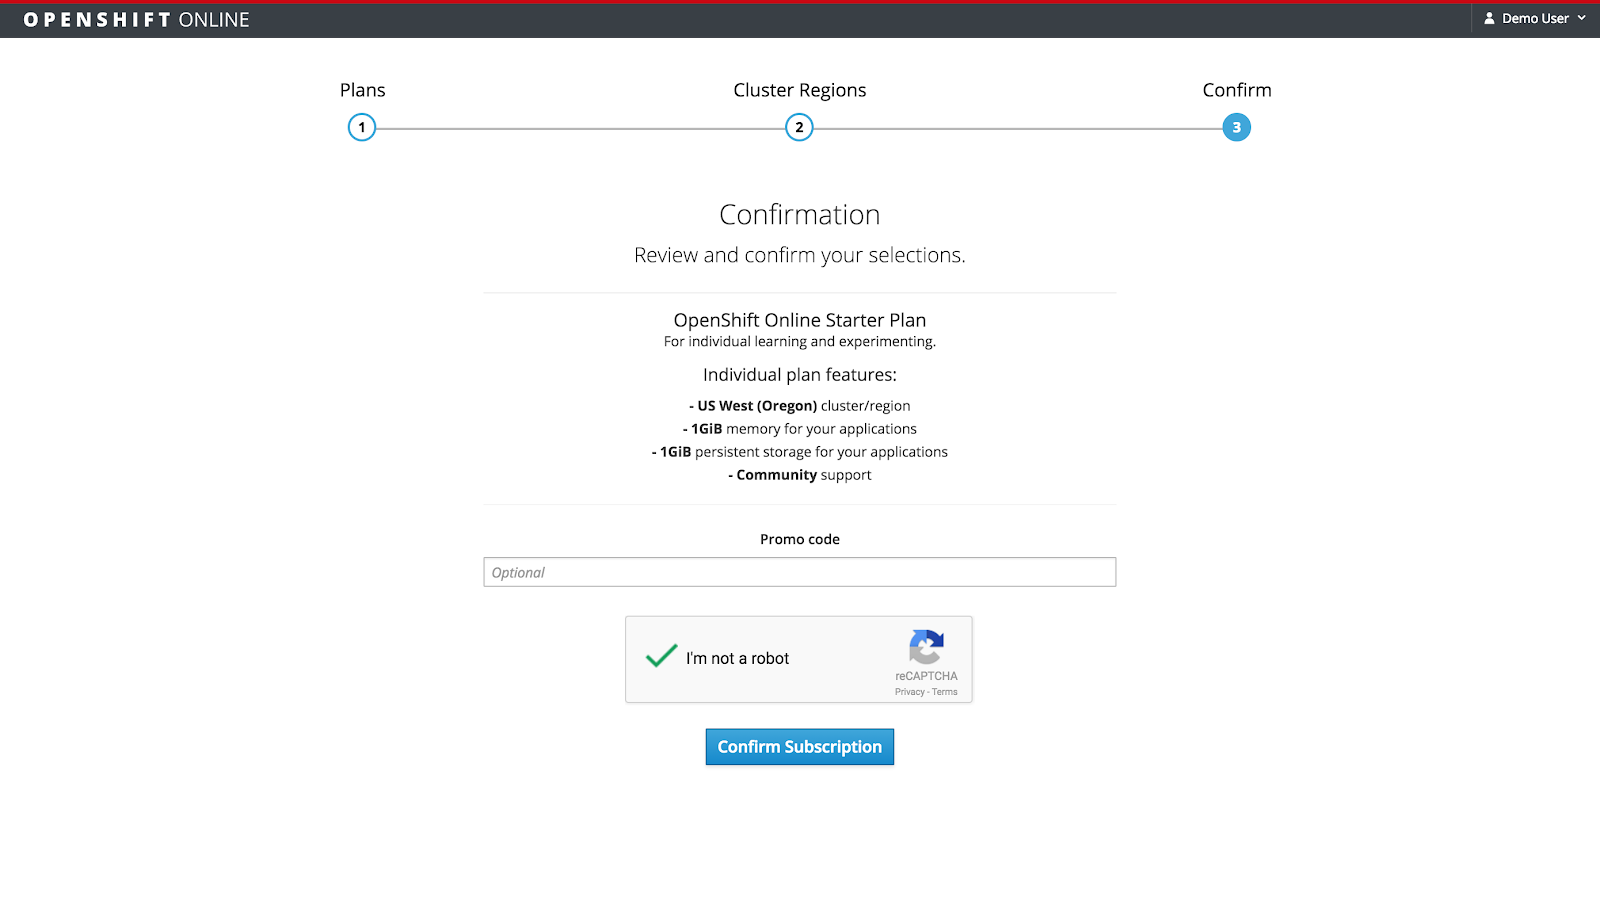
Sign up for free at https://manage.openshift.com/ and choose the desired plan and region.免费注册并选择所需的计划和地区。
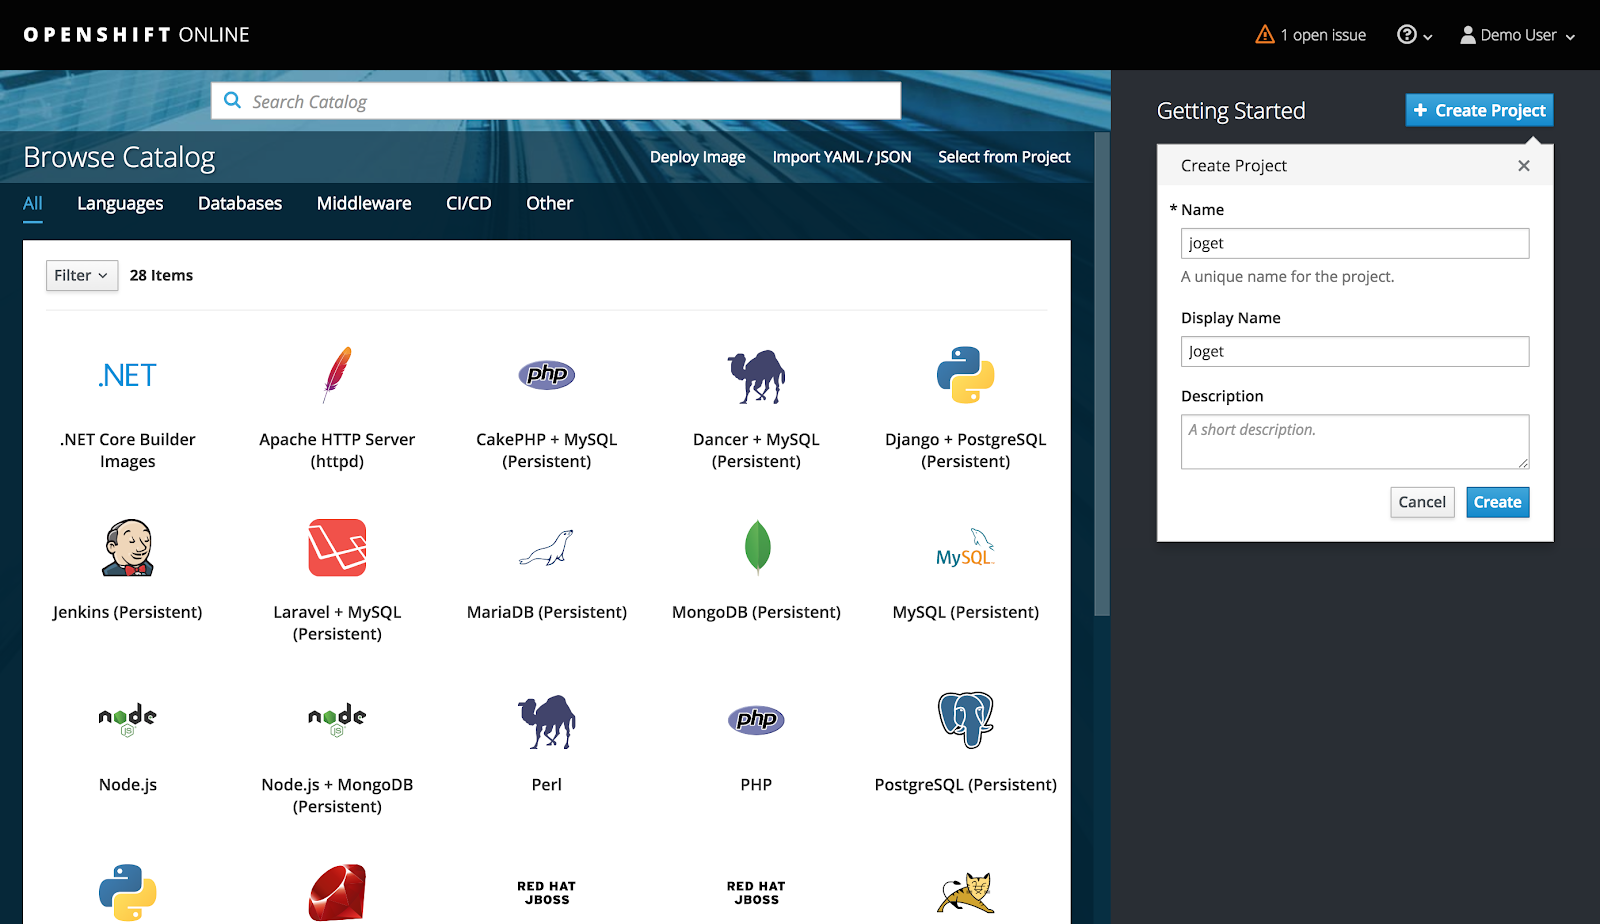
Step 2: Create OpenShift Project
In the OpenShift Web Console, create a project using the Create Project button and key in the desired Name, Display Name and Description.
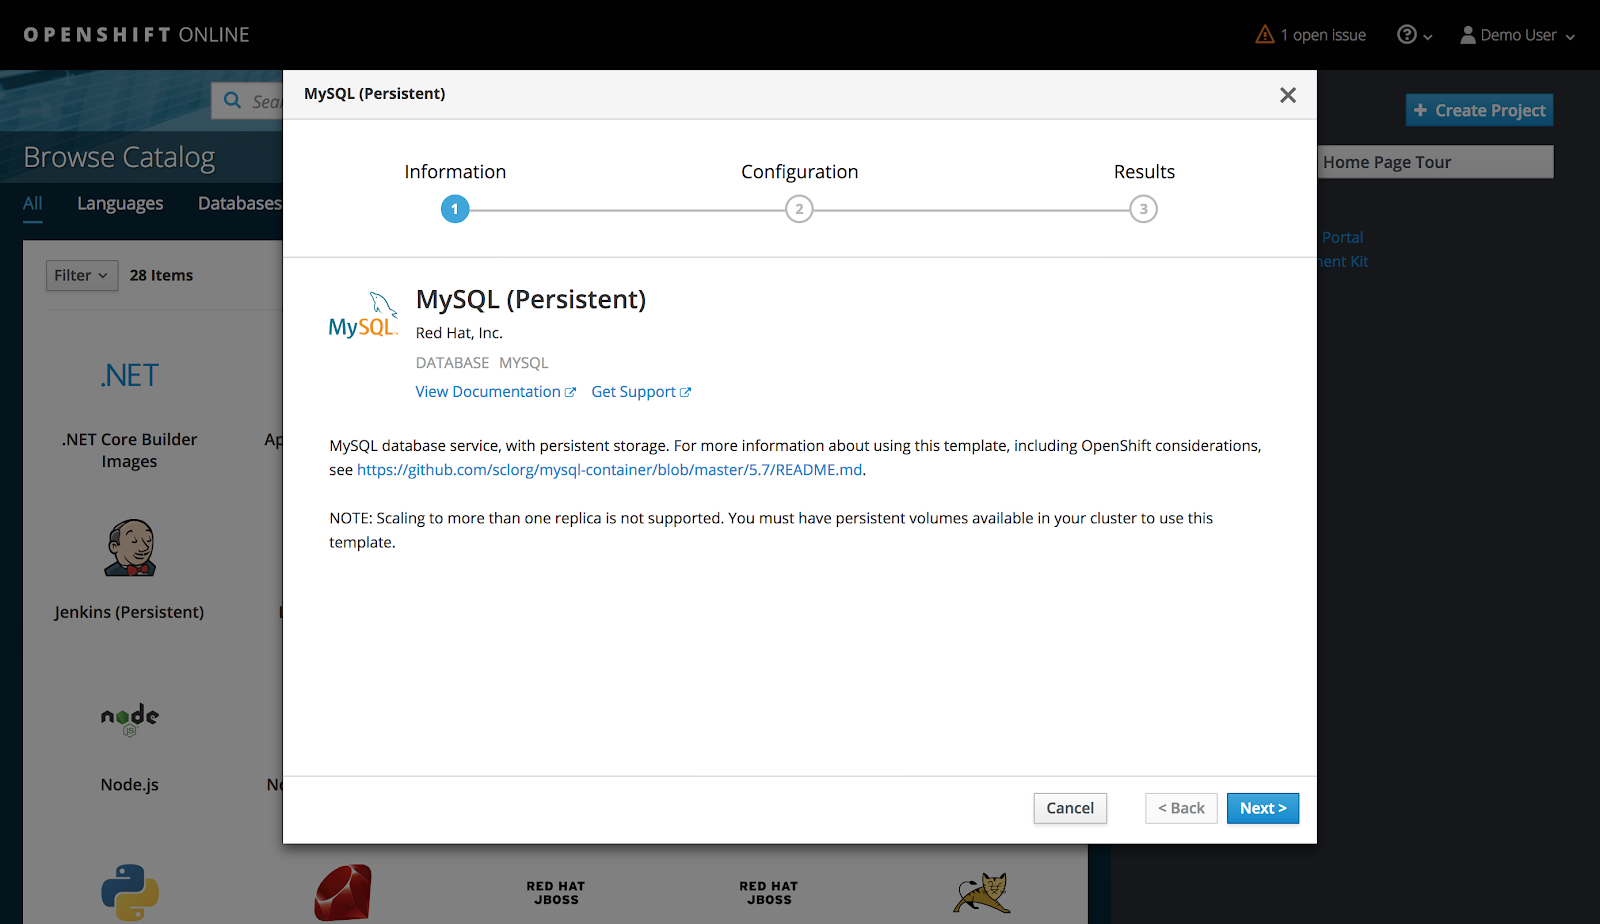
Step 3: Deploy MySQL Database
Under the selected project, select Add to Project > Browse Catalog and select the MySQL (Persistent) image.
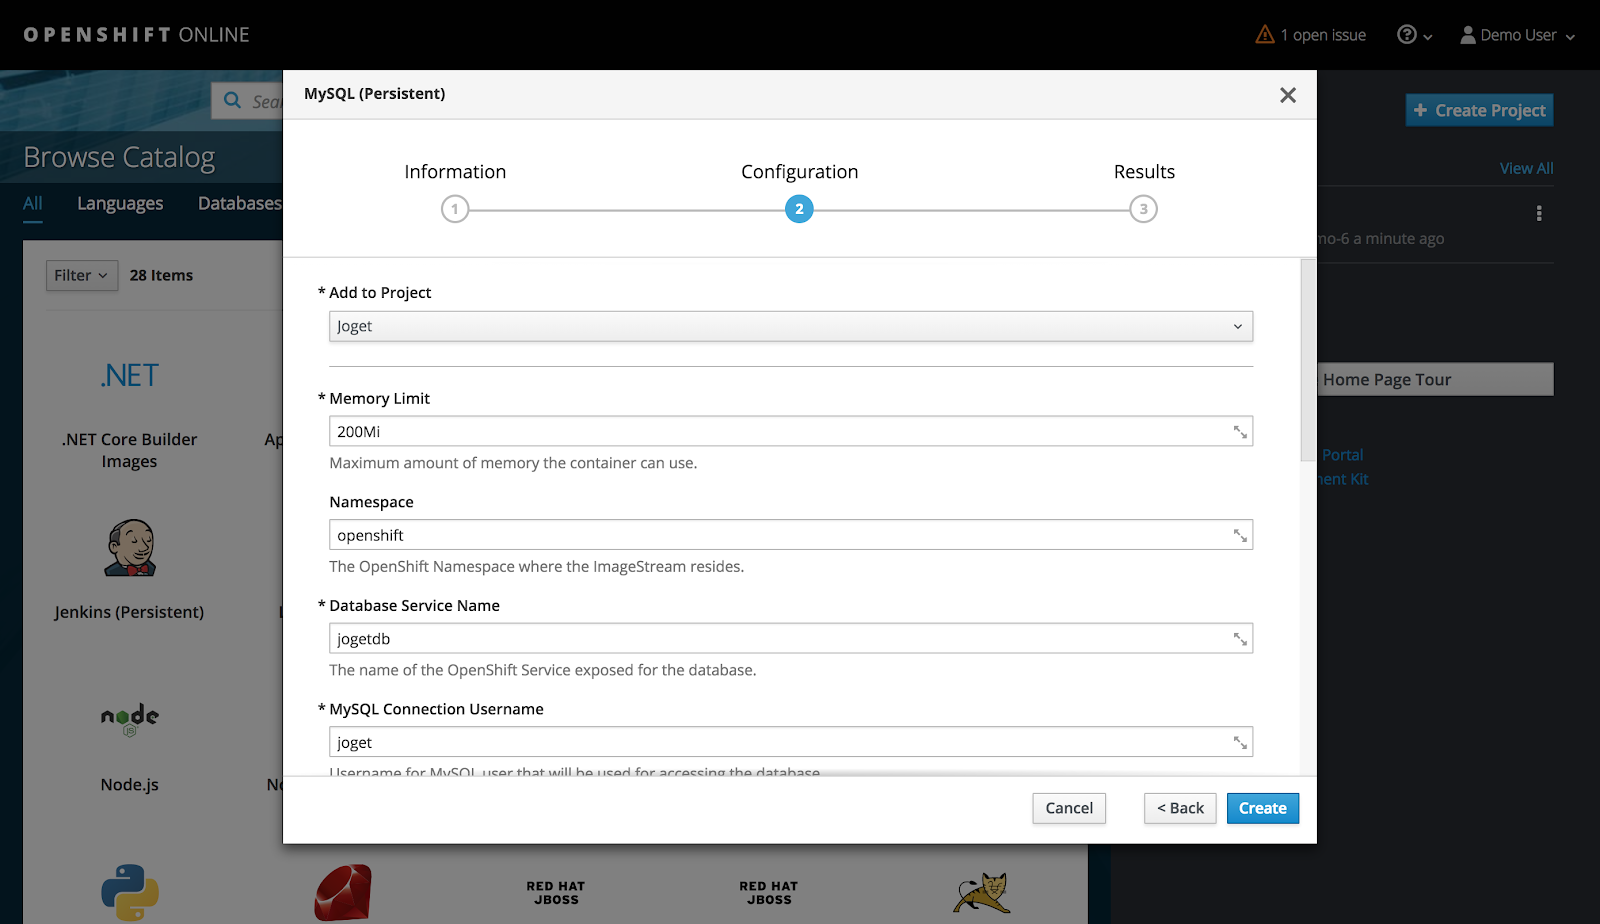
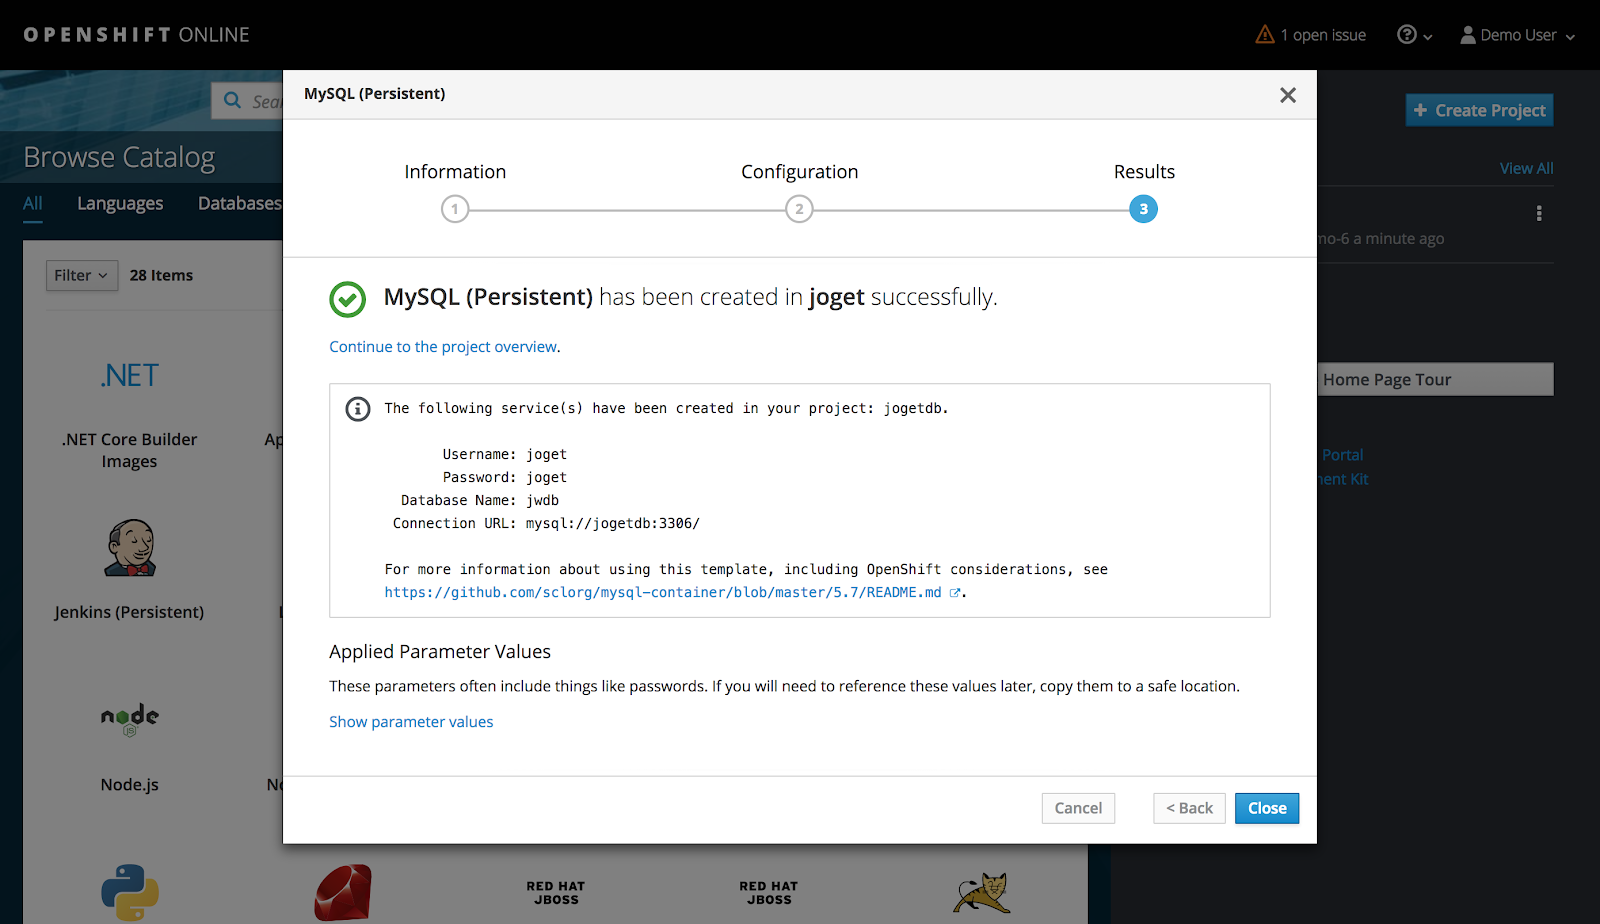
Key in the appropriate settings and click on Create e.g.
第2步:创建OpenShift项目
在OpenShift Web控制台中,使用“ 创建项目” 按钮创建一个项目,并键入所需的名称,显示名称和说明。
第3步:部署MySQL数据库
在所选项目下,选择添加到项目>浏览目录并选择MySQL(持久性)图像。
键入适当的设置并单击Create。
内存限制 | 200Mi(此值适用于将总内存限制为1GB的OpenShift Starter计划) |
数据库服务名称 | jogetdb |
MySQL连接用户名 | joget |
MySQL连接密码 | joget |
MySQL数据库名称 |
Memory Limit | 200Mi (This value is suitable for the OpenShift Starter plan which limits total memory to 1GB) |
Database Service Name | jogetdb |
MySQL Connection Username | joget |
MySQL Connection Password | joget |
MySQL Database Name | jwdb |
Step 4: Deploy Joget Workflow on JBoss WildFly Application Server
...
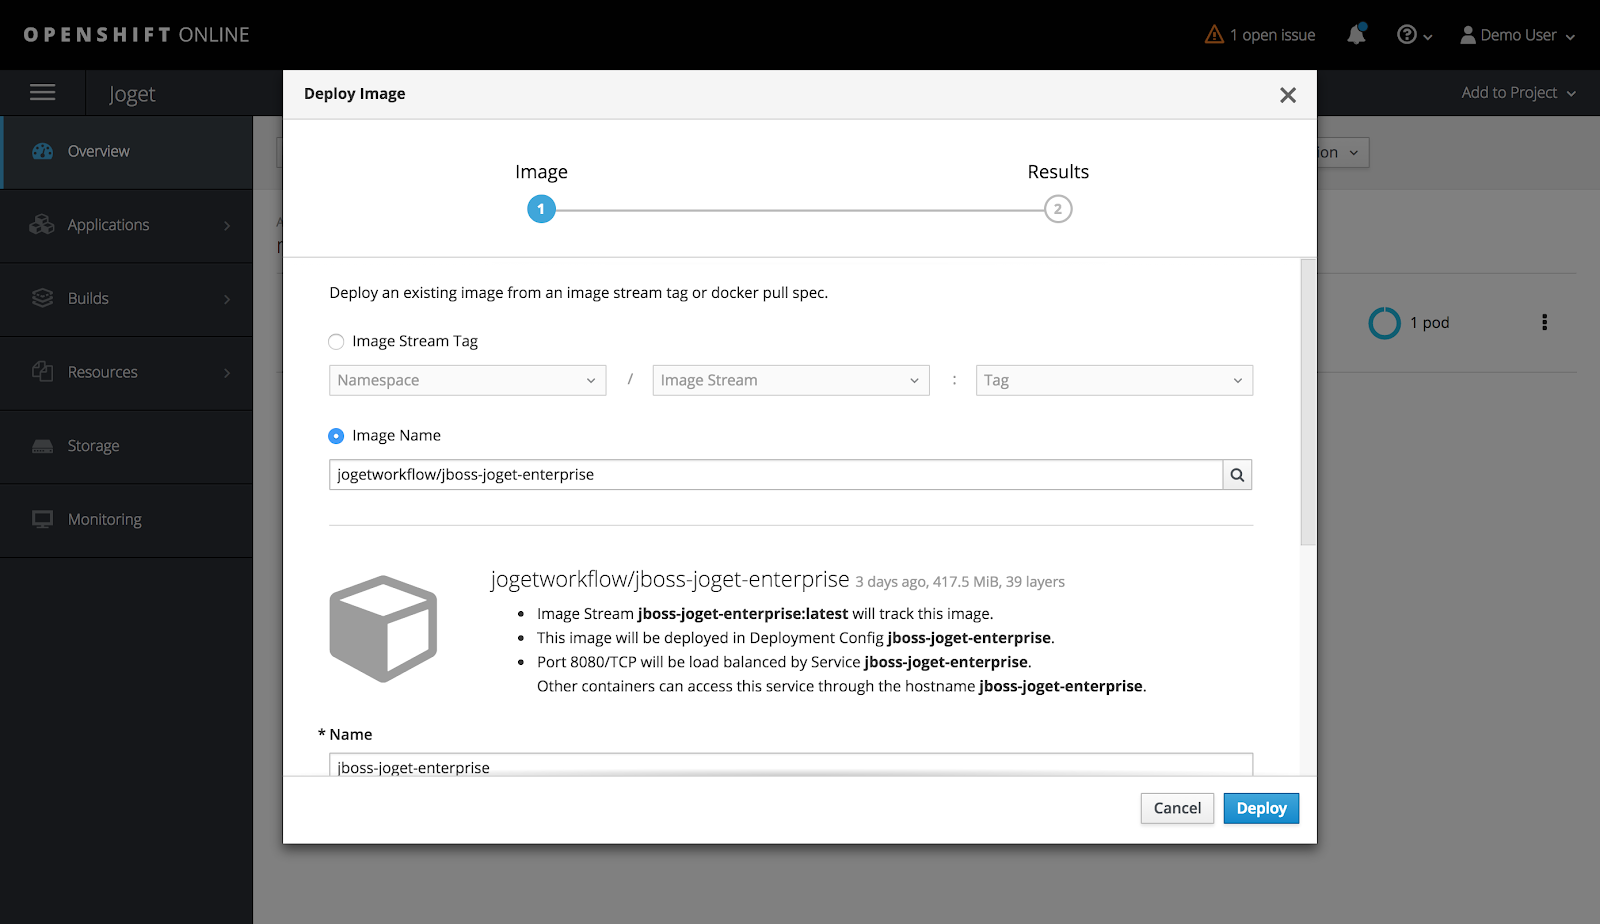
步骤4:在JBoss WildFly应用服务器上部署Joget工作流。
在选定的项目下,选择Add to project > Deploy Image,在jogetworkflow
...
/jboss-joget-
...
enterprise中选择Image Name选项和key。点击这个小的搜索图标来载入在Docker中心托管的合适的Docker镜像。
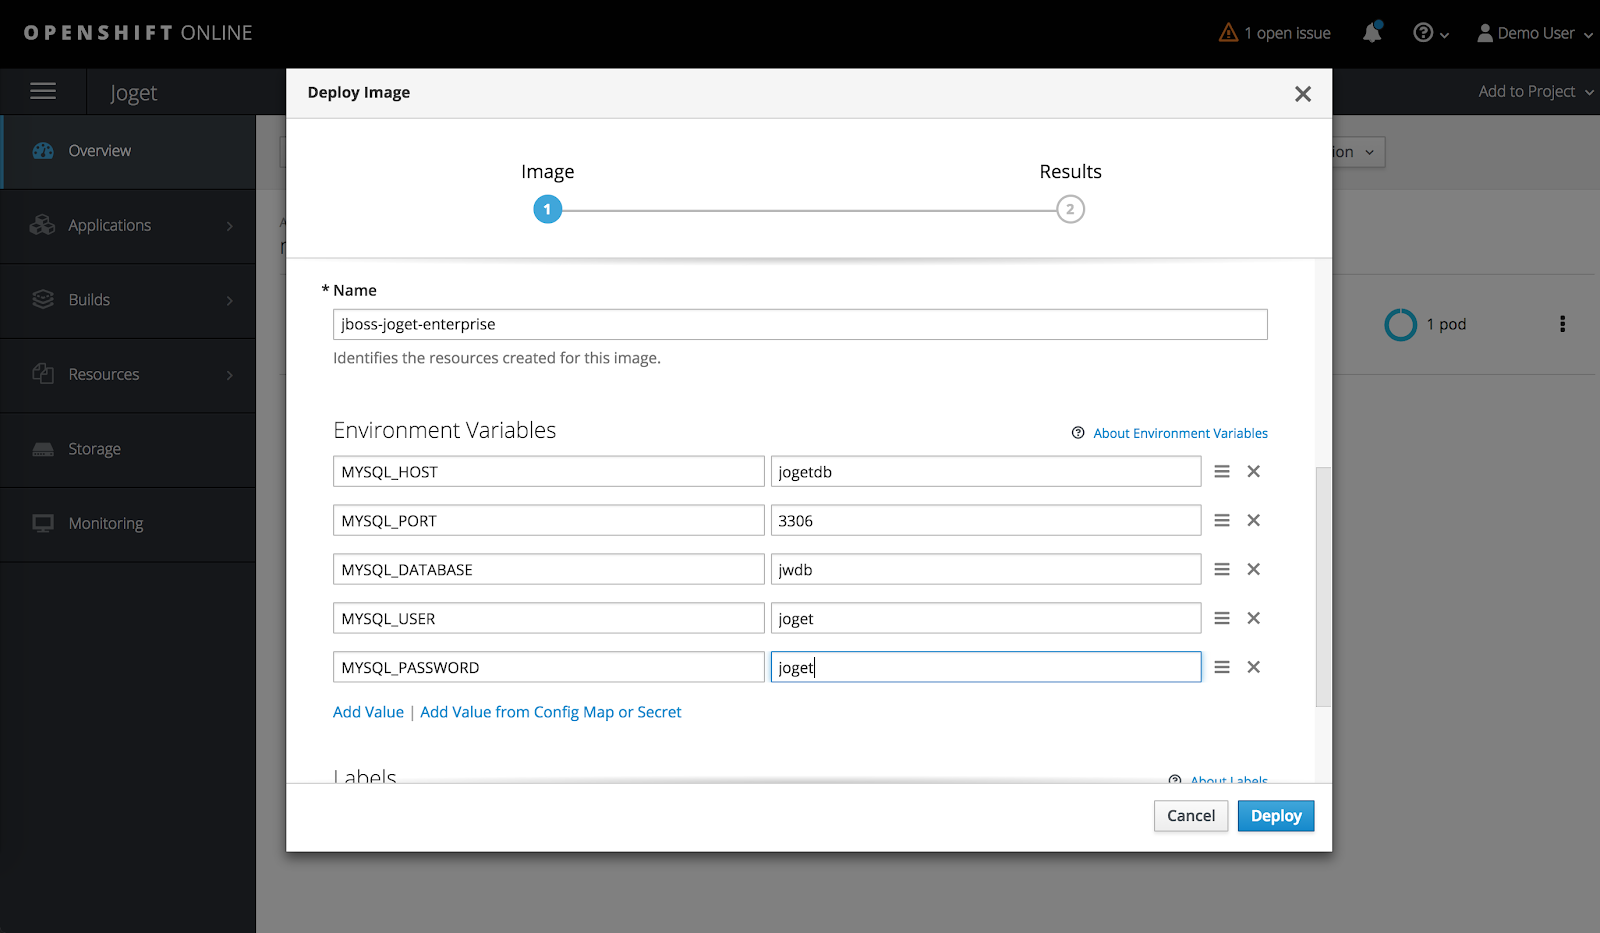
添加环境变量以匹配之前配置的MySQL容器的数据库设置,并单击Deploy。
Add Environment Variables to match the previously configured database settings for the MySQL container and click on Deploy e.g.
MYSQL_HOST | jogetdb |
MYSQL_PORT | 3306 |
MYSQL_DATABASE | jwdb |
MYSQL_USER | joget |
MYSQL_PASSWORD | joget |
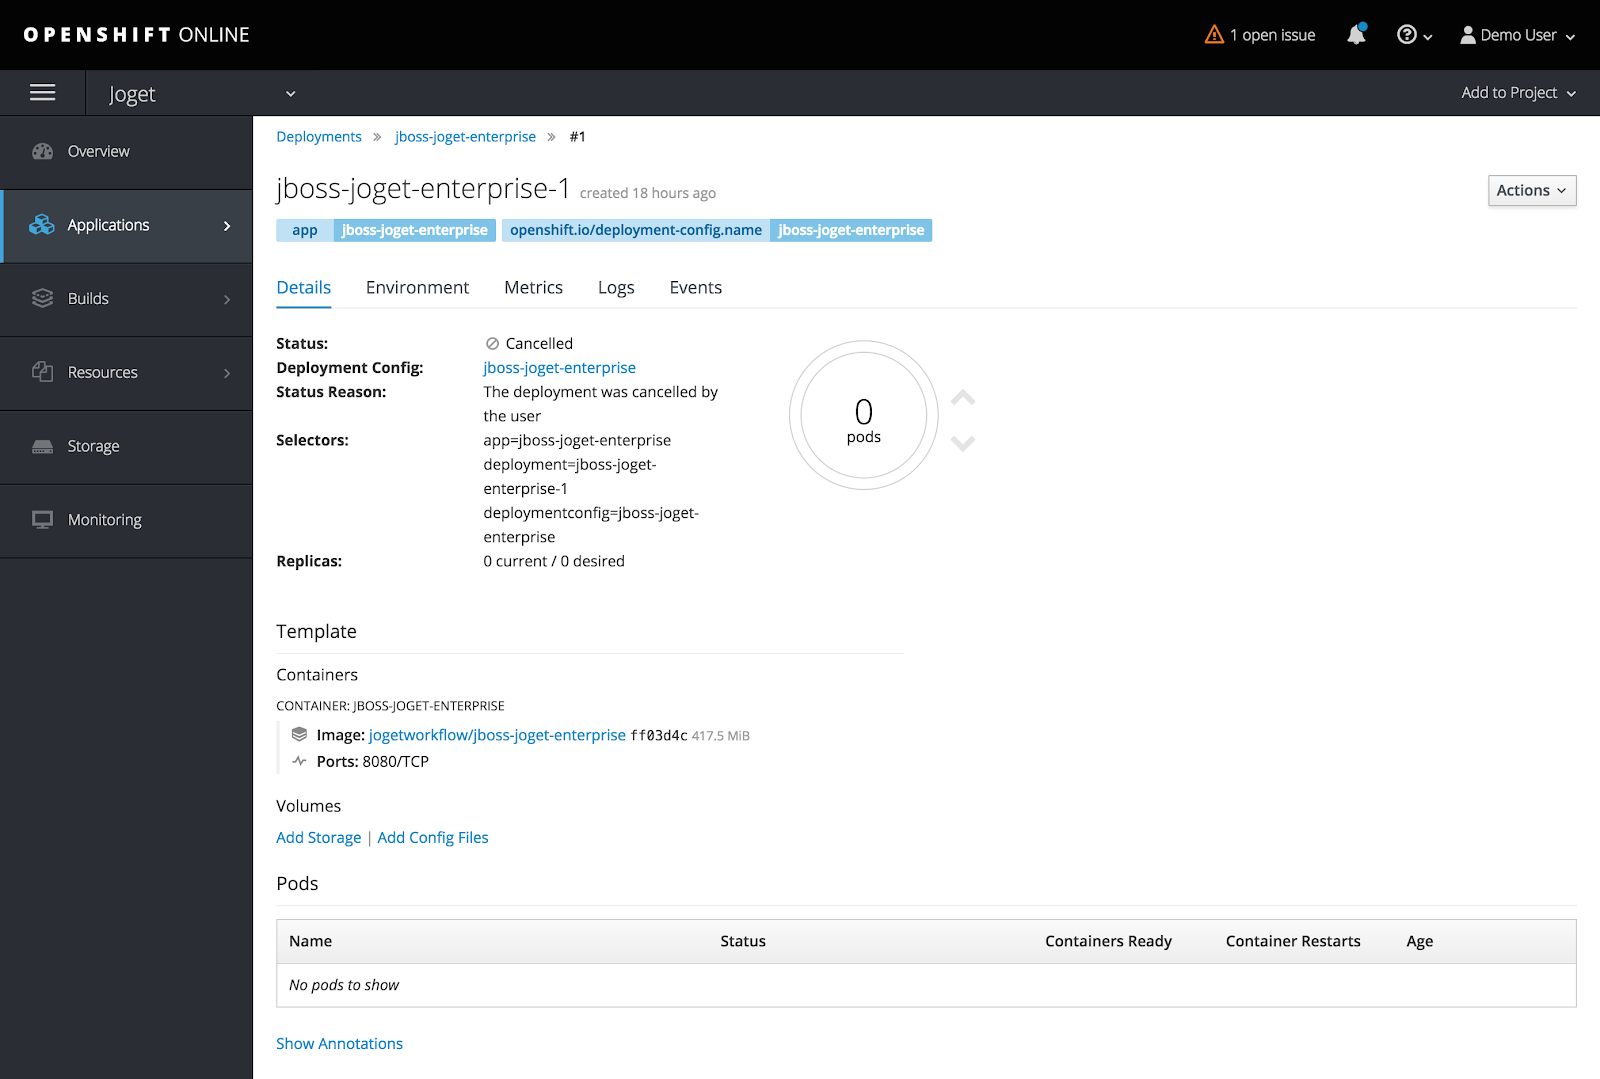
By default, the created pod (a pod is a group of one or more containers) is only allocated 512 MiB memory so we will need to allocate more resources to avoid memory errors.
Click on Applications > Deployments and select the jboss-joget-enterprise container. Reduce the running pods to zero by clicking on the down arrow.
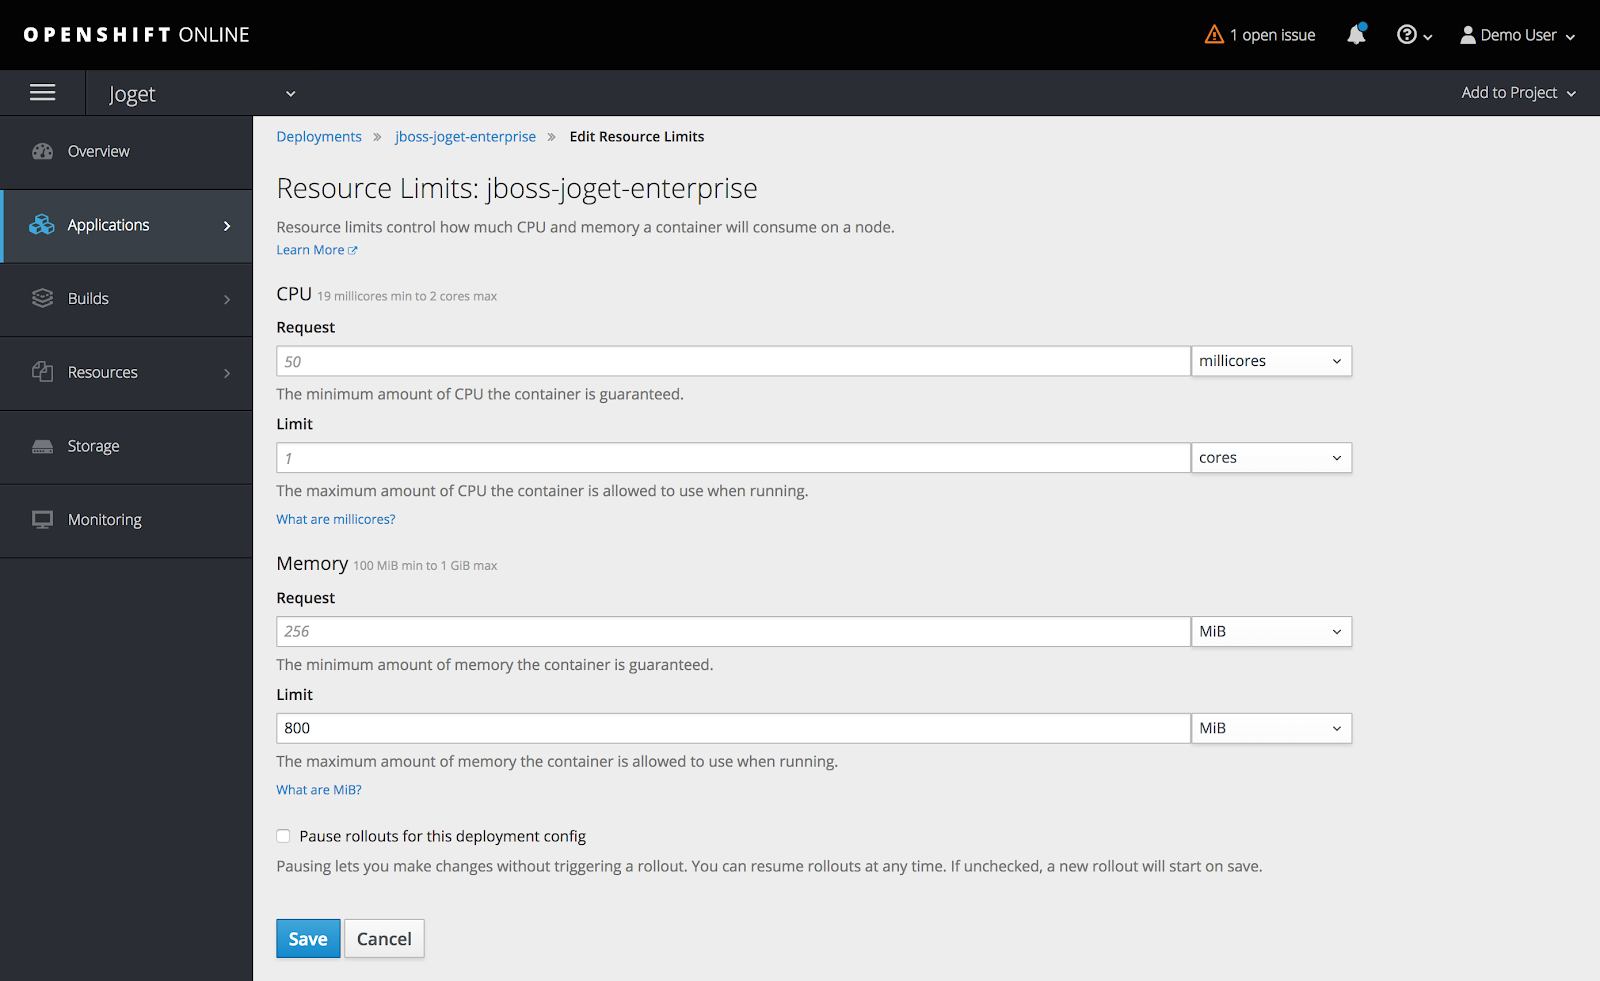
Select Actions > Edit Resource Limits, set the Memory Limit to 800 MiB and click on Save.
Return to Applications > Deployments and select the latest jboss-joget-enterprise version. Adjust the running pod back to one by clicking on the up arrow. At this point, a new pod will start up and the status should change to Active.
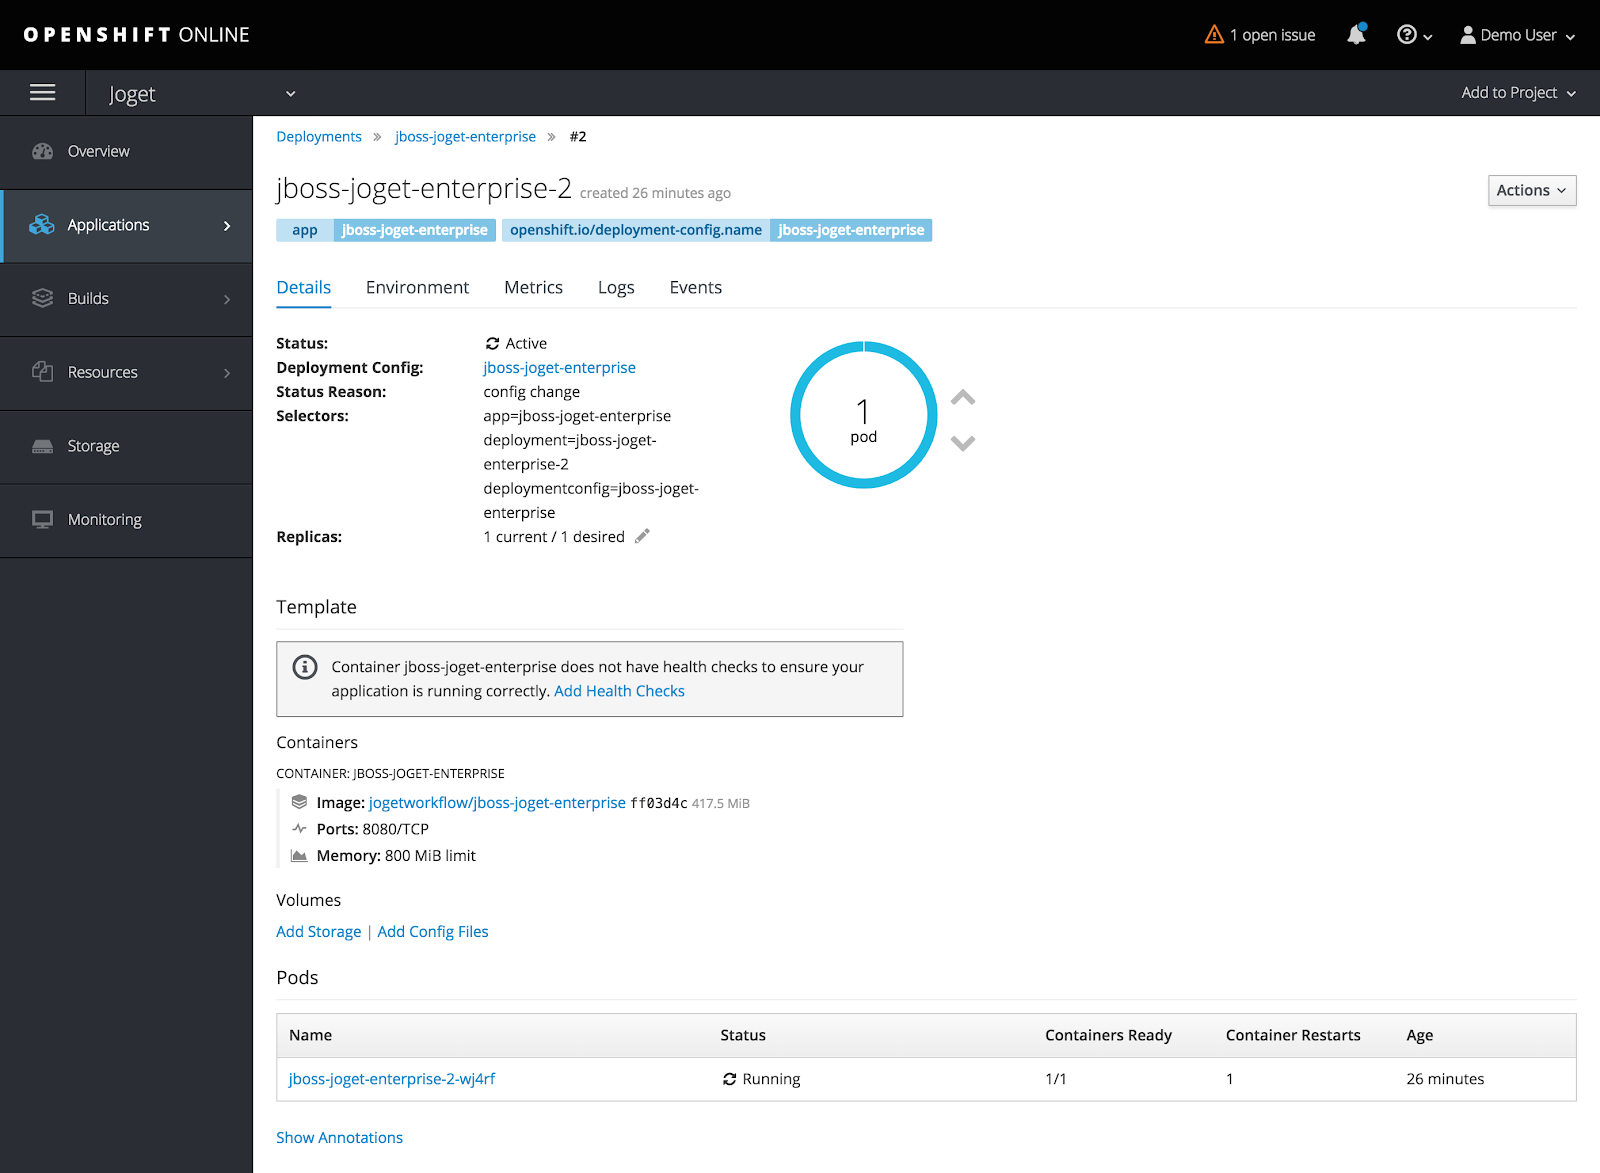
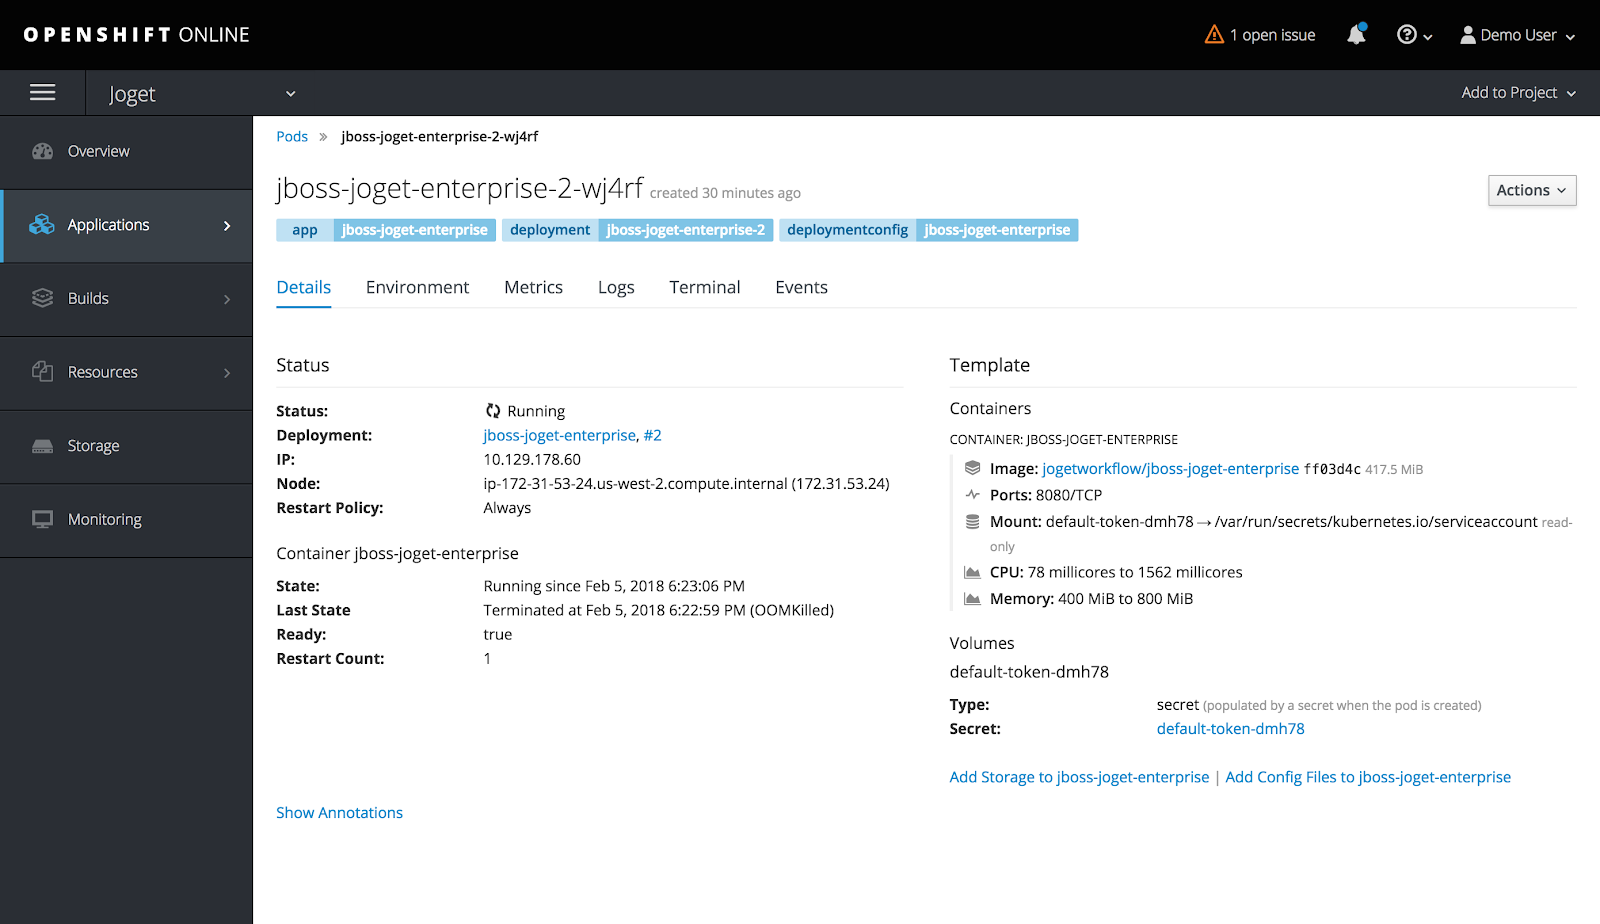
Click on the pod to view the pod details.
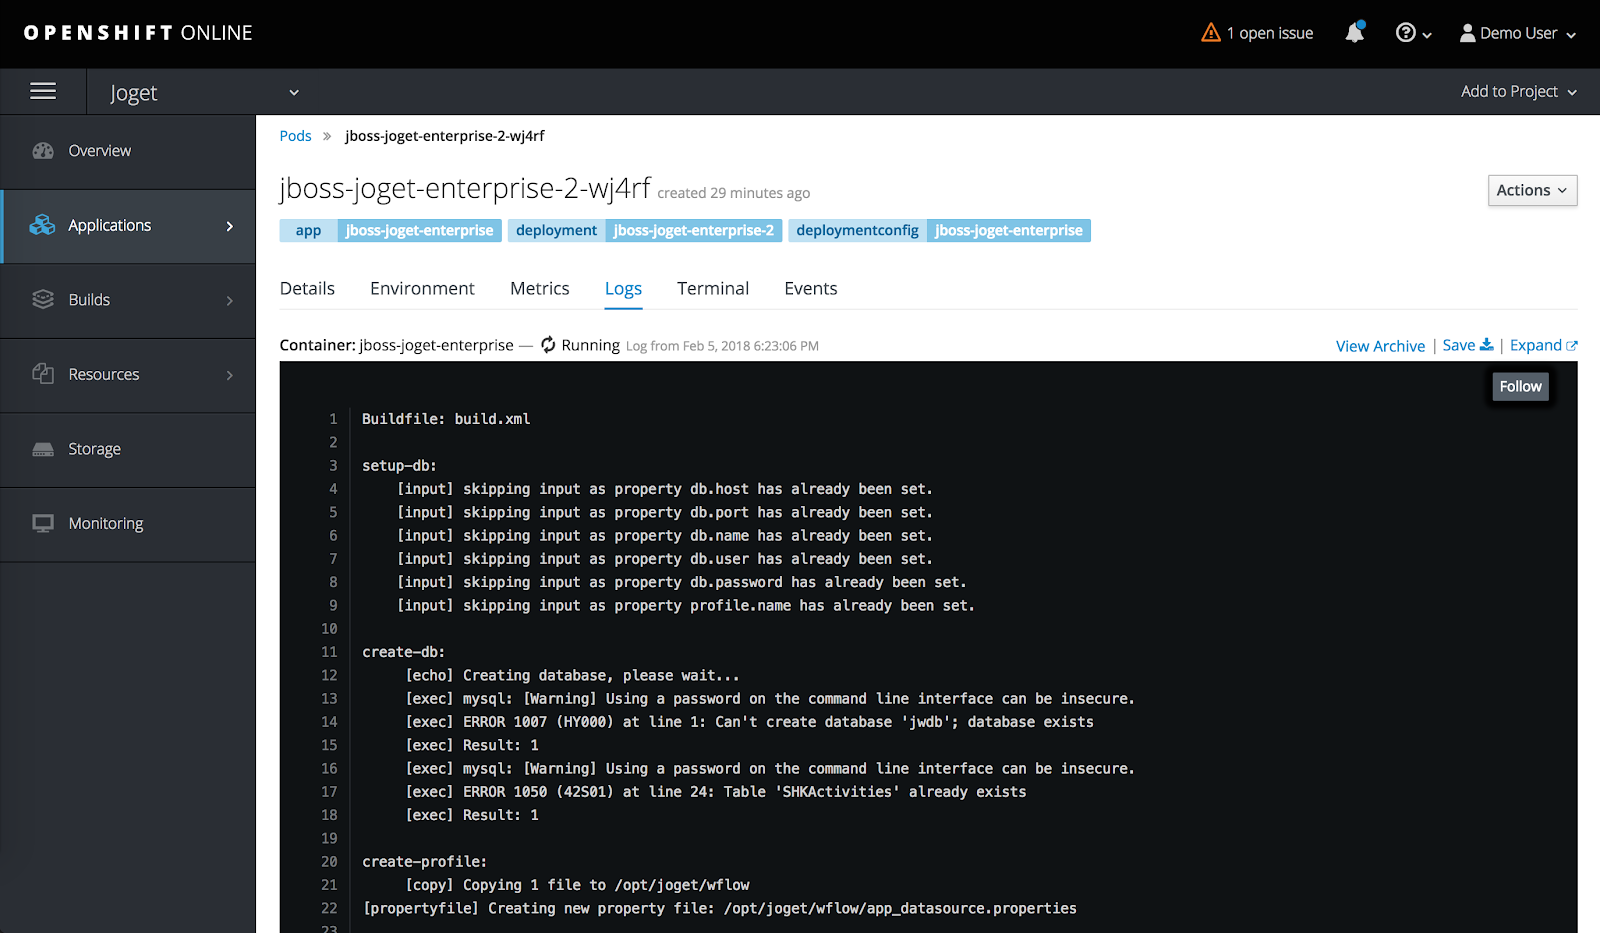
You can also view the running logs for the pod via the Logs tab.
Step 5: Create Service Route for External Access
At this point, the pod is running but is not accessible from an external web browser so you will need to create a route, which exposes a service at a host name.
Click on Applications > Services and select jboss-joget-enterprise.
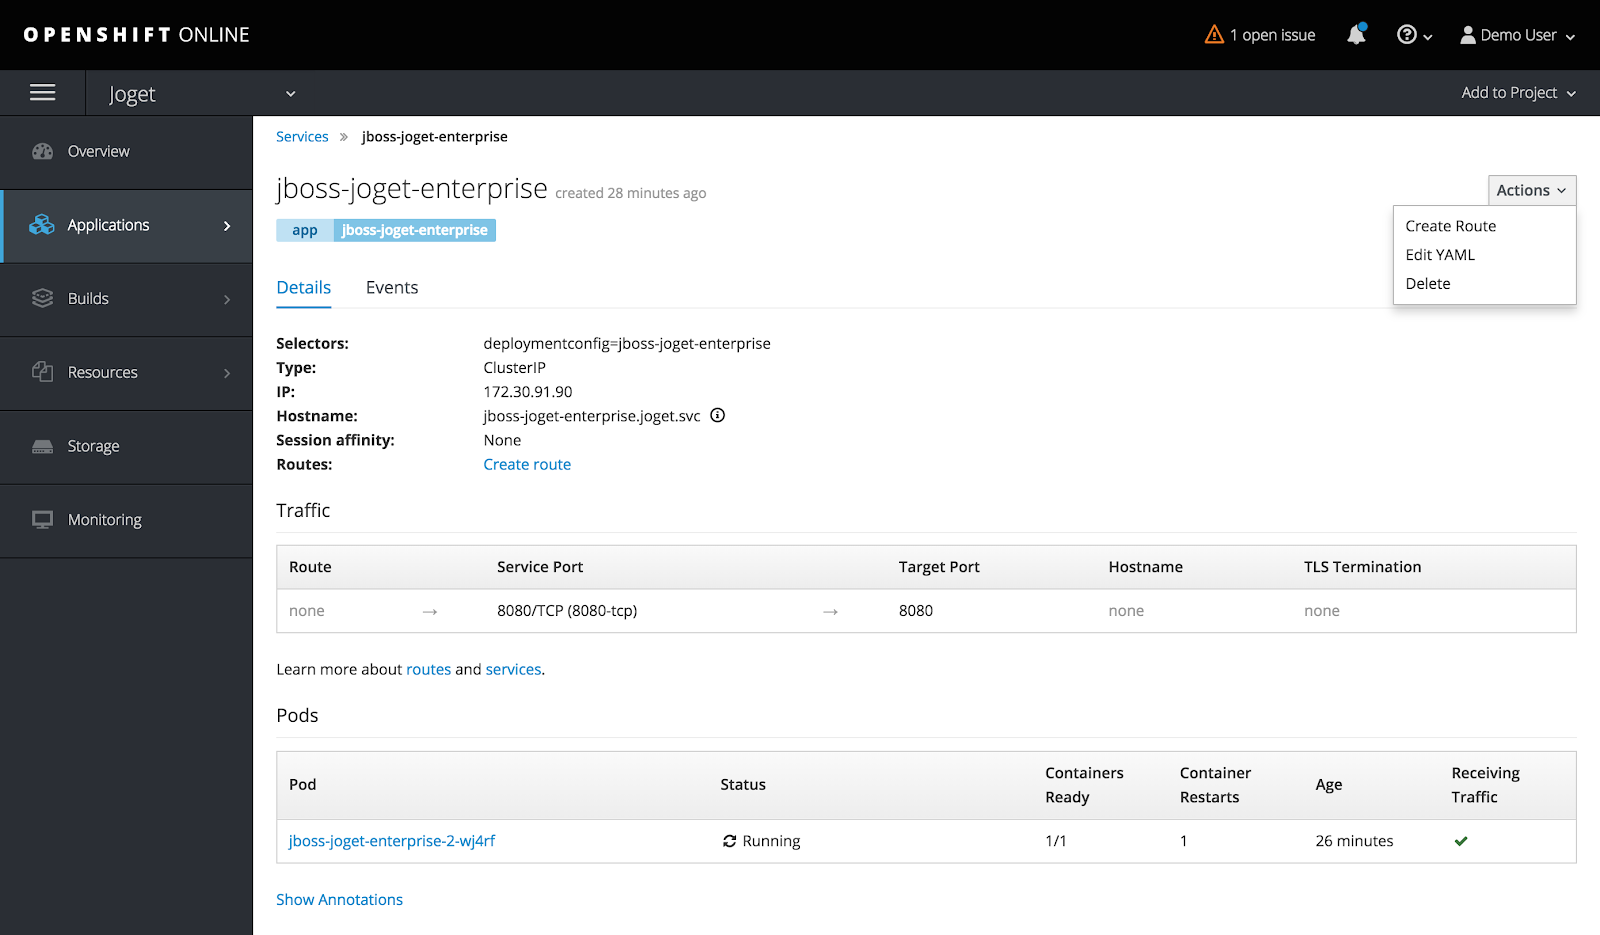
Select Actions > Create Route and click on Create.
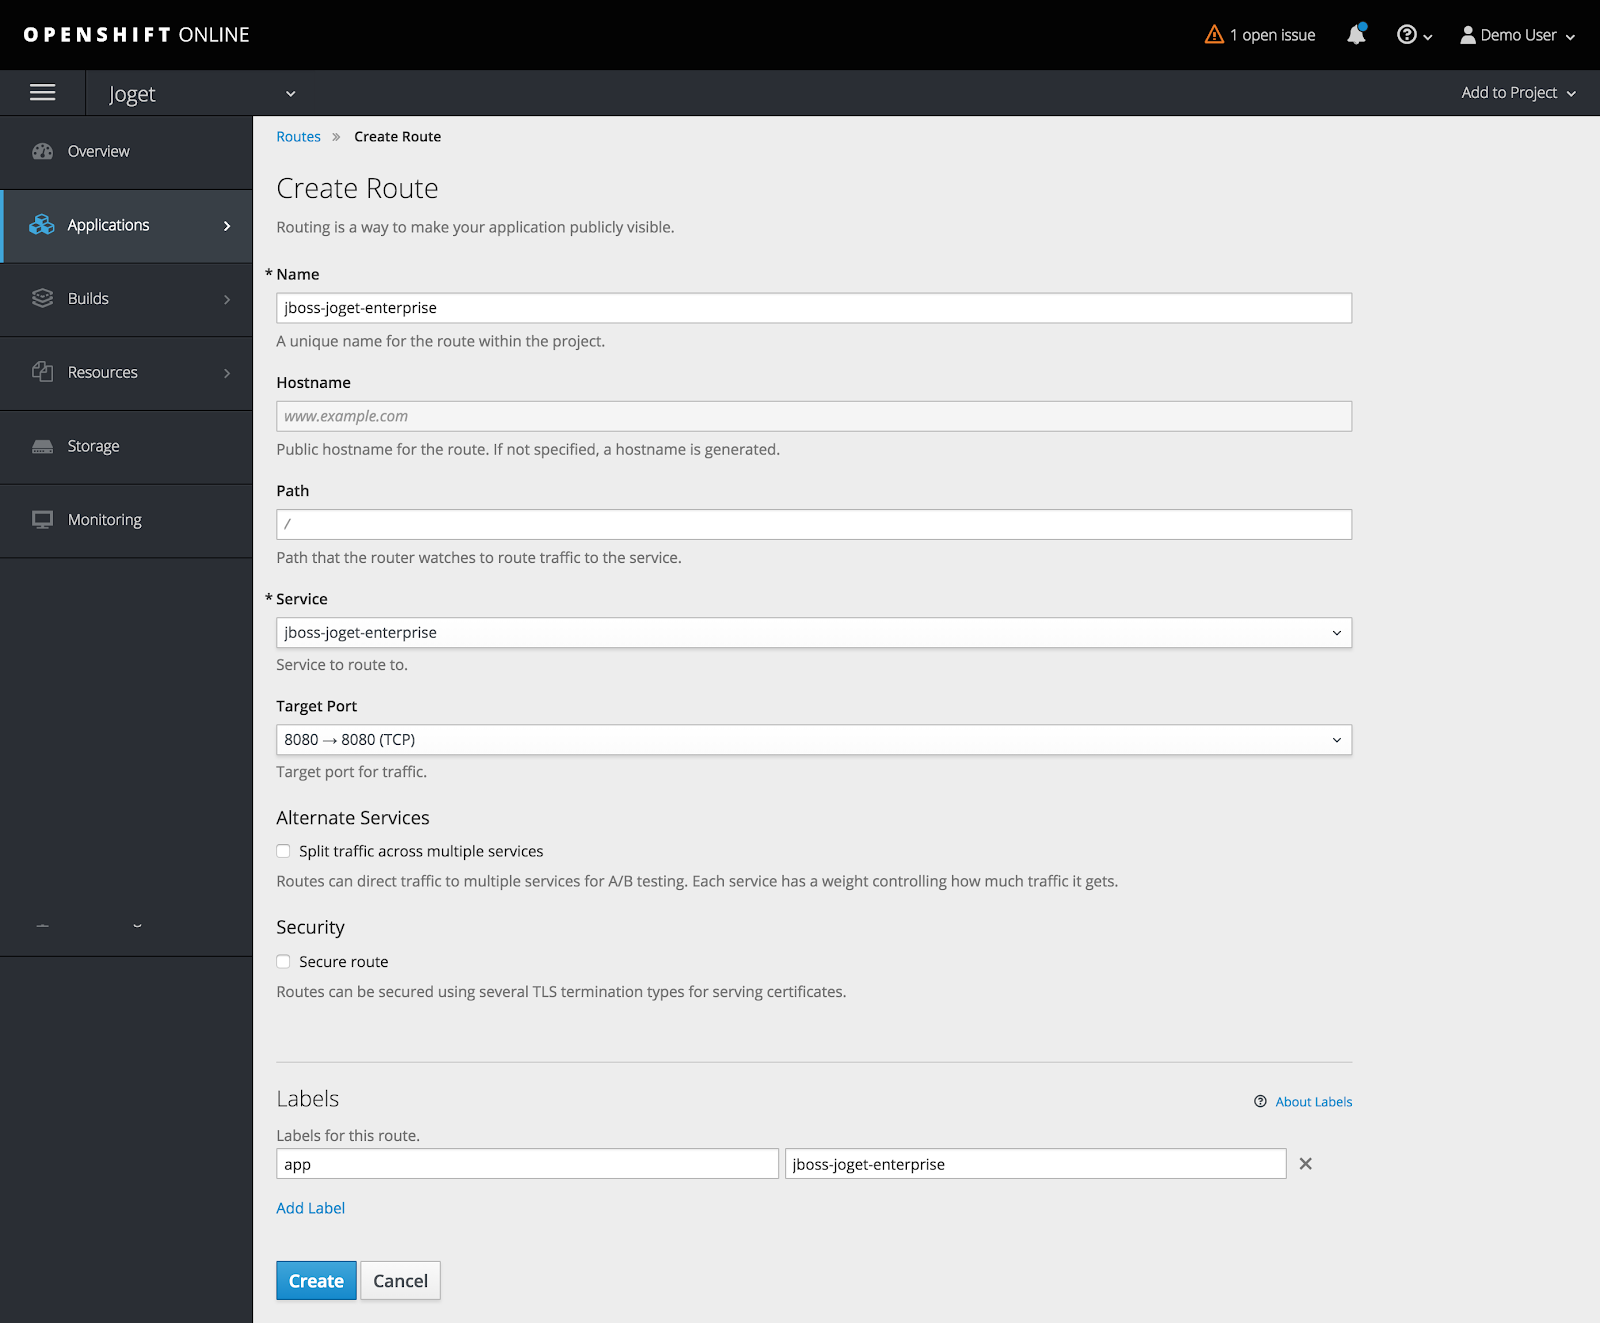
And that’s it. Click on the host name link to access the application.
默认情况下,创建的pod(一个pod是一个或多个容器的组)只分配了512Mb的内存,所以我们需要分配更多的资源以避免内存错误。
点击Applications> Deployments,然后选择jboss-joget-enterprise 容器。单击向下箭头,将运行的窗格减少到零。
选择 操作>编辑资源限制,将内存限制设置为800兆,然后单击保存。
返回应用程序>部署,并选择最新的jboss-joget-enterprise版本。通过点击向上箭头,将运行的pod调整为一个。此时,一个新的pod将启动,状态应该更改为Active。
单击pod查看pod详细信息。
您还可以通过logs选项卡查看pod的运行日志。
步骤5:为外部访问创建服务路由。
此时,pod正在运行,但无法从外部web浏览器访问,因此您需要创建一条路由,该路由以主机名公开服务。
单击应用程序>服务并选择jboss-joget-enterprise。
选择 操作>创建路线,然后点击创建。
就是这样。点击主机名链接访问应用程序。
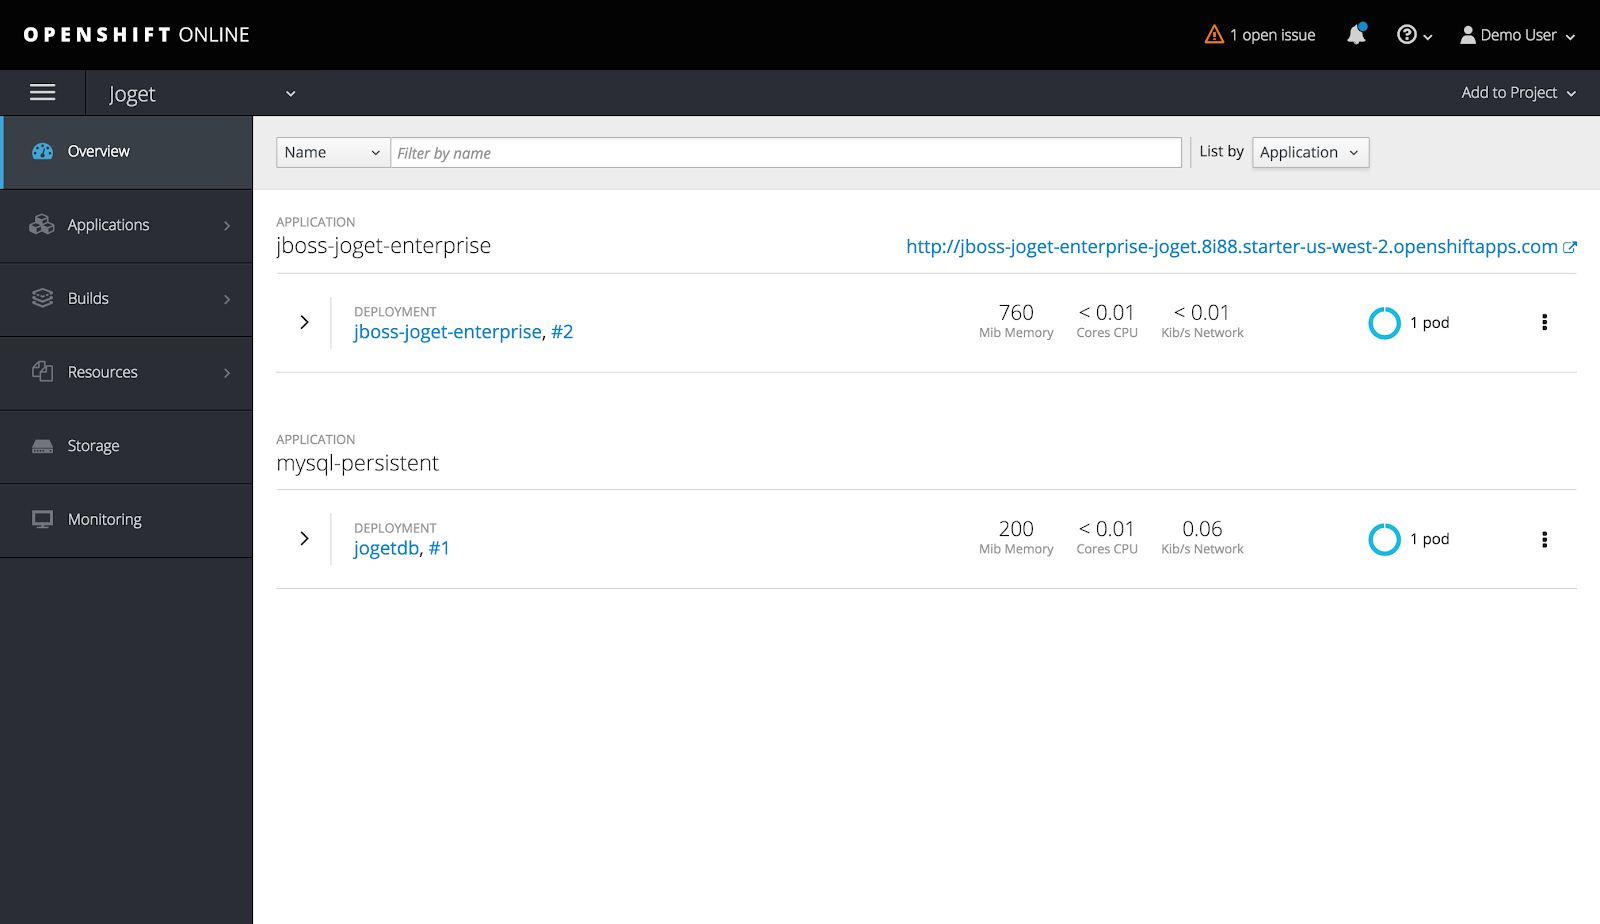
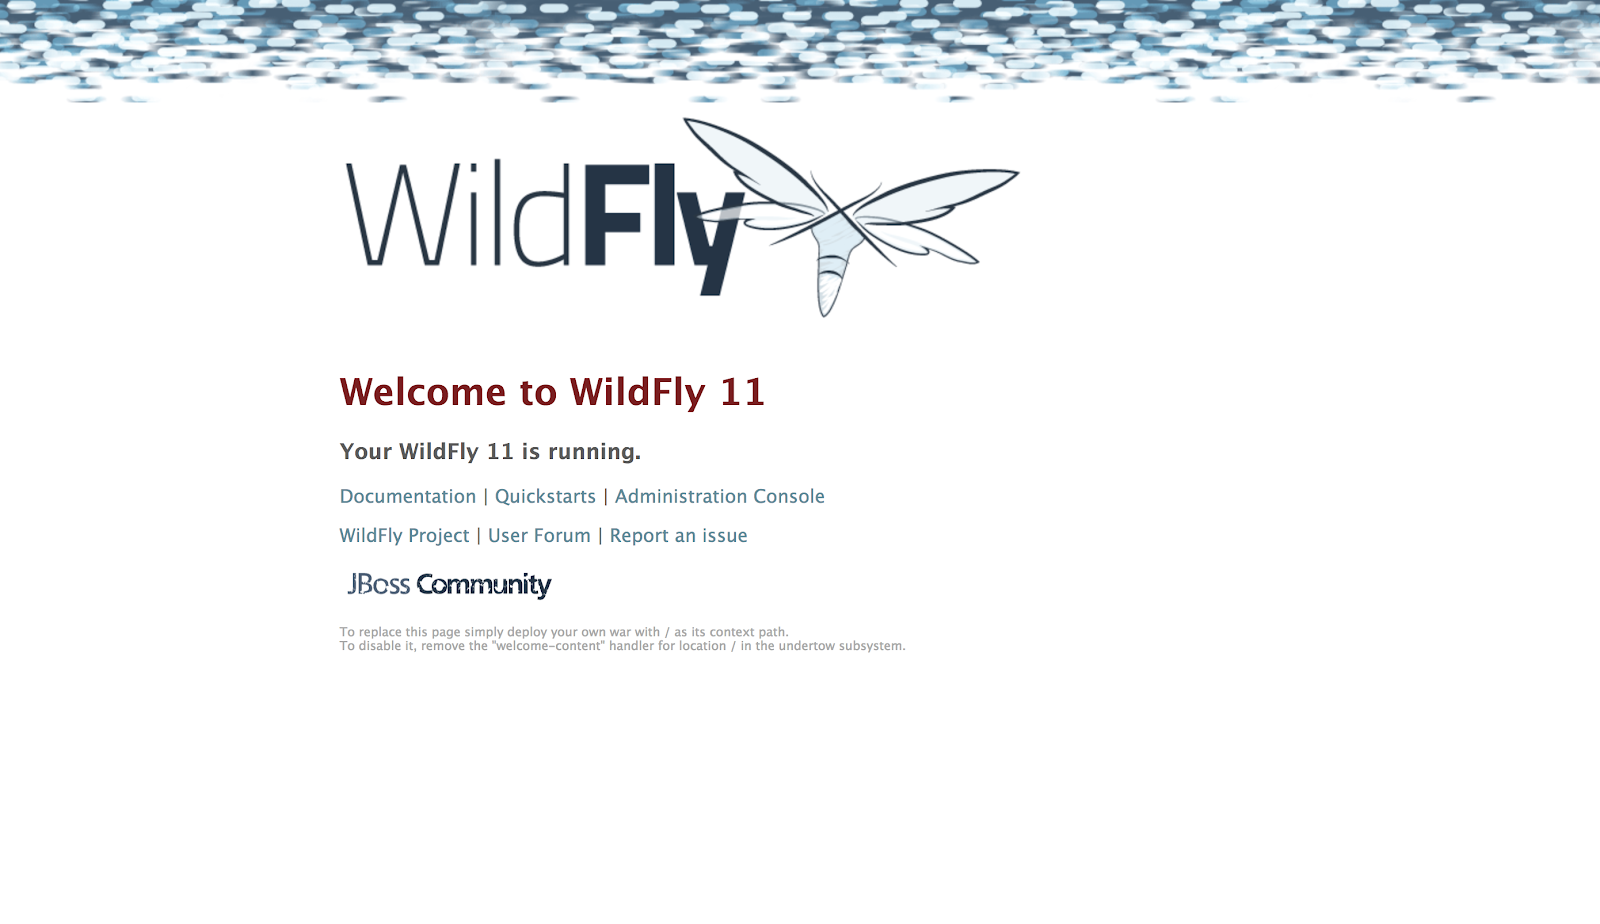
For example, in the screenshot above the URL 例如,在上面的截图中,URL http://jboss-joget-enterprise- joget.8188.starter-us-west-2.openshiftapps.com/ returns the WildFly welcome page.返回WildFly欢迎页。
Access Joget Workflow by adding /jw to the URL e.g. 通过在URL中添加/jw来访问Joget工作流,例如http://jboss-joget Joget -enterprise-enterprise joget.8188.starter-us-west-2.openshiftapps.com/jwjw。
