| Info | ||
|---|---|---|
| ||
请确保您已完成之前的课程 - 设计1个新应用 |
| Widget Connector | ||||
|---|---|---|---|---|
|
- In the App design page, click on the Create New Form button along the top在应用设计页面, 点击顶部 创建新表单 按钮.

Key in the details of the new form输入新表单信息.

Name名称 Description说明 表单ID(Form ID) 表单的唯一识别IDUnique ID to represent this entity.
Info title Naming convention 开发过程中建议使用统一的命名规范,以便于后续维护.
此字段建议使用驼峰命名法.
例如
A standard naming convention is highly recommended to be used across the development of your App to maintain consistency and ease maintenance works.
Camel case naming convention is recommended for this field.
Example: travelRequestForm
Warning title Reserved IDs Do not use the following reserved IDs as ID of Form, Section and Field请不要使用保留ID作为表单ID, 分区ID或字段ID. "appId, appVersion, version, userviewId, menuId, key, embed".
表单名称(Form Name) Name to represent this entity表单名称.
Info title Example Travel Request Form
表名(Table Name) 数据库中的表名The database table name to store the form data.
Info title Naming convention As the table name is related to the database, we highly recommend the use of database naming conventions由于与数据库表名相关, 我们强烈建议使用数据表命名规范, e.g. travel_requests
Tip Note that different forms can share data by pointing to the same table name注意不同的表单可以指向同一个数据表.
描述(Description) Entity description表单说明性描述. 复制表单 您可以选择从一个已有的表单克隆一个新表单 Duplicate form settings and elements from With the above information filled up, one can choose to clone the design from existing Form entity.
Click on Save to save the form and launch the Form Builder in a new window. If your browser blocks the popup, click on the form name to launch it.
The first step in the Form Builder is the Design Form page. On the left is the palette containing available form elements. In the middle is the canvas containing one or more sections, and each section may contain one or more columns.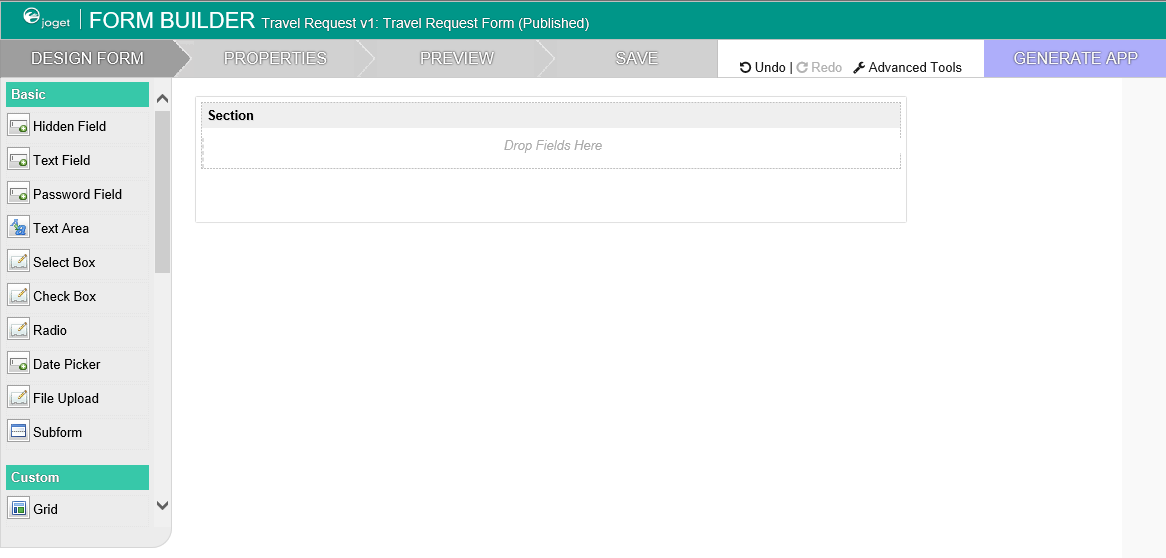
When you mouseover a section header (or any form element), buttons appear giving you options.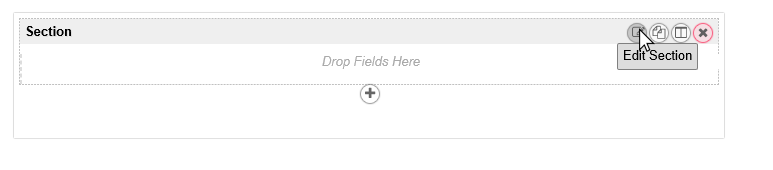
Click on Edit Section. This opens a Property Editor showing properties that you can modify. Each form element has different properties that can be configured.
Click on the OK at the bottom to save the property changes.
You can add sections using Add Section, and move sections around by dragging.- 点击 保存 打开 表单设计器 窗口. 如果您的浏览器禁止了弹窗, 请点击表单名称打开它.
- 在表单设计界面. 左侧面板中提供了所有可用的表单元素. 中间画布中包含了1个或多个 分区, 每个分区包含了1个或多个列(columns).
- 当鼠标悬浮在分区头部 (或表单其它元素), 将有多个选项按钮出现.
- 点击 编辑分区. 将打开 属性编辑器 显示您可以编辑的所有属性. 每个表单元素的属性各自不同.
- 点击底部 确定 按钮保存属性.
- 您可以通过 增加分区 添加分区, 或者通过拖拽修改布局.
- 拖拽 左侧表单元素到分区中.

- 悬浮鼠标在表单元素上将显示 编辑 和 删除 选项. 点击编辑修改表单元素.

- 在任何时候, 您可以通过顶部 预览 按钮预览表单.
- 一旦完成表单设计, 点击顶部的 保存 按钮得到保存成功的提示后, 您可以继续设计或关闭表单设计器Drag form elements from the palette into any section.
Hover any form element to see the Edit and Delete options. Click on Edit to modify the form element properties.
At any time, you may preview the form by clicking on the large Preview button at the top.
Once you have finished designing the form, click on the large Save button at the top and you will receive confirmation that the form is saved. You may then continue to design the form, or close the Form Builder window.