Table of Contents
Introduction to UiPath
UiPath Overview
UiPath is one of the leading Robotic Process Automation (RPA) vendors. UiPath consists of 3 main components:
...
UiPath Studio: UI tool to visually design the process to automate
UiPath Orchestrator: Web application that manages the creation, monitoring, and deployment of all robots and processes
UiPath Robot: Runs processes that were built in UiPath Studio. Execution agent that is installed and executed in the actual machine.
UiPath Concepts and Terms
Here are some of the basic concepts and terms in UiPath that you should get familiar with for the tutorial later:
...
Library: A process library describes a system of activities that are reusable for sharing
Schedule: Enables jobs to be executed in a preplanned manner
Asset: Usually represent shared variables or credentials that can be used in different projects.
Queue: A place to store multiple types of data, such as invoice information or customer details.
How to Integrate with UiPath
UiPath provides the Orchestrator API for integration.
The most commonly used function is Starting a Job, which should satisfy a majority of use cases. We will use this function in the following integration tutorial.
Get Started with UiPath
Step 1: Sign Up for UiPath Cloud Platform
Let’s sign up for an account at https://www.uipath.com/platform-trial. There is a Community plan to get started for free, so we’ll Choose Community to register.
...
Select the service name to open the UiPath Orchestrator web application.

Step 2: Install UiPath Studio and UiPath Robot
Download the UiPath Studio installer (UiPathStudioSetup.exe) from the Resource Center, and install it on the target computer. More information on UiPath Studio is available at the UiPath Studio Guide.
...
After installing UiPathStudioSetup.exe, start UiPath Studio from the Windows Start menu and activate it. You can start free by activating the Community Edition.

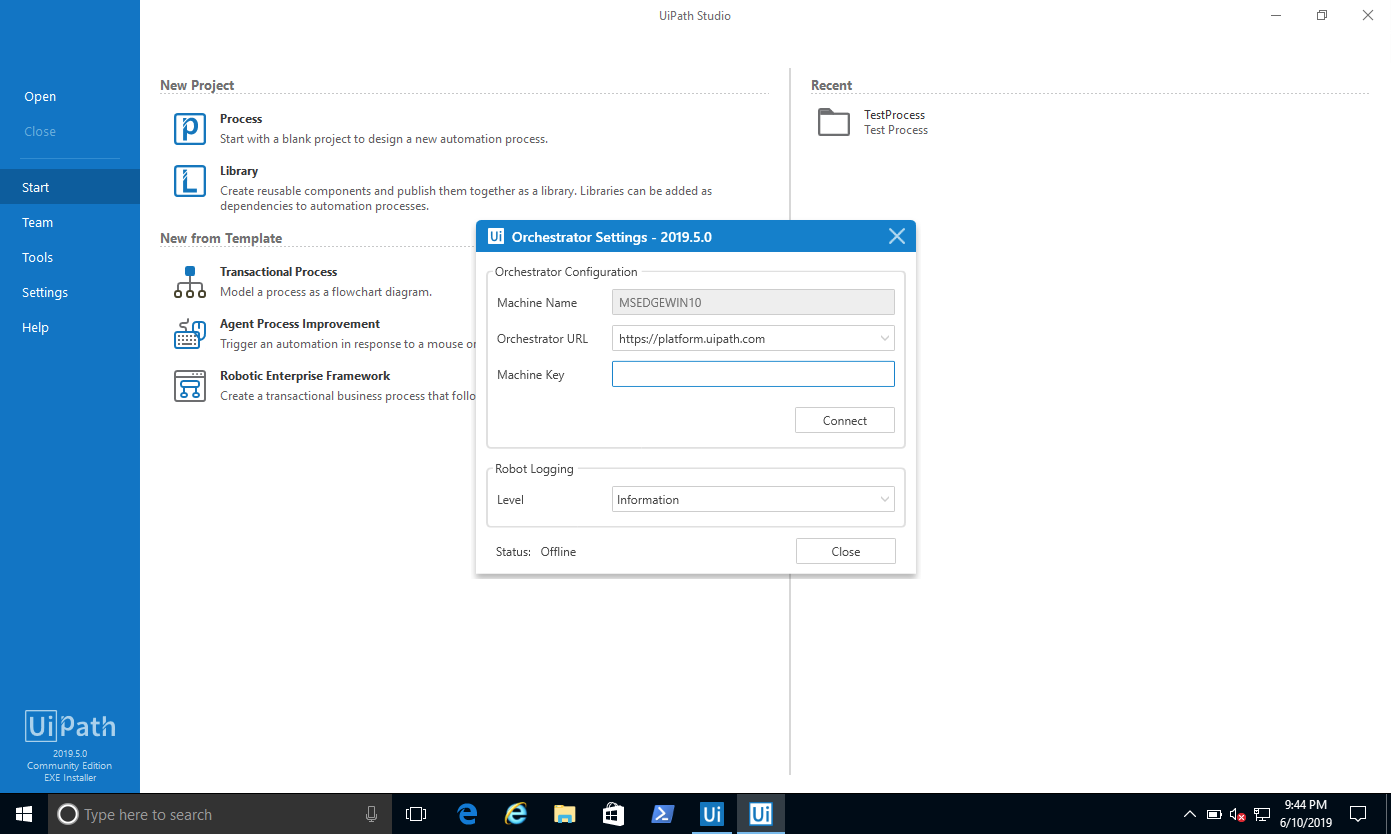
Step 3: Launch UiPath Robot and Obtain Machine Name
In the Windows Start menu, search for UiPath Robot and start it
...
Click on the Gear icon to open the Orchestrator Settings window, and copy the Machine Name.
Step 4: Obtain Machine Key
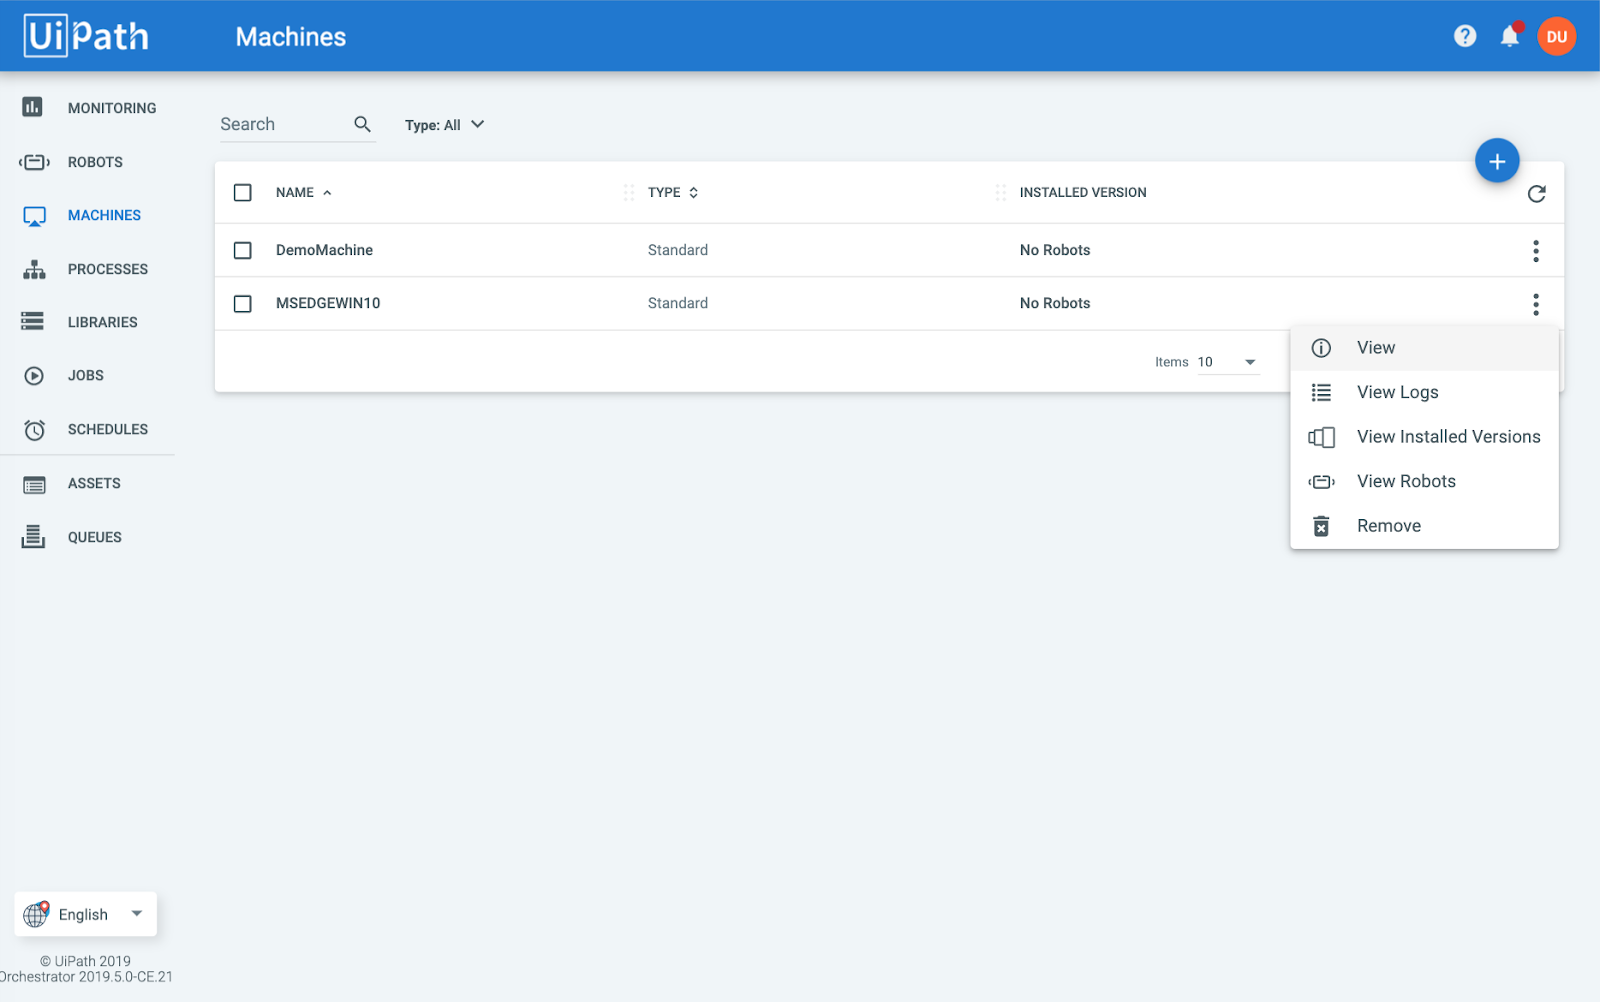
Back in the UiPath Orchestrator, create a new Machine under the Machines menu.
...
View the selected Machine and copy the Machine Key.

Step 5: Connect UiPath Robot to the Machine
In the UiPath Robot, click on the Gear icon to open the Orchestrator Settings window.
...
| Info |
|---|
Once connected, you should see “Status: Robot unavailable” at the bottom of the window. Hover over that message, and you should see the reason “Robot is not available.” This message means that the machine connection is valid, so now it’s time to create a robot. If you see a different reason then there might be an error in your configuration so you will want to double check your settings. |

Step 6: Create a Robot
In the UiPath Orchestrator under the Robots menu, click on the Plus icon on the top right.
...
Set a “Name”, and fill in the actual Windows login for the target machine (where the UiPath Robot is installed) under Domain\Username and Password.

Step 7: Add Robot to Environment
Next, we’ll need to add the created Robot to the Environment. Select the Environments tab at the top of the Robots menu and select the Manage option.
...
At this point, the robot should be successfully connected to the machine. Check the UiPath Robot Orchestrator Settings and the status should show “Connected, licensed”

Step 8: Start a Job
Now that the robot is deployed, it’s time to start a job to test it.
...
The robot has successfully started the job. You can monitor the robots and jobs in the Monitoring menu in the UiPath Orchestrator.

Step 9: Prepare for UiPath Integration
In June 2019, UiPath introduced a new mechanism for consuming its Cloud APIs. There are a number of steps required to retrieve some required information for integration:
1. Get Access and ID Tokens
1.1 Generate Code Challenge and Code Verifier
In a web browser, visit https://repl.it/languages/nodejs and run the following code:
...
| Code Block |
|---|
Generating challenge and Verifier Code challenge: RzYlHiiGzPGgOLaRQJYftZ1mmc3sCbeicZVRftTmC-A Code verifier: YVMnLczXQgJ9dwzV7MlMWEjGyAia4nXvTZzU4UVrAPE |
1.2 Get Authorization Code
Replace the code challenge into the URL below, and visit the updated URL in a browser.
...
Copy the authorization_code in the URL.
1.3 Get Refresh Token
Using any API testing tool (e.g. Postman), submit a POST request to
...
| Code Block |
|---|
{
   "access_token": "eyJ0eX...",
   "refresh_token": "CBZcOD6vrP2FQ9qa8fuqDdfoEwnVPuR2Kpz-hitbTAIzG",
   "id_token": "eyJ0eX...",
   "scope": "openid profile email offline_access",
   "expires_in": 86400,
   "token_type": "Bearer"
} |
1.4 Get Access Token and ID using the Refresh Token
Using any API testing tool, submit a POST request to
...
| Code Block |
|---|
{
   "access_token": "eyJ0eX...",
   "id_token": "eyJ0eX...",
   "scope": "openid profile email offline_access",
   "expires_in": 86400,
   "token_type": "Bearer"
} |
2. Get UiPath Account, Service and Process Identifiers
2.1 Get the Account Logical Name
Using any API testing tool, submit a POST request to
...
| Code Block |
|---|
{
   "userEmail": "demo@domain.com",
   "accounts": [
       {
           "accountName": "Demo",
           "accountLogicalName": "Demo"
       }
   ]
} |
2.2 Get Service Instance Logical Name
Using any API testing tool, submit a POST request to
...
| Code Block |
|---|
[
   {
       "serviceInstanceName": "DemoDefault",
       "serviceInstanceLogicalName": "DemoDefaultzous50676",
       "serviceType": "ORCHESTRATOR",
       "serviceUrl": "https://platform-community.azurewebsites.net"
   }
] |
2.3 Get Release Key for the Desired Process
We will now need to retrieve the Release Key, a unique identifier for a desired process. Using any API testing tool, submit a GET request to
...
| Code Block |
|---|
{
   "@odata.context": "https://platform.uipath.com/odata/$metadata#Releases",
   "@odata.count": 1,
   "value": [
       {
           "Key": "b27c7363-459c-4520-bae5-660d4a1d3813",
           "ProcessKey": "Demo_Process",
           "ProcessVersion": "1.0.21",
           "IsLatestVersion": false,
           "IsProcessDeleted": false,
           "Description": "Demo Process",
           "Name": "Demo Process",
           "EnvironmentId": 98069,
           "EnvironmentName": "Demo Environment",
           "InputArguments": null,
           "QueueDefinitionId": null,
           "QueueDefinitionName": null,
           "Id": 120897,
           "Arguments": {
               "Input": null,
               "Output": null
           },
           "ProcessSettings": null
       }
   ]
} |
2.4 Test Orchestrator API Call to Start a Job
At this point, make sure you have the following critical information at hand:
...
| Code Block |
|---|
{
   "@odata.context": "https://platform.uipath.com/odata/$metadata#Jobs",
   "value": [
       {
           "Key": "e811bd29-26fb-4cc3-af91-7fd6308ca643",
           "StartTime": null,
           "EndTime": null,
           "State": "Pending",
           "Source": "Manual",
           "SourceType": "Manual",
           "BatchExecutionKey": "382e7a96-a5b9-4343-b258-26a80cf87f80",
           "Info": null,
           "CreationTime": "2019-06-12T08:02:03.2595408Z",
           "StartingScheduleId": null,
           "ReleaseName": "Demo Process",
           "Type": "Unattended",
           "InputArguments": null,
           "OutputArguments": null,
           "HostMachineName": null,
           "HasMediaRecorded": false,
           "Id": 10169582
       }
   ]
} |
Integrate Joget with UiPath
Step 1: Sign Up for Joget Workflow On-Demand
If you already have your own installation of the Joget platform, you can use it and skip this step. Otherwise, you can sign up for Joget Workflow On-Demand, a hosted version of the Joget platform that allows you to quickly get started.
...
Once you have successfully verified your email, you will be linked to your own running installation of Joget Workflow where you’ll be able to visually build a full app in 30 minutes without coding.

Step 2: Design a Process to Start a UiPath Job
Since the UiPath Orchestrator API is a REST API with data in JSON format, we can use the Joget JSON Tool to invoke the API.
...
refresh_token (Refresh Token)
serviceInstanceLogicalName (Service Instance Logical Name)
Key (Release Key)
1. Design New App
First, let’s design a new app by clicking on Design New App in the Joget App Center.
...
Fill in desired values for the App ID and App Name, and click Save.
2. Design New Process
Click on the Processes menu, then on the Design Process button to launch the Process Builder.
...
status,
Id_token
access_token

Click on Deploy.
3. Configure First Tool to Get UiPath Access Token
Once the process has been deployed, close the Process Builder. In the process view page, select the Map Tools to Plugins tab.
...
access_token | access_token |
id_token | id_token |

Click on Submit to save.
4. Configure Second Tool to Start Job Using the Access Token
Click on Configure Plugin for the second tool and select JSON Tool, then key in the following configuration:
...
That’s it. The Joget process has been configured to invoke the UiPath Orchestrator API to start a job.
5. Run the Process
Now, let’s test the process. Click on the Run Process button at the top, then Run Process again in the confirmation dialog.
...