Swimlanes are a way for users to visually represent activities and the roles that play them. Essentially they define the participants of a process as well as the activities that will be undertaken by each of those participants in the course of the entire process flow. Given
In the tutorial scenario that we're trying to build and which is highlighted in ?Processes, we can surmise that there will be 3 different roles involved ; and hence 3 different swimlanes. Those participants areand the Participants will be as follows:
- Requestor
- Superior
- HOD
Thus, there will be 3 swimlanes.
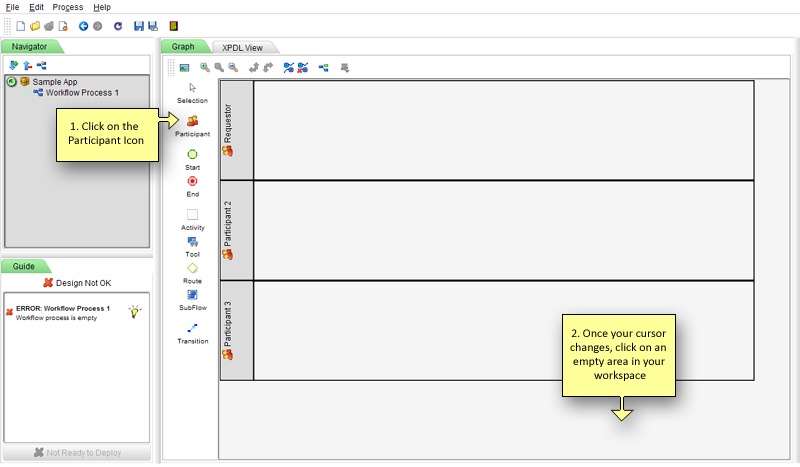
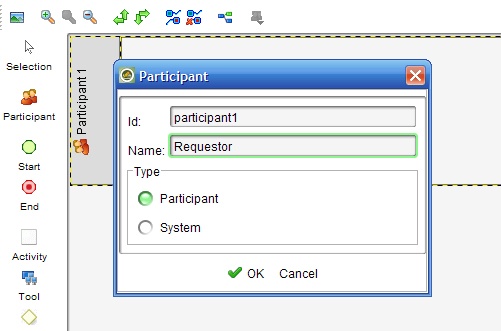
After launching Now once your Workflow Designer launches, it you will see that, by default have participant already , Participant 1 has already been created for you (called Participant1). Double-click on the Participant1 Participant 1 label and the replace the "Participant1" name with "Requestor"in the resulting dialog box; type "Requestor" in place of "Participant 1" in the Name field. Once done, click on the OK button.
Now weWe'll need 2 two more swimlanes for the two other participants.
to complete this portion. To create a new swimlane, click on the Participant element icon on your left toolbar. Your the element menu found on the left side of the design pane. Your mouse cursor should change to a people the Participant element icon now. Having done that, simply click Click twice on the workspace to add two more swimlanes.
Once you have all 3 swimlanes, double-click on each of the participant labels and rename "Participan2Participant 2" to "Supervisor" and "Participant3Participant 3" to "HOD".