| Table of Contents |
|---|
In this tutorial, we will be following the guideline for developing a plugin to develop our Bean Shell Hash Variable plugin.
| Thai |
|---|
ในบทช่วยสอนนี้เราจะทำตาม guideline for developing a plugin เพื่อพัฒนาปลั๊กอิน Shell Shell Hash Variable |
1. What is the problem?
| Thai |
|---|
อะไรคือปัญหา? |
Hash variable is convenient to use, but sometime we want to do some condition check before displaying a value. But, Hash variable does not provide the ability for condition checking.
| Thai |
|---|
ตัวแปรแฮชใช้งานได้สะดวก แต่บางครั้งเราต้องการตรวจสอบก่อนที่จะแสดงค่า แต่ตัวแปรแฮชไม่สามารถในการตรวจสอบก่อนแสดงค่า |
2. How to solve the problem?
| Thai |
|---|
วิธีแก้ปัญหา |
By looking at the Plugin Types that are currently supported by Joget Workflow, we can develop a Hash Variable Plugin to allow us to write our scripting for condition checking. There are quite a number of Bean Shell plugins provided as default plugin for several plugin types. We can do one for Hash Variable plugin as well.
| Thai |
|---|
เมื่อดูที่ Plugin Types ที่ Joget Workflow สนับสนุนในปัจจุบันเราสามารถพัฒนา Hash Variable Plugin เพื่อให้เราสามารถเขียนสคริปต์เพื่อตรวจสอบเงื่อนไข มีปลั๊กอิน Bean เชลล์จำนวนหนึ่งที่จัดเตรียมไว้เป็นปลั๊กอินเริ่มต้นสำหรับปลั๊กอินหลายประเภท เราสามารถทำปลั๊กอิน Hash Variable ได้เช่นกัน |
3. What is the input needed for your plugin?
| Thai |
|---|
สิ่งที่จำเป็นในการป้อนข้อมูลสำหรับปลั๊กอินของคุณ? |
Hash Variable plugin does not provide interface for user to configure, but to develop a Bean Shell Hash Variable plugin, we need somewhere to put our Bean Shell script. We can reuse the Environment Variable to store our script. So the Hash Variable syntax will be a prefix with environment variable key.
| Thai |
|---|
ปลั๊กอิน Hash Variable ไม่ได้จัดให้มีอินเทอร์เฟซสำหรับผู้ใช้ในการกำหนดค่า แต่เพื่อพัฒนาปลั๊กอินของ Bean Shell Hash Variable เราต้องการที่ที่จะวางสคริปต์ Bean Shell ของเรา เราสามารถใช้ Environment Variable เพื่อเก็บสคริปต์ของเรา ดังนั้นไวยากรณ์ Hash Variable จะเป็นคำนำหน้าด้วยคีย์ตัวแปรสภาพแวดล้อม |
E.g. #beanshell.EnvironmentVariableKey#
But, this may not be enough, we may need some other way to pass in some variable also. We can consider using a URL query parameters syntax to pass in our variables because it is easier to parse later on.
| Thai |
|---|
แต่นี่อาจไม่เพียงพอเราอาจต้องการวิธีอื่นในการส่งผ่านตัวแปรบางตัว เราสามารถพิจารณาการใช้ไวยากรณ์พารามิเตอร์การสืบค้น URL เพื่อส่งผ่านตัวแปรของเราเพราะง่ายต่อการแยกวิเคราะห์ในภายหลัง |
E.g. #beanshell.EnvironmentVariableKey[name=Joget&email=info@joget.org&message={form.sample.message?url}]#
4. What is the output and expected outcome of your plugin?
| Thai |
|---|
ผลลัพธ์และผลลัพธ์ที่คาดหวังของปลั๊กอินของคุณคืออะไร? |
What do we expected from this Bean Shell Hash variable plugin? The Bean Shell Hash Variable plugin is for admin/developer user to use when building/developing an app. Once used, the Hash Variable will be replaced by the output return from the Bean Shell interpreter. So that the admin user can do condition check before display something to normal user.
| Thai |
|---|
เราคาดหวังอะไรจากปลั๊กอินตัวแปร Bean Shell Hash นี้ ปลั๊กอิน Bean Shell Hash Variable ใช้สำหรับผู้ดูแลระบบ / ผู้พัฒนาที่จะใช้เมื่อสร้าง / พัฒนาแอพ เมื่อใช้แล้ว Hash Variable จะถูกแทนที่ด้วยเอาต์พุตส่งคืนจากล่าม Bean Shell เพื่อให้ผู้ใช้ที่เป็นผู้ดูแลระบบสามารถทำการตรวจสอบสภาพก่อนที่จะแสดงบางสิ่งกับผู้ใช้ปกติ |
E.g. Display a welcome message for logged in user but display nothing when the user is an anonymous.
5. Are there any resources/API that can be reused?
| Thai |
|---|
มีทรัพยากร / API ที่สามารถนำกลับมาใช้ใหม่ได้หรือไม่? |
To develop Bean Shell Hash Variable plugin, we can refer to the source code of all the Hash Variable plugin and Bean Shell plugin. Especially, we can refer to the Environment Variable Hash Variable plugin on how to retrieve environment variable using a variable key. We can also refer to the Bean Shell Tool or Bean Shell Form Binder plugin on what to execute the script with Bean Shell interpreter.
We can use getUrlParams method from StringUtil to help us parse parameters passed in with URL query parameters syntax.
| Thai |
|---|
ในการพัฒนาปลั๊กอิน Bean Shell Hash Variable เราสามารถอ้างถึง source code ของปลั๊กอิน Hash Variable และปลั๊กอิน Bean Shell ทั้งหมด โดยเฉพาะอย่างยิ่งเราสามารถอ้างถึงปลั๊กอินตัวแปรสภาพแวดล้อมของแฮชตัวแปรในการเรียกข้อมูลตัวแปรสภาพแวดล้อมโดยใช้คีย์ตัวแปร นอกจากนี้เรายังสามารถอ้างถึง Bean Bean Tool หรือปลั๊กอิน Bean Binder ของฟอร์มในการดำเนินการสคริปต์ด้วย Bean Shell interpreter เราสามารถใช้วิธี getUrlParams จาก StringUtilเพื่อช่วยเราวิเคราะห์พารามิเตอร์ที่ส่งผ่านด้วยไวยากรณ์พารามิเตอร์การค้นหา URL |
6. Prepare your development environment
| Thai |
|---|
เตรียมสภาพแวดล้อมการพัฒนาของคุณ |
We need to always have our Joget Workflow Source Code ready and builded by following this guideline.
The following tutorial is prepared with a Macbook Pro and Joget Source Code version 5.0.0. Please refer to the Guideline for developing a plugin article for other platform commands.
Let say our folder directory is as following.
| Thai |
|---|
เราจำเป็นต้องให้ซอร์สโค้ด Joget Workflow ของเราพร้อมและสร้างโดยปฏิบัติตาม this guideline บทช่วยสอนต่อไปนี้จัดทำขึ้นด้วย Macbook Pro และ Joget Source Code เวอร์ชั่น 5.0.0 โปรดอ้างอิง Guideline for developing a plugin สำหรับคำสั่งแพลตฟอร์มอื่น ๆ สมมติว่าไดเรกทอรีโฟลเดอร์ของเรามีดังต่อไปนี้ |
| Code Block |
|---|
- Home
  - joget
    - plugins
    - jw-community
-5.0.0 |
The "plugins" directory is the folder we will create and store all our plugins and the "jw-community" directory is where the Joget Workflow Source code stored.
Run the following command to create a maven project in "plugins" directory.
| Thai |
|---|
ไดเรกทอรี "ปลั๊กอิน" คือโฟลเดอร์ที่เราจะสร้างและจัดเก็บปลั๊กอินทั้งหมดของเราและไดเรกทอรี "jw-community" เป็นที่เก็บซอร์สโค้ด Joget Workflow เรียกใช้คำสั่งต่อไปนี้เพื่อสร้างโครงการ maven ในไดเรกทอรี "ปลั๊กอิน" |
| Code Block | ||
|---|---|---|
| ||
cd joget/plugins/ ~/joget/jw-community/5.0.0/wflow-plugin-archetype/create-plugin.sh org.joget.tutorial beanshell_hash_variable 5.0.0 |
Then, the shell script will ask us to key in a version number for the plugin and ask us for a confirmation before it generates the maven project.
| Thai |
|---|
จากนั้นเชลล์สคริปต์จะขอให้เราใส่หมายเลขเวอร์ชันสำหรับปลั๊กอินและขอให้เรายืนยันก่อนที่จะสร้างโครงการ Maven |
| Code Block | ||
|---|---|---|
| ||
Define value for property 'version': 1.0-SNAPSHOT: : 5.0.0 [INFO] Using property: package = org.joget.tutorial Confirm properties configuration: groupId: org.joget.tutorial artifactId: beanshell_hash_variable version: 5.0.0 package: org.joget.tutorial Y: : y |
We should get "BUILD SUCCESS" message shown in our terminal and a "beanshell_hash_variable" folder created in "plugins" folder.
Open the maven project with your favour IDE. I will be using NetBeans.
| Thai |
|---|
เราควรได้รับข้อความ "BUILD SUCCESS" ที่ปรากฏในเครื่องของเราและโฟลเดอร์ "beanshell_hash_variable" ที่สร้างในโฟลเดอร์ "plugins" เปิดโครงการ maven ด้วย IDE ที่คุณโปรดปราน จะใช้ NetBeans |
7. Just code it!
| Thai |
|---|
เพียงแค่รหัส! |
a. Extending the abstract class of a plugin type
| Thai |
|---|
การขยายคลาสนามธรรมของประเภทปลั๊กอิน |
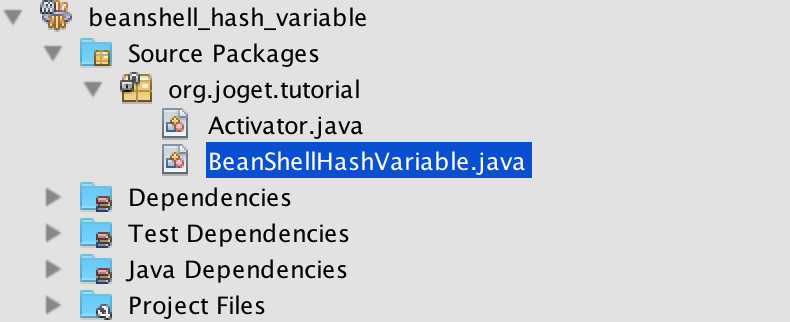
Create a "BeanShellHashVariable" class under "org.joget.tutorial" package.
| Thai |
|---|
สร้างคลาส "BeanShellHashVariable" ภายใต้แพ็คเกจ "org.joget.tutorial" |
Then, based on Hash Variable Plugin document, we will have to extends org.joget.apps.app.model.DefaultHashVariablePlugin abstract class.
| Thai |
|---|
จากนั้นตาม Hash Variable Plugin เราจะต้องขยาย org.joget.apps.app.model.DefaultHashVariablePlugin คลาสนามธรรม |
b. Implement all the abstract methods
| Thai |
|---|
ใช้วิธีนามธรรมทั้งหมด |
Let us implement all the abstract methods. We will be using AppPluginUtil.getMessage method to support i18n and using constant variable MESSAGE_PATH for message resource bundle directory.
| Thai |
|---|
ให้เราใช้วิธีนามธรรมทั้งหมด เราจะใช้วิธี AppPluginUtil.getMessage เพื่อสนับสนุน i18n และการใช้ตัวแปร MESSAGE_PATH คงที่สำหรับไดเรกทอรี |
| Code Block | ||||||
|---|---|---|---|---|---|---|
| ||||||
package org.joget.tutorial;

import org.joget.apps.app.model.DefaultHashVariablePlugin;
import org.joget.apps.app.service.AppPluginUtil;

public class BeanShellHashVariable extends DefaultHashVariablePlugin {

    private final static String MESSAGE_PATH = "messages/BeanShellHashVariable";

    public String getName() {
        return "BeanShellHashVariable";
    }

    public String getVersion() {
        return "5.0.0";
    }

    public String getClassName() {
        return getClass().getName();
    }

    public String getLabel() {
        //support i18n
        return AppPluginUtil.getMessage("org.joget.tutorial.BeanShellHashVariable.pluginLabel", getClassName(), MESSAGE_PATH);
    }

    public String getDescription() {
        //support i18n
        return AppPluginUtil.getMessage("org.joget.tutorial.BeanShellHashVariable.pluginDesc", getClassName(), MESSAGE_PATH);
    }

    public String getPropertyOptions() {
        //Hash variable plugin do not support property options
        return "";
    }

    public String getPrefix() {
        return "beanshell";
    }

    public String processHashVariable(String variableKey) {
        throw new UnsupportedOperationException("Not supported yet.");
    }
} |
Now, let's focus on the main method of our Hash Variable plugin which is processHashVariable. We will refer to the source code of Environment Variable Hash Variable plugin on how to retrieve the Environment variable. Then, refer to the source code of Bean Shell Form Binder on how to execute a bean shell script.
| Thai |
|---|
ตอนนี้เรามาดูวิธีการหลักของปลั๊กอิน Hash Variable ซึ่งเป็น processHashVariable เราจะอ้างถึงซอร์สโค้ดของปลั๊กอินสภาพแวดล้อมตัวแปรแฮชตัวแปรเกี่ยวกับวิธีการดึงตัวแปรสภาพแวดล้อม จากนั้นอ้างถึงซอร์สโค้ดของ Bean Shell Form Binder เกี่ยวกับวิธีดำเนินการสคริปต์เชลล์ถั่ว |
| Code Block | ||
|---|---|---|
| ||
    public String processHashVariable(String variableKey) {
        try {
            String environmentVariableKey = variableKey;

            //first check and retrieve parameters passed in with URL query parameters syntax wrapped in square bracket []
            String queryParams = null;
            if (variableKey.contains("[") && variableKey.contains("]")) {
                queryParams = variableKey.substring(variableKey.indexOf("[") + 1, variableKey.indexOf("]"));
                environmentVariableKey = variableKey.substring(0, variableKey.indexOf("["));
            }

            //Parse the query parameters to a map
            Map<String, String[]> parameters = null;
            if (queryParams != null && !queryParams.isEmpty()) {
                parameters = StringUtil.getUrlParams(queryParams);

                //put all parameters to plugin properties
                getProperties().putAll(parameters);
            }

            //Retrieve the environment variable based on environmentVariableKey
            AppDefinition appDef = (AppDefinition) getProperty("appDefinition");
            if (appDef != null) {
                ApplicationContext appContext = AppUtil.getApplicationContext();
                EnvironmentVariableDao environmentVariableDao = (EnvironmentVariableDao) appContext.getBean("environmentVariableDao");
                EnvironmentVariable env = environmentVariableDao.loadById(environmentVariableKey, appDef);
                if (env != null) {
                    String script = env.getValue();
                    //execute the script with all plugin properties
                    return executeScript(script, getProperties());
                } else {
                    //environment variable not found, return empty value
                    return "";
                }
            }
        } catch (Exception e) {
            //log the exception using LogUtil
            LogUtil.error(getClassName(), e, "#beanshell."+variableKey+"# fail to parse.");
        }

        //return null to by pass the replacing
        return null;
    }

    protected String executeScript(String script, Map properties) throws Exception {
        Interpreter interpreter = new Interpreter();
        interpreter.setClassLoader(getClass().getClassLoader());
        for (Object key : properties.keySet()) {
            interpreter.set(key.toString(), properties.get(key));
        }
        LogUtil.debug(getClass().getName(), "Executing script " + script);
        return (String) interpreter.eval(script);
} |
c. Manage the dependency libraries of your plugin
| Thai |
|---|
จัดการไลบรารีปลั๊กอินของคุณ |
Our plugin class cannot resolve "bsh.Interpreter". So, we will have to add bean shell library to our POM file.
| Thai |
|---|
คลาสปลั๊กอินของเราไม่สามารถแก้ไข "bsh.Interpreter" ดังนั้นเราจะต้องเพิ่ม bean shell library ในไฟล์ POM ของเรา |

| Code Block | ||
|---|---|---|
| ||
<!-- Change plugin specific dependencies here -->
<dependency>
    <groupId>org.beanshell</groupId>
    <artifactId>bsh</artifactId>
    <version>2.0b4</version>
</dependency>
<!-- End change plugin specific dependencies here --> |
d. Make your plugin internationalization (i18n) ready
| Thai |
|---|
เตรียมปลั๊กอินสากลให้พร้อม (i18n) |
We are using AppPluginUtil.getMessage method to display i18n value for our getLabel and getDescription method. We will have to create a message resource bundle properties file for it. Create directory "resources/messages" under "beanshell_hash_variable/src/main" directory. Then, create a "BeanShellHashVariable.properties" file in the folder.
| Thai |
|---|
เรากำลังใช้วิธี AppPluginUtil.getMessage เพื่อแสดงค่า i18n สำหรับวิธี getLabel และ getDescription ของเรา เราจะต้องสร้างไฟล์คุณสมบัติมัดทรัพยากรสำหรับมัน สร้างไดเรกทอรี "ทรัพยากร / ข้อความ" ภายใต้ไดเรกทอรี "beanshell_hash_variable / src / main" จากนั้นสร้างไฟล์ "BeanShellHashVariable.properties" ในโฟลเดอร์ |

In our properties file, we will need to add the key we have used.
| Thai |
|---|
ในไฟล์คุณสมบัติของเราเราจะต้องเพิ่มคีย์ที่เราใช้ |
| Code Block | ||
|---|---|---|
| ||
org.joget.tutorial.BeanShellHashVariable.pluginLabel=Bean Shell Hash Variable org.joget.tutorial.BeanShellHashVariable.pluginDesc=Using environment variable to execute bean shell script. |
e. Register your plugin to the Felix Framework
| Thai |
|---|
ลงทะเบียนปลั๊กอินของคุณไปที่ Felix Framework |
We will have to register our plugin class in Activator class to tell the Felix Framework that this is a plugin.
| Thai |
|---|
เราจะต้องลงทะเบียนคลาสปลั๊กอินของเราในคลาส Activator เพื่อบอก Felix Framework ว่านี่คือปลั๊กอิน |

| Code Block | ||
|---|---|---|
| ||
public void start(BundleContext context) {
    registrationList = new ArrayList<ServiceRegistration>();

    //Register plugin here
    registrationList.add(context.registerService(BeanShellHashVariable.class.getName(), new BeanShellHashVariable(), null));
} |
f. Build it and test
| Thai |
|---|
สร้างและทดสอบ |
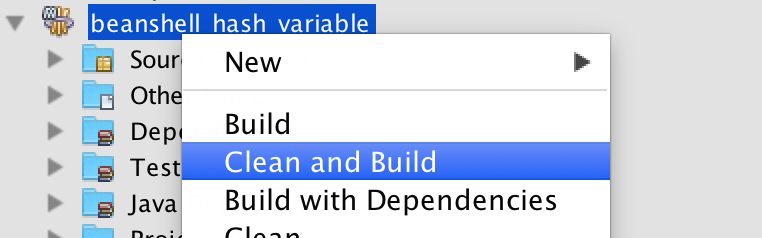
Let build our plugin. Once the building process is done, we will find that a "beanshell_hash_variable-5.0.0.jar" file is created under "beanshell_hash_variable/target" directory.
| Thai |
|---|
ให้สร้างปลั๊กอินของเรา เมื่อกระบวนการสร้างเสร็จสิ้นเราจะพบว่าไฟล์ "beanshell_hash_variable-5.0.0.jar" ถูกสร้างขึ้นภายใต้ไดเรกทอรี "beanshell_hash_variable / target" |
Then, let's upload the plugin jar to Manage Plugins. After uploading the jar file, double check that the plugin is uploaded and activated correctly.
| Thai |
|---|
จากนั้นลองอัปโหลดปลั๊กอินไปที่ Manage Plugins หลังจากอัปโหลดไฟล์ jar ให้ตรวจสอบอีกครั้งว่ามีการอัปโหลดและเปิดใช้งานปลั๊กอินอย่างถูกต้อง |

Now, let's test our plugin.
Let assume that we have a HTML menu page in a userview that wants to display the following line to logged in user. Normally, we will use "Welcome #currentUser,username#," to display a welcome message.
| Thai |
|---|
ตอนนี้ลองทดสอบปลั๊กอินของเรา สมมติว่าเรามีหน้าเมนู HTML ใน userview ที่ต้องการแสดงบรรทัดต่อไปนี้เพื่อเข้าสู่ระบบผู้ใช้ โดยปกติเราจะใช้ "ยินดีต้อนรับ # currentUser ชื่อผู้ใช้ #" เพื่อแสดงข้อความต้อนรับ |
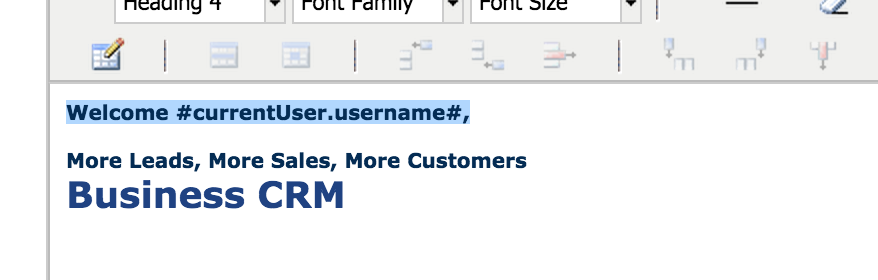
But, in this use case there is a problem, which shows "Welcome ," without an username when the user is an anonymous.
| Thai |
|---|
แต่ในกรณีการใช้งานนี้มีปัญหาซึ่งแสดง "ยินดีต้อนรับ" โดยไม่มีชื่อผู้ใช้เมื่อผู้ใช้ไม่ระบุชื่อ |

Now, change the whole message to our Bean Shell Hash Variable and create an environment variable to put our script.
| Thai |
|---|
ตอนนี้เปลี่ยนข้อความทั้งหมดเป็น Bean Shell Hash Variable และสร้างตัวแปรสภาพแวดล้อมเพื่อใส่สคริปต์ของเรา |
Change:
| Thai |
|---|
เปลี่ยนแปลง: |
| Code Block |
|---|
Welcome #currentUser.username#, |
to the following. We will need to pass the current user's username as one of our parameters and do not forget to escape it as url.
| Thai |
|---|
ต่อไปนี้ เราจะต้องส่งชื่อผู้ใช้ของผู้ใช้ปัจจุบันเป็นหนึ่งในพารามิเตอร์ของเราและอย่าลืมที่จะหลีกเลี่ยงมันเป็น URL |
| Code Block |
|---|
#beanshell.welcome[username={currentUser.username?url}]?html# |
Then, we can create an environment variable with ID "welcome" and use the following script. As we are using getUrlParams method from StringUtil to parse the parameters, all value from parameters are String array.
| Thai |
|---|
จากนั้นเราสามารถสร้างตัวแปรสภาพแวดล้อมด้วย ID "ยินดีต้อนรับ" และใช้สคริปต์ต่อไปนี้ ในขณะที่เราใช้เมธอด getUrlParams จาก StringUtil เพื่อวิเคราะห์พารามิเตอร์ค่าทั้งหมดจากพารามิเตอร์คืออาร์เรย์สตริง |
| Code Block | ||
|---|---|---|
| ||
//all parameters passed in from Beanshell Hash Variable will converted to String array
if (username != null && username.length == 1 && !username[0].isEmpty()) {
    return "Welcome " + username[0] + ",";
} else {
    return "";
} |
Let go back to our HTML menu page to see the result.
When user is logged in, it shows the message correctly.
| Thai |
|---|
ให้กลับไปที่หน้าเมนู HTML ของเราเพื่อดูผลลัพธ์ เมื่อผู้ใช้เข้าสู่ระบบจะแสดงข้อความอย่างถูกต้อง |

When no user is logged in, the welcome message is not shown.
| Thai |
|---|
เมื่อไม่มีผู้ใช้ที่ล็อกอินข้อความต้อนรับจะไม่ปรากฏขึ้น |

8. Take a step further, share it or sell it
| Thai |
|---|
ก้าวไปอีกขั้นแบ่งปันหรือขายมัน |
You can download the source code from beanshell_hash_variable.zip.
To download the ready-to-use plugin jar, please find it in http://marketplace.joget.org/.
| Thai |
|---|
คุณสามารถดาวน์โหลดซอร์สโค้ดจาก beanshell_hash_variable.zip หากต้องการดาวน์โหลด jar ปลั๊กอินที่พร้อมใช้งานโปรดค้นหาได้ที่ http://marketplace.joget.org/ |