| Table of Contents |
|---|
In this tutorial, we will follow the guideline for developing a plugin to develop our Mood Rating Form Field plugin. Please also refer to the very first tutorial How to develop a Bean Shell Hash Variable for more details steps.
| Thai |
|---|
ในบทช่วยสอนนี้เราจะทำตาม guideline for developing a plugin เพื่อพัฒนาปลั๊กอินฟิลด์การให้คะแนนอารมณ์ โปรดอ้างอิงถึงบทช่วยสอน How to develop a Bean Shell Hash Variable สำหรับขั้นตอนรายละเอียดเพิ่มเติม |
1. What is the problem?
| Thai |
|---|
อะไรคือปัญหา? |
We would like to have a rating field with some smiley images which can be reuse for other form.
| Thai |
|---|
เราต้องการให้มีฟิลด์การจัดเรตพร้อมด้วยภาพที่สามารถนำไปใช้กับรูปแบบอื่นได้ |
2. How to solve the problem?
| Thai |
|---|
วิธีการแก้ปัญหา? |
We will develop a Form Field Element Plugin to render our mood rating field.
| Thai |
|---|
เราจะพัฒนา Form Field Element Plugin เพื่อแสดงฟิลด์การให้คะแนนอารมณ์ของเรา |
3. What is the input needed for your plugin?
| Thai |
|---|
สิ่งที่จำเป็นในการป้อนข้อมูลสำหรับปลั๊กอินของคุณ? |
To develop a Mood Rating Form Field plugin, we will need to provide some standard inputs for a Form Field element.
| Thai |
|---|
ในการพัฒนาปลั๊กอินเขตข้อมูลฟอร์มการให้คะแนนอารมณ์เราจะต้องให้อินพุตมาตรฐานบางอย่างสำหรับองค์ประกอบเขตข้อมูลฟอร์ม |
- Field Id
- Field Label
- Validator
- Readonly
- Workflow Variable
4. What is the output and expected outcome of your plugin?
| Thai |
|---|
ผลลัพธ์และผลลัพธ์ที่คาดหวังของปลั๊กอินของคุณคืออะไร? |
A form field shown selection of smiley images and its radio button.
| Thai |
|---|
ฟิลด์ฟอร์มแสดงการเลือกภาพที่ยิ้มและปุ่มตัวเลือก |
5. Are there any resources/API that can be reused?
| Thai |
|---|
มีทรัพยากร / API ที่สามารถนำกลับมาใช้ใหม่ได้หรือไม่? |
To develop the Mood Rating Form Field plugin, we can extends the Radio field in core product then replace its template and plugin properties options.
| Thai |
|---|
ในการพัฒนาปลั๊กอินเขตข้อมูลฟอร์มการให้คะแนนอารมณ์เราสามารถขยายฟิลด์วิทยุในผลิตภัณฑ์หลักจากนั้นแทนที่ตัวเลือกคุณสมบัติแม่แบบและปลั๊กอิน |
6. Prepare your development environment
| Thai |
|---|
เตรียมสภาพแวดล้อมการพัฒนาของคุณ |
We need to always have our Joget Workflow Source Code ready and builded by following this guideline.
The following tutorial is prepared with a Macbook Pro and the Joget Source Code is version 5.0.1. Please refer to the Guideline for developing a plugin article for other platform commands.
Let's say our folder directory is as follows.
| Thai |
|---|
เราจำเป็นต้องให้ซอร์สโค้ด Joget Workflow ของเราพร้อมและสร้างโดยปฏิบัติตาม this guideline บทช่วยสอนต่อไปนี้จัดทำขึ้นด้วย Macbook Pro และรหัสแหล่งที่มาของ Joget เป็นรุ่น 5.0.1 โปรดอ้างอิง Guideline for developing a plugin สำหรับคำสั่งแพลตฟอร์มอื่น ๆ สมมติว่าไดเรกทอรีโฟลเดอร์ของเรามีดังนี้ |
| Code Block |
|---|
- Home
  - joget
    - plugins
    - jw-community
-5.0.1 |
The "plugins" directory is the folder we will create and store all our plugins and the "jw-community" directory is where the Joget Workflow Source code is stored.
Run the following command to create a maven project in "plugins" directory.
| Thai |
|---|
ไดเรกทอรี "ปลั๊กอิน" คือโฟลเดอร์ที่เราจะสร้างและจัดเก็บปลั๊กอินทั้งหมดของเราและไดเรกทอรี "jw-community" เป็นที่เก็บ Joget Workflow Source code เรียกใช้คำสั่งต่อไปนี้เพื่อสร้างโครงการ maven ในไดเรกทอรี "ปลั๊กอิน" |
| Code Block | ||
|---|---|---|
| ||
cd joget/plugins/ ~/joget/jw-community/5.0.1/wflow-plugin-archetype/create-plugin.sh org.joget mood_rating 5.0.1 |
Then, the shell script will ask us to key in a version number for the plugin and ask us for a confirmation before it generates the maven project.
| Thai |
|---|
จากนั้นเชลล์สคริปต์จะขอให้เราใส่หมายเลขเวอร์ชันสำหรับปลั๊กอินและขอให้เรายืนยันก่อนที่จะสร้างโครงการ Maven |
| Code Block | ||
|---|---|---|
| ||
Define value for property 'version': 1.0-SNAPSHOT: : 5.0.0 [INFO] Using property: package = org.joget Confirm properties configuration: groupId: org.joget artifactId: mood_rating version: 5.0.0 package: org.joget Y: : y |
We should get a "BUILD SUCCESS" message shown in our terminal and a "mood_rating" folder created in the "plugins" folder.
Open the maven project with your favourite IDE. I will be using NetBeans.
| Thai |
|---|
เราควรได้รับข้อความ "BUILD SUCCESS" ที่ปรากฏในเครื่องของเราและโฟลเดอร์ "mood_rating" ที่สร้างขึ้นในโฟลเดอร์ "ปลั๊กอิน" เปิดโครงการ maven ด้วย IDE ที่คุณชื่นชอบ ฉันจะใช้ NetBeans |
7. Just code it!
| Thai |
|---|
เพียงแค่รหัส! |
a. Extending the abstract class of a plugin type
| Thai |
|---|
การขยายคลาสนามธรรมของประเภทปลั๊กอิน |
Create a "MoodRatingField" class under "org.joget" package. Then, extend the class with org.joget.apps.form.lib.Radio class. The org.joget.apps.form.lib.Radio class is an implementation of org.joget.apps.form.model.Element abstract class. Please refer to Form Field Element Plugin.
| Thai |
|---|
สร้างคลาส "MoodRatingField" ใต้แพ็คเกจ "org.joget" จากนั้นขยายคลาสด้วย org.joget.apps.form.lib.Radio คลาส คลาส org.joget.apps.form.lib.Radio เป็นการใช้งานคลาสนามธรรม org.joget.apps.form.model.Element โปรดอ้างอิง Form Field Element Plugin |
b. Implement all the abstract methods
| Thai |
|---|
ใช้วิธีนามธรรมทั้งหมด |
As usual, we have to implement all the abstract methods. We will use the AppPluginUtil.getMessage method to support i18n and using constant variable MESSAGE_PATH for message resource bundle directory.
| Thai |
|---|
ตามปกติเราต้องใช้วิธีนามธรรมทั้งหมด เราจะใช้วิธี AppPluginUtil.getMessage เพื่อสนับสนุน i18n และการใช้ตัวแปร MESSAGE_PATH แบบคงที่สำหรับไดเร็กทอรีบันเดิลทรัพยากรข้อความ |
| Code Block | ||||||
|---|---|---|---|---|---|---|
| ||||||
package org.joget;

import java.util.Map;
import org.joget.apps.app.service.AppPluginUtil;
import org.joget.apps.app.service.AppUtil;
import org.joget.apps.form.lib.Radio;
import org.joget.apps.form.model.FormBuilderPalette;

public class MoodRatingField extends Radio {

    private final static String MESSAGE_PATH = "message/form/MoodRatingField";

    @Override
    public String getName() {
        return "Mood Rating";
    }

    @Override
    public String getVersion() {
        return "5.0.0";
    }

    @Override
    public String getClassName() {
        return getClass().getName();
    }

    @Override
    public String getFormBuilderCategory() {
        return FormBuilderPalette.CATEGORY_CUSTOM;
    }

    @Override
    public String getLabel() {
        //support i18n
        return AppPluginUtil.getMessage("org.joget.MoodRatingField.pluginLabel", getClassName(), MESSAGE_PATH);
    }

    @Override
    public String getDescription() {
        //support i18n
        return AppPluginUtil.getMessage("org.joget.MoodRatingField.pluginDesc", getClassName(), MESSAGE_PATH);
    }

    @Override
    public String getPropertyOptions() {
        return AppUtil.readPluginResource(getClass().getName(), "/properties/form/moodRatingField.json", null, true, MESSAGE_PATH);
    }

    @Override
    public String getFormBuilderTemplate() {
        return "<label class='label'>"+getLabel()+"</label>";
    }
} |
Now, we have to create a UI for admin user to provide inputs for our plugin. In getPropertyOptions method, we already specify our Plugin Properties Options definition file is located at "/properties/form/moodRatingField.json". Let us create a directory "resources/properties/form" under "mood_rating/src/main" directory. After creating the directory, create a file named "moodRatingField.json" in the "properties" folder.
In the properties definition options file, we will need to provide options as below. Please note that we can use "@@message.key@@" syntax to support i18n in our properties options.
| Thai |
|---|
ตอนนี้เราต้องสร้าง UI สำหรับผู้ใช้ผู้ดูแลระบบเพื่อให้อินพุตสำหรับปลั๊กอินของเรา ในวิธีการ getPropertyOptions เราได้ระบุไฟล์ข้อกำหนด Plugin Properties Options ของเราแล้วที่ "/properties/form/moodRatingField.json" ให้เราสร้างไดเรกทอรี "ทรัพยากร / คุณสมบัติ / แบบฟอร์ม" ภายใต้ไดเรกทอรี "mood_rating / src / main" หลังจากสร้างไดเรกทอรีให้สร้างไฟล์ชื่อ "moodRatingField.json" ในโฟลเดอร์ "properties" ในไฟล์ตัวเลือกคำจำกัดความของคุณสมบัติเราจะต้องระบุตัวเลือกดังต่อไปนี้ โปรดทราบว่าเราสามารถใช้ไวยากรณ์ "@@ message.key @@" เพื่อรองรับ i18n ในตัวเลือกคุณสมบัติของเรา |
| Code Block | ||
|---|---|---|
| ||
[{
    title : '@@form.moodRating.config@@',
    properties : [{
        name : 'id',
        label : '@@form.radio.id@@',
        type : 'textfield',
        required : 'True',
        regex_validation : '^[a-zA-Z0-9_]+$',
        validation_message : '@@form.radio.invalidId@@'
    },
    {
        name : 'label',
        label : '@@form.radio.label@@',
        type : 'textfield',
        value : '@@org.joget.MoodRatingField.pluginLabel@@'
    }]
},
{
    title : '@@form.radio.advancedOptions@@',
    properties : [{
        label : '@@form.radio.data@@',
        type : 'header'
    },
    {
        name : 'validator',
        label : '@@form.radio.validator@@',
        type : 'elementselect',
        options_ajax : '[CONTEXT_PATH]/web/property/json/getElements?classname=org.joget.apps.form.model.FormValidator',
        url : '[CONTEXT_PATH]/web/property/json[APP_PATH]/getPropertyOptions'
    },
    {
        label : '@@form.radio.ui@@',
        type : 'header'
    },
    {
        name : 'readonly',
        label : '@@form.radio.readonly@@',
        type : 'checkbox',
        value : 'False',
        options : [{
            value : 'true',
            label : ''
        }]
    },
    {
        label : '@@form.radio.workflow@@',
        type : 'header'
    },
    {
        name : 'workflowVariable',
        label : '@@form.radio.workflowVariable@@',
        type : 'textfield'
    }]
}] |
After completing the properties option to collect input, we can work on the main methods of the plugin which are renderTemplate and formatData method. Since we extends Radio class, we do not need to implement formatData method.
| Thai |
|---|
หลังจากเสร็จสิ้นตัวเลือกคุณสมบัติเพื่อรวบรวมอินพุตเราสามารถทำงานกับวิธีหลักของปลั๊กอินซึ่งเป็น renderTemplate และ formatData วิธี เนื่องจากเราขยายคลาส Radio เราไม่จำเป็นต้องใช้เมธอด formatData |
| Code Block | ||
|---|---|---|
| ||
    @Override
    public String renderTemplate(FormData formData, Map dataModel) {
        String template = "moodRatingField.ftl";

        // set value
        String value = FormUtil.getElementPropertyValue(this, formData);
        dataModel.put("value", value);
        String html = FormUtil.generateElementHtml(this, formData, template, dataModel);
        return html;
} |
In the renderTemplate, we specify the template file to "moodRatingField.ftl". Let create this file under "mood_rating/src/main/resources/templates" directory. Then, using FreeMaker syntax to construct our template as below:
| Thai |
|---|
ใน renderTemplate เราระบุไฟล์เทมเพลตเป็น "moodRatingField.ftl" ให้สร้างไฟล์นี้ภายใต้ไดเรกทอรี "mood_rating / src / main / resources / templates" จากนั้นใช้ไวยากรณ์ FreeMaker เพื่อสร้างแม่แบบของเราดังต่อไปนี้: |
| Code Block | ||
|---|---|---|
| ||
<div class="form-cell mood_rating" ${elementMetaData!}>
    <label class="label">${element.properties.label} <span class="form-cell-validator">${decoration}</span><#if error??> <span class="form-error-message">${error}</span></#if></label>
    <div class="form-cell-value" id="${elementParamName!}${element.properties.elementUniqueKey!}">
    <#if !(request.getAttribute("org.joget.MoodRatingField")??) >
        <style>
            .mood_rating .tdstyle {text-align:center;width:20%;border:0px none transparent !important;}
        </style>
    </#if>
    <table style="width:150px">
        <tbody>
            <tr>
                <td class="tdstyle"><img height="25" width="25" src="${request.contextPath}/plugin/org.joget.MoodRatingField/images/smiley5.png"></td>
                <td class="tdstyle"><img height="25" width="25" src="${request.contextPath}/plugin/org.joget.MoodRatingField/images/smiley4.png"></td>
                <td class="tdstyle"><img height="25" width="25" src="${request.contextPath}/plugin/org.joget.MoodRatingField/images/smiley3.png"></td>
                <td class="tdstyle"><img height="25" width="25" src="${request.contextPath}/plugin/org.joget.MoodRatingField/images/smiley2.png"></td>
                <td class="tdstyle"><img height="25" width="25" src="${request.contextPath}/plugin/org.joget.MoodRatingField/images/smiley1.png"></td>
            </tr>
            <tr>
                <#list ['5', '4', '3', '2', '1'] as i>
                    <td class="tdstyle">
                        <input grouping="${elementParamName!}" id="${elementParamName!}" name="${elementParamName!}" type="radio" value="${i}" <#if error??>class="form-error-cell"</#if> <#if element.properties.readonly! == 'true'> disabled</#if> <#if value?? && value == i>checked</#if> />
                    </td>
                </#list>
            </tr>
        </tbody>
    </table>
    </div>
    <div style="clear:both;"></div>
</div> |
There are some smiley image files will be used by the template, let put those image files under "mood_rating/src/main/resources/resources/image" directory.
| Thai |
|---|
มีเทมเพลตไฟล์รูปภาพยิ้ม ๆ ที่จะใช้โดยให้วางไฟล์รูปภาพเหล่านั้นไว้ในไดเรกทอรี "mood_rating / src / main / resources / resources / image" |
c. Manage the dependency libraries of your plugin
| Thai |
|---|
จัดการไลบรารีของปลั๊กอินของคุณ |
There are no additional library needed.
| Thai |
|---|
ไม่จำเป็นต้องมีห้องสมุดเพิ่มเติม |
d. Make your plugin internationalization (i18n) ready
| Thai |
|---|
เตรียมปลั๊กอินสากลให้พร้อม (i18n) |
We are using i18n message key in getLabel and getDescription method. We will use i18n message key in our properties options definition as well. Then, we will need to create a message resource bundle properties file for our plugin.
Create a directory, "resources/message/form", under "mood_rating/src/main" directory. Then, create a "MoodRatingField.properties" file in the folder. In the properties file, add all the message keys and its label as below.
| Thai |
|---|
เรากำลังใช้คีย์ข้อความ i18n ในวิธี getLabel และ getDescription เราจะใช้คีย์ข้อความ i18n ในการกำหนดตัวเลือกคุณสมบัติของเราเช่นกัน จากนั้นเราจะต้องสร้างไฟล์คุณสมบัติมัดทรัพยากรสำหรับปลั๊กอินของเรา สร้างไดเรกทอรี "ทรัพยากร / ข้อความ / แบบฟอร์ม" ภายใต้ไดเรกทอรี "mood_rating / src / main" จากนั้นสร้างไฟล์ "MoodRatingField.properties" ในโฟลเดอร์ ในไฟล์คุณสมบัติให้เพิ่มคีย์ข้อความและป้ายกำกับทั้งหมดดังต่อไปนี้ |
| Code Block |
|---|
org.joget.MoodRatingField.pluginLabel=Mood Rating org.joget.MoodRatingField.pluginDesc=Form Field for rating mood form.moodRating.config=Edit Mood Rating |
e. Register your plugin to the Felix Framework
| Thai |
|---|
ลงทะเบียนปลั๊กอินของคุณไปที่ Felix Framework |
Next, we will have to register our plugin class in the Activator class (Auto generated in the same class package) to tell the Felix Framework that this is a plugin.
| Thai |
|---|
ต่อไปเราจะต้องลงทะเบียนคลาสปลั๊กอินของเราในคลาส Activator (สร้างอัตโนมัติในแพ็คเกจคลาสเดียวกัน) เพื่อบอก Felix Framework ว่านี่เป็นปลั๊กอิน |
| Code Block | ||
|---|---|---|
| ||
    public void start(BundleContext context) {
        registrationList = new ArrayList<ServiceRegistration>();
        //Register plugin here
        registrationList.add(context.registerService(MoodRatingField.class.getName(), new MoodRatingField(), null));
} |
f. Build it and test
| Thai |
|---|
สร้างและทดสอบ |
Let's build our plugin. Once the building process is done, we will find a "mood_rating-5.0.0.jar" file created under "mood_rating/target" directory.
Then, let's upload the plugin jar to Manage Plugins. After uploading the jar file, double check that the plugin is uploaded and activated correctly.
| Thai |
|---|
มาสร้างปลั๊กอินของเรากัน เมื่อกระบวนการสร้างเสร็จสิ้นเราจะพบไฟล์ "mood_rating-5.0.0.jar" ที่สร้างขึ้นภายใต้ไดเรกทอรี "mood_rating / target" จากนั้นลองอัปโหลดปลั๊กอินไปที่ Manage Plugins หลังจากอัปโหลดไฟล์ jar ให้ตรวจสอบอีกครั้งว่ามีการอัปโหลดและเปิดใช้งานปลั๊กอินอย่างถูกต้อง |

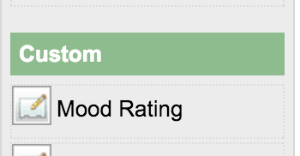
Then, check the Mood Rating field is shown in the Form Builder.
| Thai |
|---|
จากนั้นตรวจสอบฟิลด์การจัดประเภทอารมณ์จะแสดงในเครื่องมือ Form Builder |
Drag it to the Form Builder Canvas and set its properties.
| Thai |
|---|
ลากไปที่ตัวสร้างฟอร์มและตั้งค่าคุณสมบัติ |


Save the properties and check the field is render in canvas as following.
| Thai |
|---|
บันทึกคุณสมบัติและตรวจสอบว่าฟิลด์แสดงผลเป็น canvas ดังต่อไปนี้ |

Check and test the field in form.
| Thai |
|---|
ตรวจสอบและทดสอบฟิลด์ในรูปแบบ |

8. Take a step further, share it or sell it
| Thai |
|---|
ก้าวไปอีกขั้นแบ่งปันหรือขายมัน |
You can download the source code from mood_rating_src.zip.
To download the ready-to-use plugin jar, please find it in http://marketplace.joget.org/. (Coming Soon)
| Thai |
|---|
คุณสามารถดาวน์โหลดซอร์สโค้ดได้จาก mood_rating_src.zip หากต้องการดาวน์โหลด jar ปลั๊กอินที่พร้อมใช้งานโปรดค้นหาได้ที่ http://marketplace.joget.org/ (เร็ว ๆ นี้) |