Introduction
The UI Manage Permission Menu allows you to configure category permissions for user-defined groups at run-time.
This feature eliminates the need for app designers to go into the UI builder to manually set the permission for every menu category.
Get Started
The easiest way to see how the Manage Permission menu works is to download the attached demo app, import, publish and run the app in your Joget platform:
Steps:
|
|---|

Figure 1
2. The Configure button (Figure 2) will present you with the following permission options:
|
|---|

Figure 2
3. In UI Builder, the Manage Permission menu property is shown in Figure 3 (More details are provided below). |
|---|

Figure 3
4. Each menu category permission property (Figure 4) is tagged as "Permission Type = Controlled By Manage Permission Menu" and given a "Permission Key" name. You then map the respective "Permission Key" names into the "Manage Permission > Permissions" grid (Figure 3). |
|---|
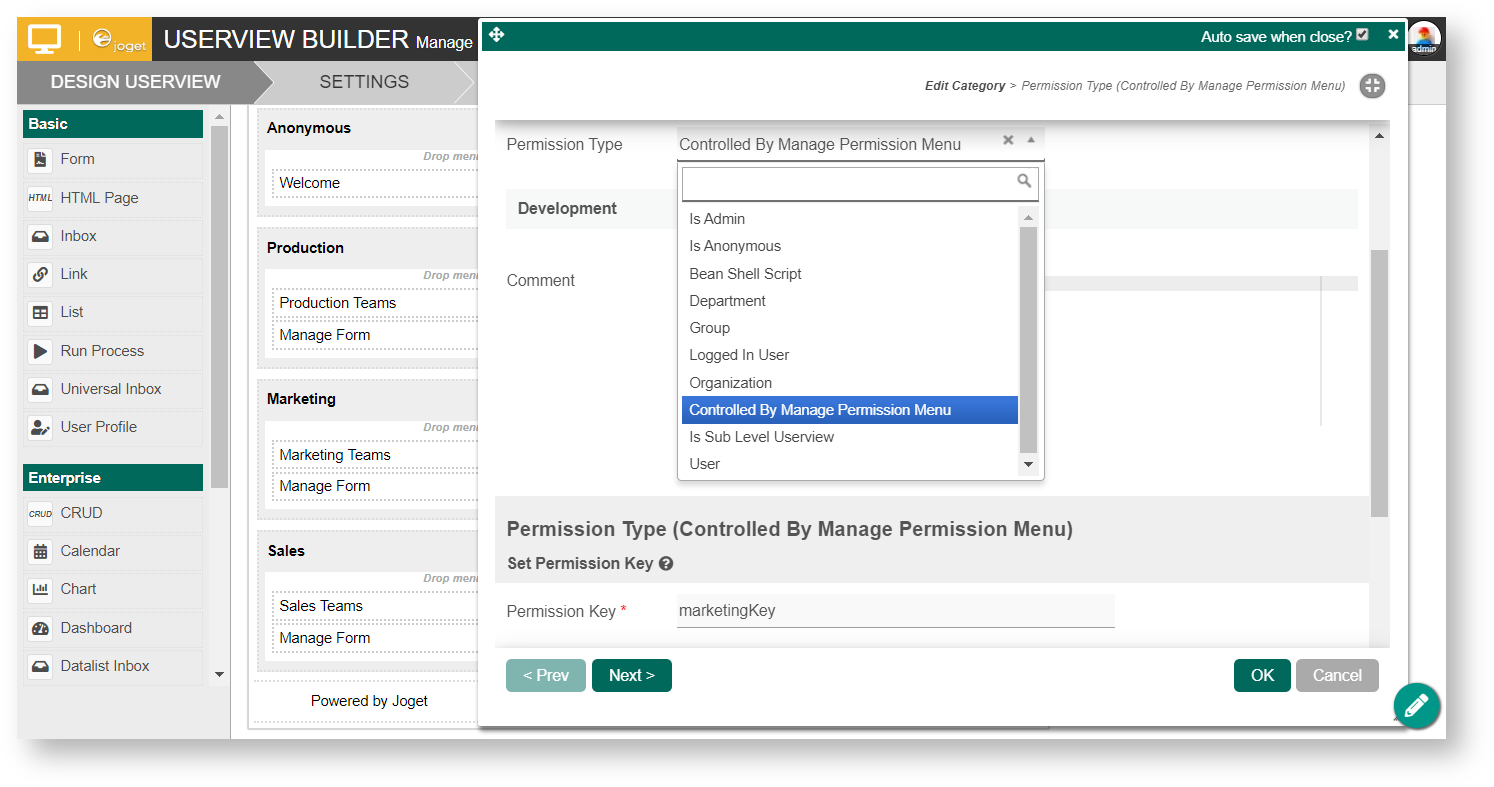
Figure 4
Manage Permission Properties
Configure Manage Permission Menu

Figure 5
| Custom ID | Item link slug. Optional field (Figure 5) Unique field Value defined here must be unique to the rest of the UI Menus as the first matching name will be called upon. | ||||||
| Label | Menu label. Mandatory field. | ||||||
| Page Title | Page title on Permission Menu page. You can use HTML tags, for example <b></b> to bold the title. | ||||||
| Permissions |
| ||||||
| Enable Refined Controls (Requires Admin User Role)? | Allows administrators to implement intricate user permission configurations per group. Using LDAP / External Directory Manager? If you are using external directory manager such as the LDAP Directory Manager, you must enable this option to use this Manage Permission menu. Important Note Once this feature is enabled, only users with administrative access can manage the permission. As opposed to Figure 2, when configuring permission, you will be brought to the following screen for finer permission control.
|

Advanced

Figure 6
Name | Description |
|---|---|
| Custom Header | Custom Header in HTML to show (Figure 6). |
| Custom Footer | Custom Footer in HTML to show. |
Performance & Offline
Cache Settings

Figure 7
Name | Description |
|---|---|
| Scope | Caching options are (Figure 7):
|
| Duration (s) | Duration in seconds to cache content, defaults to 20 seconds if applicable. |
Read more at Performance Improvement with UI Caching.
PWA Offline Settings
Note: PWA Offline support is dependent on the theme used.
Name | Description |
|---|---|
| Enable cache for offline support | Check this to enable caching for offline support, usually set for use on mobile browsers. |
Read Progressive Web Application (PWA) for more information.
How to use this permission plugin in a userview category
In the UI category that you wish to manage its permission via this plugin, edit the category's permission as shown in figure 4. After setting up the Permission Menu, remember to configure all the respective UI categories. Note that, multiple categories can use the same permission key. Setting up as such will grant multiple categories to a permission group.