In this article, we will demonstrate how to configure OpenID on Joget using the OpenID Connect Manager Plugin.
- Create an Auth0 account here.
- Use whatever tenant you have available, in my case it is "dev-hprpdb0led4su3pm", but yours will be different.
- From the dashboard, go to User Management > Users > Create User, and create a new user.
- Then, based on Okta documentation, we will need to go to the discovery URL to extract the necessary information. In my case, it is https://dev-hprpdb0led4su3pm.jp.auth0.com/.well-known/openid-configuration.
- You can use a JSON beautifying tool reorganize the JSON file from the previous step. In our case, we used this web tool.
- From the discovery URL, copy the relevant values and paste them into the respective fields in Joget OpenID Connect Manager Plugin. First, set the issuer to Custom. Please refer to Figure 1 & Figure 2.
- issuer → Issuer URL
- authorization_endpoint → Authorization Token Endpoint
- token_endpoint → Token Endpoint
- userinfo_endpoint → User Info Endpoint
- jwks_uri → Json Web Key Set
- "code" → Response Types Supported
- "openid profile email" → Scope
- From the Application, copy the relevant values and paste them into the respective fields in Joget OpenID Connect Manager Plugin. Please refer to Figure 1 & Figure 3.
- Client ID → Client ID
- Client Secret → Client Secret
- From the Joget OpenID Connect Manager Plugin, copy the relevant values and paste them into the respective fields in the Application. Please refer to Figure 1 & Figure 4.
- Callback URL → Allow Callback URLs
- After setting up the OpenID Connect Provider Details, you will have to set up your SMTP, for detailed instructions on configuring the Email Tool, click here.
- If you have configured the settings correctly, you should be met with the pages seen in Figure 5 & Figure 6:

Figure 1: Plugin configuration
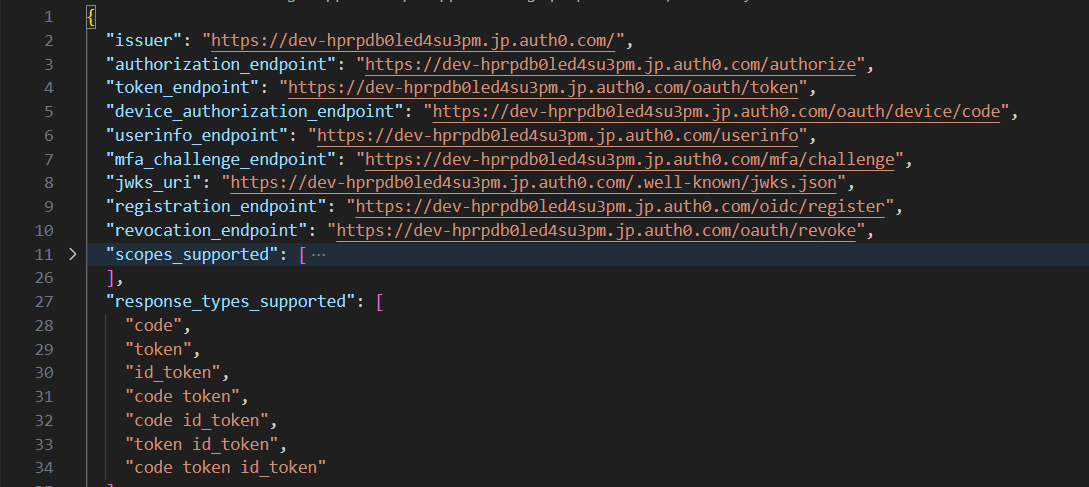
Figure 2: Discovery URL's Relevant Values
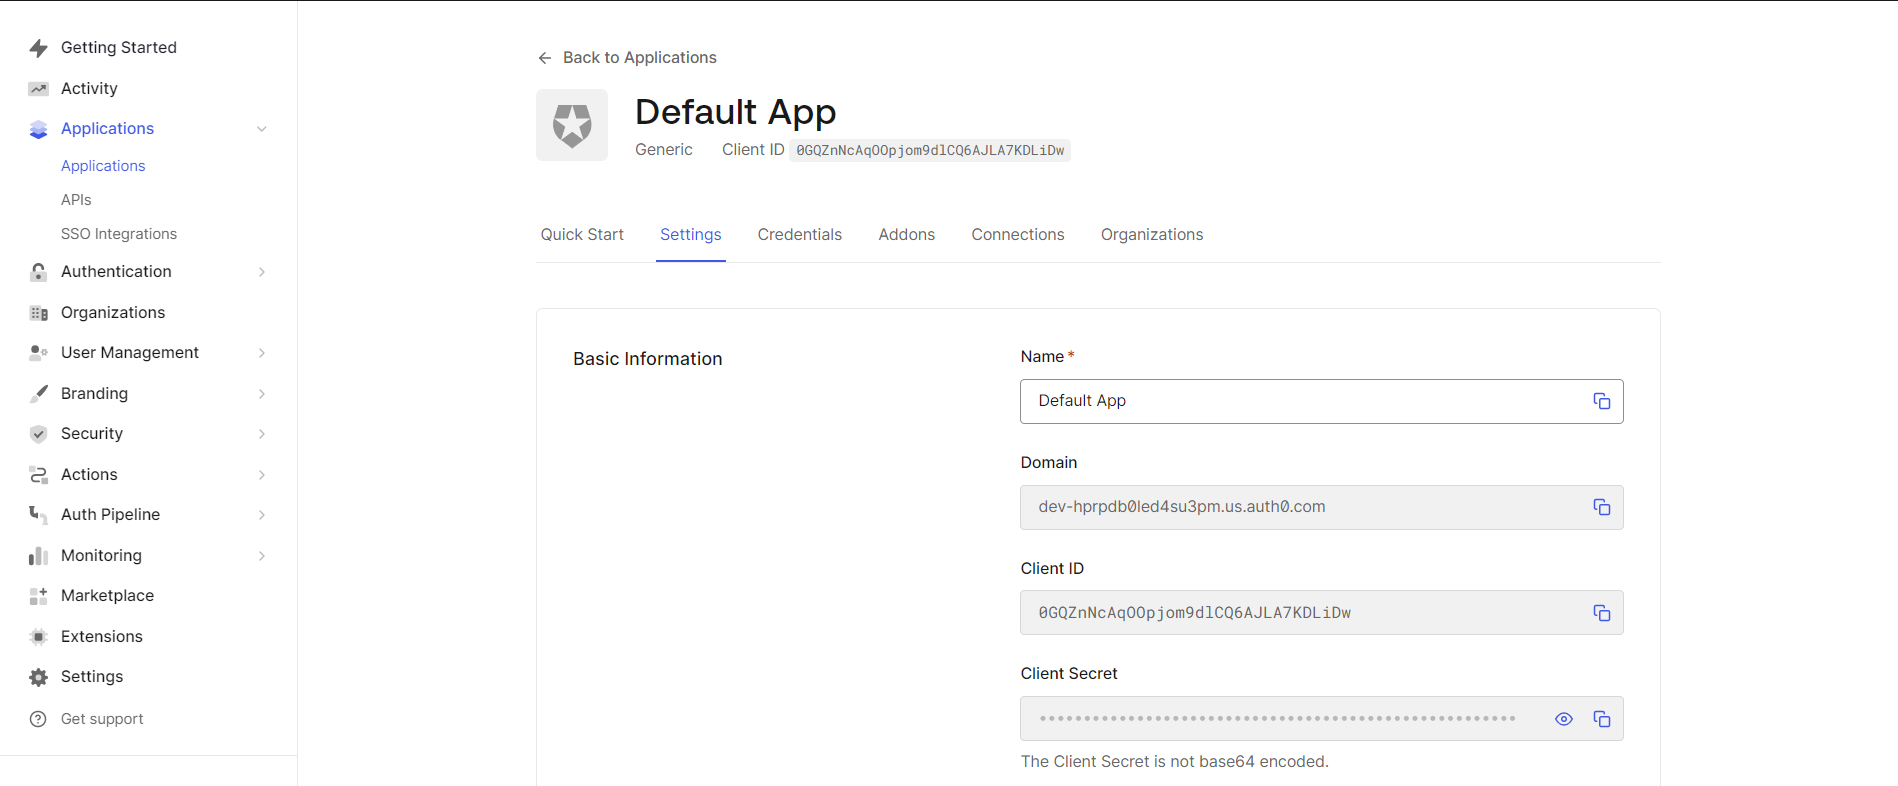
Figure 3: Application

Figure 4: Callback URLs

Figure 5: Joget Login Screen: Pressing the "Login" button will redirect you to the next screen.

Figure 6: OpenID Login Screen
Notes:
- If you are a free user, you may be limited to 3 licensed users, if so you may have to delete other users to accommodate for the user login.
- In the Joget System Settings > General Settings, set API Domain Whitelist to * (IMPORTANT NOTE: If this is not set, you will get a 400 Forbidden error when performing the SSO).
- Download the plugin here.