| English | |||||||||||||
|---|---|---|---|---|---|---|---|---|---|---|---|---|---|
|
Table of Contents
Introduction
Rich Text Editor offers the interface for for editing the rich text within web browsers, which presents the user with a "what-you-see-is-what-you-get" (WYSIWYG) editing areaarea.
The Rich Text Editor is only available on Professional and Enterprise Edition.
...
The easiest way to see how the Rich Text Editor works are to use the existing built-in App Expenses Claims. Here are the steps:
- Start the Joget Server and open and open the App Center.
- Log in as admin and click on the pencil icon on the Expenses Claim to open the Design App Composer. (see Figure 1)
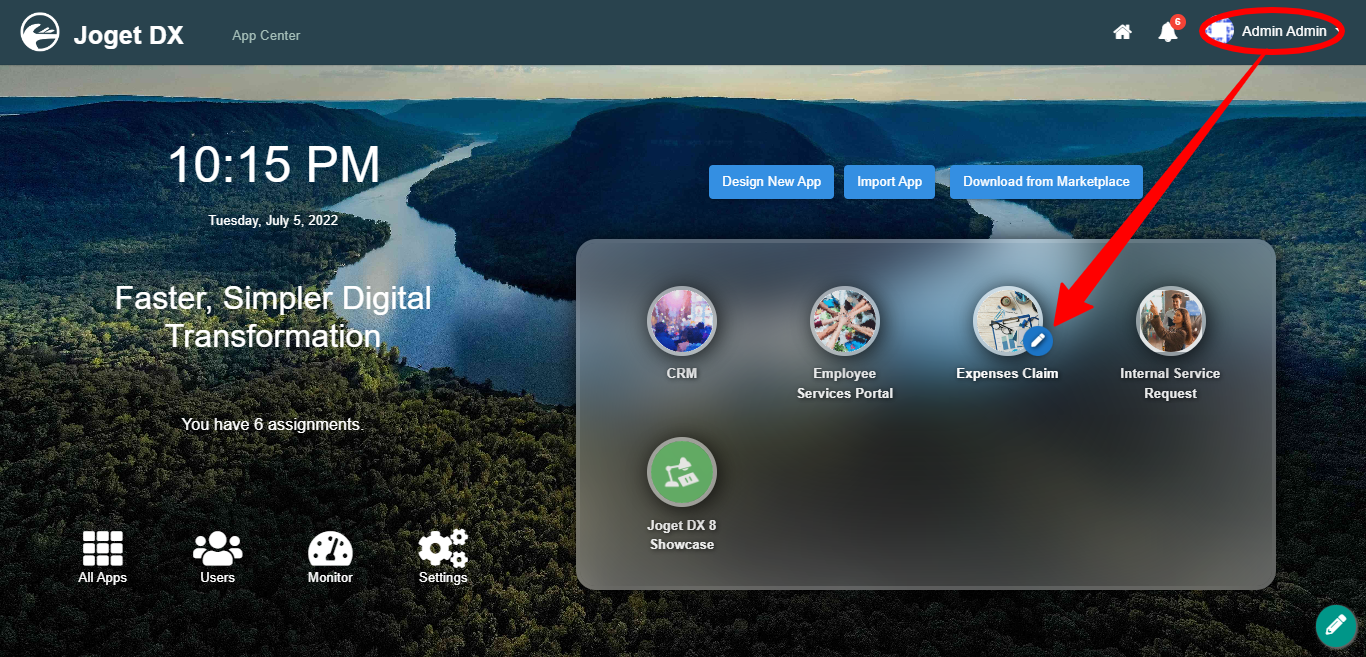
Figure 1 - Click on the Create New Form button and fill up the Form Details as follows (see Figure 2):
- Form ID: richTextEditor
- Form Name: Rich Text Editor
- Table Name: j_expense_claim
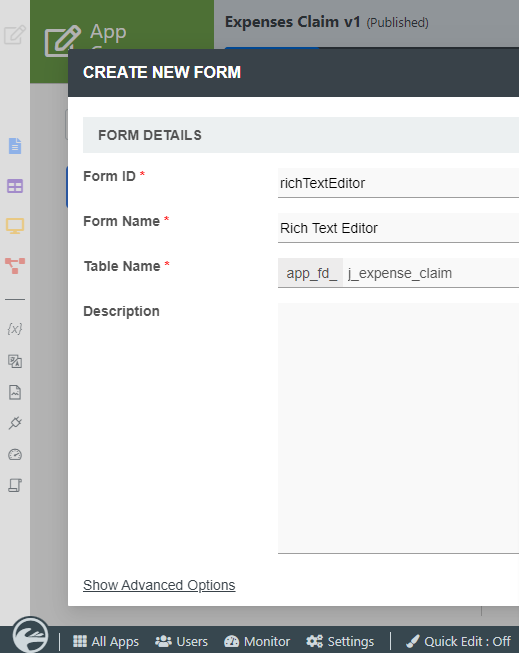
Figure 2 - Drag and drop a a Rich Text Editor element on to the canvas.
- Fill up the Edit Popup Select Box Configure Rich Text Editor properties as follows and click on Next :
- Label: Message
- ID: message
Label: Message
- Click on Advanced Options, tick on Full Features Toolbar? and click the OK the Apply Change button. (see Figure 3)

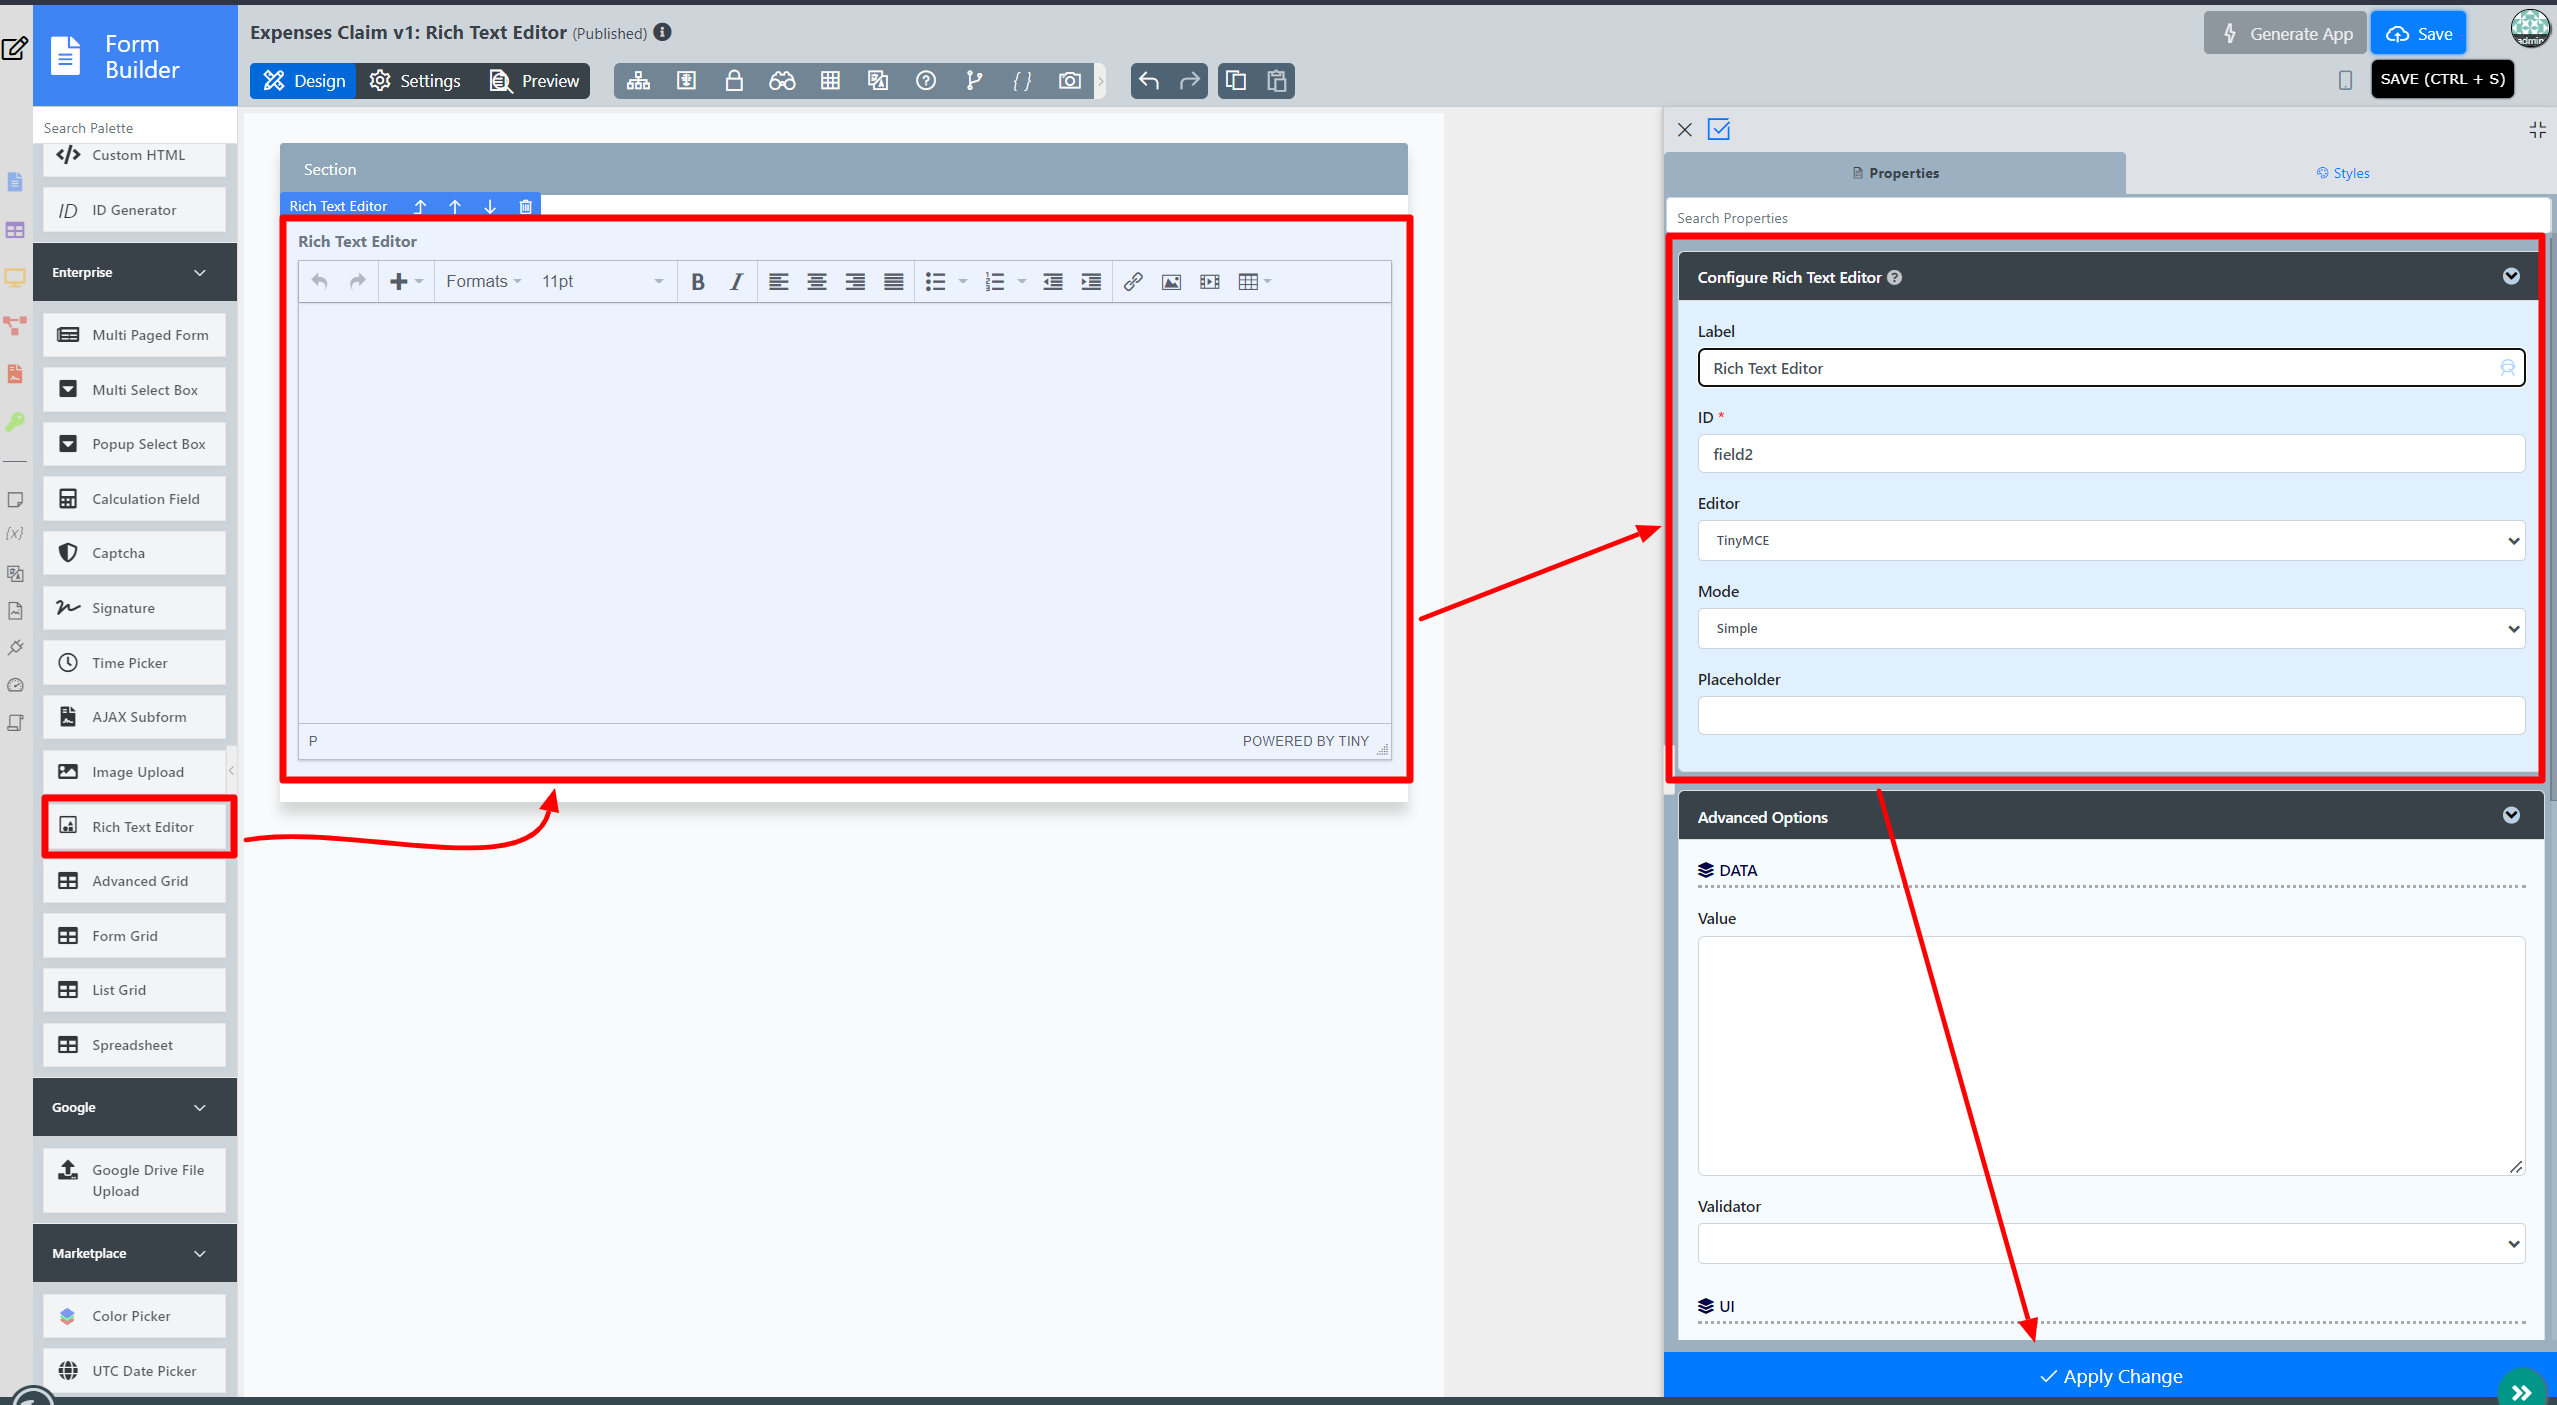
Figure 3 - Click on Preview.
Rich Text Editor Properties
...
Configure Rich Text Editor


| Name | Description |
|---|---|
| Label | Element Label to be displayed to the end-user. |
| ID | Element ID (By declaring as "message", a corresponding database table column "c_message" will be created) Please see Form Element for more information about defining the ID and list of reserved IDs. |
| Label | Element Label to be displayed to the end-user. |
| Editor | |
| Mode | Toolbar features:
|
| Enable Switch Between Inline Edit | Available for Quill Editor Only Display as a checkbox if the Mode is Full and Simple
Display as Multi Select Box if the Mode is Inline Edit
Example:
|
| Placeholder | The placeholder attribute specifies a short hint that describes the expected value of an input field (e.g. a sample value or a short description of the expected format). The short hint is displayed in the input field before the user enters a value. |


Advanced Options
Data


| Name | Description | |||||
|---|---|---|---|---|---|---|
| Value | Default Value | |||||
| Validator | Attach Attach a Validator plugin to validate the input value. Please see Form Validator.
|
UI
Available options:
|
UI


| Name | Description |
|---|---|
| Readonly | Determines if the element is editable. |
| Height (px) | Defines the height of the rich text editor.Rich Text Editor. |
| Custom Settings (JSON) | Refer to https://www.tiny.cloud/docs/configure/editor-appearance/#style_formats for more TinyMCE Editor customization Refer to https://quilljs.com/docs/modules/toolbar for more Quill Editor customization |
Image Upload


| Name | Description | |
|---|---|---|
| Permission | Manage on who is able to access the file uploaded. Read more at Permission Control. Info | |
|
Related Tutorials
Sample App
| View file | ||||
|---|---|---|---|---|
|