Red Hat OpenShift是一个容器应用程序平台,将Docker和Kubernetes引入企业。OpenShift Online是一个公共的平台即服务(PaaS),在云中提供托管解决方案。借助OpenShift Online,您可以快速构建,托管和扩展由Red Hat运营和支持的公共云中的集装箱化应用程序。
作为开源的低代码平台,可视化地为编程人员和非编码人员构建企业网络应用程序,Joget Workflow是OpenShift的一个很好的补充。

| Info |
|---|
OpenShift Online提供免费的Starter计划,因此您可以免费使用它进行学习和实验。 |
...
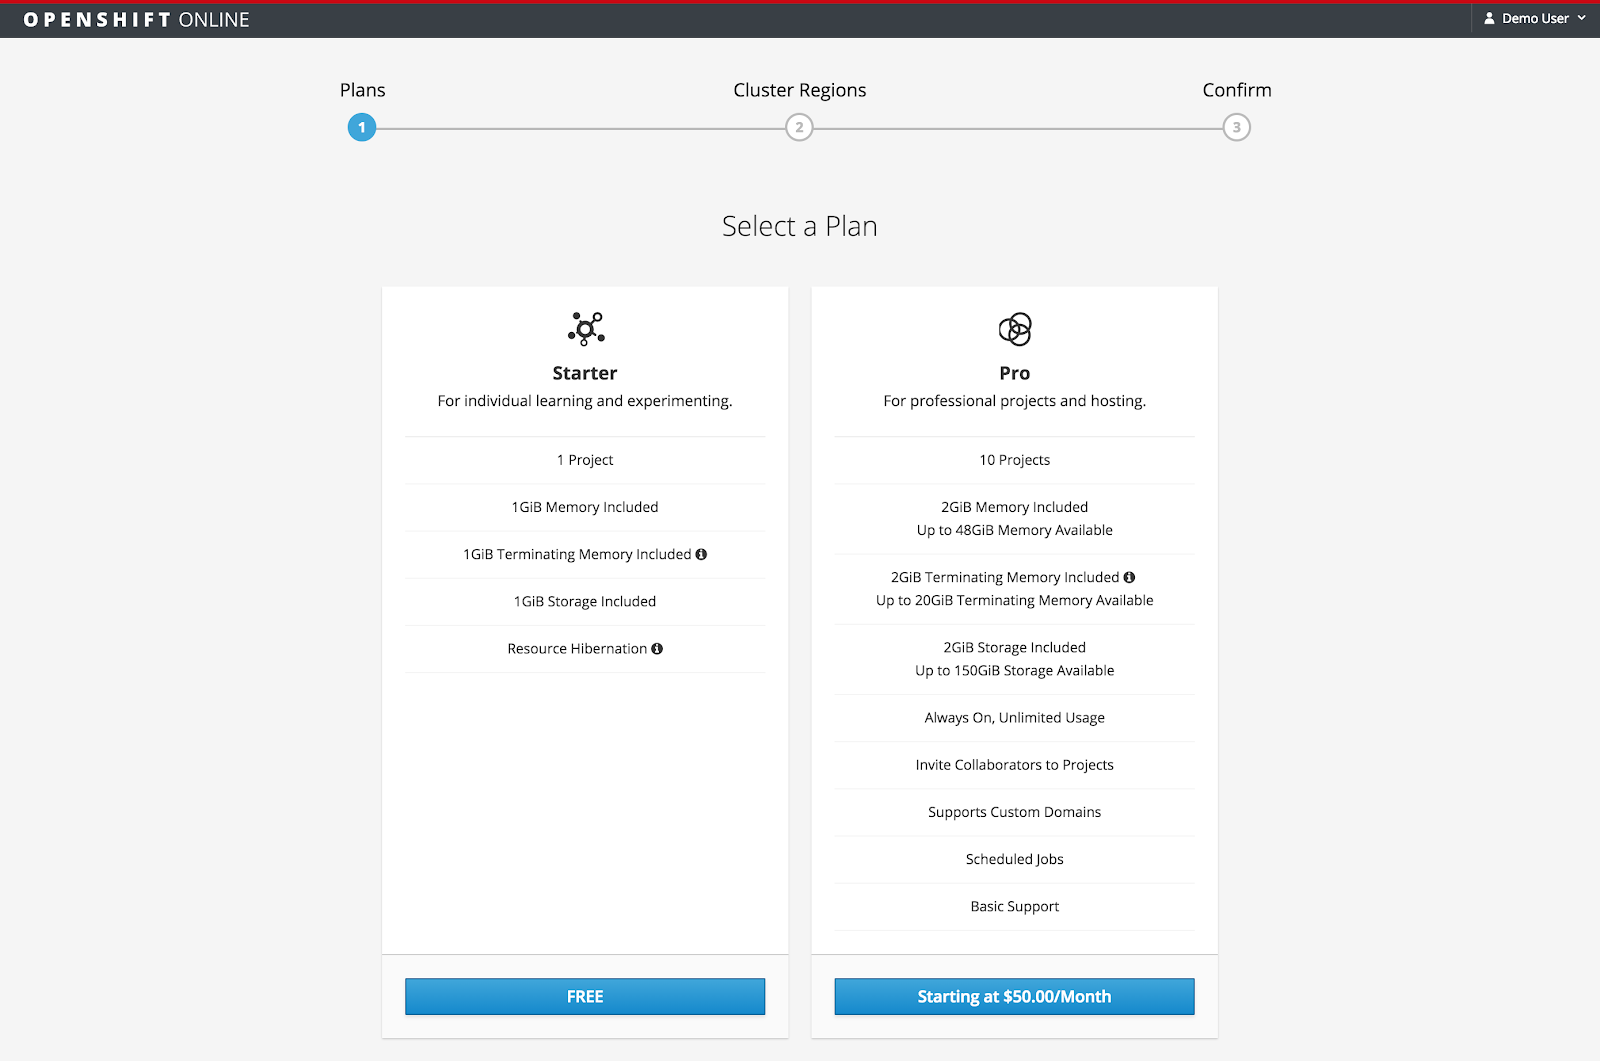
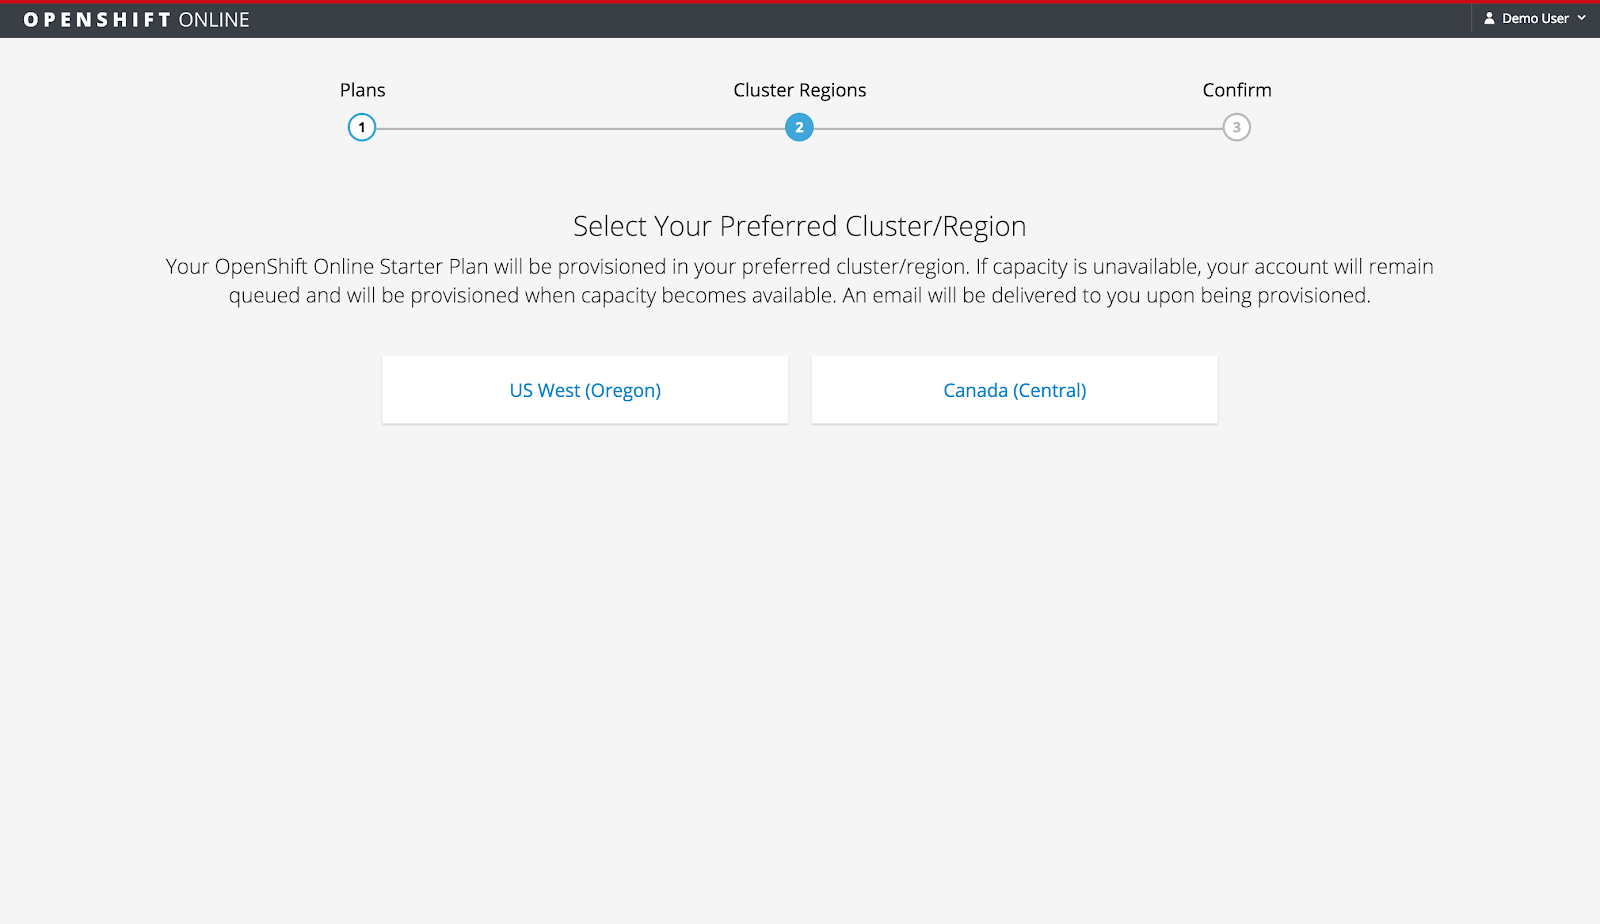
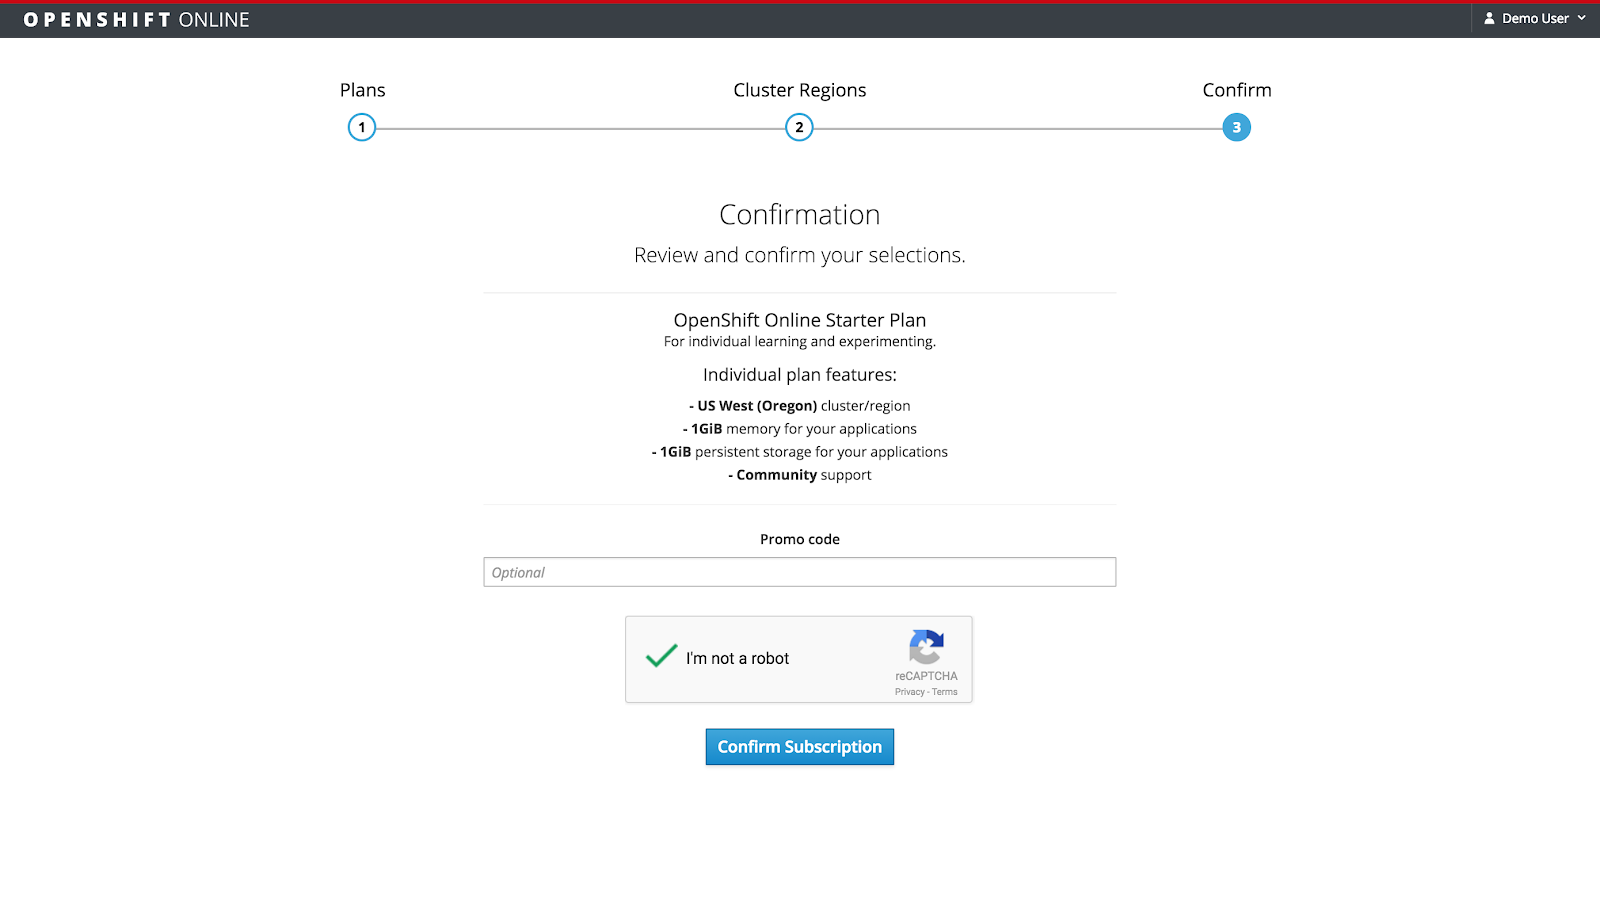
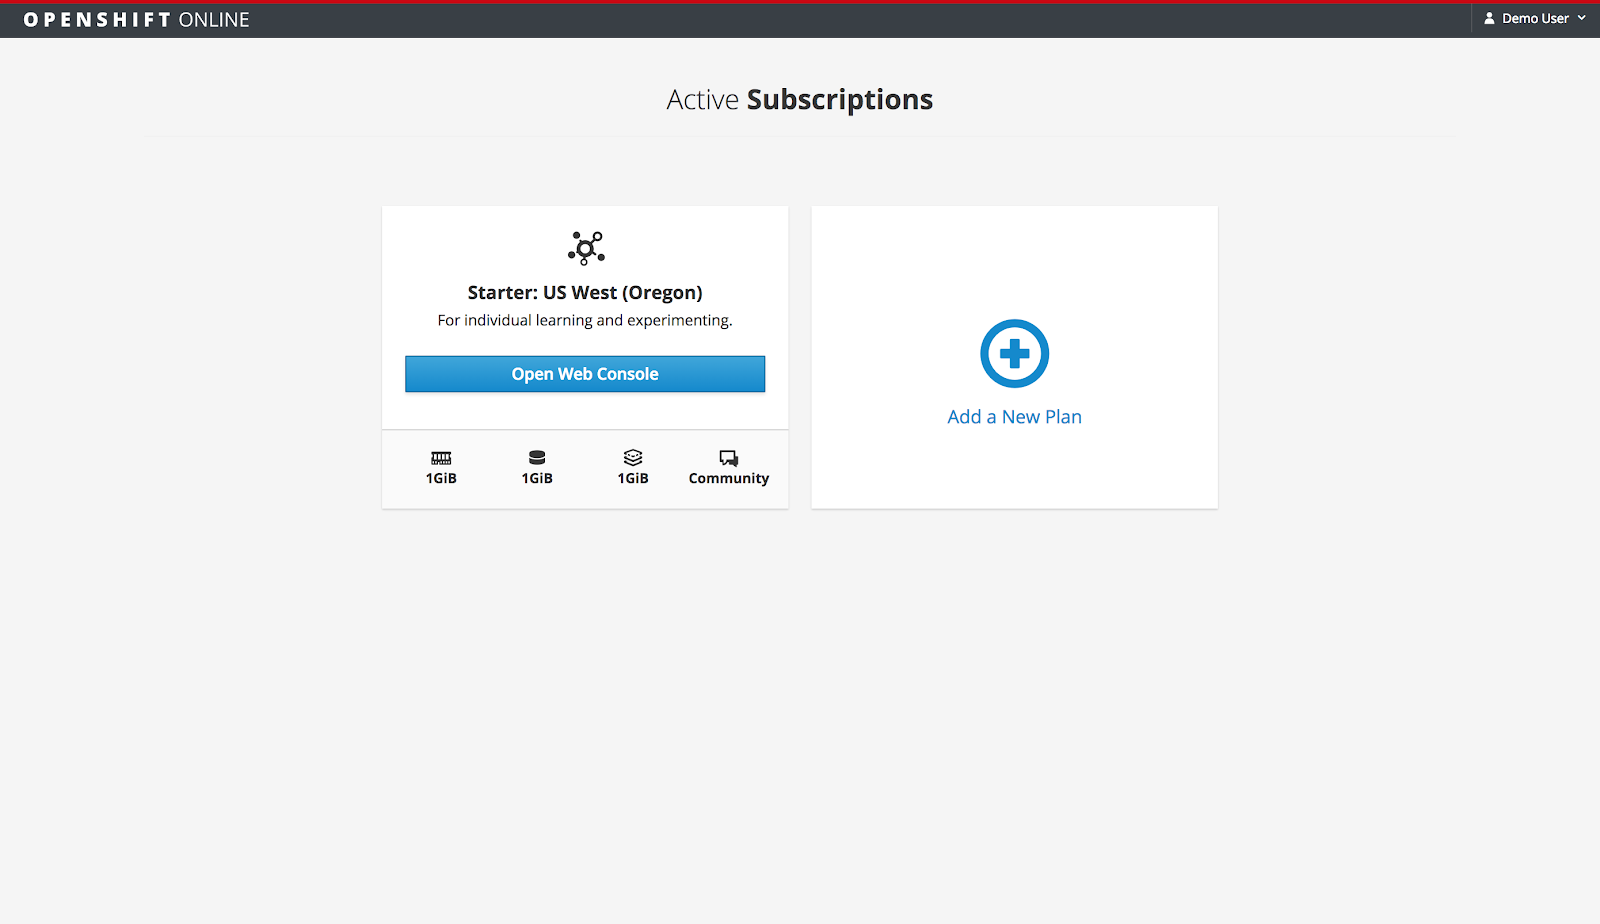
步骤1:在线注册OpenShift
在Widget Connector width 650 url
managehttps://
openshiftwww.
免费注册并选择所需的计划和地区。youtube.com/
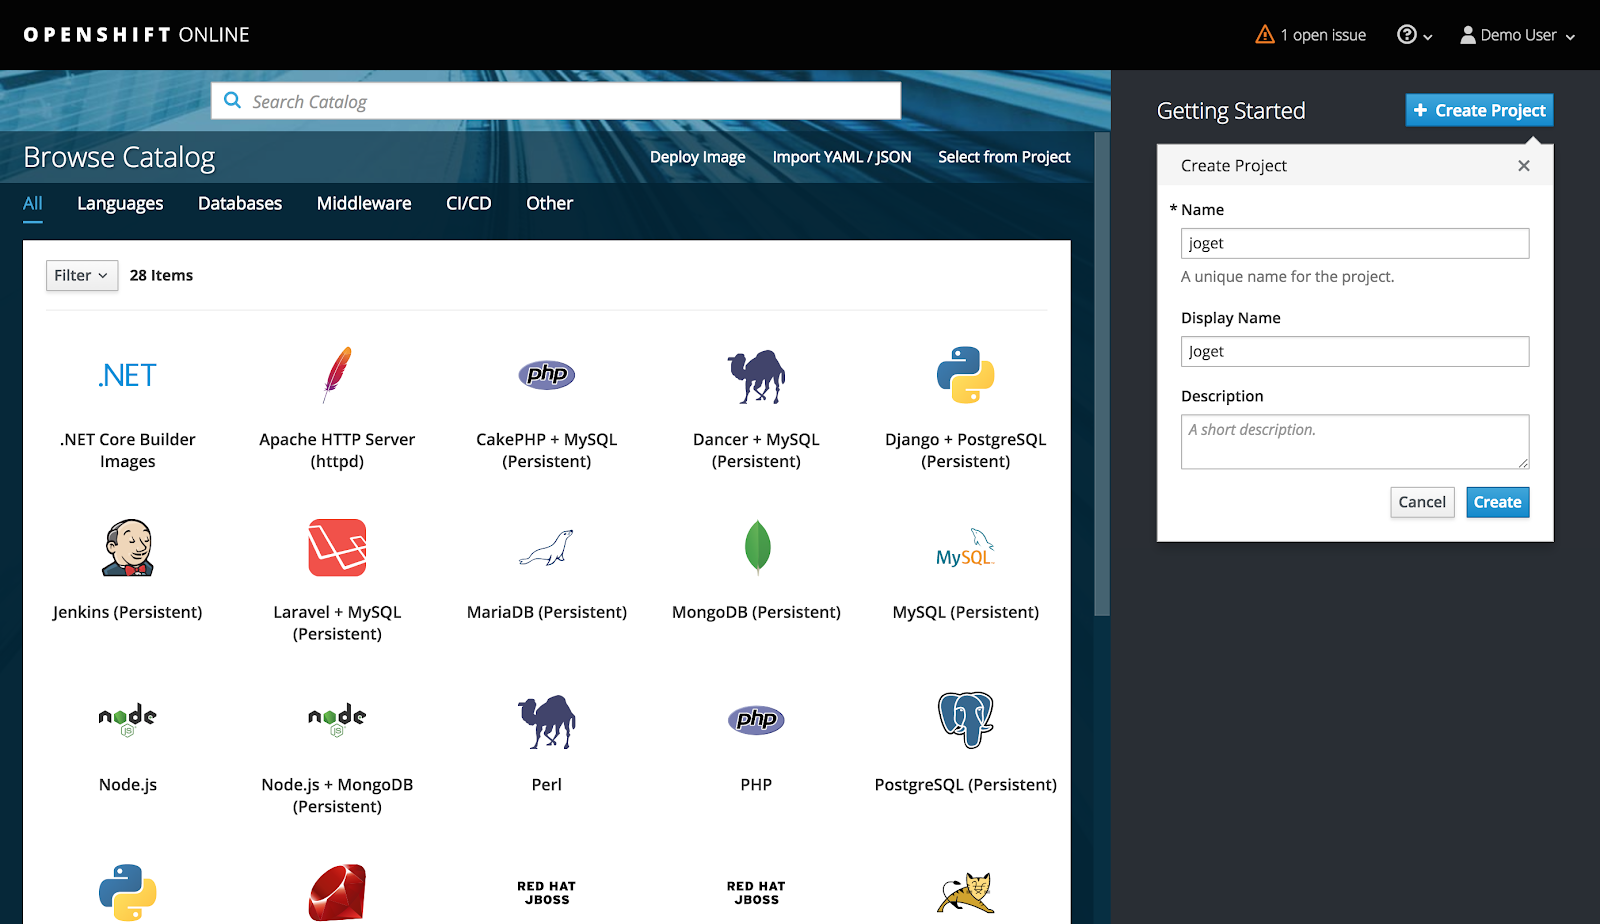
第2步:创建OpenShift项目
在OpenShift Web控制台中,使用“ 创建项目” 按钮创建一个项目,并键入所需的名称,显示名称和说明。
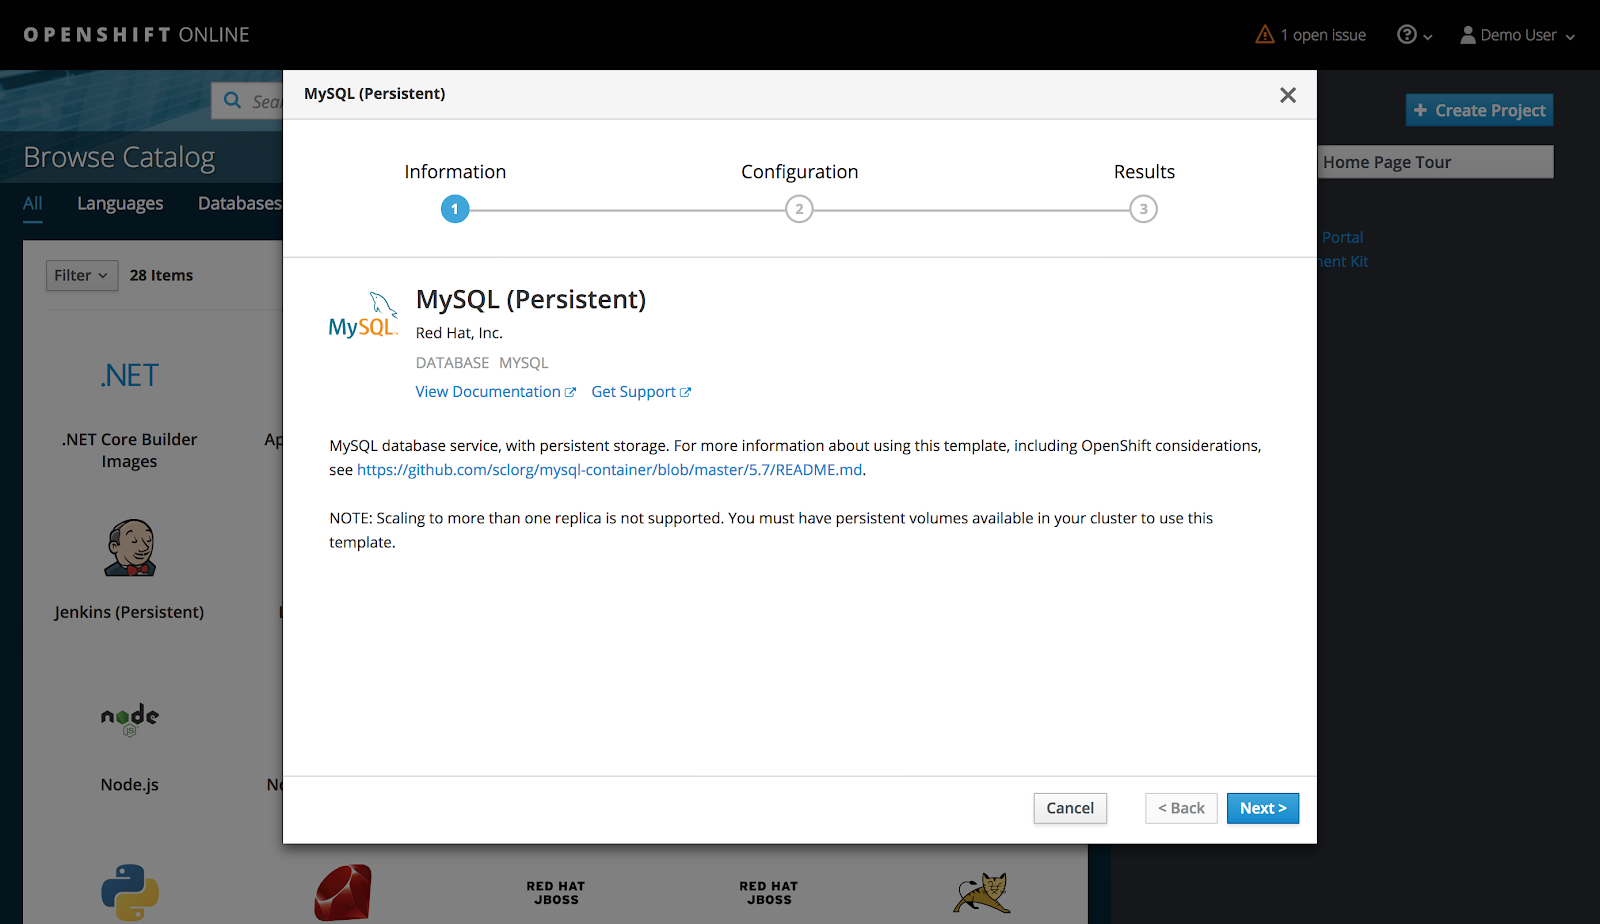
第3步:部署MySQL数据库
在所选项目下,选择添加到项目>浏览目录并选择MySQL(持久性)图像。
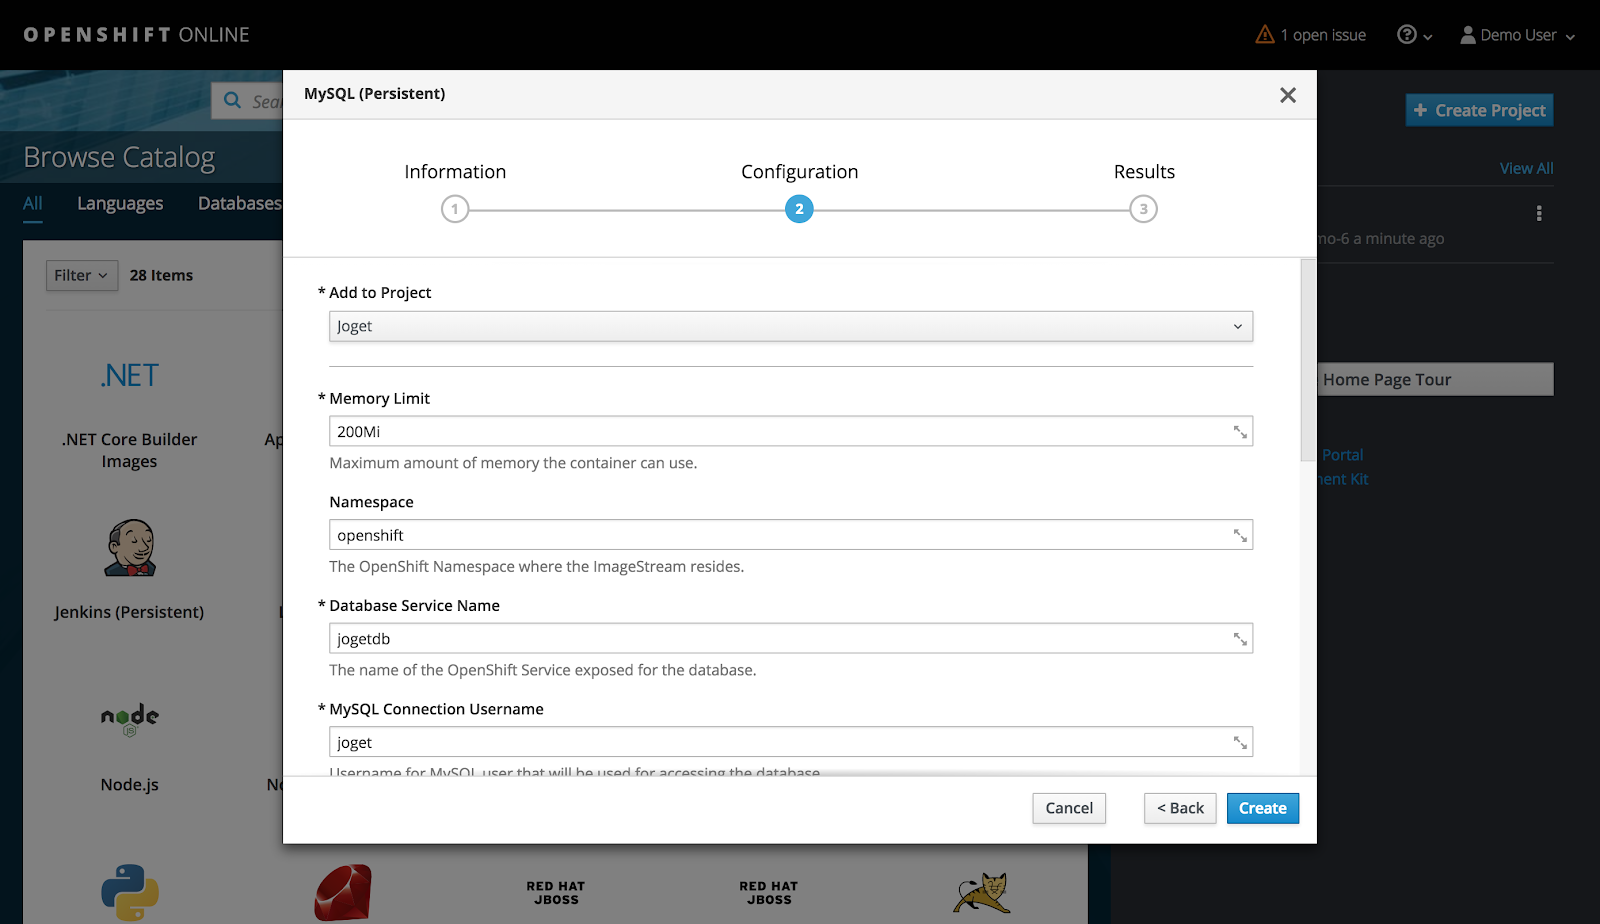
键入适当的设置并单击Create。
...
内存限制
...
200Mi(此值适用于将总内存限制为1GB的OpenShift Starter计划)
...
数据库服务名称
...
jogetdb
...
MySQL连接用户名
...
joget
...
MySQL连接密码
...
joget
...
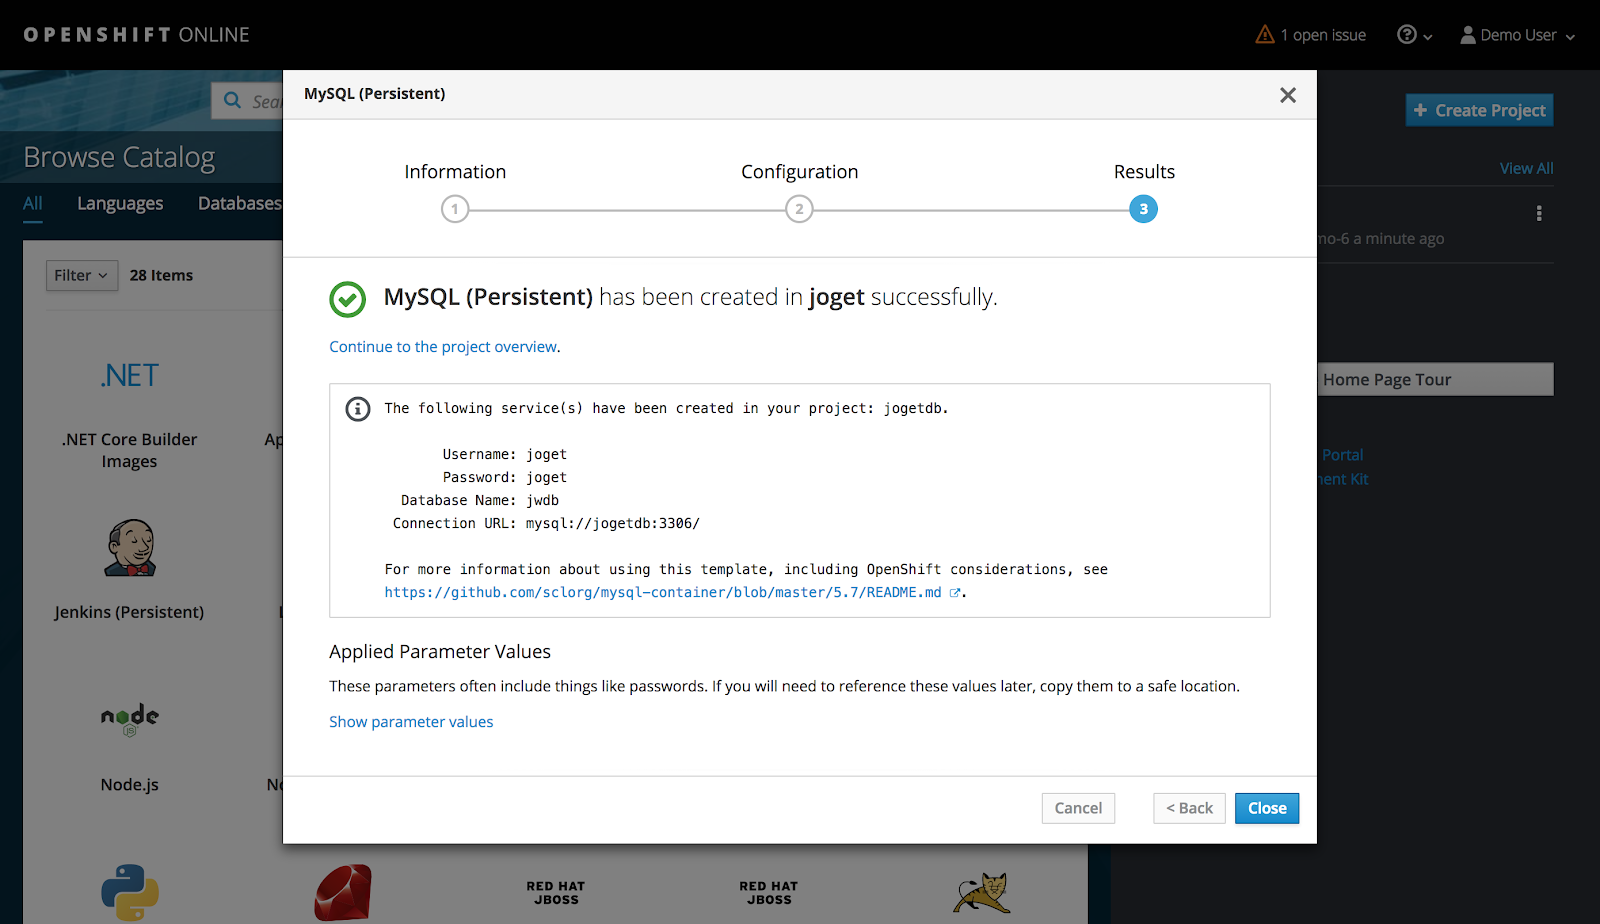
MySQL数据库名称
...
jwdb
步骤4:在JBoss WildFly应用服务器上部署Joget工作流。
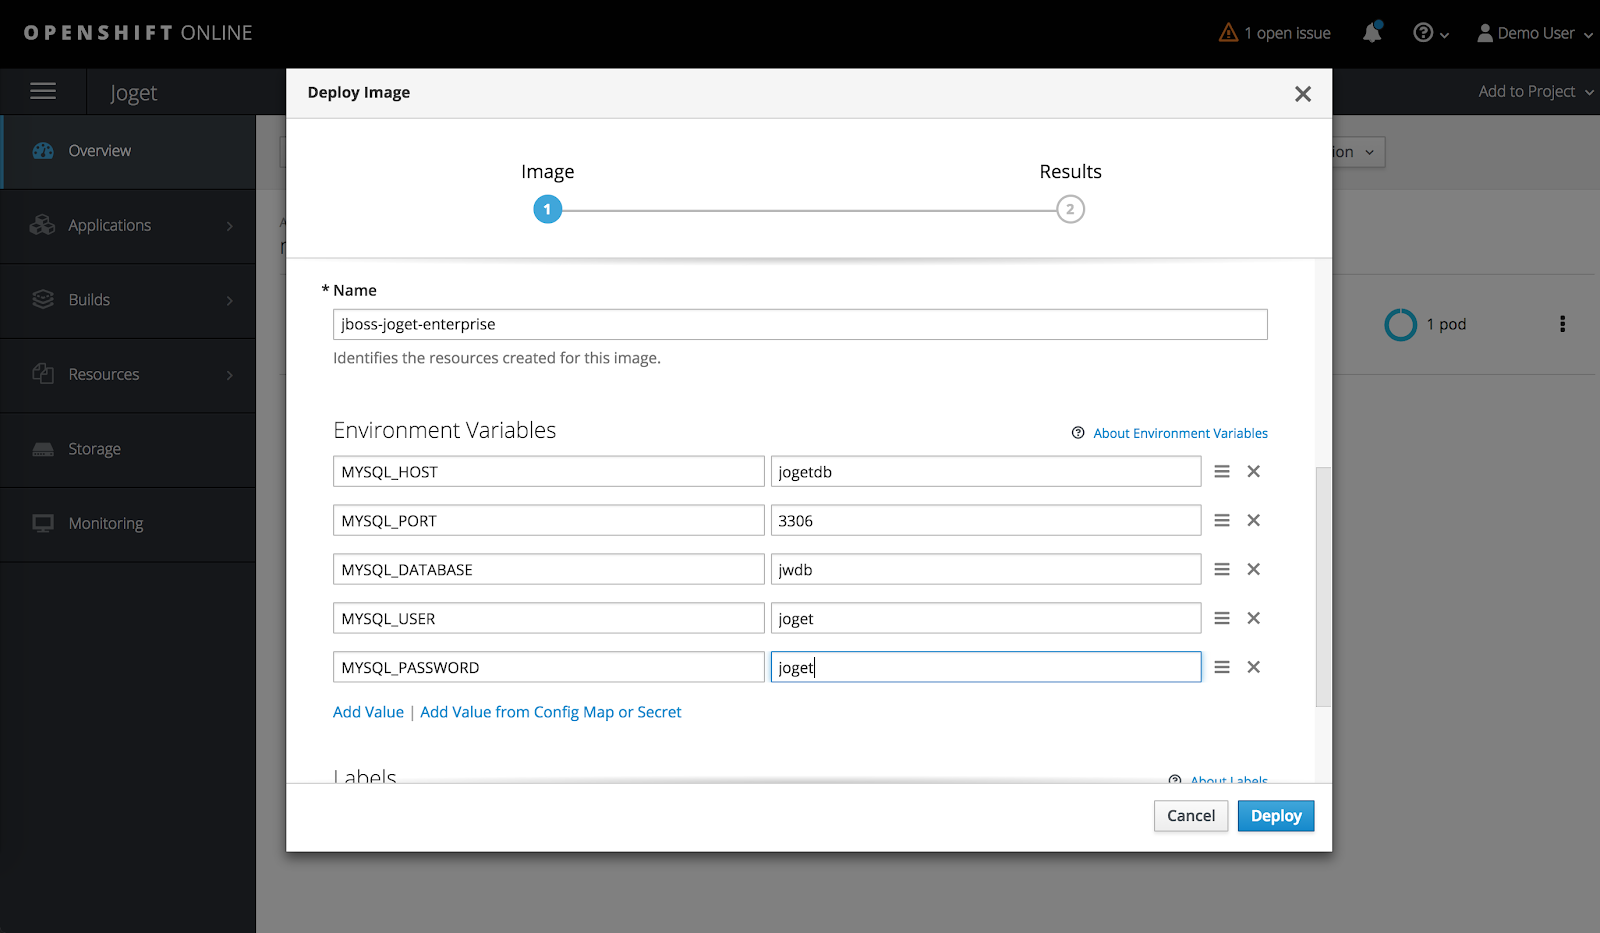
在选定的项目下,选择Add to project > Deploy Image,在jogetworkflow/jboss-joget-enterprise中选择Image Name选项和key。点击这个小的搜索图标来载入在Docker中心托管的合适的Docker镜像。
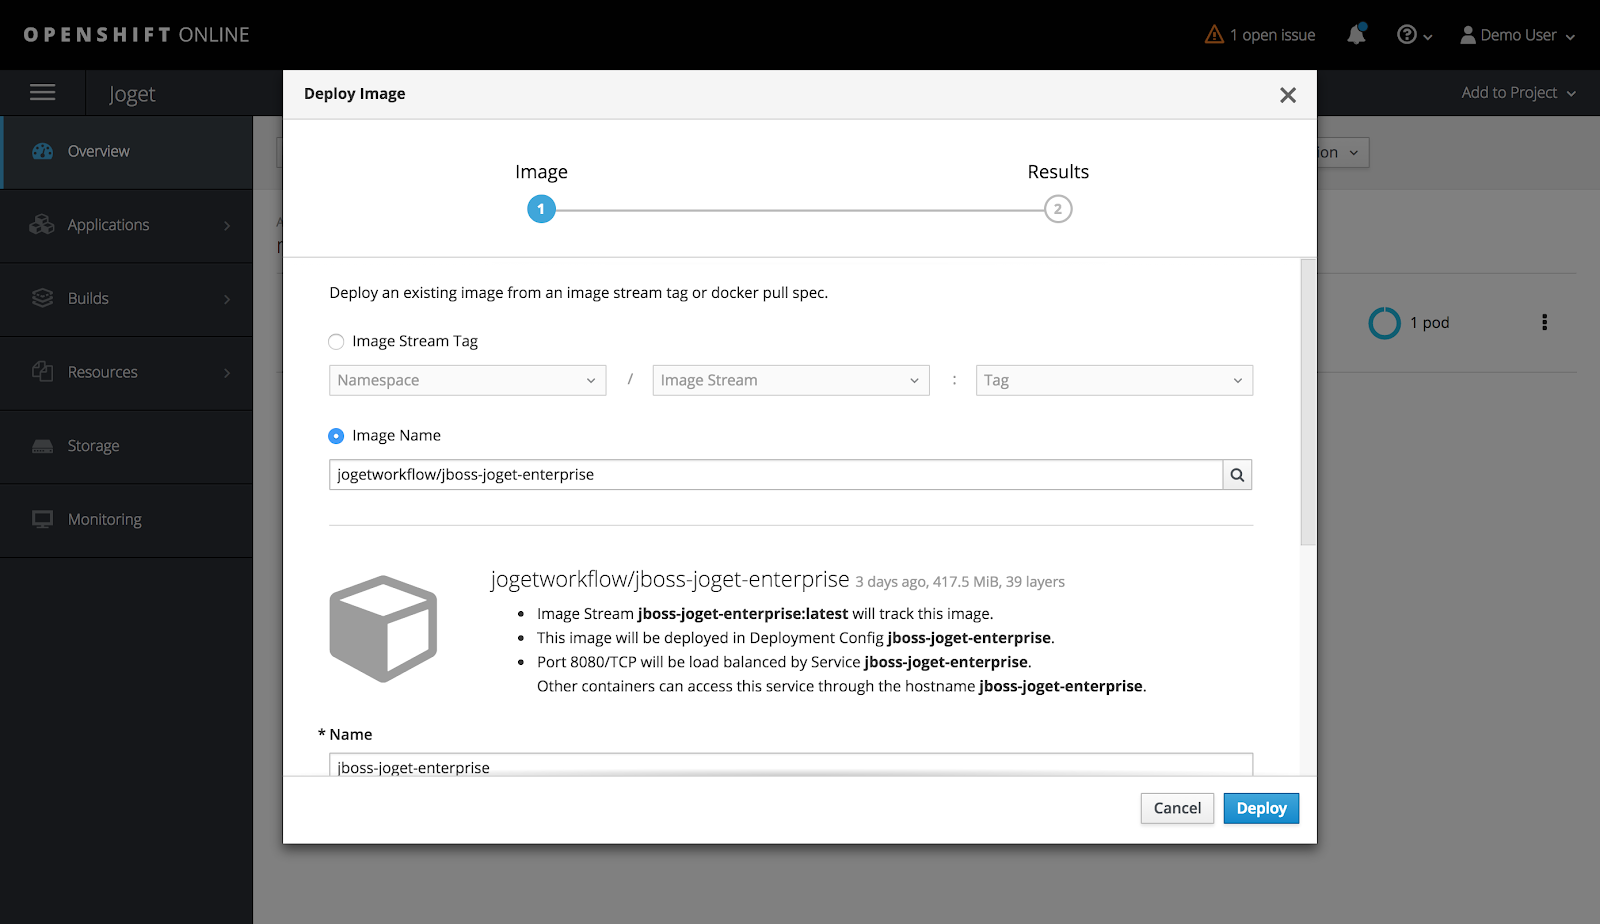
添加环境变量以匹配之前配置的MySQL容器的数据库设置,并单击Deploy。
...
MYSQL_HOST
...
jogetdb
...
MYSQL_PORT
...
3306
...
MYSQL_DATABASE
...
jwdb
...
MYSQL_USER
...
joget
...
MYSQL_PASSWORD
...
joget
watch?v=8xdNVKtflxE
Red Hat OpenShift is a container application platform that brings Docker and Kubernetes to the enterprise. As a cloud native computing platform, OpenShift allows teams to automate the build, deployment, and management of applications. They can focus on developing apps without worrying about the underlying infrastructure, whether on physical/virtual servers, or on public/ private/hybrid cloud environments.
As an open source no-code/low-code platform to visually build enterprise web apps for coders and non-coders, Joget is an ideal complement to OpenShift to fill the gap. The Joget platform is now available as a Red Hat Certified Container, so it is trusted, secure and commercially supported on OpenShift. This article describes the steps in deploying the certified Joget container image running with the MySQL database.


Deploy Joget using the OpenShift Web Console
Step 1: Create OpenShift Project
Access the OpenShift Web Console and login

Create a project using the Create Project button and key in the desired Name, Display Name and Description.

Step 2: Deploy MySQL Database
Under the selected project, select Add to Project > Browse Catalog and select the MySQL image.
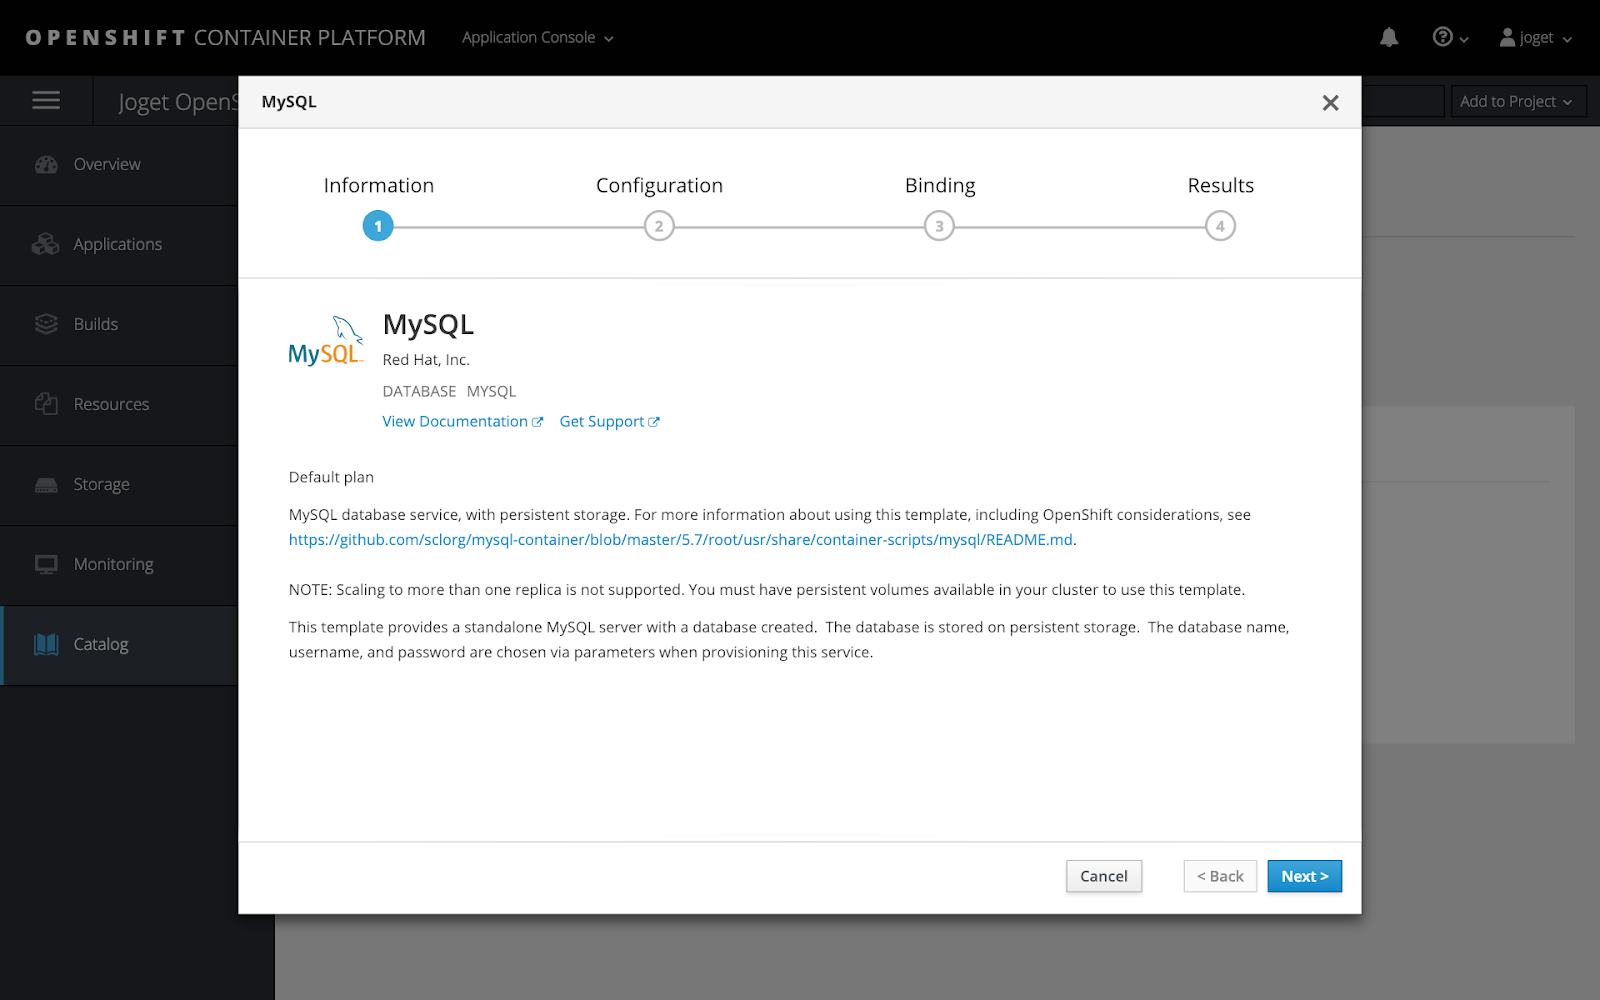
Key in the appropriate settings and click on Create e.g.
Namespace | openshift |
Database Service Name | jogetdb |
MySQL Connection Username | joget |
MySQL Connection Password | joget |
MySQL Database Name | jwdb |

Step 3: Deploy Joget Platform
To access the Red Hat Container Catalog, a valid username and password that is used to log in to the Red Hat Customer Portal is required.
| Info |
|---|
If you do not have an account, you can acquire one by registering for one of the following options:
|
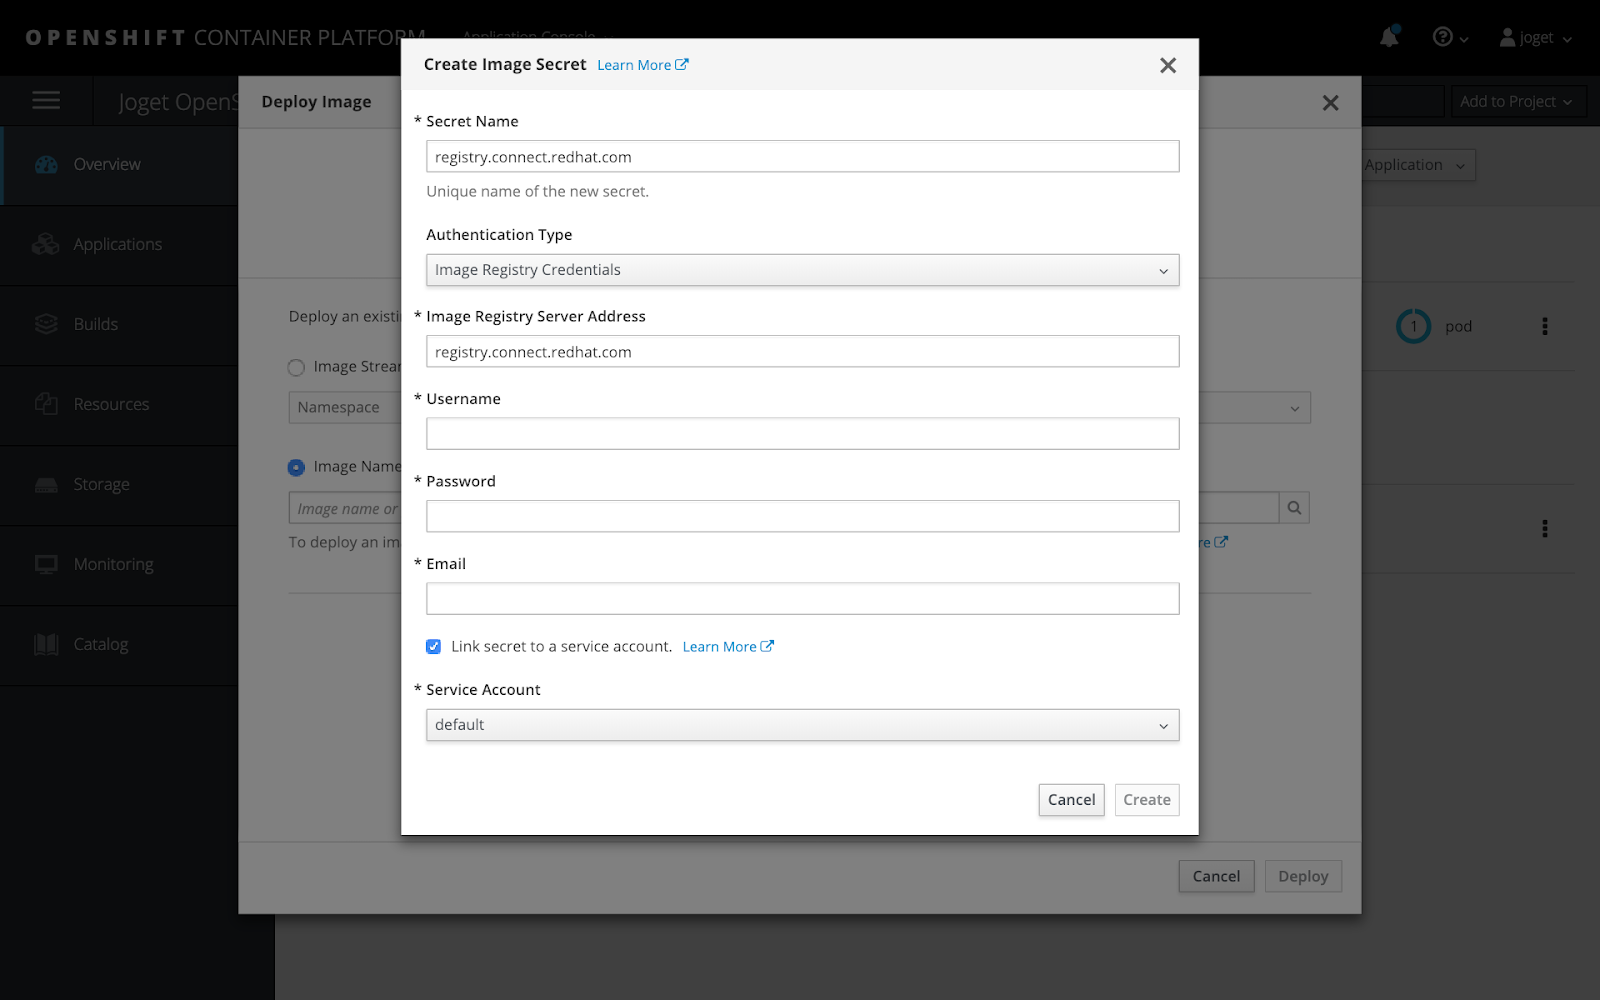
Under the selected project, select Add to Project > Deploy Image and click on the create an image pull secret link. In the ensuing popup, key in the Red Hat login details for the registry.
Secret Name | |
Authentication Type | Image Registry Credentials |
Image Registry Server Address | |
Username | Red Hat account username |
Password | Red Hat account password |
Red Hat account email | |
Link secret to a service account | Yes |
Service Account | default |
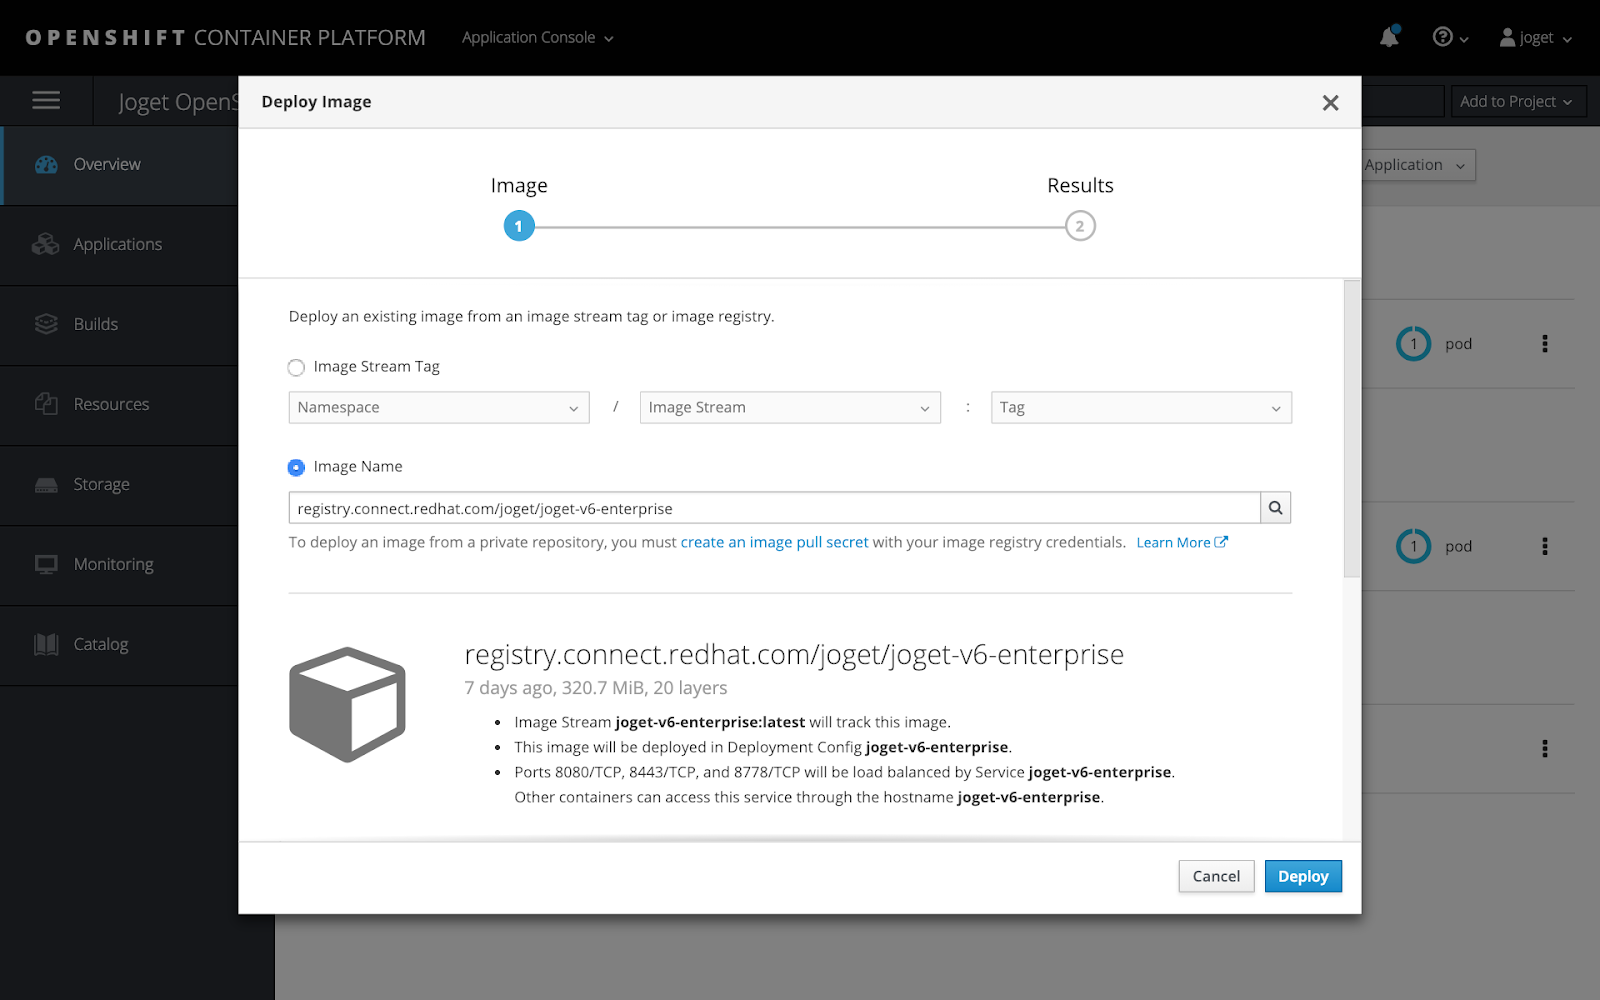
Once the secret has been created, select Add to Project > Deploy Image, select the Image Name option and key in registry.connect.redhat.com/joget/joget-v6-enterprise. Click on the small search icon to load the image details from the registry, key in the desired Name then click Deploy.
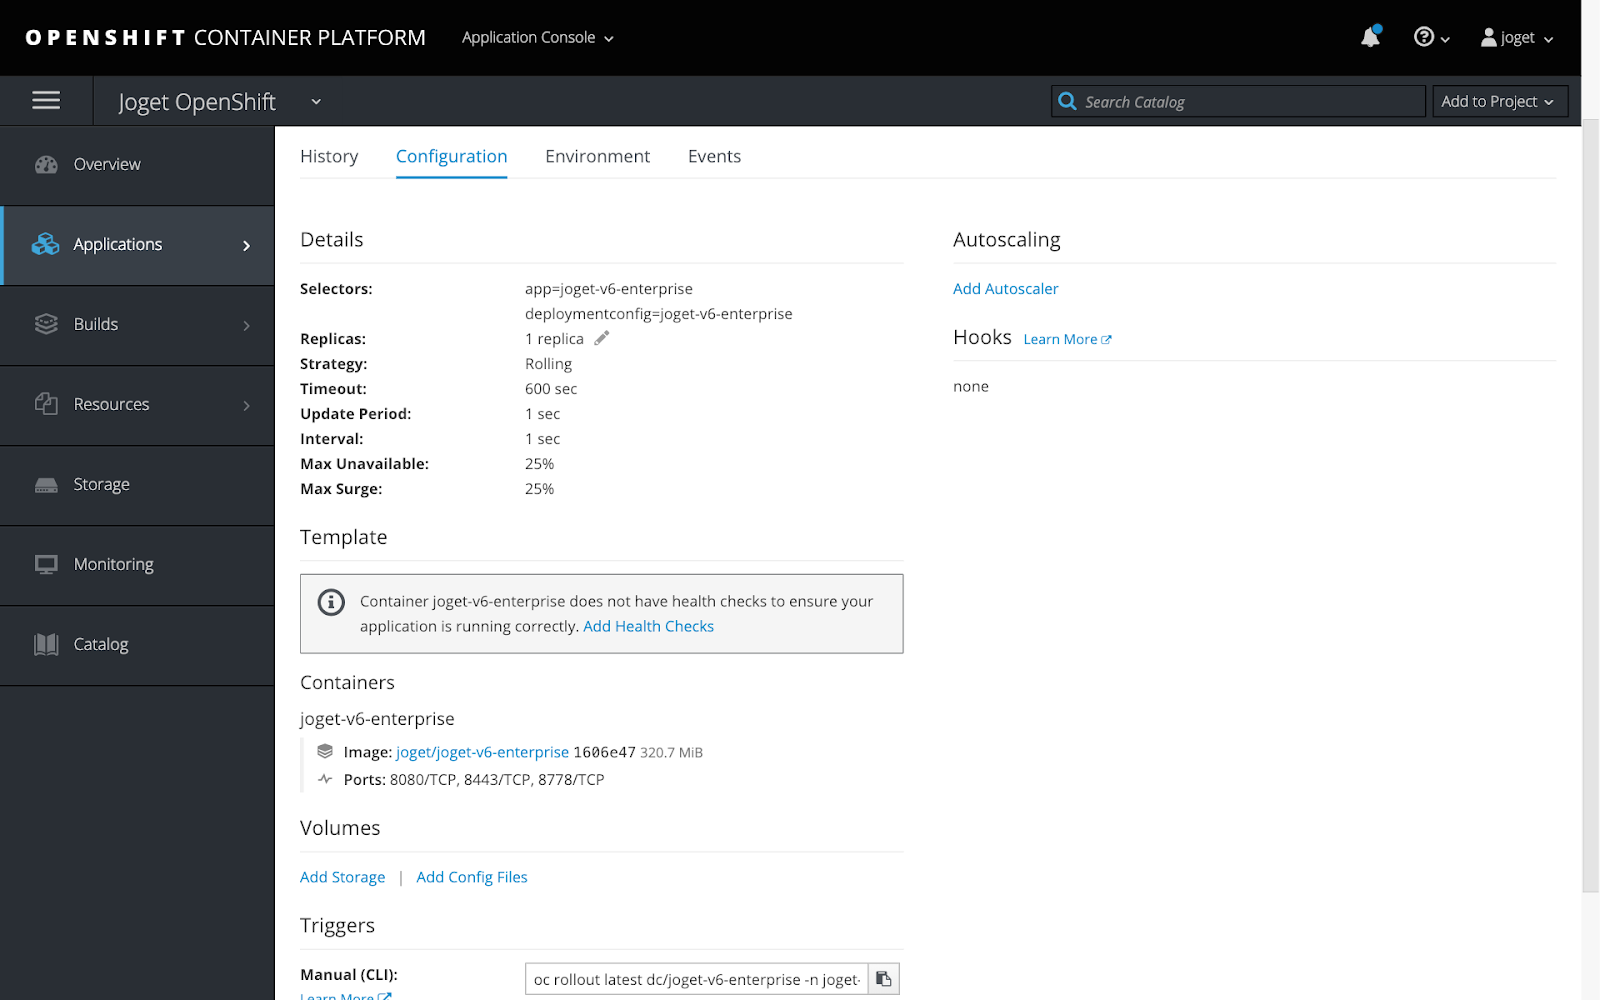
Step 4: Add Persistent Storage
The next step is to add persistent storage to the container for storing configuration files and persistent file uploads. Under Applications > Deployments, select the application, then the Configuration tab. Scroll down to the Volumes section and click on the Add Storage link.
In the Add storage page, click on the small create storage link. Create the new storage with the desired values e.g.
Name | joget-data |
Access Mode | Shared Access (RWX) |
Size | 1GB (or as required) |

Back in the Add Storage page, select the newly created storage, set the Mount Path to /opt/joget/wflow, then Add.
Mount Path | /opt/joget/wflow |

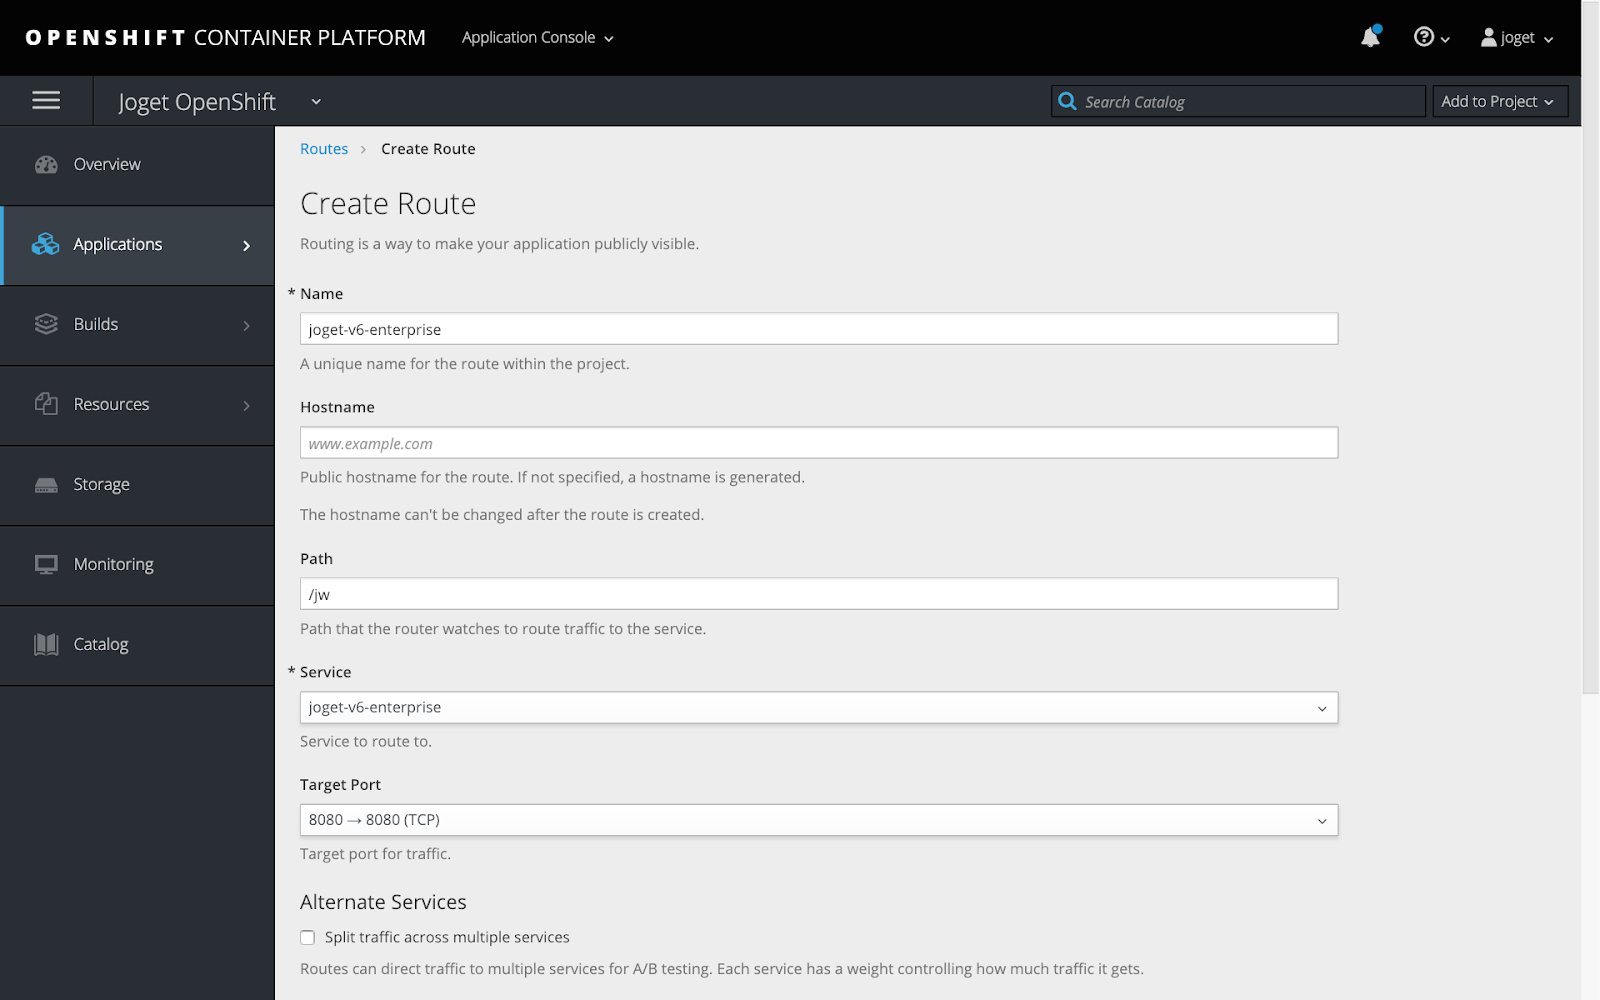
Step 5: Create Service Route for External Access
At this point, the service is not accessible from an external web browser so you will need to create a route, which exposes a service at a host name.
Click on Applications > Services and select joget-v6-enterprise.

Select Actions > Create Route, set the Path to /jw and click on Create.
Path | /jw |
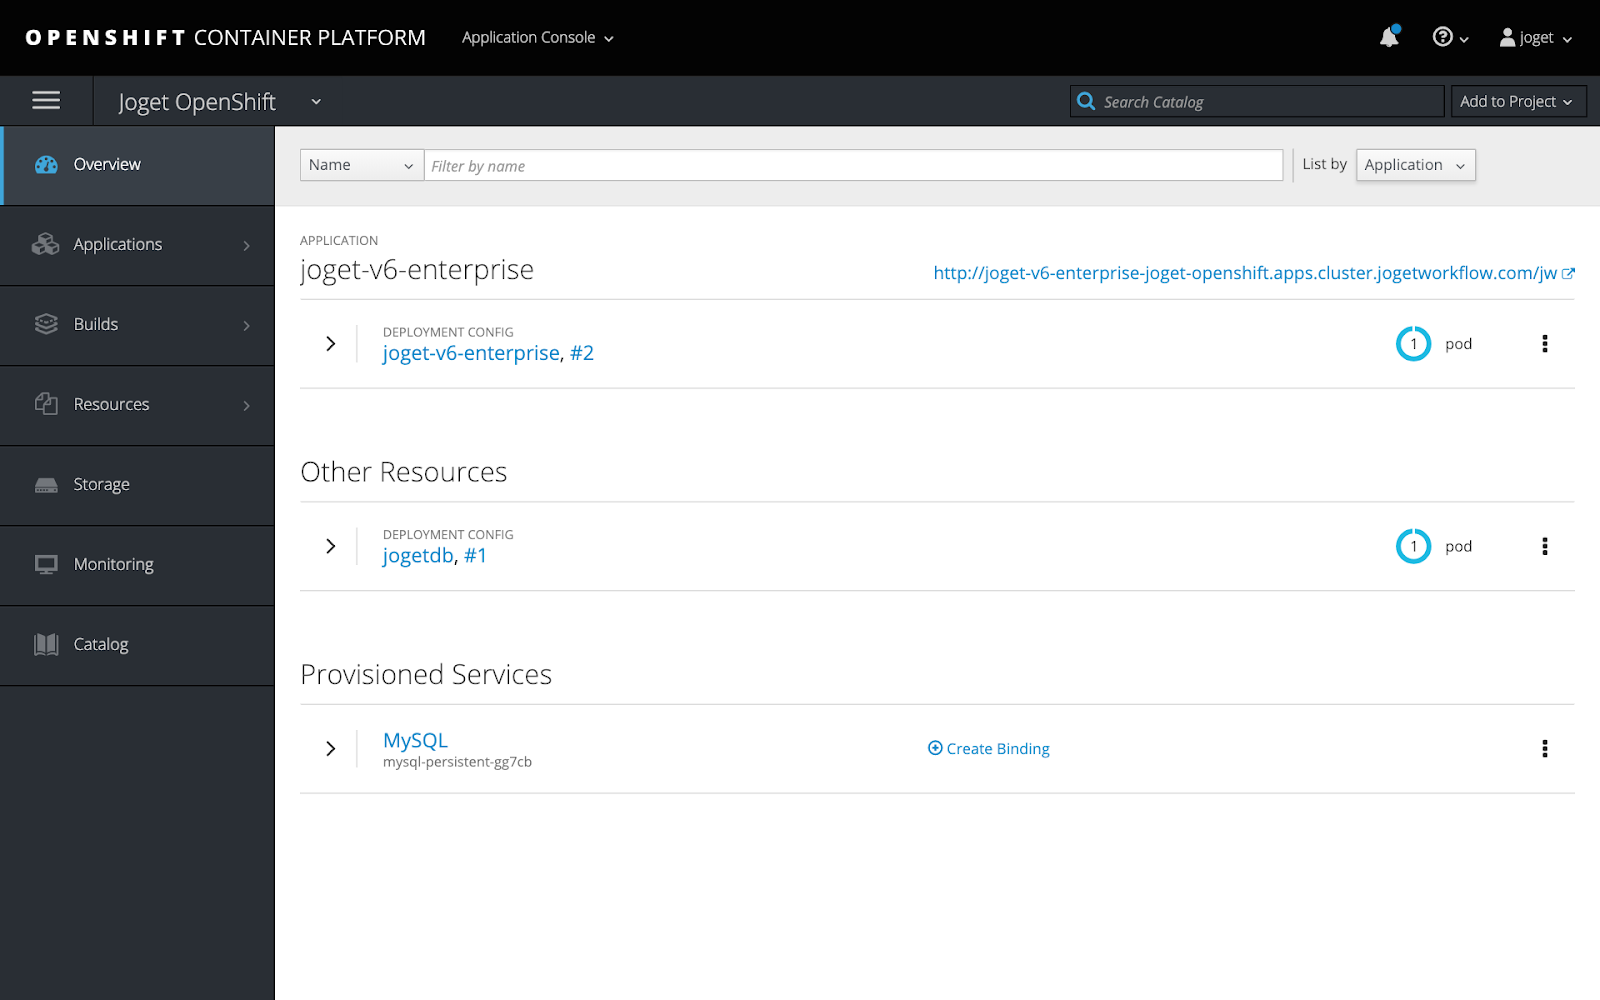
Return to the Overview and click on the URL next to the application name to launch the Joget platform.
Deploy Joget using the OpenShift CLI
For those more inclined to use a non-graphical command line interface, it is actually faster to use the OpenShift command line interface (CLI) to deploy the Joget platform.
The following is a Linux script to accomplish a similar Joget platform deployment. Before running this script, install the CLI and login. Change the environment variables in the script accordingly, at least the four values below:
PROJECT_NAME | The desired project name |
REGISTRY_USERNAME | Red Hat account username |
REGISTRY_PASSWORD | Red Hat account password |
REGISTRY_EMAIL | Red Hat account email |
| Code Block | ||
|---|---|---|
| ||
#!/bin/sh

export PROJECT_NAME=joget-openshift
export REGISTRY_USERNAME=email@domain
export REGISTRY_PASSWORD=password
export REGISTRY_EMAIL=email@domain
export REGISTRY_SERVER=registry.connect.redhat.com
export IMAGE_NAMESPACE=joget
export IMAGE_NAME=joget-v6-enterprise
export IMAGE_TAG=latest
export APP_NAME=joget-v6-enterprise
export DB_APP_NAME=joget-mysql
export STORAGE_NAME=joget-data
export MYSQL_DATABASE=jwdb
export MYSQL_USER=joget
export MYSQL_PASSWORD=joget

echo === deploy Joget on OpenShift ===
echo PROJECT_NAME: $PROJECT_NAME
echo REGISTRY_SERVER: $REGISTRY_SERVER
echo REGISTRY_USERNAME: $REGISTRY_USERNAME
echo REGISTRY_EMAIL: $REGISTRY_EMAIL
echo IMAGE_NAMESPACE: $IMAGE_NAMESPACE
echo IMAGE_NAME: $IMAGE_NAME
echo IMAGE_TAG $IMAGE_TAG
echo IMAGE_NAME: $IMAGE_NAME
echo APP_NAME: $APP_NAME
echo DB_APP_NAME: $DB_APP_NAME
echo STORAGE_NAME: $STORAGE_NAME
echo MYSQL_DATABASE: $MYSQL_DATABASE
echo MYSQL_USER: $MYSQL_USER
echo MYSQL_PASSWORD: $MYSQL_PASSWORD

echo === create project ===
oc new-project $PROJECT_NAME

echo === deploy MySQL ===
oc new-app openshift/mysql:5.7 --name $DB_APP_NAME -e MYSQL_USER=$MYSQL_USER -e MYSQL_PASSWORD=$MYSQL_PASSWORD -e MYSQL_DATABASE=$MYSQL_DATABASE

echo === create and bind secret to pull Joget image ===
oc create secret docker-registry $REGISTRY_SERVER --docker-server=$REGISTRY_SERVER --docker-username=$REGISTRY_USERNAME docker-password=$REGISTRY_PASSWORD --docker-email=$REGISTRY_EMAIL
oc secrets link default $REGISTRY_SERVER --for=pull

echo === import Joget image ===
oc import-image $PROJECT_NAME/$IMAGE_NAME --from=$REGISTRY_SERVER/$IMAGE_NAMESPACE/$IMAGE_NAME --confirm

#echo === grant pull permission if from different project ===
#oc policy add-role-to-user system:image-puller system:serviceaccount:$PROJECT_NAME:default -n $IMAGE_NAMESPACE

echo === deploy Joget ===
oc new-app $PROJECT_NAME/$IMAGE_NAME:$IMAGE_TAG -e GC_MAX_METASPACE_SIZE=300 --name $APP_NAME

echo === create persistent storage claim ===
cat <<EOF > pvc.yaml
apiVersion: "v1"
kind: "PersistentVolumeClaim"
metadata:
name: "$STORAGE_NAME"
spec:
accessModes:
  - "ReadWriteMany"
resources:
  requests:
    storage: "1Gi"
EOF
oc create -f pvc.yaml
rm pvc.yaml

echo === mount storage ===
oc set volume dc/$APP_NAME --add --type=persistentVolumeClaim --claim-name=$STORAGE_NAME --mount-path=/opt/joget/wflow

echo === expose service route for external excess ===
oc expose svc $APP_NAME --path=/jw
oc annotate route $APP_NAME --overwrite haproxy.router.openshift.io/timeout=60s
oc get route
echo URL: http://$(oc get route $APP_NAME --template='{{ .spec.host }}')/jw |
Setup Database
The first time the Joget platform is accessed, the Database Setup page will be displayed. Configure the database settings using the values defined when deploying the MySQL database previously e.g.
Database Host | jogetdb |
Database Port | 3306 |
Database Name | jwdb |
Database User | joget |
Database Password | joget |
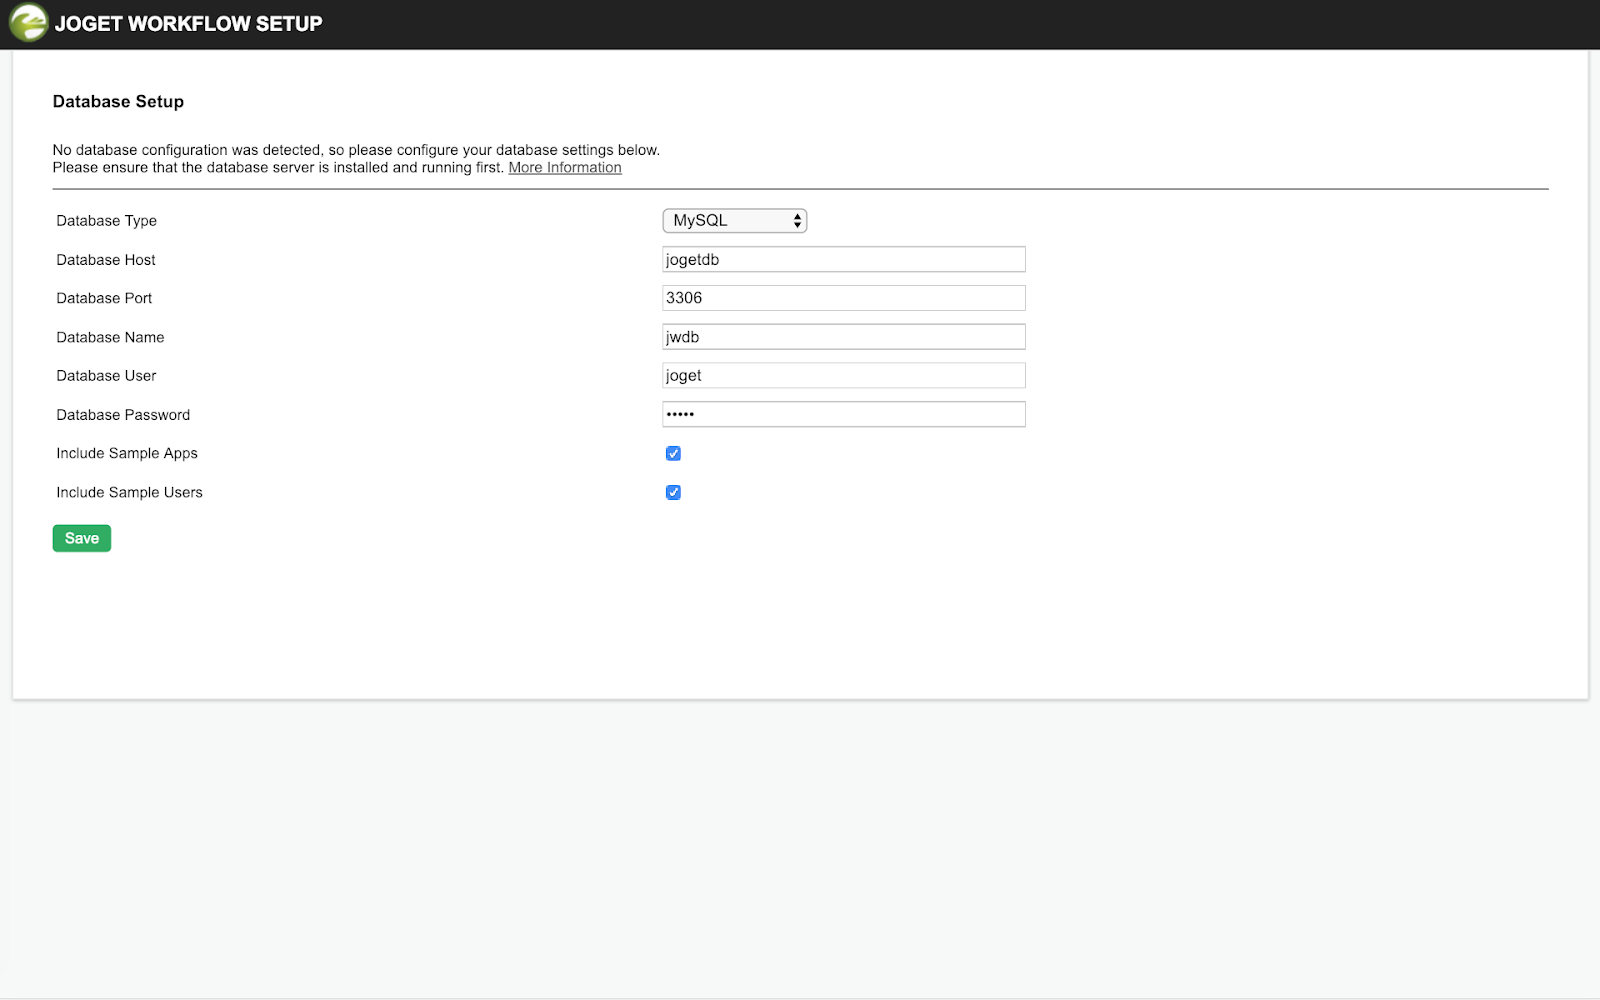
Upon successful configuration, the Joget App Center will be loaded.

| Warning |
|---|
NOTE: If you encounter a 504 Gateway Timeout during the database setup, it is caused by the database initialization taking longer than the default OpenShift Route timeout. You can actually ignore the error and wait a couple of minutes before accessing the Application URL from the Overview page again. You can also increase the route timeout using the OpenShift CLI i.e. oc annotate route $APP_NAME --overwrite haproxy.router.openshift.io/timeout=60s |
默认情况下,创建的pod(一个pod是一个或多个容器的组)只分配了512Mb的内存,所以我们需要分配更多的资源以避免内存错误。
点击Applications> Deployments,然后选择jboss-joget-enterprise 容器。单击向下箭头,将运行的窗格减少到零。
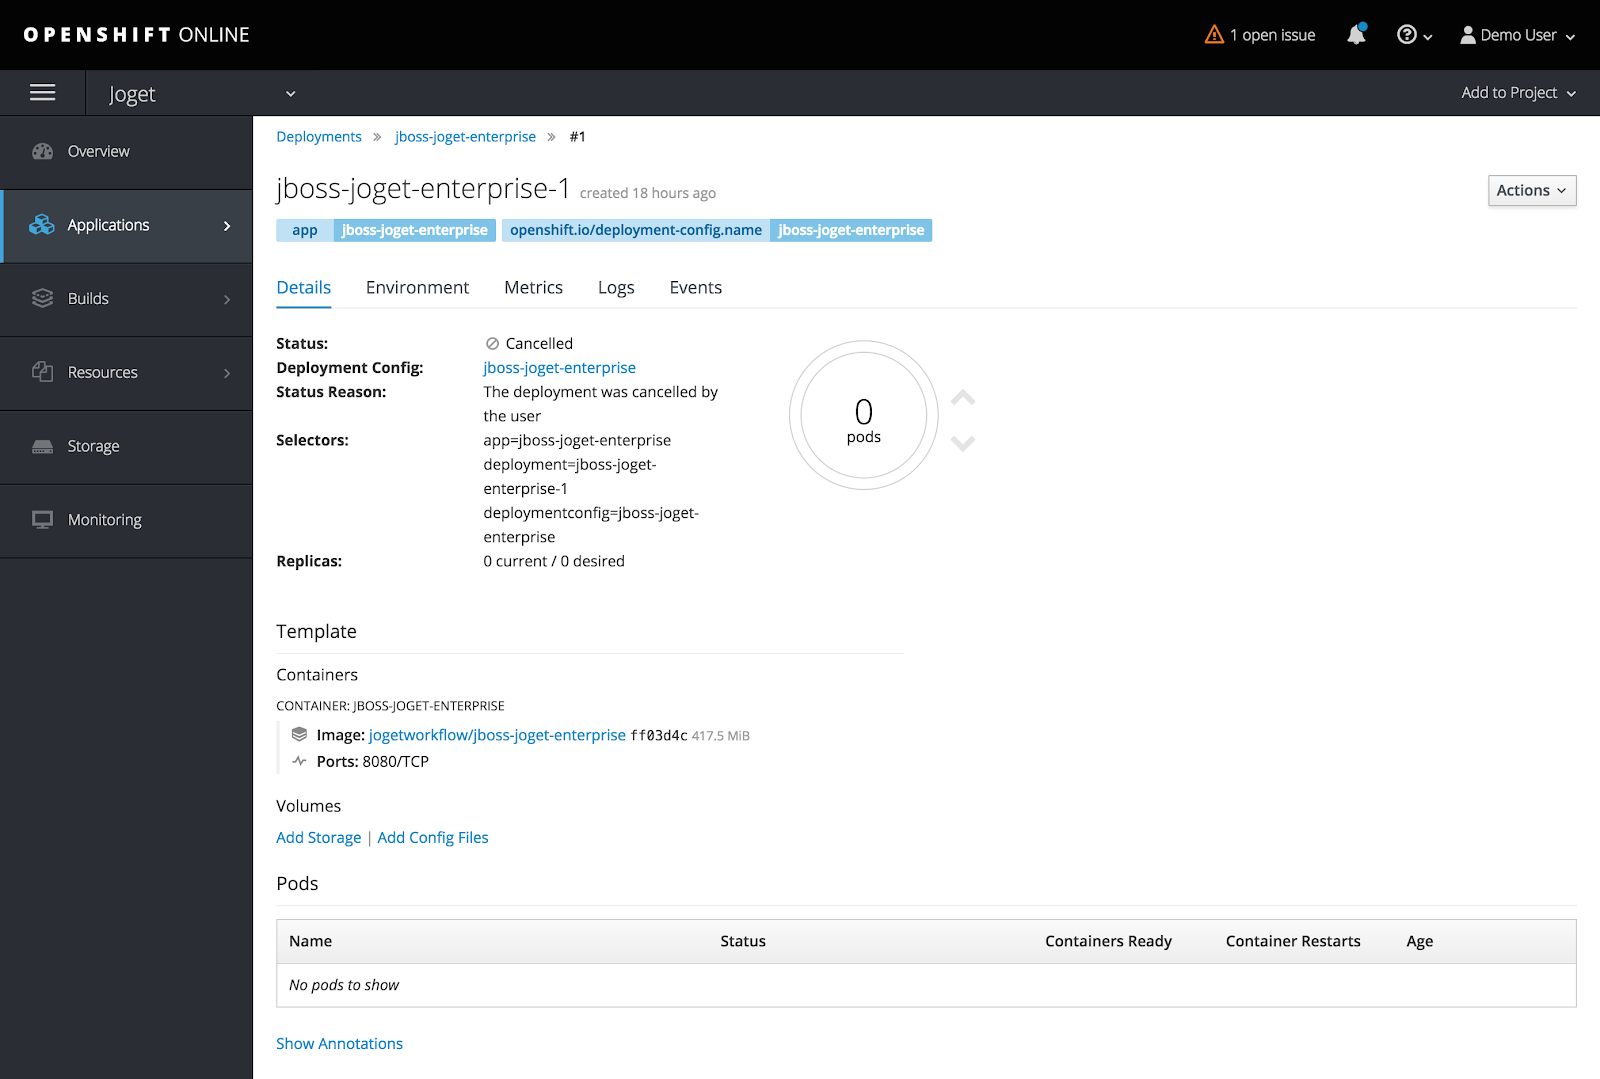
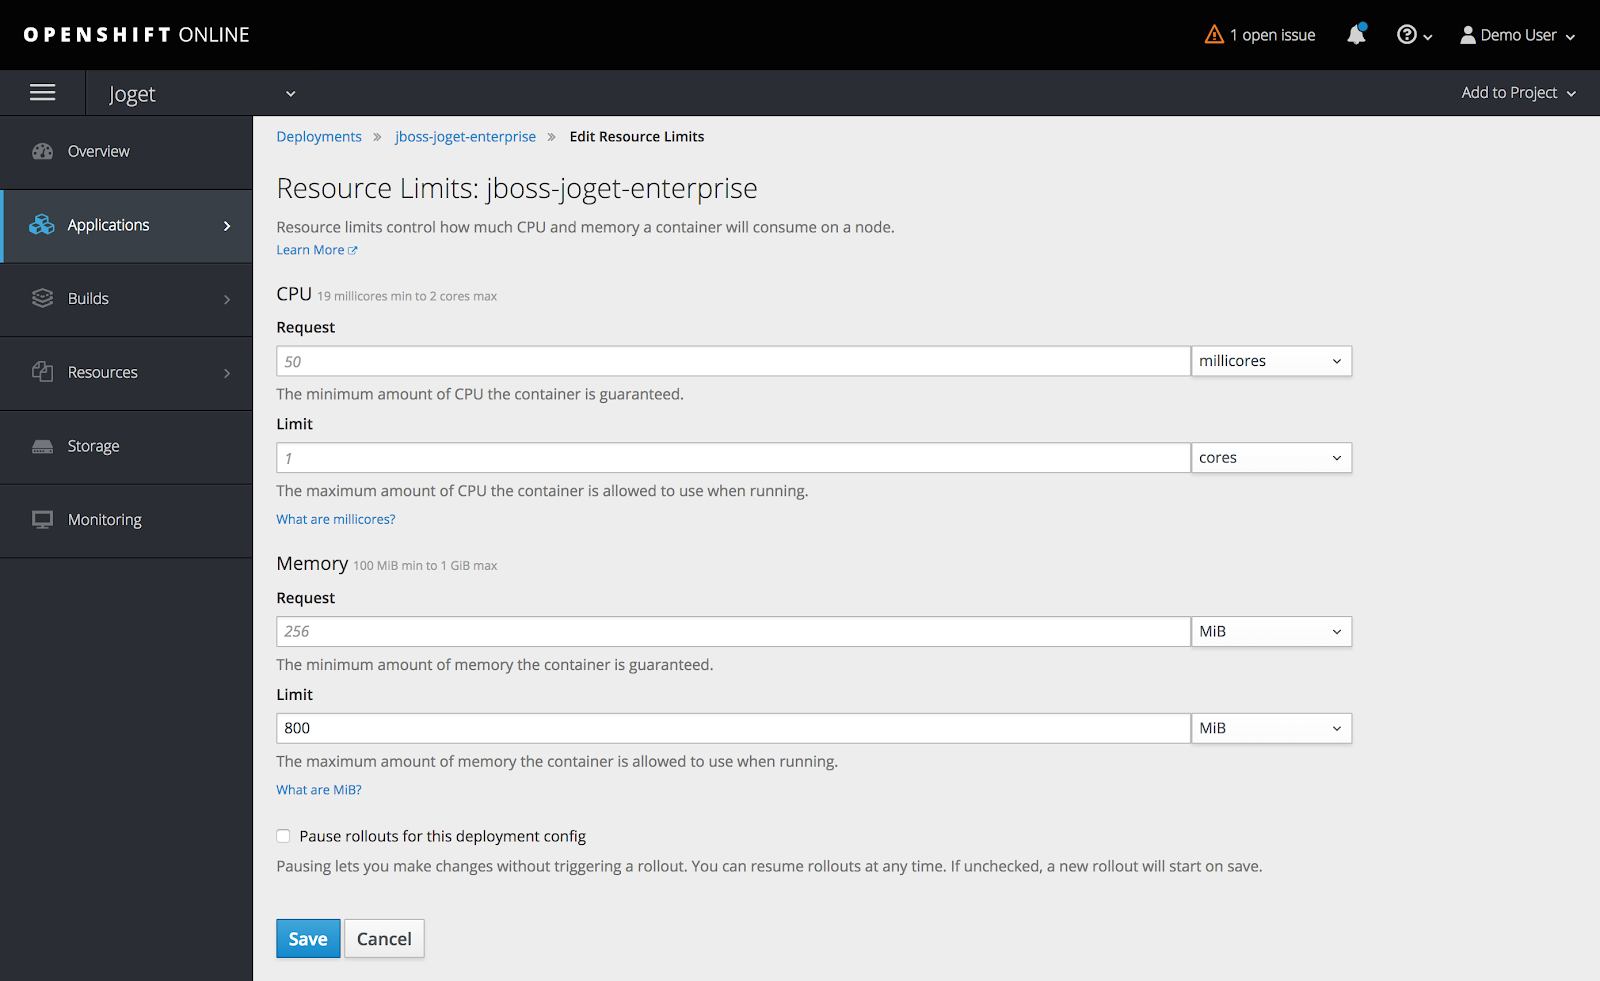
选择 操作>编辑资源限制,将内存限制设置为800兆,然后单击保存。
返回应用程序>部署,并选择最新的jboss-joget-enterprise版本。通过点击向上箭头,将运行的pod调整为一个。此时,一个新的pod将启动,状态应该更改为Active。
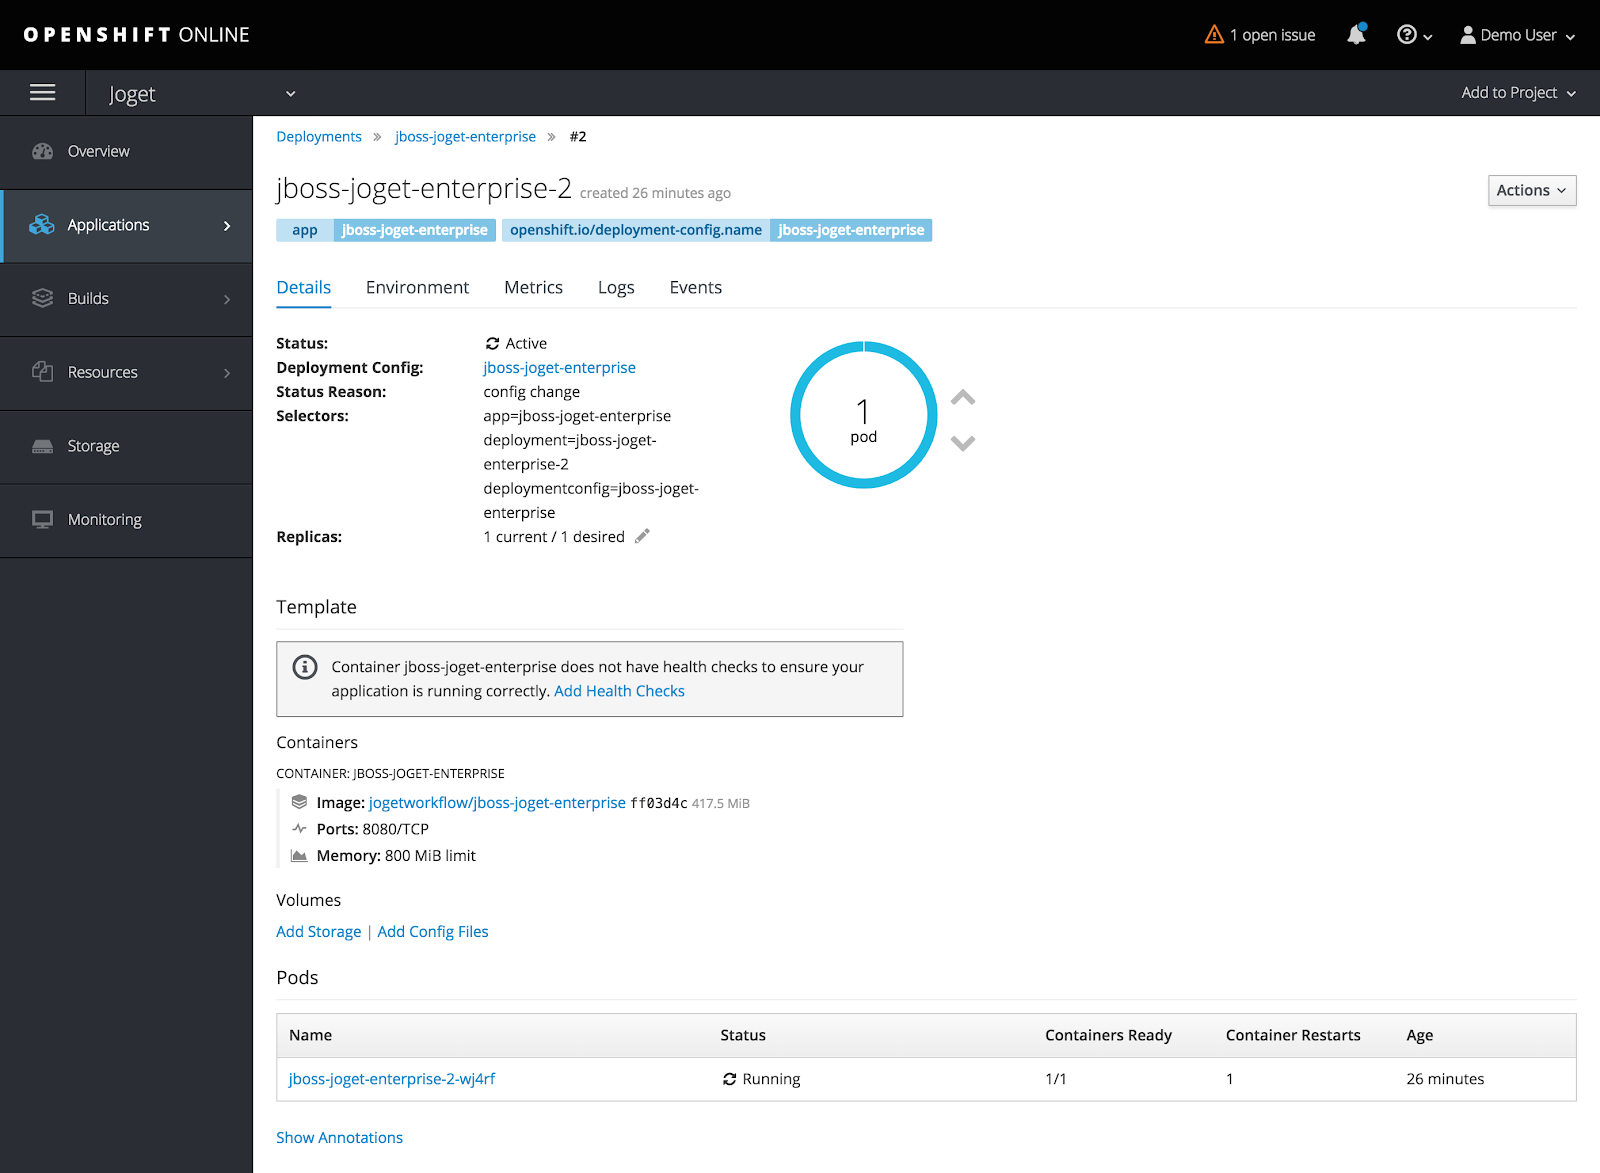
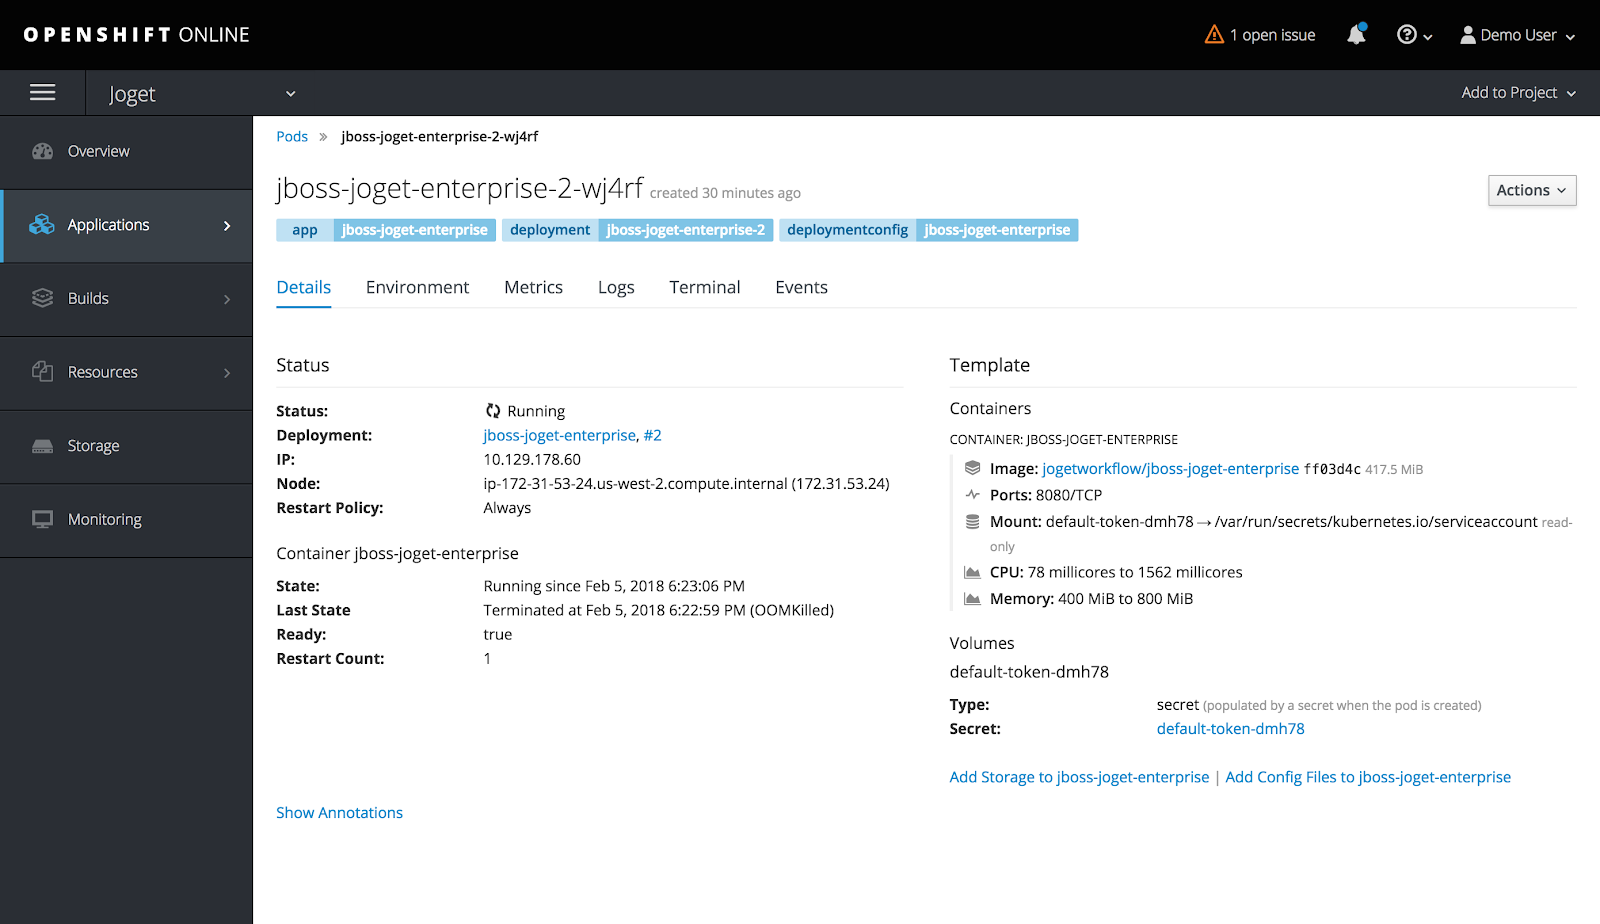
单击pod查看pod详细信息。
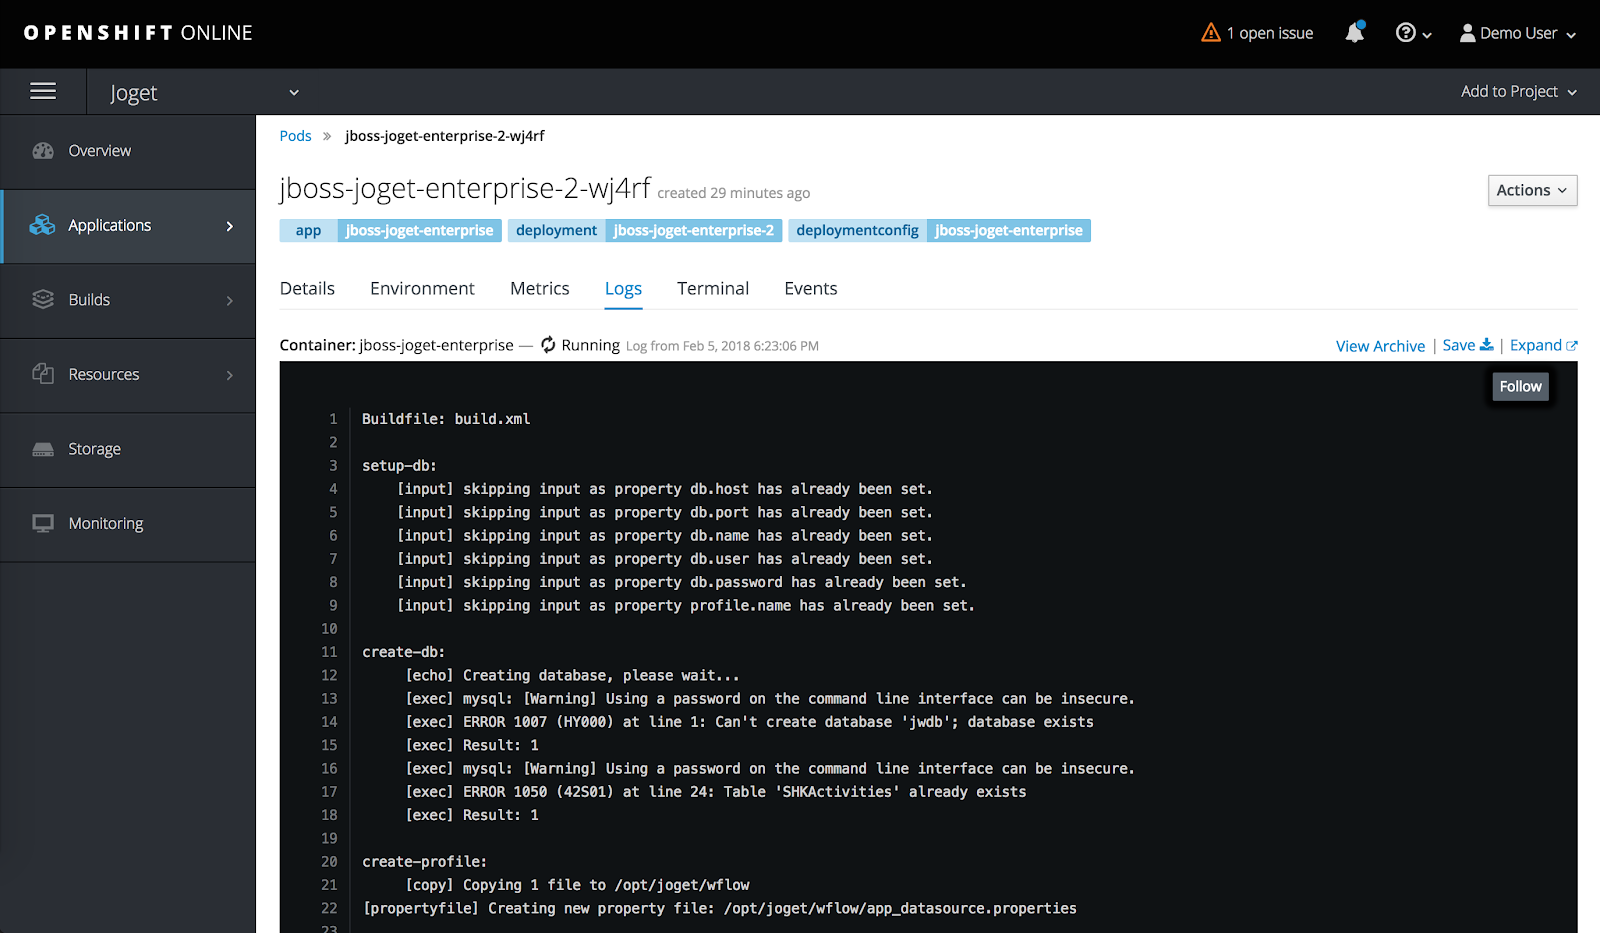
您还可以通过logs选项卡查看pod的运行日志。
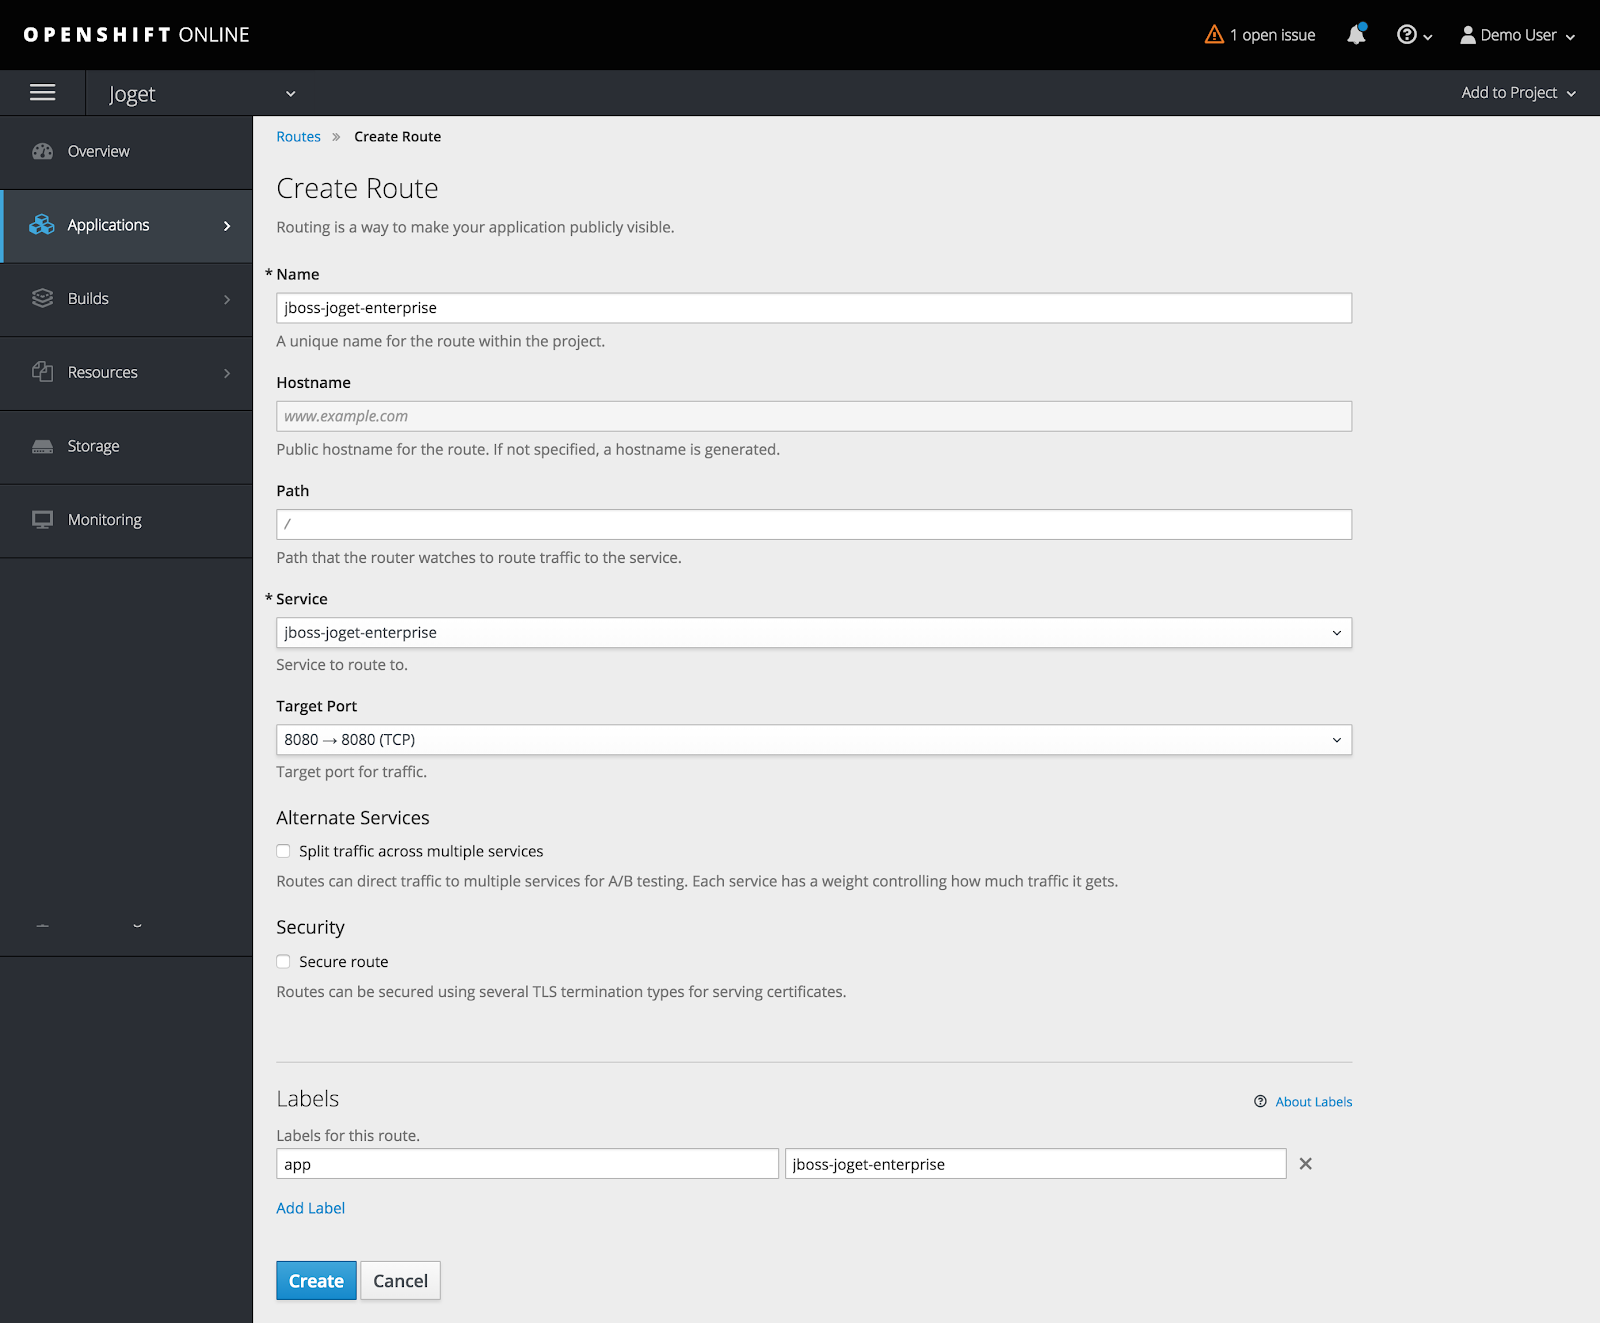
步骤5:为外部访问创建服务路由。
此时,pod正在运行,但无法从外部web浏览器访问,因此您需要创建一条路由,该路由以主机名公开服务。
单击应用程序>服务并选择jboss-joget-enterprise。
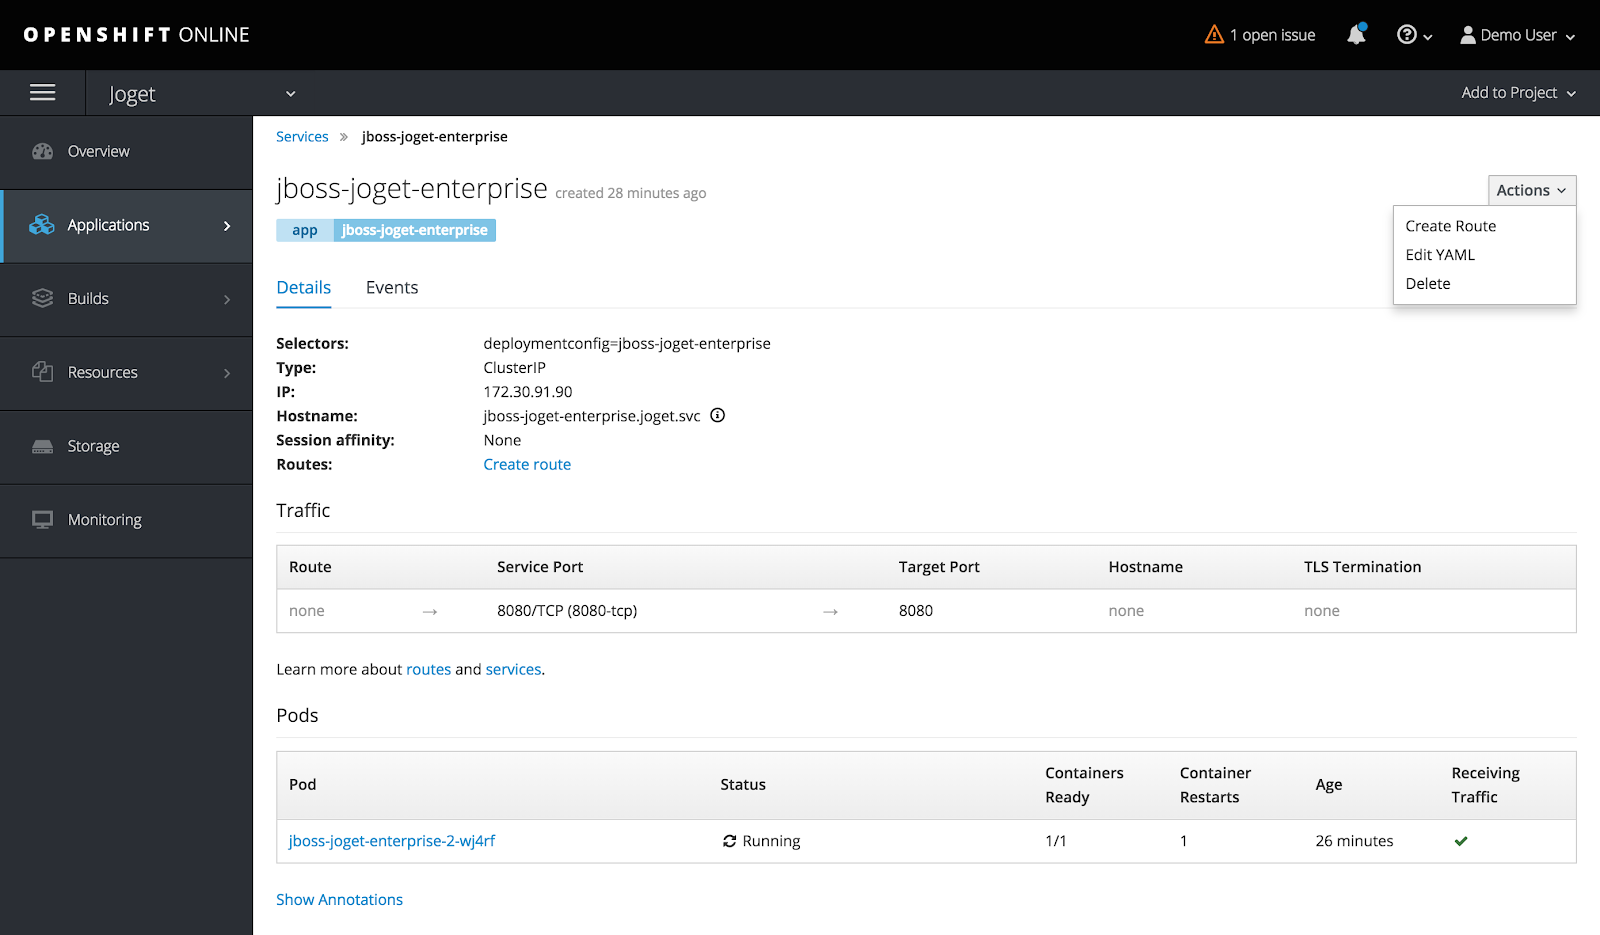
选择 操作>创建路线,然后点击创建。
就是这样。点击主机名链接访问应用程序。
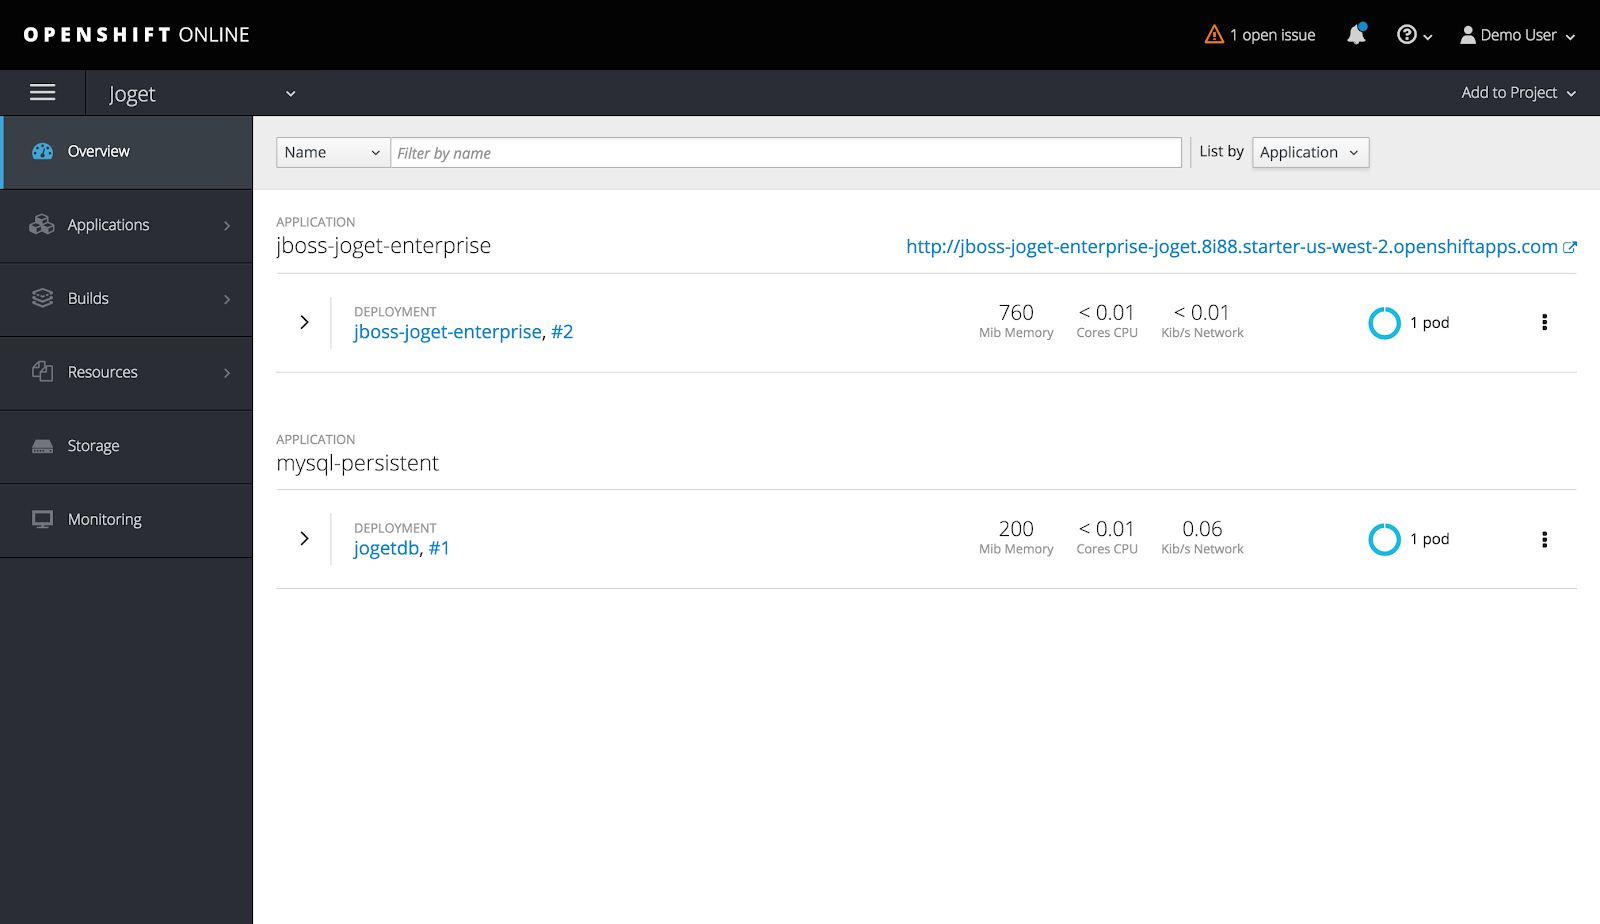
例如,在上面的截图中,URL http://jboss-joget-enterprise joget.8188.starter-us-west-2.openshiftapps.com/返回WildFly欢迎页。

通过在URL中添加/jw来访问Joget工作流,例如http://jboss- Joget -enterprise joget.8188.starter-us-west-2.openshiftapps.com/jw。
