| Table of Contents |
|---|
In this tutorial, we will follow the guideline for developing a plugin to develop our Amazon S3 Datalist Binder plugin. Please also refer to the very first tutorial How to develop a Bean Shell Hash Variable for more details steps.
| Thai |
|---|
ในบทช่วยสอนนี้เราจะทำตามแนวทางในการพัฒนา guideline for developing a plugin Amazon S3 Datalist Binder โปรดอ้างอิงถึง How to develop a Bean Shell Hash Variable สำหรับขั้นตอนรายละเอียดเพิ่มเติม |
1. What is the problem?
| Thai |
|---|
อะไรคือปัญหา? |
We want to retrieve the files information in Amazon S3.
| Thai |
|---|
เราต้องการดึงข้อมูลไฟล์ใน Amazon S3 |
2. How to solve the problem?
| Thai |
|---|
วิธีแก้ปัญหา |
We can either develop a Datalist Binder Plugin or Userview Menu Plugin for this purpose. In this tutorial, we will develop a Datalist Binder Plugin to retrieve the files information and populate it using Datalist Builder.
| Thai |
|---|
เราสามารถพัฒนาปลั๊กอิน Datalist Binder Plugin หรือ Userview Menu Plugin สำหรับวัตถุประสงค์นี้ ในบทช่วยสอนนี้เราจะพัฒนาปลั๊กอิน Datalist Binder Plugin เพื่อดึงข้อมูลไฟล์และเติมข้อมูลโดยใช้ Datalist Builder |
| Note | ||
|---|---|---|
Datalist Binder is not a suitable plugin type for this purpose as the Amazon S3 Client API does not able to get the total number of files and not able to support datalist action like sort, paging and filtering. We are writing this for learning purpose and not encourage for production usage as it will have performance issue. Better way to do this is to develop an Userview Menu which can display the file as a Tree Structure and load additional files when the tree expanded.
|
3. What is the input needed for your plugin?
| Thai |
|---|
สิ่งที่จำเป็นในการป้อนข้อมูลสำหรับปลั๊กอินของคุณ? |
To develop an Amazon S3 Datalist Binder plugin, we will need to provide the input as below:
| Thai |
|---|
ในการพัฒนาปลั๊กอิน Amazon S3 Datalist Binder เราจะต้องให้ข้อมูลดังต่อไปนี้: |
- Amazon S3 API access key
- Amazon S3 API secret
- Amazon S3 Region
- Amazon S3 Bucket
- Folder / prefix to retrieve file list (Optional)
We will do it a little bit different here as some of the inputs will be putting in a properties file and retrieve it from the properties file when needed. Please refer to how is done in File Upload Form Element Integrated with Amazon S3.
| Thai |
|---|
เราจะทำแตกต่างกันเล็กน้อยที่นี่เนื่องจากอินพุตบางส่วนจะใส่ในไฟล์คุณสมบัติและดึงข้อมูลจากไฟล์คุณสมบัติเมื่อจำเป็น โปรดอ้างอิงถึงวิธีการทำ File Upload Form Element Integrated with Amazon S3. |
4. What is the output and expected outcome of your plugin?
| Thai |
|---|
ผลลัพธ์และผลลัพธ์ที่คาดหวังของปลั๊กอินของคุณคืออะไร? |
A datalist which will list the files in Amazon S3 bucket based on configuration.
| Thai |
|---|
ข้อมูลที่จะแสดงรายการไฟล์ในที่ฝากข้อมูล Amazon S3 ตามการกำหนดค่า |
5. Are there any resources/API that can be reused?
| Thai |
|---|
มีทรัพยากร / API ที่สามารถนำกลับมาใช้ใหม่ได้หรือไม่? |
We will use the AWS SDK for Java.
| Thai |
|---|
เราจะใช้ AWS SDK for Java |
6. Prepare your development environment
| Thai |
|---|
เตรียมสภาพแวดล้อมการพัฒนาของคุณ |
We need to always have our Joget Workflow Source Code ready and builded by following this guideline.
The following tutorial is prepared with a Macbook Pro and the Joget Source Code is version 5.0.1. Please refer to the Guideline for developing a plugin article for other platform commands.
Let's say our folder directory is as follows.
| Thai |
|---|
เราจำเป็นต้องให้ซอร์สโค้ด Joget Workflow ของเราพร้อมและสร้างโดยปฏิบัติตาม this guideline |
| Code Block |
|---|
- Home
  - joget
    - plugins
    - jw-community
-5.0.1 |
The "plugins" directory is the folder we will create and store all our plugins and the "jw-community" directory is where the Joget Workflow Source code is stored.
Run the following command to create a maven project in "plugins" directory.
| Thai |
|---|
ไดเรกทอรี "ปลั๊กอิน" คือโฟลเดอร์ที่เราจะสร้างและจัดเก็บปลั๊กอินทั้งหมดของเราและไดเรกทอรี "jw-community" เป็นที่เก็บ Joget Workflow Source code เรียกใช้คำสั่งต่อไปนี้เพื่อสร้างโครงการ maven ในไดเรกทอรี "ปลั๊กอิน" |
| Code Block | ||
|---|---|---|
| ||
cd joget/plugins/ ~/joget/jw-community/5.0.1/wflow-plugin-archetype/create-plugin.sh org.joget amazon_s3_datalist_binder 5.0.1 |
Then, the shell script will ask us to key in a version number for the plugin and ask us for a confirmation before it generates the maven project.
| Thai |
|---|
จากนั้นเชลล์สคริปต์จะขอให้เราใส่หมายเลขเวอร์ชันสำหรับปลั๊กอินและขอให้เรายืนยันก่อนที่จะสร้างโครงการ Maven |
| Code Block | ||
|---|---|---|
| ||
Define value for property 'version': 1.0-SNAPSHOT: : 5.0.0 [INFO] Using property: package = org.joget Confirm properties configuration: groupId: org.joget artifactId: amazon_s3_datalist_binder version: 5.0.0 package: org.joget Y: : y |
We should get a "BUILD SUCCESS" message shown in our terminal and a "amazon_s3_datalist_binder" folder created in the "plugins" folder.
Open the maven project with your favourite IDE. I will be using NetBeans.
| Thai |
|---|
| เราควรได้รับข้อความ "BUILD SUCCESS" ที่ปรากฏในเครื่องของเราและโฟลเดอร์ "amazon_s3_datalist_binder" ที่สร้างขึ้นในโฟลเดอร์ "ปลั๊กอิน" เปิดโครงการ maven ด้วย IDE ที่คุณชื่นชอบ ฉันจะใช้ NetBeans |
7. Just code it!
| Thai |
|---|
เพียงแค่รหัส! |
a. Extending the abstract class of a plugin type
| Thai |
|---|
การขยายคลาสนามธรรมของประเภทปลั๊กอิน |
Create a "AmazonS3DatalistBinder" class under "org.joget" package. Then, extend the class with org.joget.apps.datalist.model.DataListBinderDefault abstract class. Please refer to Datalist Binder Plugin. We will need to implement org.joget.plugin.base.PluginWebSupport interface class as well to provide an Ajax validation in plugin properties page. Please refer to Web Service Plugin.
| Thai |
|---|
สร้างคลาส "AmazonS3DatalistBinder" ภายใต้แพคเกจ "org.joget" จากนั้นขยายคลาสด้วย org.joget.apps.datalist.model.DataListBinderDefault คลาสนามธรรม โปรดอ้างอิงถึง Datalist Binder Plugin เราจะต้องใช้คลาสส่วนติดต่อ org.joget.plugin.base.PluginWebSupport เพื่อให้การตรวจสอบ Ajax ในหน้าคุณสมบัติปลั๊กอิน โปรดอ้างอิง Web Service Plugin |
b. Implement all the abstract methods
| Thai |
|---|
ใช้วิธีนามธรรมทั้งหมด |
As usual, we have to implement all the abstract methods. We will using AppPluginUtil.getMessage method to support i18n and using constant variable MESSAGE_PATH for message resource bundle directory.
| Thai |
|---|
ตามปกติเราต้องใช้วิธีนามธรรมทั้งหมด เราจะใช้วิธี AppPluginUtil.getMessage เพื่อสนับสนุน i18n และใช้ตัวแปร MESSAGE_PATH คงที่สำหรับไดเรกทอรี |
| Code Block | ||||||
|---|---|---|---|---|---|---|
| ||||||
package org.joget;

import org.joget.apps.app.service.AppPluginUtil;
import org.joget.apps.app.service.AppUtil;
import org.joget.apps.datalist.model.DataListBinderDefault;
import org.joget.plugin.base.PluginWebSupport;

public class AmazonS3DatalistBinder extends DataListBinderDefault implements PluginWebSupport {
    private final static String MESSAGE_PATH = "message/AmazonS3DatalistBinder";

    @Override
    public String getName() {
        return "Amazon S3 Datalist Binder";
    }
    @Override
    public String getVersion() {
        return "5.0.0";
    }

    @Override
    public String getClassName() {
        return getClass().getName();
    }

    @Override
    public String getLabel() {
        //support i18n
        return AppPluginUtil.getMessage("org.joget.AmazonS3DatalistBinder.pluginLabel", getClassName(), MESSAGE_PATH);
    }
    @Override
    public String getDescription() {
        //support i18n
        return AppPluginUtil.getMessage("org.joget.AmazonS3DatalistBinder.pluginDesc", getClassName(), MESSAGE_PATH);
    }

    @Override
    public String getPropertyOptions() {
        return AppUtil.readPluginResource(getClass().getName(), "/properties/amazonS3DatalistBinder.json", null, true, MESSAGE_PATH);
    }

} |
Now, we have to create a UI for admin user to provide inputs for our plugin. In getPropertyOptions method, we already specify our Plugin Properties Options definition file is located at "/properties/amazonS3DatalistBinder.json". Let us create a directory "resources/properties" under "amazon_s3_datalist_binder/src/main" directory. After creating the directory, create a file named "amazonS3DatalistBinder.json" in the "properties" folder.
| Thai |
|---|
ตอนนี้เราต้องสร้าง UI สำหรับผู้ใช้ผู้ดูแลระบบเพื่อให้อินพุตสำหรับปลั๊กอินของเรา ในวิธีการ getPropertyOptions เราได้ระบุไฟล์ข้อกำหนด Plugin Properties Options ของเราแล้วที่ "/properties/amazonS3DatalistBinder.json" ให้เราสร้างไดเรกทอรี "resources / properties" ภายใต้ไดเรกทอรี "amazon_s3_datalist_binder / src / main" หลังจากสร้างไดเรกทอรีให้สร้างไฟล์ชื่อ "amazonS3DatalistBinder.json" ในโฟลเดอร์ "properties" |
In the properties definition options file, we will need to provide options as below. Please note that we can use "@@message.key@@" syntax to support i18n in our properties options. As mentioned previously, some of the properties will put in a properties file, so only 1 property exist in our Plugin Properties Options definition file. We will have an AJAX validation to validate the properties file is exist and able to connect to Amazon S3 service.
| Thai |
|---|
ในไฟล์ตัวเลือกคำจำกัดความของคุณสมบัติเราจะต้องระบุตัวเลือกดังต่อไปนี้ โปรดทราบว่าเราสามารถใช้ไวยากรณ์ "@@ message.key @@" เพื่อรองรับ i18n ในตัวเลือกคุณสมบัติของเรา ตามที่กล่าวไว้ก่อนหน้าคุณสมบัติบางอย่างจะใส่ไว้ในไฟล์คุณสมบัติดังนั้นมีเพียง 1 คุณสมบัติเท่านั้นในไฟล์นิยาม Plugin Properties Options ของเรา เราจะมีการตรวจสอบ AJAX เพื่อตรวจสอบความถูกต้องของไฟล์คุณสมบัติและสามารถเชื่อมต่อกับบริการ Amazon S3 |
| Code Block | ||
|---|---|---|
| ||
[{
    title : '@@AmazonS3DatalistBinder.config@@',
    properties : [{
        name : 'folder',
        label : '@@AmazonS3DatalistBinder.folder@@',
        type : 'textfield'
    }],
    validators : [{
        type : 'AJAX',
        url : '[CONTEXT_PATH]/web/json/app[APP_PATH]/plugin/org.joget.AmazonS3DatalistBinder/service?action=validate'
    }]
}] |
Other properties will put in awsS3.properties file. This properties file will need to put in your wflow folder.
After completing the properties option to collect inputs, we can work on the main methods of the plugin which are getColumns, getPrimaryKeyColumnName, getData and getDataTotalRowCount method.
| Thai |
|---|
คุณสมบัติอื่น ๆ จะใส่ในไฟล์ awsS3.properties ไฟล์คุณสมบัตินี้จะต้องใส่ในโฟลเดอร์ wflow ของคุณ หลังจากเสร็จสิ้นตัวเลือกคุณสมบัติเพื่อรวบรวมอินพุตเราสามารถทำงานกับวิธีการหลักของปลั๊กอินซึ่ง ได้แก่ getColumns, getPrimaryKeyColumnName, getData และ getDataTotalRowCount วิธี |
| Code Block | ||
|---|---|---|
| ||
    protected static AmazonS3 s3;
    protected static Properties properties;
    protected static DataListColumn[] columns;
    protected List<Map<String, Object>> cacheData;

    protected static String getPropertiesPath() {
        return SetupManager.getBaseSharedDirectory() + "awsS3.properties";
    }

    public static AmazonS3 getClient() throws Exception {
        if (s3 == null) {
            FileInputStream fis = null;
            try {
                properties = new Properties();
                fis = new FileInputStream(new File(getPropertiesPath()));
                properties.load(fis);

                BasicAWSCredentials awsCreds = new BasicAWSCredentials(properties.getProperty("access_key_id"), properties.getProperty("secret_access_key"));
                s3 = new AmazonS3Client(awsCreds);


                Region region = Region.getRegion(Regions.fromName(properties.getProperty("region")));
                s3.setRegion(region);

                if (!s3.doesBucketExist(properties.getProperty("bucket"))) {
                    Bucket bucket = s3.createBucket(properties.getProperty("bucket"));
                    if (bucket == null) {
                        throw new RuntimeException(AppPluginUtil.getMessage("AmazonS3DatalistBinder.bucketFilToCreate", AmazonS3DatalistBinder.class.getName(), MESSAGE_PATH));
                    }
                }
            } catch (Exception e) {
                LogUtil.error(AmazonS3DatalistBinder.class.getName(), e, "");
                s3 = null;

                if (e instanceof FileNotFoundException) {
                    throw new RuntimeException(AppPluginUtil.getMessage("AmazonS3DatalistBinder.configureationFileIsMissing", AmazonS3DatalistBinder.class.getName(), MESSAGE_PATH));
                } else {
                    throw e;
                }
            } finally {
                try {
                    if (fis != null) {
                        fis.close();
                    }
                } catch (Exception e) {}
            }
        }
        return s3;
    }

    protected List<Map<String, Object>> getCacheData() {
        if (cacheData == null) {
            cacheData = new ArrayList<Map<String, Object>>();
            try {
                AmazonS3 client = getClient();
                String prefix = getPropertyString("folder");
                if (prefix.isEmpty()) {
                    prefix = null;
                }
                ObjectListing listing = client.listObjects(properties.getProperty("bucket"), prefix);
                boolean cont;
                do {
                    cont = false;

                    List<S3ObjectSummary> summaries = listing.getObjectSummaries();
                    for (S3ObjectSummary s : summaries) {
                        Map<String, Object> obj = new HashMap<String, Object>();
                        String key = s.getKey();
                        int pos = key.lastIndexOf("/");
                        obj.put("key", key);
                        obj.put("path", (pos > 0)?(key.substring(0, pos-1)):"");
                        obj.put("filename", (pos > 0)?(key.substring(pos+1)):key);
                        obj.put("owner", s.getOwner().getDisplayName());
                        obj.put("md5", s.getETag());
                        obj.put("size", s.getSize());
                        obj.put("storageClass", s.getStorageClass());
                        obj.put("lastModified", s.getLastModified());

                        cacheData.add(obj);
                    }

                    if (listing.isTruncated()) {
                        cont = true;
                        listing = client.listNextBatchOfObjects(listing);
                    }
                } while (cont);
            } catch (Exception e) {}
        }
        return cacheData;
    }

    public DataListColumn[] getColumns() {
        if (columns == null) {
            Collection<DataListColumn> list = new ArrayList<DataListColumn>();
            list.add(new DataListColumn("key", AppPluginUtil.getMessage("AmazonS3DatalistBinder.key", getClassName(), MESSAGE_PATH), true));
            list.add(new DataListColumn("path", AppPluginUtil.getMessage("AmazonS3DatalistBinder.path", getClassName(), MESSAGE_PATH), true));
            list.add(new DataListColumn("filename", AppPluginUtil.getMessage("AmazonS3DatalistBinder.filename", getClassName(), MESSAGE_PATH), true));
            list.add(new DataListColumn("owner", AppPluginUtil.getMessage("AmazonS3DatalistBinder.owner", getClassName(), MESSAGE_PATH), true));
            list.add(new DataListColumn("md5", AppPluginUtil.getMessage("AmazonS3DatalistBinder.md5", getClassName(), MESSAGE_PATH), false));
            list.add(new DataListColumn("size", AppPluginUtil.getMessage("AmazonS3DatalistBinder.size", getClassName(), MESSAGE_PATH), true));
            list.add(new DataListColumn("storageClass", AppPluginUtil.getMessage("AmazonS3DatalistBinder.storageClass", getClassName(), MESSAGE_PATH), true));
            list.add(new DataListColumn("lastModified", AppPluginUtil.getMessage("AmazonS3DatalistBinder.lastModified", getClassName(), MESSAGE_PATH), true));

            columns = list.toArray(new DataListColumn[]{});
        }
        return columns;
    }

    public String getPrimaryKeyColumnName() {
        return "key";
    }

    public DataListCollection getData(DataList dataList, Map properties, DataListFilterQueryObject[] filterQueryObjects, String sort, Boolean desc, Integer start, Integer rows) {
        //TODO: handle filterQueryObjects

        List list = PagingUtils.sortAndPage(getCacheData(), sort, desc, start, rows);
        DataListCollection data = new DataListCollection();
        data.addAll(list);

        return data;
    }
    public int getDataTotalRowCount(DataList dataList, Map properties, DataListFilterQueryObject[] filterQueryObjects) {
        //TODO: handle filterQueryObjects

        return getCacheData().size();
} |
In our plugin properties, we have an AJAX validation to test the properties file and the connection to Amazon S3 Client. Let implement the webService method to provide an API for validation.
| Thai |
|---|
ในคุณสมบัติปลั๊กอินของเราเรามีการตรวจสอบ AJAX เพื่อทดสอบไฟล์คุณสมบัติและการเชื่อมต่อกับไคลเอนต์ Amazon S3 ให้ใช้วิธีการ webService เพื่อให้ API สำหรับการตรวจสอบ |
| Code Block | ||
|---|---|---|
| ||
    public void webService(HttpServletRequest request, HttpServletResponse response) throws ServletException, IOException {
        boolean isAdmin = WorkflowUtil.isCurrentUserInRole(WorkflowUserManager.ROLE_ADMIN);
        if (!isAdmin) {
            response.sendError(HttpServletResponse.SC_UNAUTHORIZED);
            return;
        }

        String action = request.getParameter("action");
        if ("validate".equals(action)) {
            String message = "";
            boolean success = true;
            try {
                AmazonS3DatalistBinder.getClient();
            } catch (Exception e) {
                LogUtil.error(this.getClassName(), e, "");
                success = false;
                message = StringUtil.escapeString(e.getMessage(), StringUtil.TYPE_JAVASCIPT, null);
            }
            try {
                JSONObject jsonObject = new JSONObject();
                jsonObject.accumulate("status", (success?"success":"fail"));
                JSONArray messageArr = new JSONArray();
                messageArr.put(message);
                jsonObject.put("message", messageArr);
                jsonObject.write(response.getWriter());
            } catch (Exception e) {
                //ignore
            }
        } else {
            response.setStatus(HttpServletResponse.SC_NO_CONTENT);
        }
} |
c. Manage the dependency libraries of your plugin
| Thai |
|---|
จัดการไลบรารีของปลั๊กอินของคุณ |
We need to include "jsp-api" and "aws-java-sdk-s3" libraries in our POM file.
| Thai |
|---|
เราจำเป็นต้องรวมไลบรารี "jsp-api" และ "aws-java-sdk-s3" ไว้ในไฟล์ POM ของเรา |
| Code Block |
|---|
        <!-- Change plugin specific dependencies here -->
        <dependency>
            <groupId>javax.servlet</groupId>
            <artifactId>jsp-api</artifactId>
            <version>2.0</version>
        </dependency>
        <dependency>
            <groupId>com.amazonaws</groupId>
            <artifactId>aws-java-sdk-s3</artifactId>
            <version>1.10.56</version>
        </dependency>
<!-- End change plugin specific dependencies here --> |
d. Make your plugin internationalization (i18n) ready
| Thai |
|---|
เตรียมปลั๊กอินสากลให้พร้อม (i18n) |
We are using i18n message key in getLabel and getDescription method. We will use i18n message key in our properties options definition as well. Then, we will need to create a message resource bundle properties file for our plugin.
| Thai |
|---|
เรากำลังใช้คีย์ข้อความ i18n ในวิธี getLabel และ getDescription เราจะใช้คีย์ข้อความ i18n ในการกำหนดตัวเลือกคุณสมบัติของเราเช่นกัน จากนั้นเราจะต้องสร้างไฟล์คุณสมบัติมัดทรัพยากรสำหรับปลั๊กอินของเรา |
Create a directory, "resources/message", under "amazon_s3_datalist_binder/src/main" directory. Then, create a "AmazonS3DatalistBinder.properties" file in the folder. In the properties file, add all the message keys and its label as below.
| Thai |
|---|
สร้างไดเรกทอรี "resources / message" ภายใต้ไดเรกทอรี "amazon_s3_datalist_binder / src / main" จากนั้นสร้างไฟล์ "AmazonS3DatalistBinder.properties" ในโฟลเดอร์ ในไฟล์คุณสมบัติให้เพิ่มคีย์ข้อความและป้ายกำกับทั้งหมดดังต่อไปนี้ |
| Code Block |
|---|
org.joget.AmazonS3DatalistBinder.pluginLabel=Amazon S3 Datalist Binder org.joget.AmazonS3DatalistBinder.pluginDesc=Used to retrieve the available files in Amazon S3. AmazonS3DatalistBinder.config=Configure Amazon S3 Datalist Binder AmazonS3DatalistBinder.configureationFileIsMissing=AWS S3 configuration file is missing. AmazonS3DatalistBinder.bucketFilToCreate=AWS Bucket fail to create. AmazonS3DatalistBinder.key=Key AmazonS3DatalistBinder.path=Path AmazonS3DatalistBinder.filename=File Name AmazonS3DatalistBinder.owner=Owner AmazonS3DatalistBinder.md5=MD5 Hash AmazonS3DatalistBinder.size=Size AmazonS3DatalistBinder.storageClass=Storage Class AmazonS3DatalistBinder.lastModified=Last Modified AmazonS3DatalistBinder.folder=Folder |
e. Register your plugin to the Felix Framework
| Thai |
|---|
ลงทะเบียนปลั๊กอินของคุณไปที่ Felix Framework |
Next, we will have to register our plugin class in the Activator class (Auto generated in the same class package) to tell the Felix Framework that this is a plugin.
| Thai |
|---|
ต่อไปเราจะต้องลงทะเบียนคลาสปลั๊กอินของเราในคลาส Activator (สร้างอัตโนมัติในแพ็คเกจคลาสเดียวกัน) เพื่อบอก Felix Framework ว่านี่เป็นปลั๊กอิน |
| Code Block | ||
|---|---|---|
| ||
    public void start(BundleContext context) {
        registrationList = new ArrayList<ServiceRegistration>();
        //Register plugin here
        registrationList.add(context.registerService(AmazonS3DatalistBinder.class.getName(), new AmazonS3DatalistBinder(), null));
} |
f. Build it and test
| Thai |
|---|
สร้างและทดสอบ |
Let's build our plugin. Once the building process is done, we will find a "amazon_s3_datalist_binder-5.0.0.jar" file created under "amazon_s3_datalist_binder/target" directory.
Then, let's upload the plugin jar to Manage Plugins. After uploading the jar file, double check that the plugin is uploaded and activated correctly.
| Thai |
|---|
ใมาสร้างปลั๊กอินของเรากัน เมื่อกระบวนการสร้างเสร็จสิ้นเราจะพบไฟล์ "amazon_s3_datalist_binder-5.0.0.jar" ที่สร้างขึ้นภายใต้ไดเรกทอรี "amazon_s3_datalist_binder / target" จากนั้นลองอัปโหลดปลั๊กอินไปที่ Manage Plugins หลังจากอัปโหลดไฟล์ jar ให้ตรวจสอบอีกครั้งว่ามีการอัปโหลดและเปิดใช้งานปลั๊กอินอย่างถูกต้อง |

Check the Amazon S3 Datalist Binder plugin is available in Datalist Builder.
| Thai |
|---|
ตรวจสอบว่ามีปลั๊กอิน Amazon S3 Datalist Binder อยู่ใน Datalist Builder |
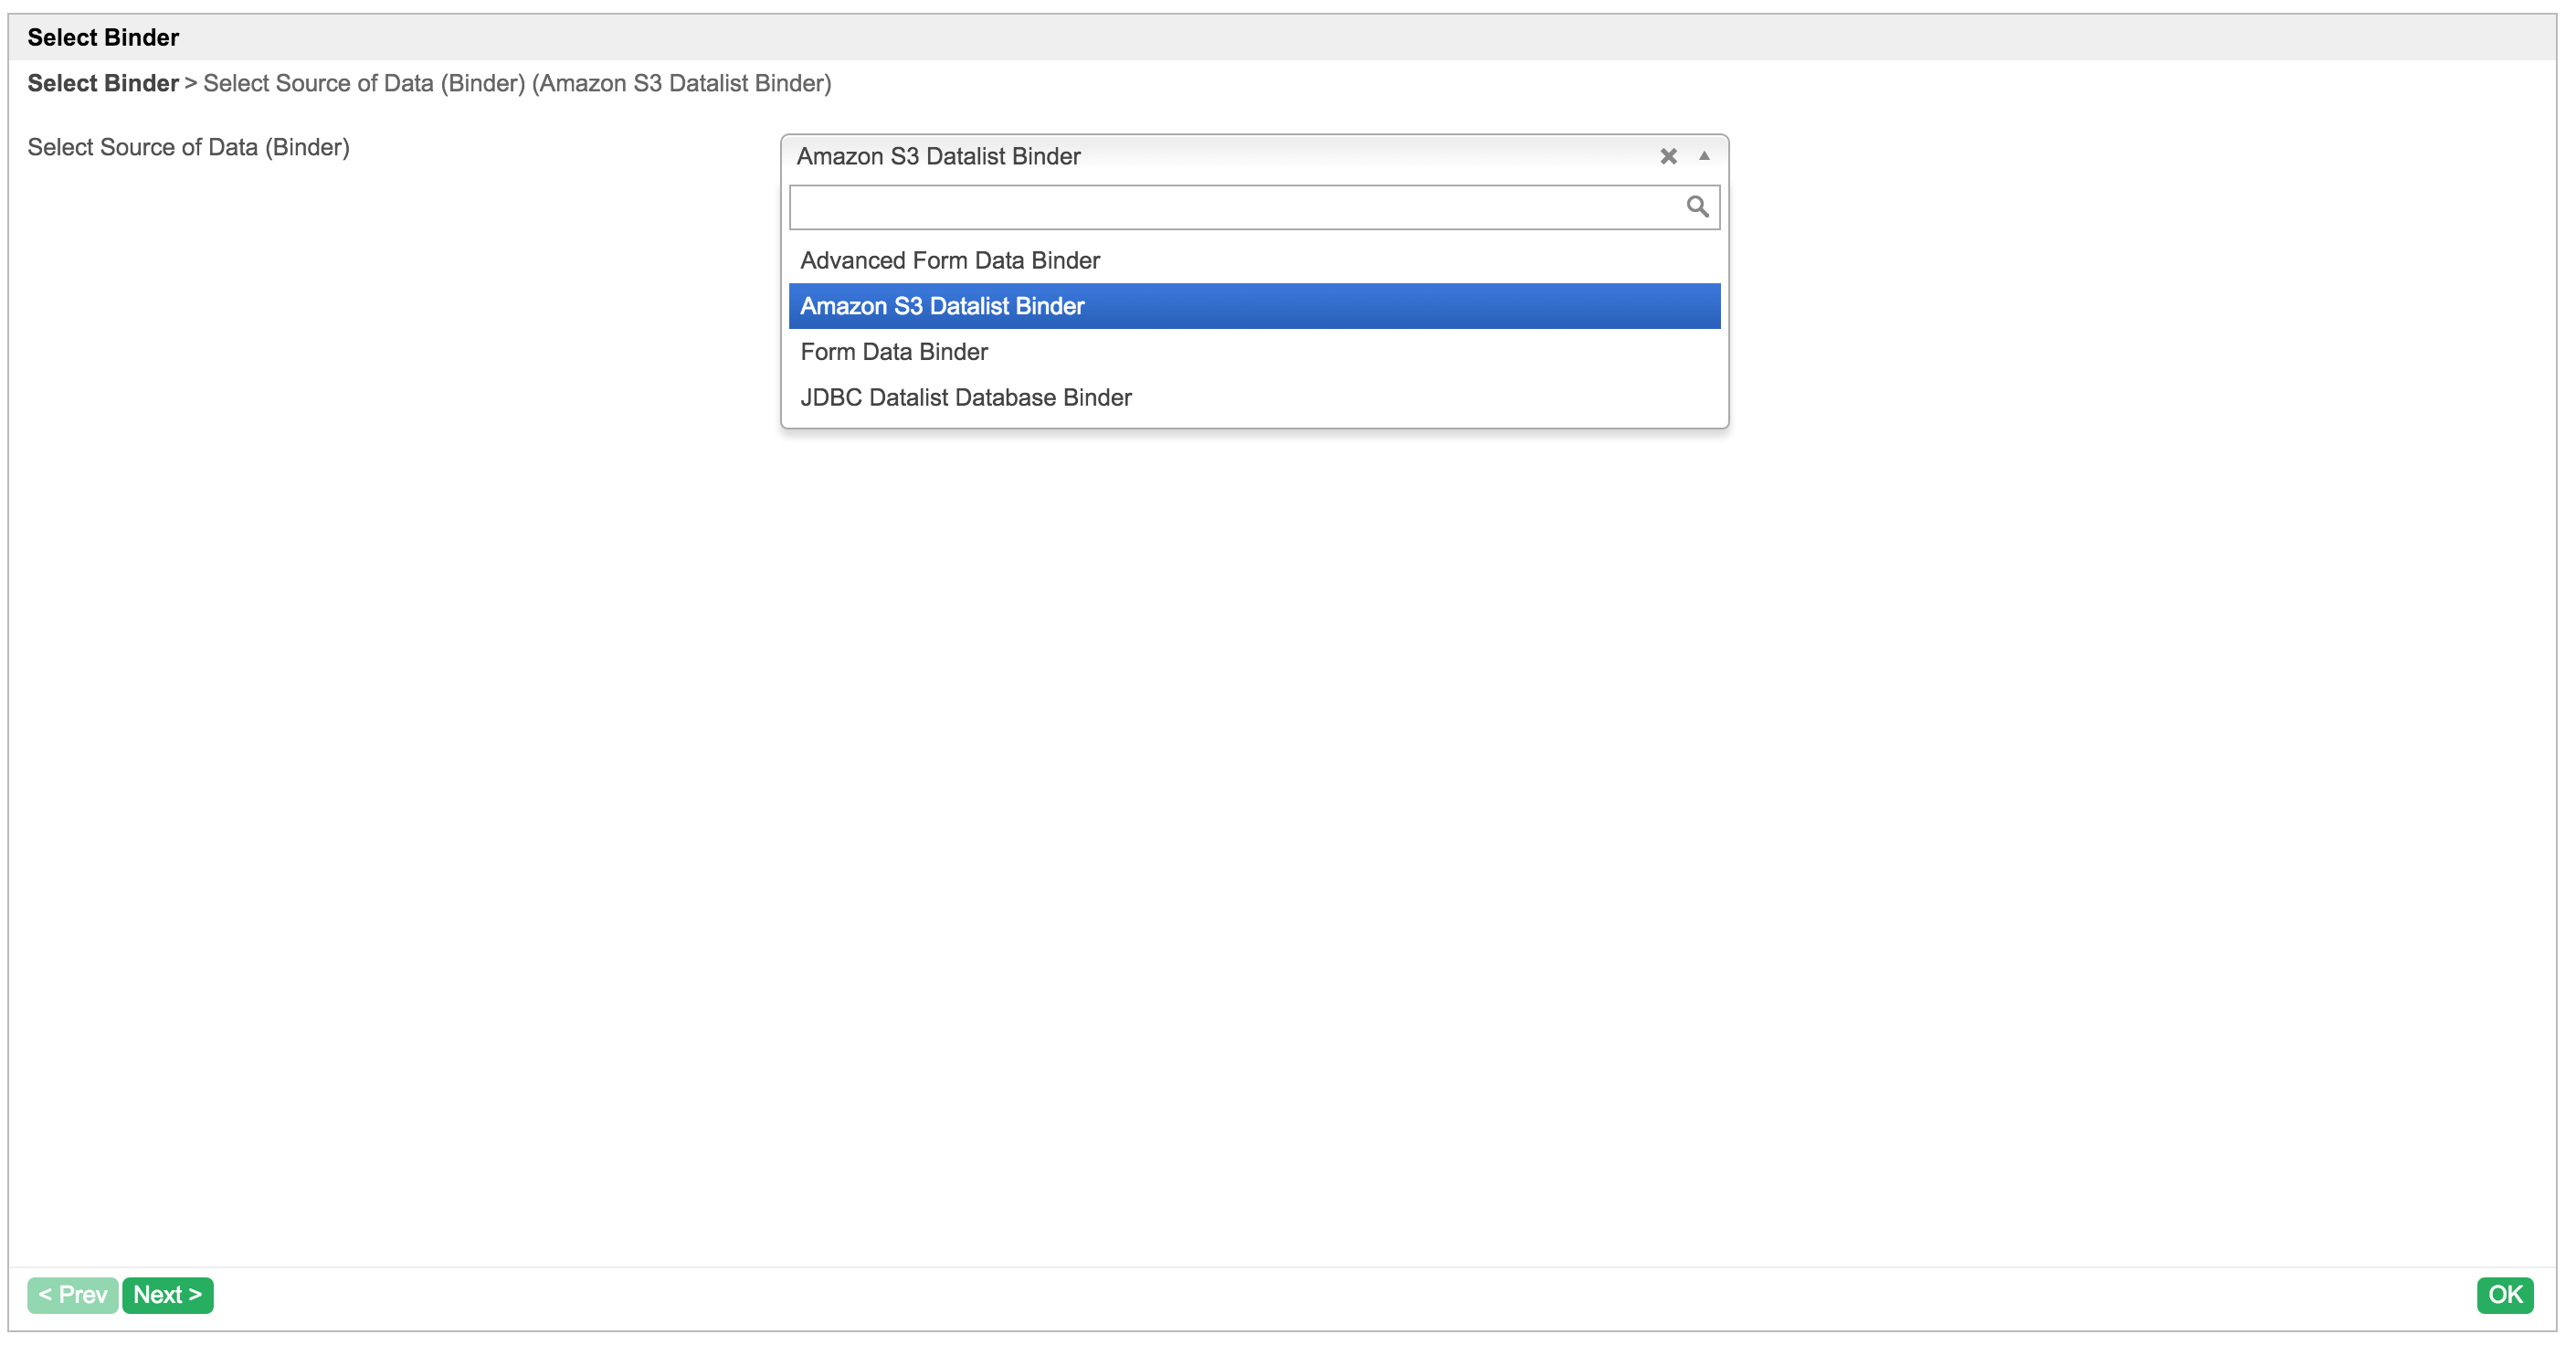
Select and configure the Amazon S3 Datalist Binder.
| Thai |
|---|
เลือกและกำหนดค่า Amazon S3 Datalist Binder |

Press ok. It the awsS3.properties properties file is missing or invalid. Error message will shown.
| Thai |
|---|
กดตกลง ไฟล์คุณสมบัติ awsS3.properties ขาดหายไปหรือไม่ถูกต้อง ข้อความแสดงข้อผิดพลาดจะปรากฏขึ้น |

Design the datalist.
| Thai |
|---|
ออกแบบดาต้าลิสต์ |

Check the result.
| Thai |
|---|
ตรวจสอบผลลัพธ์ |

8. Take a step further, share it or sell it
| Thai |
|---|
ก้าวไปอีกขั้นแบ่งปันหรือขายมัน |
You can download the source code from amazon_s3_datalist_binder_src.zip.
| Thai |
|---|
คุณสามารถดาวน์โหลดซอร์สโค้ดได้จาก amazon_s3_datalist_binder_src.zip |