This article provides a tutorial on deploying, running and scaling Joget on Google Kubernetes Engine (GKE). GKE is a managed Kubernetes service offered by Google Cloud.
Deploy Joget on Google Kubernetes Engine (GKE)
1. Create Kubernetes Cluster
Access the Google Kubernetes Engine console. In the Clusters page, click on the Create cluster button.

You will be presented with several configuration pages. Adjust the cluster configuration as desired, or just use the default values.
In the Cluster basics page, you can configure the name, zone and Kubernetes version for the cluster.

In the Node Pools page, you can configure the number of nodes and scaling options.

Under the Nodes page, you can choose the machine configuration to specify the machine type, CPU and disk options.

Click on the CREATE button at the bottom to start creating the cluster.
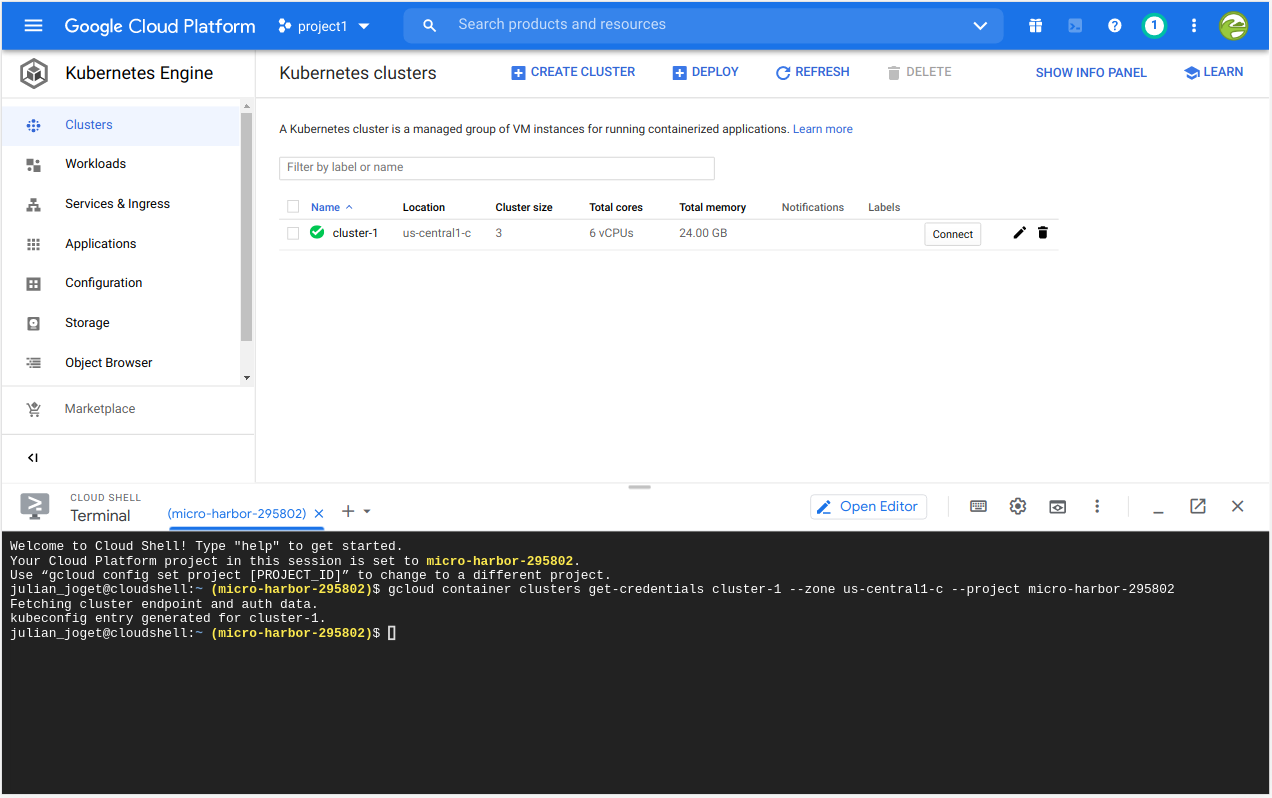
When the cluster has been created, you will see a tick next to the cluster name, and a Connect button will become available.

2. Deploy MariaDB Database
Once we have a running cluster, you will need to deploy a database to be used by the Joget platform. In this case, we will use a MariaDB database that is available in the Google Cloud Marketplace.
Open the Applications page, and click on the Deploy from Marketplace button.
In the Marketplace, search for MariaDB, click on the MariaDB entry and click on the Configure button.

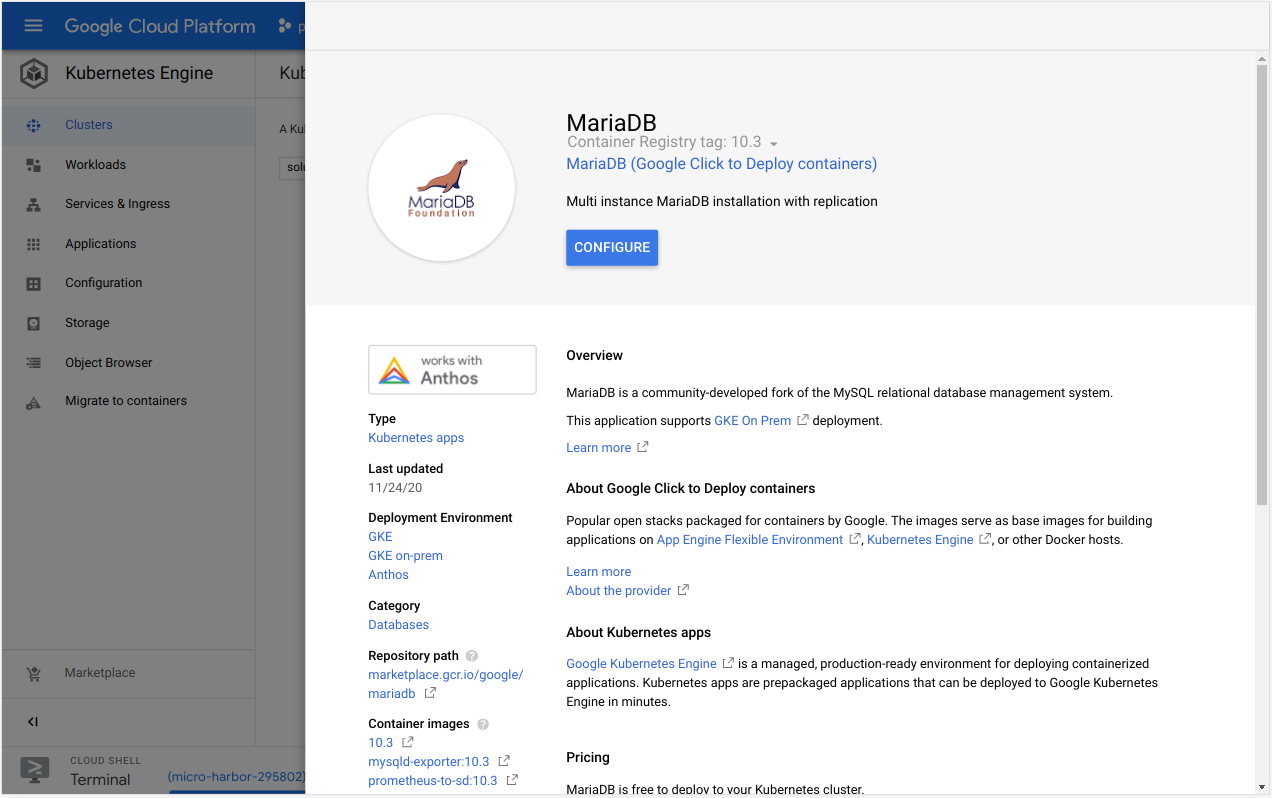
Change the configuration as required, or just use the default values, and click on Deploy. Wait for a few minutes while the MariaDB instance is starting.

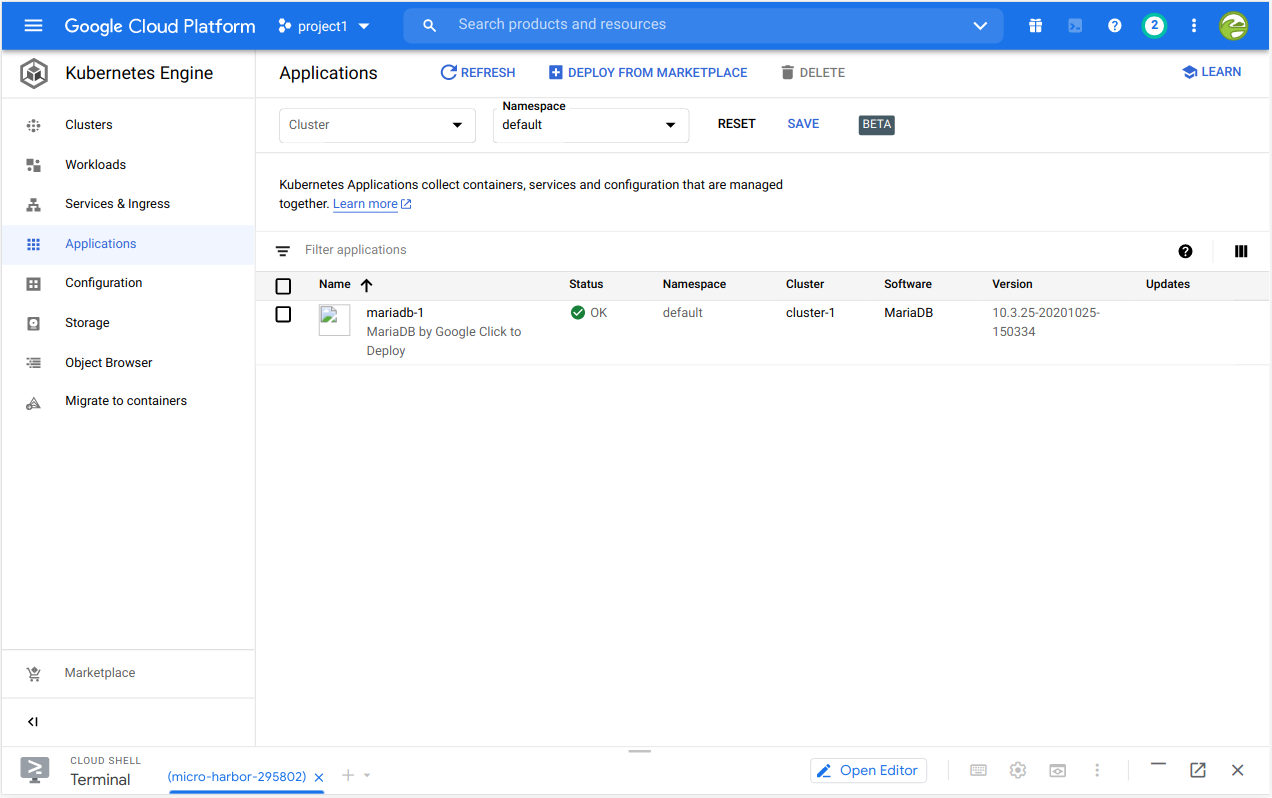
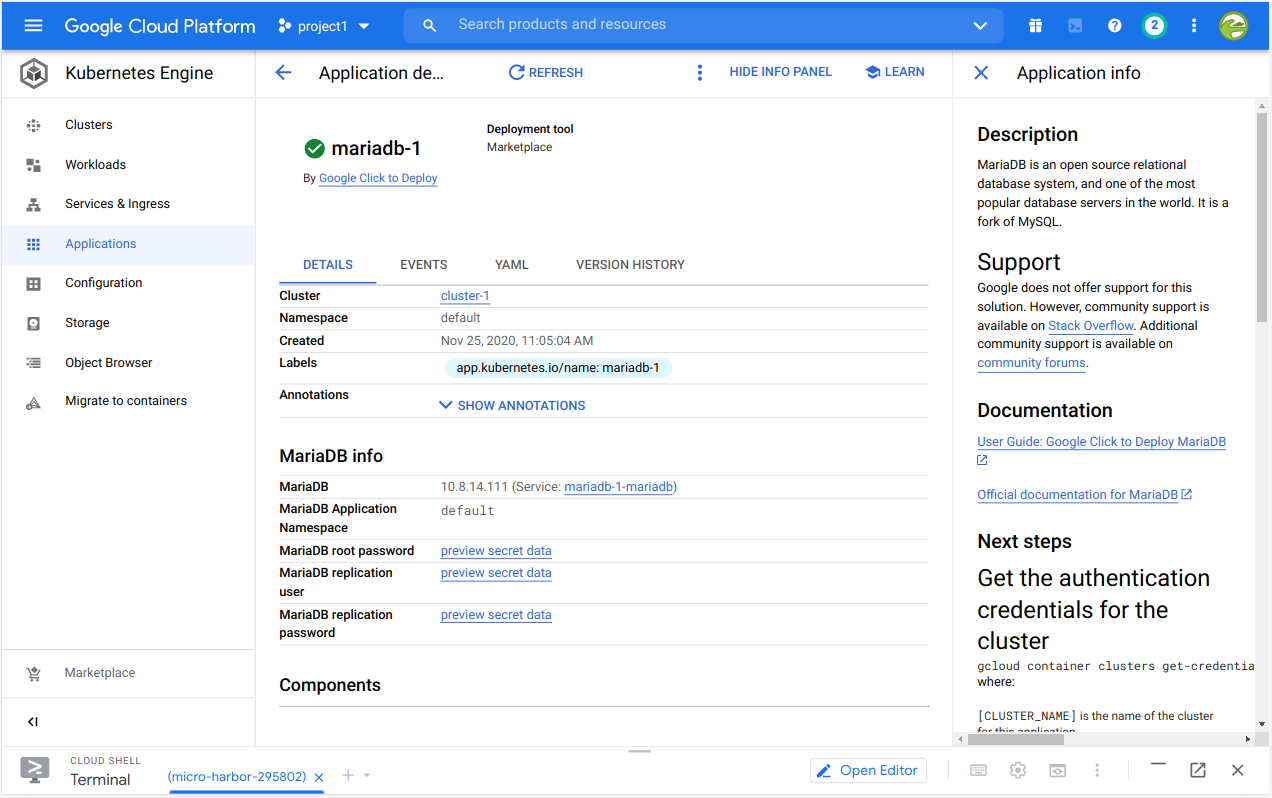
Once the status is OK, click on the name and view the details. Under Details, look for MariaDB root password and click on preview secret data.
3. Deploy Google Cloud Filestore Persistent Volume
If you are running a multiple node Kubernetes cluster, you will need to allocate shared persistent storage with read write access by multiple nodes. For this purpose, you can use Google Cloud Filestore, a fully managed storage service.
Access the Google Cloud Filestore console. The first time you access it, you will need to click on the Enable button.

In the Instances page, click on the Create Instance button.

Key in an Instance ID, File share name and Region/Zone, then click on the Create button.
Name | Value |
Instance ID | joget-storage |
File Share Name | volume1 |

Once the instance has been initialized, take note of the IP address and File share name to be used later.

4. Deploy Joget DX
With the prerequisite database and persistent storage available, you can now deploy Joget.
Download the joget-dx7-tomcat9-gke.yaml file below, and modify the PersistentVolume to match the Filestore settings for the path (file share name) and server (IP address).

   path: /volume1 # change to match the Filestore instance file share name
   server: 10.255.140.178 # change to match the IP address of the Filestore instance
You can now use the kubectl command line tool to apply the entire YAML. In GKE, you can run a Cloud Shell directly in the browser.
In the GKE Clusters page, click on the Connect button for your cluster, then Run in Cloud Shell.

Once you have access to the Cloud Shell command line, use your favourite editor (e.g. vi or nano) to save your YAML into a file.
You can then apply the YAML using kubectl e.g.
kubectl apply -f joget-dx7-tomcat9-gke.yaml
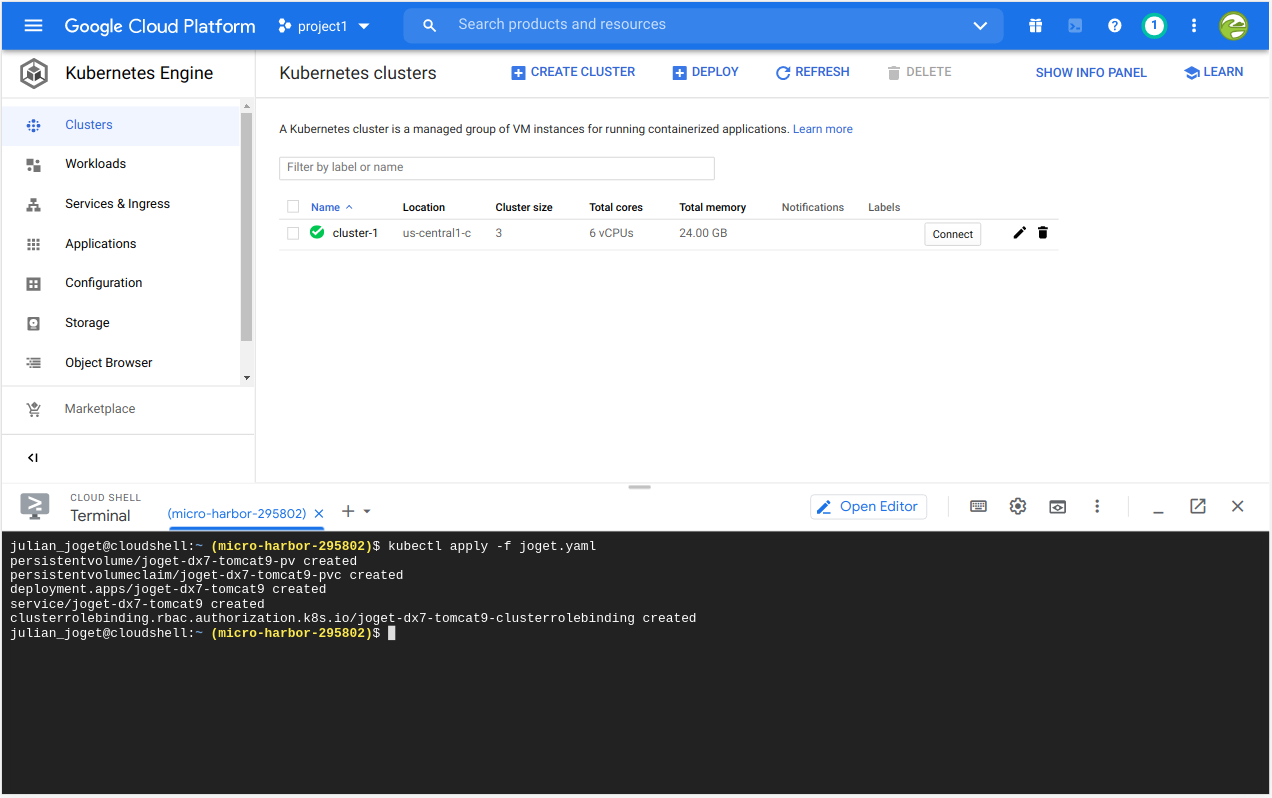
Wait for a few minutes while the required Kubernetes objects (Deployment, PersistentVolume, PersistentVolumeClaim, Deployment, Service and ClusterRoleBinding) are created for the Joget deployment.
You can view the deployment in the Workloads page in the GKE console.


In the Services & Ingress page, you can see an External load balancer service with a corresponding Endpoint URL.
Click on that Endpoint URL to access Joget.

5. Setup Database
To complete the Joget deployment, you need to perform a one-time Database Setup.
Key in the previously created MariaDB service name in the Database Host, and the root password in the Database Password fields. Click on Save.

Once the setup is complete, click on Done and you will be brought to the Joget App Center.

6. Scale Deployment
To scale the number of pods running Joget, you can use the GKE console.
In the Workloads page, choose the Joget deployment and in the Deployment details header, select Actions > Scale.
Key in the required number of replicas (pods) that you require and click on the Scale button.
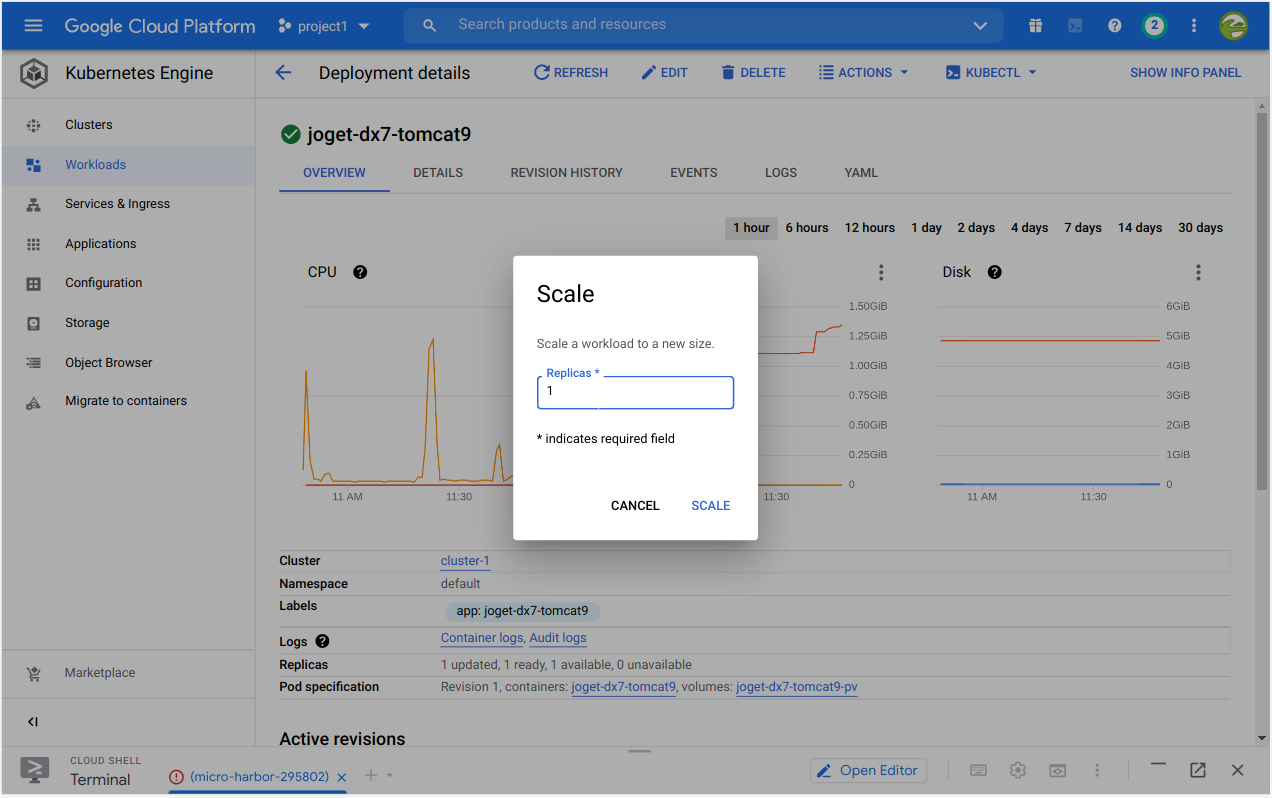
The desired number of pods will initialize and startup. These instances will have session replication configured, so load can be balanced between them and transparent failover will happen in the event of failure.

Sample Deployment YAML
# Example YAML for Google Kubernetes Engine (GKE) deployment using Google Cloud Filestore as persistent volume
# https://cloud.google.com/filestore/docs/accessing-fileshares
---
apiVersion: v1
kind: PersistentVolume
metadata:
  name: fileserver
spec:
  capacity:
    storage: 1Ti
  accessModes:
  - ReadWriteMany
  nfs:
    path: /volume1 # change to match the Filestore instance file share name
    server: 10.145.99.42 # change to match the IP address of the Filestore instance
---
apiVersion: v1
kind: PersistentVolumeClaim
metadata:
  name: joget-dx7-tomcat9-pvc
spec:
  accessModes:
    - ReadWriteMany
  storageClassName: ""
  volumeName: fileserver
  resources:
    requests:
      storage: 100Gi
---
apiVersion: apps/v1
kind: Deployment
metadata:
  name: joget-dx7-tomcat9
  labels:
    app: joget-dx7-tomcat9
spec:
  replicas: 1
  selector:
    matchLabels:
      app: joget-dx7-tomcat9
  template:
    metadata:
      labels:
        app: joget-dx7-tomcat9
    spec:
      volumes:
        - name: joget-dx7-tomcat9-pv
          persistentVolumeClaim:
            claimName: joget-dx7-tomcat9-pvc
            readOnly: false
      initContainers:
        - name: init-volume
          image: busybox:1.28
          command: ['sh', '-c', 'chmod -f -R g+w /opt/joget/wflow; exit 0']
          volumeMounts:
            - name: joget-dx7-tomcat9-pv
              mountPath: "/opt/joget/wflow"
      containers:
        - name: joget-dx7-tomcat9
          image: jogetworkflow/joget-dx7-tomcat9:latest
          ports:
            - containerPort: 8080
          volumeMounts:
            - name: joget-dx7-tomcat9-pv
              mountPath: /opt/joget/wflow
          env:
            - name: KUBERNETES_NAMESPACE
              valueFrom:
                fieldRef:
                    fieldPath: metadata.namespace
---
apiVersion: v1
kind: Service
metadata:
  name: joget-dx7-tomcat9
  labels:
    app: joget-dx7-tomcat9
spec:
  ports:
  - name: http
    port: 80
    targetPort: 8080
  - name: https
    port: 443
    targetPort: 9080
  selector:
    app: joget-dx7-tomcat9
  type: LoadBalancer
---
apiVersion: rbac.authorization.k8s.io/v1
kind: ClusterRoleBinding
metadata:
  name: joget-dx7-tomcat9-clusterrolebinding
roleRef:
  apiGroup: rbac.authorization.k8s.io
  kind: ClusterRole
  name: view
subjects:
  - kind: ServiceAccount
    name: default
    namespace: default