Introduction
Get Started
The easiest way to see how the Radio button works are to use the existing built-in App Expenses Claims. Here are the steps:
- Start the Joget Server and open the App Center.
- Log in as admin and click on the pencil icon on the Expenses Claim to open the App Composer. (see Figure 1)
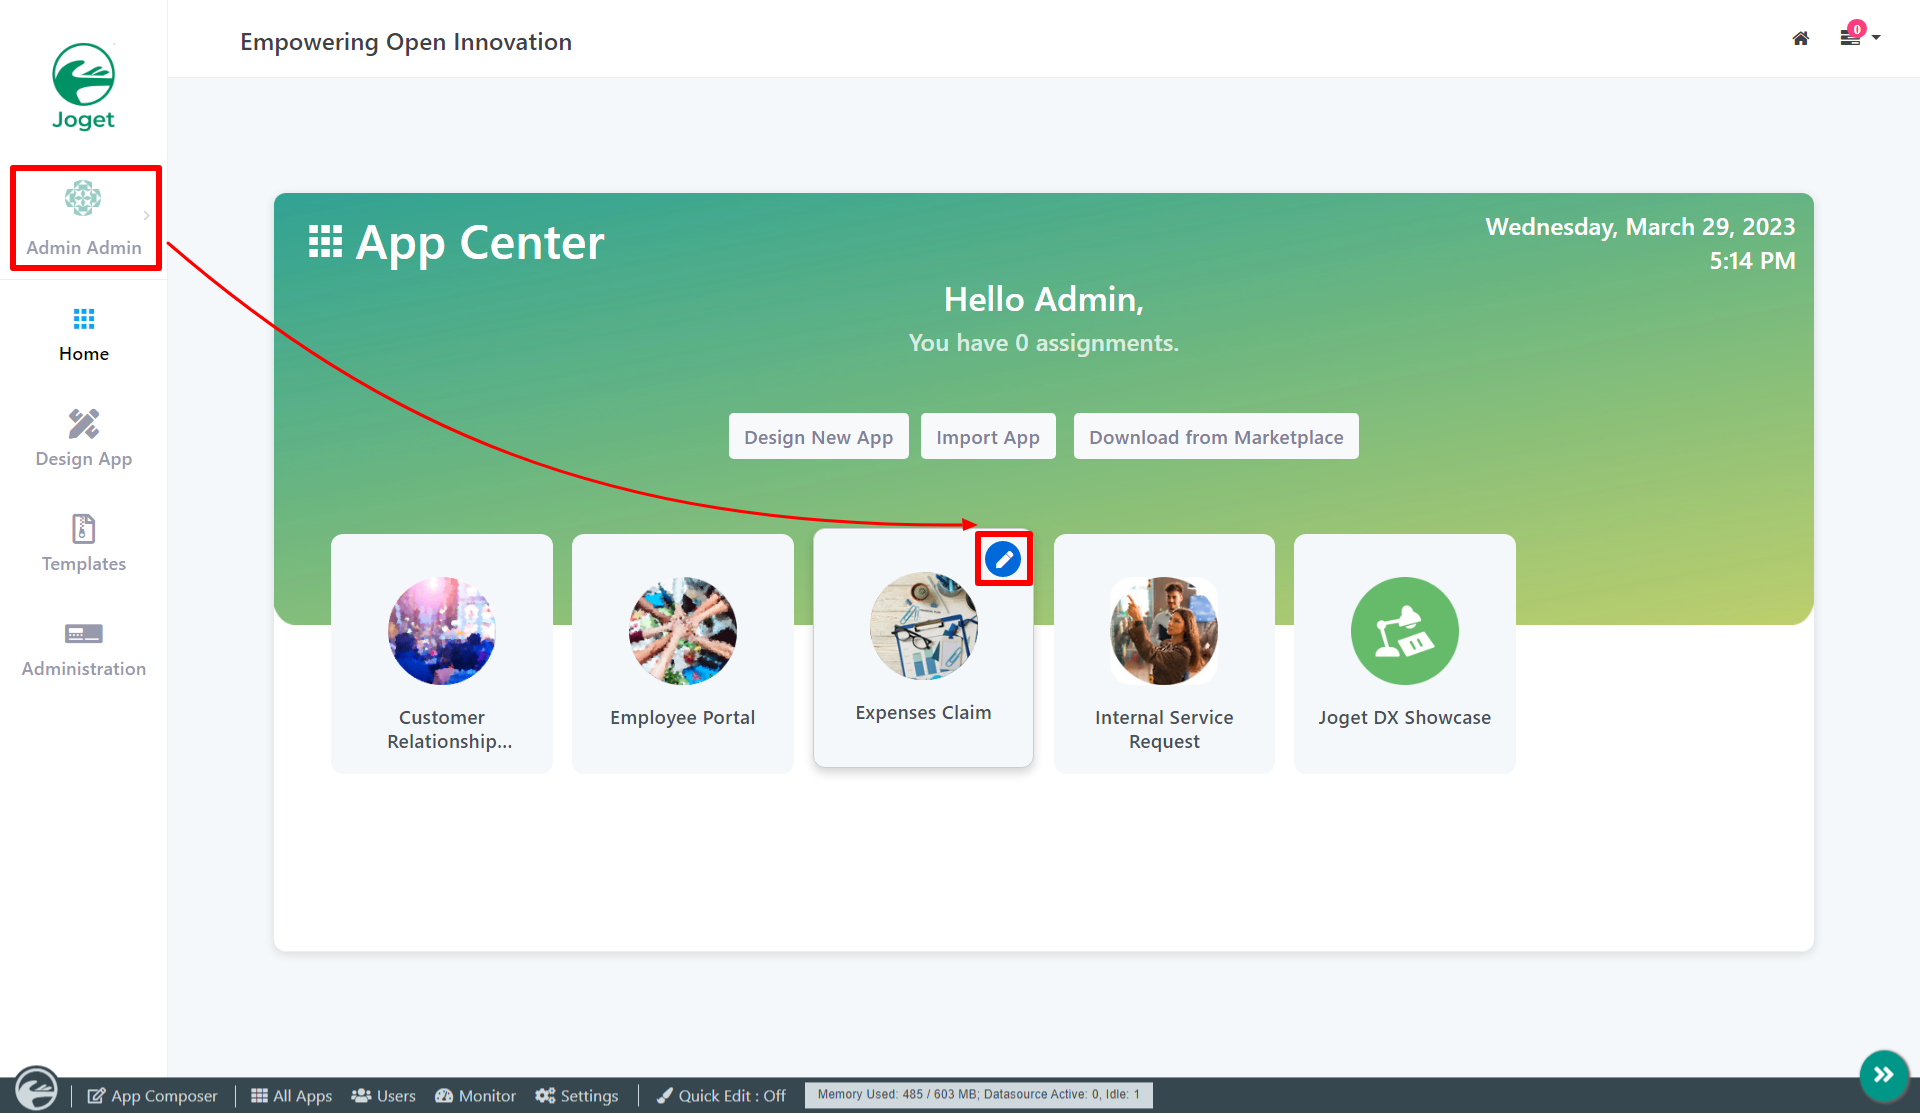
Figure 1 - Click on the ⊕ button and fill up the Form Details as follows (see Figure 2):
- Form ID: radio
- Form Name: Radio
- Table Name: j_expense_claim

Figure 2 - Drag and drop a Radio element on to the canvas.
- Click on the Radio element on the canvas to open up the Configure Radio properties.
Fill up the following fields as follows and click on Apply Change (see Figure 3):
- ID: type
Options:
Default Value
Label
Local Local International International

Figure 3- Click on Preview, click on the options available.
Radio Properties
Configure Radio

| Name | Description |
| Label | Element Label to be displayed to the end-user. |
| ID | Element ID (By declaring as "type", a corresponding database table column "c_type" will be created) Please see Form Element for more information about defining the ID and list of reserved IDs. |
| Options | Select Box options Options defined here will not be put into use if Options Data Store is defined below. |
| Or Load Data From | Radio options to be populated using the Options Data Store plugin. Available options:
|
Advanced Options
Data

| Name | Description |
|---|---|
| Value | Default Value when there's no existing value found/selected. A hash variable is accepted here. For example, you may key the following #currentUser.firstName# #currentUser.lastName# to pre-populate the field with currently logged in user's name. You may define multiple default options by separating them using semicolons. Sample option1;option2;option3 |
| Validator | Attach a Validator plugin to validate the input value. Please see Form Validator. When will validation takes place? Validation will take place whenever a form is submitted except when it is submitted as "Save as Draft". Available options:
|
Dependency

| Name | Description |
|---|---|
| Field ID to Control Available Options Based on Grouping | Dynamically change the available options based on the "grouping" attribute defined in the options by matching the current value of the element ID defined. |
UI

| Name | Description |
|---|---|
| Readonly | Determines if the element is editable. |
| Display Field as Label When Readonly? | Displays the value of the element as plain text when an element is set to "Readonly". |
Workflow

| Name | Description |
|---|---|
| Workflow Variable | If the form is part of a workflow process, upon saving of the form (by clicking on "Save as Draft" or "Complete" button). The value in this input field will be saved into the corresponding workflow variable named here. Using a non-existent Workflow Variable name You will get the following warning with the name printed out (e.g. status) in the server log if you attempt to map to a non-existent Workflow Variable. context attribute status does not exist in process context - adding new attributes to the process context is not allowed |