
Cloud Foundry is an open source platform as a service (PaaS) for developers to deploy and scale applications without manually configuring and managing servers. The promise of “write once, run anywhere” means developers can build their apps on a programming language or framework of their choice, and be able to deploy it to any underlying cloud environment.
For example, developers could code a Java-based Spring Framework application, and “push” the application to a Cloud Foundry space. That space could be running in an on-premises OpenStack cloud, or a public cloud like Amazon AWS, Google Cloud Platform, IBM Bluemix or Microsoft Azure. The idea is that it hides away infrastructure details and services such as databases, so developers do not need to worry about managing the underlying environment.
The Cloud Foundry platform is available from either the Cloud Foundry Foundation as open source software, or as a commercial product or service from multiple providers. Pivotal Cloud Foundry (PCF) is a commercial offering from Pivotal.
As an open source low code platform to visually build enterprise web apps for coders and non-coders, Joget Workflow is a good complement for Cloud Foundry.
Deploy Joget Workflow on Pivotal Cloud Foundry
In this example, we will deploy Joget Workflow on PCF Dev from Pivotal. PCF Dev is a lightweight, easy to install distribution of Cloud Foundry designed to run on a developer machine, making it easier to locally develop, test and explore Cloud Foundry.
Step 1: Install PCF Dev
Install PCF Dev according to the instructions in the Pivotal Documentation.
Once installed, start PCF Dev using the command
cf dev start
and you should see the output:
Downloading VM...
Progress: |====================>| 100%
VM downloaded
Importing VM...
Starting VM...
Provisioning VM...
Waiting for services to start...
40 out of 40 running
_______  _______  _______    ______   _______  __   __
|       ||       ||       |  |      | |       ||  | |  |
|    _  ||       ||    ___|  |  _    ||    ___||  |_|  |
|   |_| ||       ||   |___   | | |   ||   |___ |       |
|    ___||      _||    ___|  | |_|   ||    ___||       |
|   |    |     |_ |   |      |       ||   |___  |     |
|___|    |_______||___|      |______| |_______|  |___|
is now running.
To begin using PCF Dev, please run:
   cf login -a https://api.local.pcfdev.io --skip-ssl-validation
Admin user => Email: admin / Password: admin
Regular user => Email: user / Password: pass
Follow the instructions provided at the end of to connect to PCF Dev, by logging in using the admin user and choosing the pcfdev-org organization:
cf login -a https://api.local.pcfdev.io --skip-ssl-validation
You should have output like the following:
API endpoint: https://api.local.pcfdev.io

Email> admin

Password>

Authenticating...

OK

Select an org (or press enter to skip):

1. pcfdev-org

2. system

Org> 1

Targeted org pcfdev-org

Targeted space pcfdev-space
Step 2: Create MySQL Database Service
In Cloud Foundry, all external dependencies such as databases, file systems and so on are considered services. Cloud Foundry allows administrators to provide a marketplace of services, from which users can provision reserved resources on-demand.
Here, we will create a MySQL Database Service.
In the command line, search the marketplace for MySQL plans available.
cf marketplace -s p-mysql
Create a service instance with the 1gb plan with the name jogetdb:
cf create-service p-mysql 1gb jogetdb
More detailed information can be found at https://pivotal.io/platform/pcf-tutorials/getting-started-with-pivotal-cloud-foundry-dev/connect-a-database
Step 3: Create Local Volume Service
In Cloud Foundry, a volume service provides a reliable, persistent file system.
Create a service instance using the PCF Local Volume Service with the name jogetdata:
cf create-service local-volume free-local-disk jogetdata
More detailed information can be found at https://docs.cloudfoundry.org/devguide/services/using-vol-services.html and https://github.com/cloudfoundry/local-volume-release
Step 4: Download and Deploy Joget Workflow WAR
Download Joget Workflow from https://www.joget.org/download/
Install Joget Workflow https://dev.joget.org/community/display/KBv6/Installing+Joget
Look for the Joget Workflow WAR file jw.war in joget_installation_directory/apache-tomcat/webapps.
Push the WAR to the Cloud Foundry space with a memory allocation of 1G and application name joget:
cf push joget -p joget_installation_directory/apache-tomcat-8.5.23/webapps/jw.war -m 1G --no-start
Note that we use the --no-start parameter to delay the start of the application, because we need to set a couple of environment variables before starting up.
Step 5: Configure and Start Joget Workflow
Set the Apache Tomcat context path to /jw:
cf set-env joget JBP_CONFIG_TOMCAT '{tomcat: {context_path: "/jw"}}'
Next, disable the Spring auto reconfiguration. This is because the Joget Workflow WAR already performs the necessary initialization at startup, and the auto configuration will interfere with it:
cf set-env joget JBP_CONFIG_SPRING_AUTO_RECONFIGURATION '[enabled: false]'
Bind the local volume service to mount the persistent filesystem to the Joget data directory:
cf bind-service joget jogetdata -c '{"mount":"/home/vcap/wflow"}'
Bind the MySQL database service:
cf bind-service joget jogetdb
Verify that the services are bound to the Joget application:
cf services
For example the output shows the services bound to the joget application:
name        service        plan              bound apps   last operation
jogetdata   local-volume   free-local-disk   joget        create succeeded
jogetdb     p-mysql        1gb               joget        create succeeded
Start the Joget application:
cf start joget
Step 6: Setup Joget Workflow Database
Now that the Joget Workflow platform has been deployed in Cloud Foundry, the final step is to setup the database schema, based on https://docs.cloudfoundry.org/devguide/services/migrate-db.html#single-migration.
If you are using Joget Workflow prior to version 6.0.3, you need to modify the default Joget Workflow SQL setup script due to a limitation in MySQL for PCF where explicit locking is not supported i.e. LOCK TABLES.
SSH into the application:
cf ssh joget
And download the modified script:
curl https://raw.githubusercontent.com/jogetworkflow/jw-community/6.0.3/wflow-consoleweb/src/main/resources/setup/sql/jwdb-mysql.sql > ~/app/WEB-INF/classes/setup/sql/jwdb-mysql.sql
exit
At this point, we can obtain the MySQL database service credentials by viewing the environment variables:
cf env joget
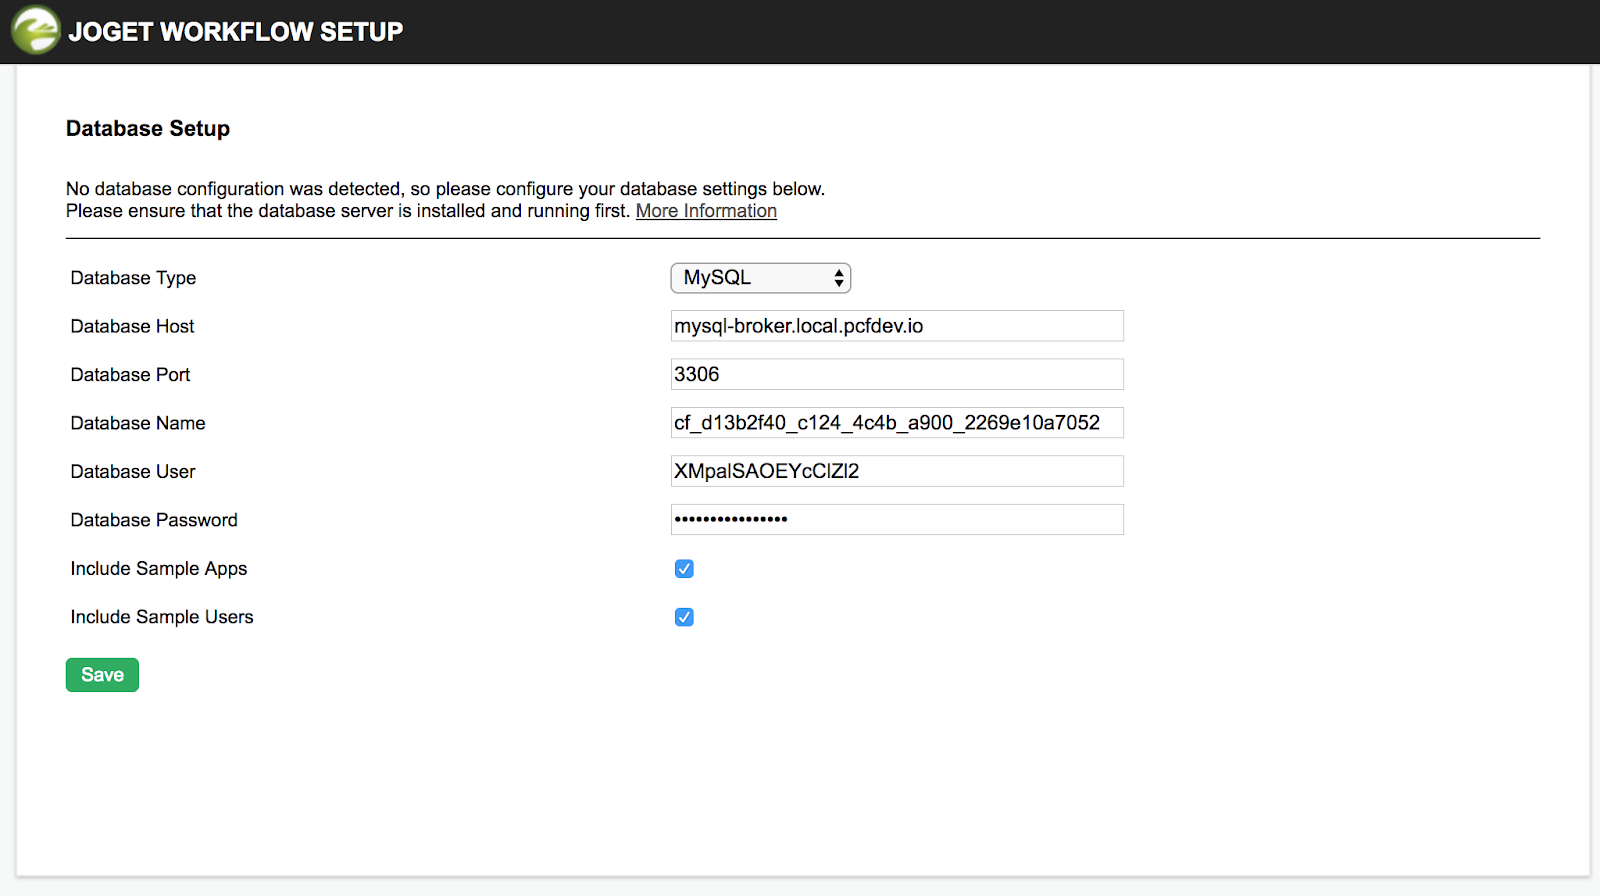
In particular, note down the p-mysql service hostname, port, name, username and password.
System-Provided:
{
"VCAP_SERVICES": {
 "local-volume": [
  {
   "credentials": {},
   "label": "local-volume",
   "name": "jogetdata",
   "plan": "free-local-disk",
   "provider": null,
   "syslog_drain_url": null,
   "tags": [
    "local"
   ],
   "volume_mounts": [
    {
     "container_dir": "/home/vcap/wflow",
     "device_type": "shared",
     "mode": "rw"
    }
   ]
  }
 ],
 "p-mysql": [
  {
   "credentials": {
    "hostname": "mysql-broker.local.pcfdev.io",
    "jdbcUrl": "jdbc:mysql://mysql-broker.local.pcfdev.io:3306/cf_d13b2f40_c124_4c4b_a900_2269e10a7052?user=XMpalSAOEYcClZl2\u0026password=uSRs0B1D6NPNuLOe",
    "name": "cf_d13b2f40_c124_4c4b_a900_2269e10a7052",
    "password": "uSRs0B1D6NPNuLOe",
    "port": 3306,
    "uri": "mysql://XMpalSAOEYcClZl2:uSRs0B1D6NPNuLOe@mysql-broker.local.pcfdev.io:3306/cf_d13b2f40_c124_4c4b_a900_2269e10a7052?reconnect=true",
    "username": "XMpalSAOEYcClZl2"
   },
   "label": "p-mysql",
   "name": "jogetdb",
   "plan": "1gb",
   "provider": null,
   "syslog_drain_url": null,
   "tags": [
    "mysql"
   ],
   "volume_mounts": []
  }
 ]
}
}
{
"VCAP_APPLICATION": {
 "application_id": "a450291a-0440-4727-ba78-c65f12d99961",
 "application_name": "joget",
 "application_uris": [
  "joget.local.pcfdev.io"
 ],
 "application_version": "aedb8053-7288-4272-bcf7-85eab3dbd360",
 "cf_api": "http://api.local.pcfdev.io",
 "limits": {
  "disk": 512,
  "fds": 16384,
  "mem": 1024
 },
 "name": "joget",
 "space_id": "4376eb82-3935-49c1-b543-8df589392831",
 "space_name": "pcfdev-space",
 "uris": [
  "joget.local.pcfdev.io"
 ],
 "users": null,
 "version": "aedb8053-7288-4272-bcf7-85eab3dbd360"
}
}

User-Provided:
JBP_CONFIG_SPRING_AUTO_RECONFIGURATION: [enabled: false]
JBP_CONFIG_TOMCAT: {tomcat: {context_path: "/jw"}}
Access Joget Workflow at http://joget.local.pcfdev.io/jw/ and you will be presented with the database setup page.
Proceed to setup the database according to the instructions at https://dev.joget.org/community/display/KBv6/Setting+Up+Database.
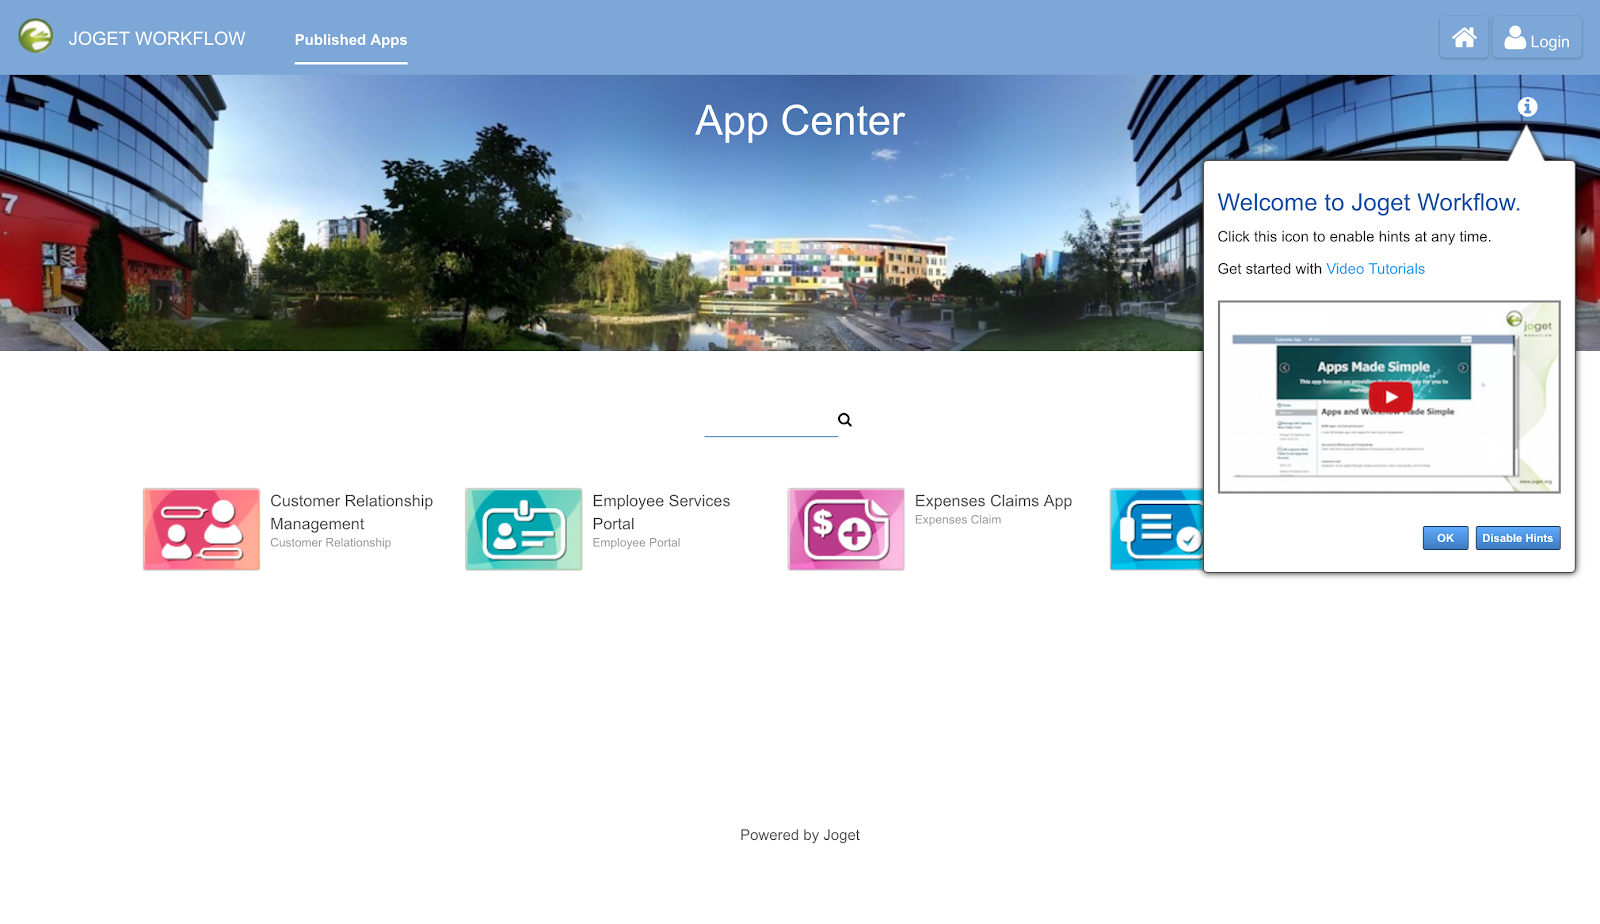
Once setup is complete, you will be brought to the Joget Workflow App Center.
Appendix A: Application Manifest File
Optionally, an application manifest file can be used to specify environment variables and bind services.
manifest.yml:
---
applications:
- name: joget
 memory: 1G
 buildpack: https://github.com/cloudfoundry/java-buildpack.git
 path: /path_to/jw.war
 services:
   - jogetdb
   - jogetdata
 env:
   JBP_CONFIG_SPRING_AUTO_RECONFIGURATION: '[enabled: false]'
   JBP_CONFIG_TOMCAT: '{tomcat: {context_path: "/jw"}}'
However, there is a limitation that the current version of Cloud Foundry does not support specifying parameters when binding parameters, so binding of the local volume service to the Joget data directory has to be done manually:
cf bind-service joget jogetdata -c '{"mount":"/home/vcap/wflow"}'
cf restage joget
Appendix B: Useful Cloud Foundry Commands
View application logs:
cf logs joget
Restage the application after modifying service bindings or environment variables:
cf restage joget
Stop PCF Dev VM:
cf dev stop
Delete the PCF Dev VM:
cf dev destroy
Uninstall the PCF Dev Plugin:
cf uninstall-plugin pcfdev
View PCF Dev App Manager: