Introduction
In this article, we will show you how to create fixed HTML Div Tag on Scroll. In this example, we will make Request Form Approval Process - Approval title and Progress Bar from view approval page to stick in the same position when we scroll the page content.
Implementation Steps:
1) Open desired app or download Simple Request Approval app for the demonstration purpose.
2) Open App runtime. In this case we will run Fixed HTML Tag on Scroll app in run time. From the left menu panel, Click Approval to display list of the approval task (Step 1). Then click on the View to view the task (Step 2).
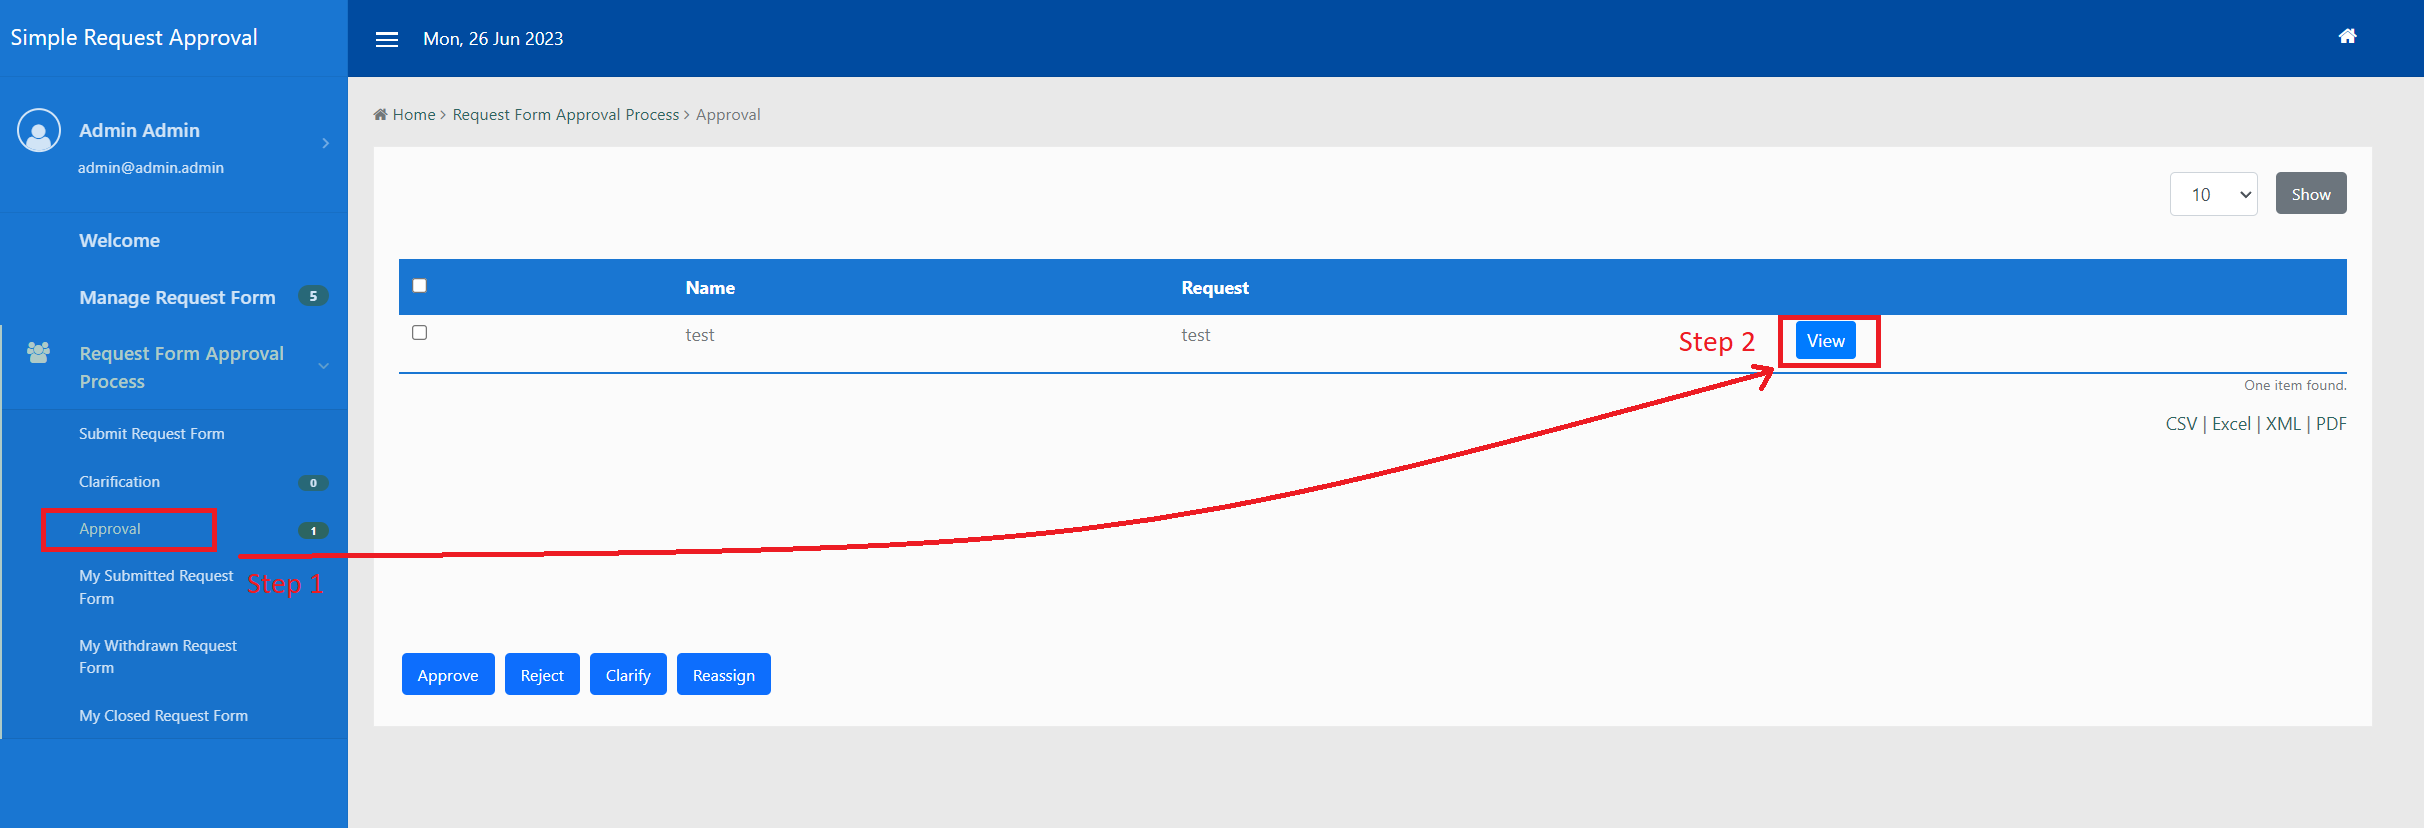
Figure 1
3) Right click on the Request Form Approval Process - Approval (Step 1) and select Inspect option (Step 2). This will open the developer console and point up the location of the element.
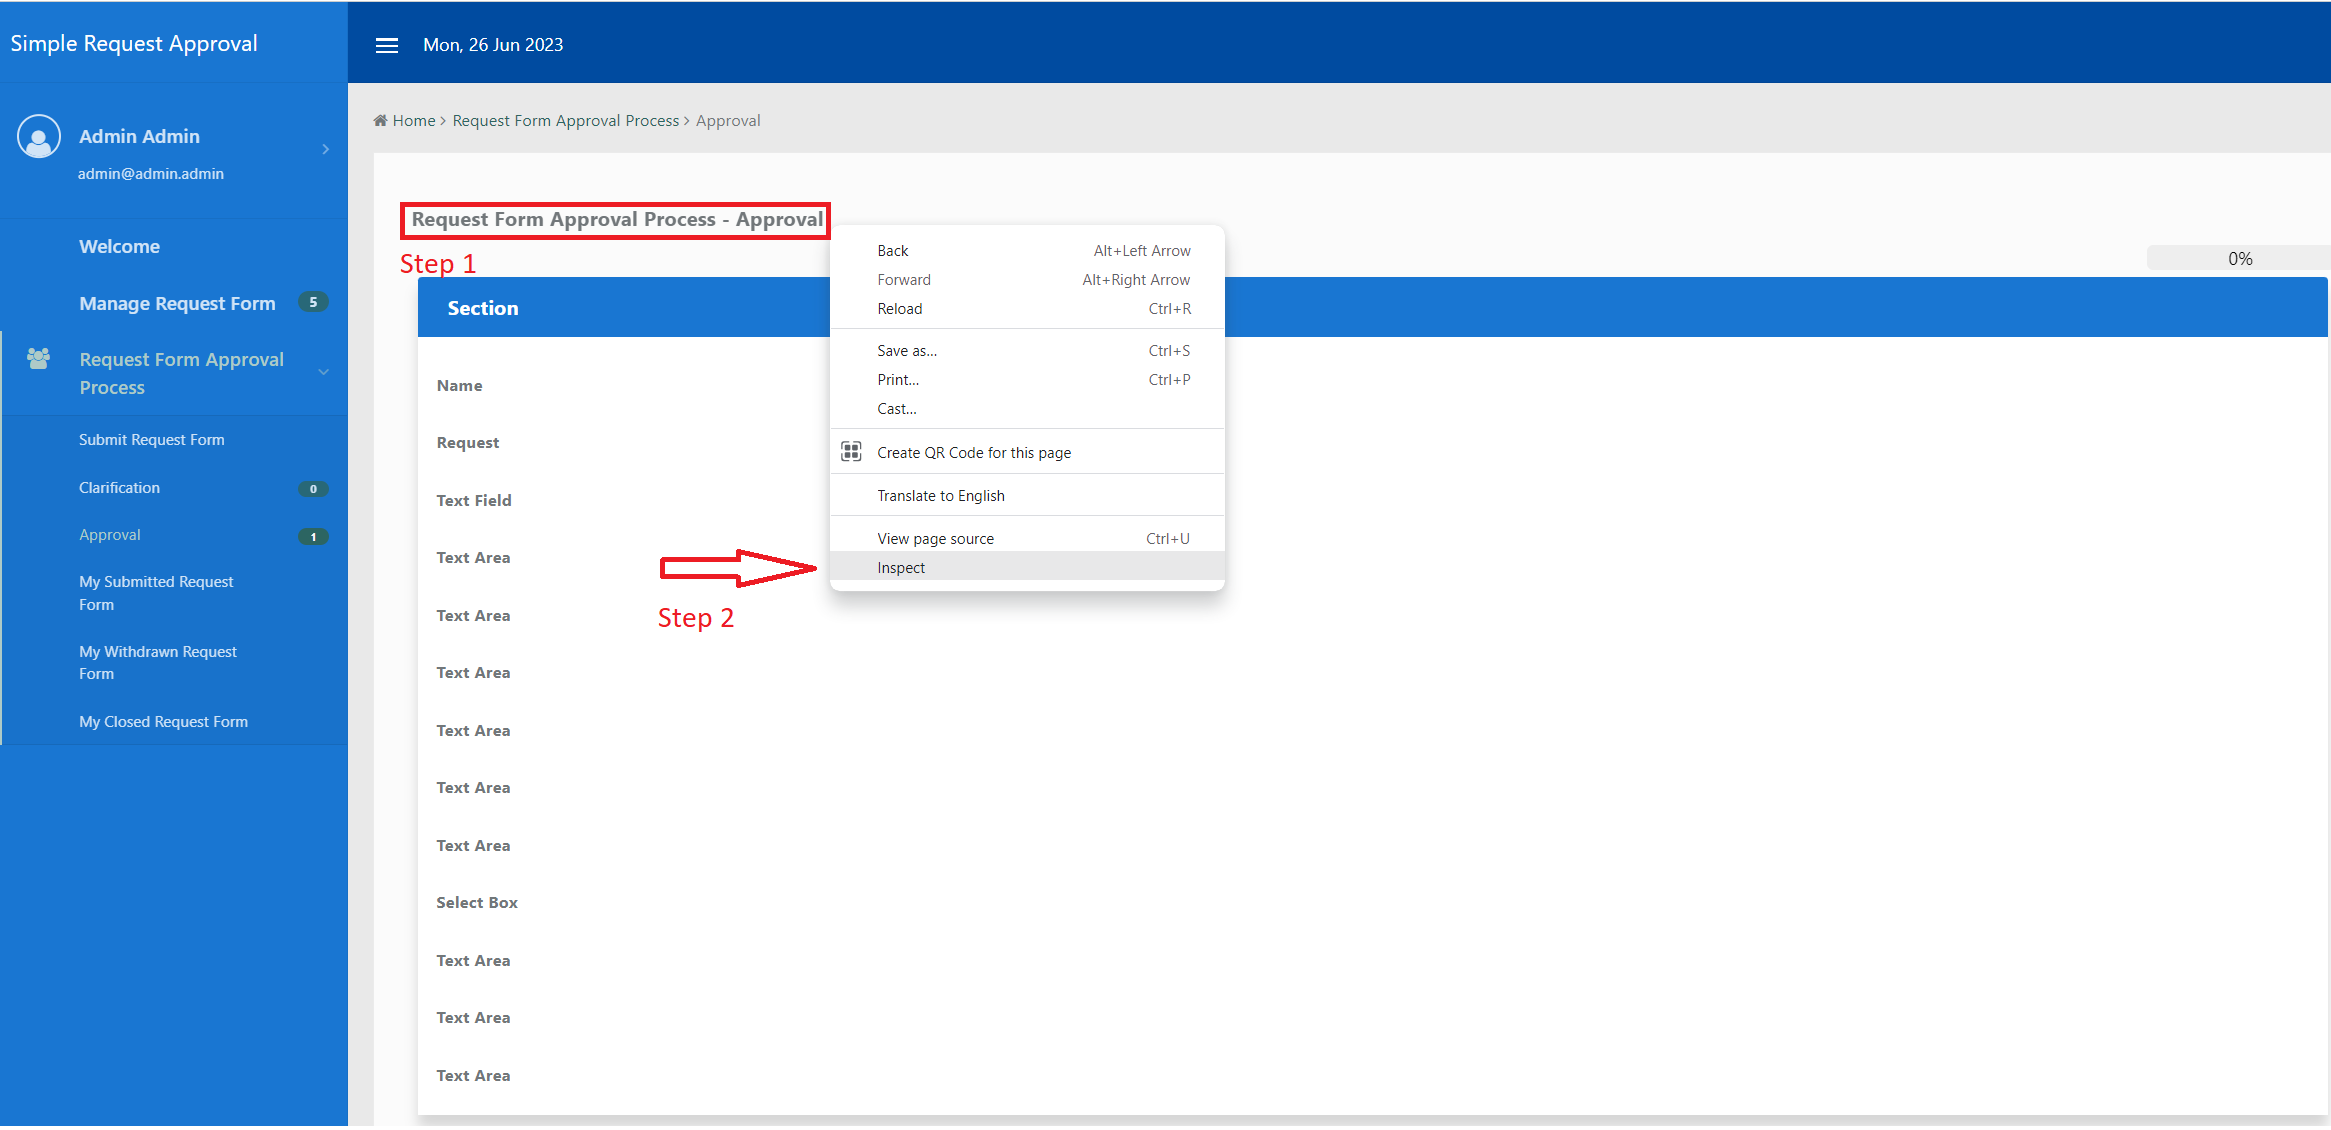
Figure 2
4) Take note on the name of div class. In this example the div class is viewForm-body-header.
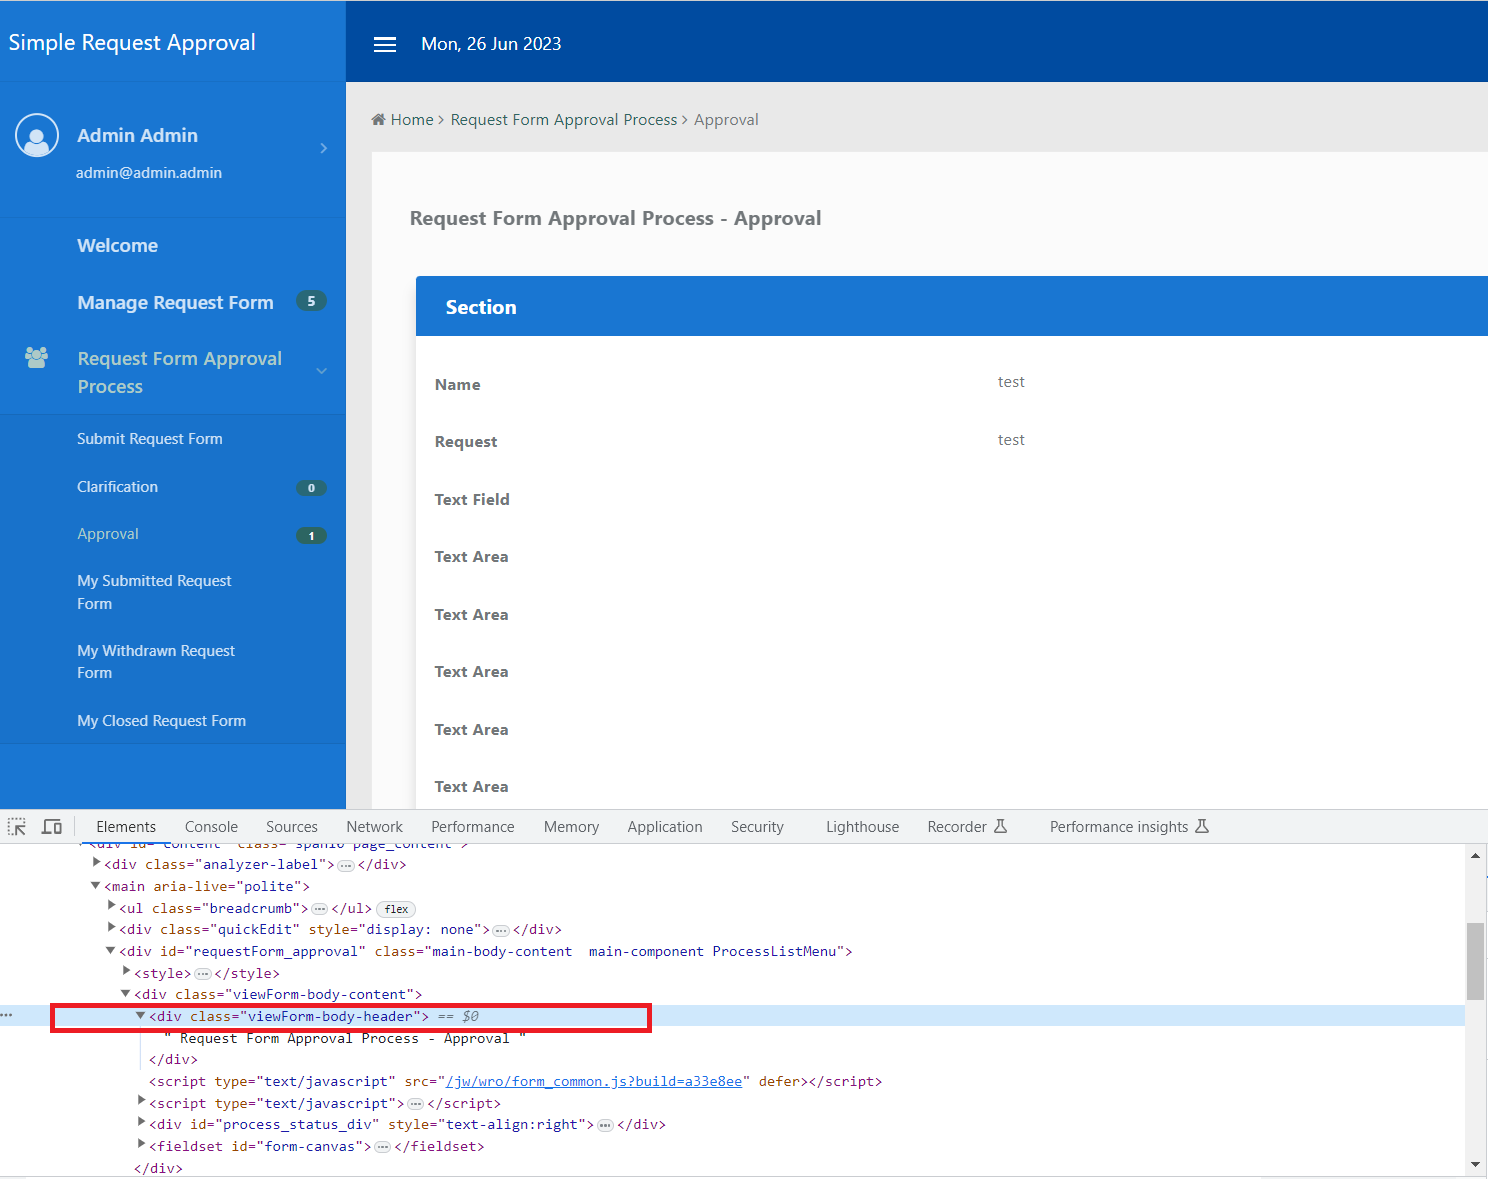
Figure 3
5) Navigate to UI Builder component. Go to Settings and then to Advanced option, navigate to Custom CSS. Enter CSS code below in the text area:
.viewForm-body-header {
    font-size: 16px;
    font-weight: bold;
    padding: 10px 0px;
    position: sticky;
    top: 65px;
    z-index: 9999;
    border-radius: 5px;

}
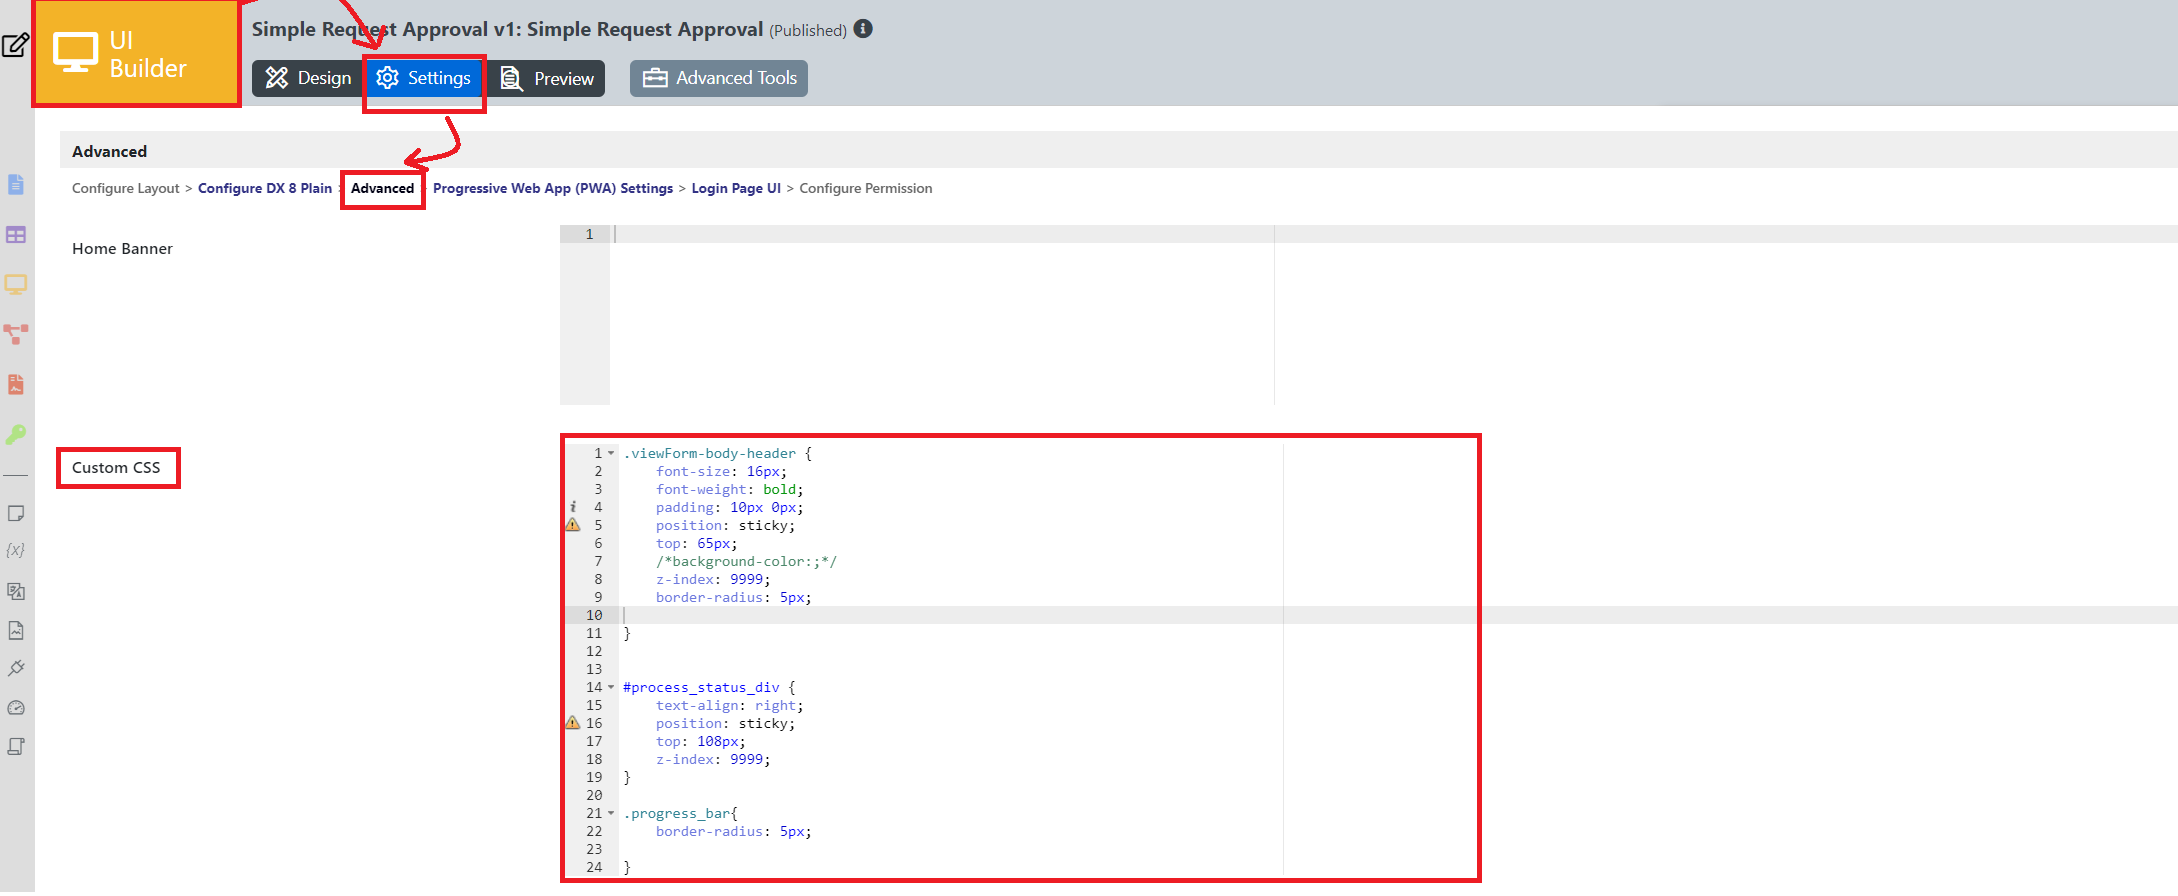
Figure 4
6) Next, we will try to inspect the Progress Bar element using the same method. Right click on the Progress Bar area (Step 1). Next, choose Inspect (step 2) and take note on the div id in developer console (step 3)
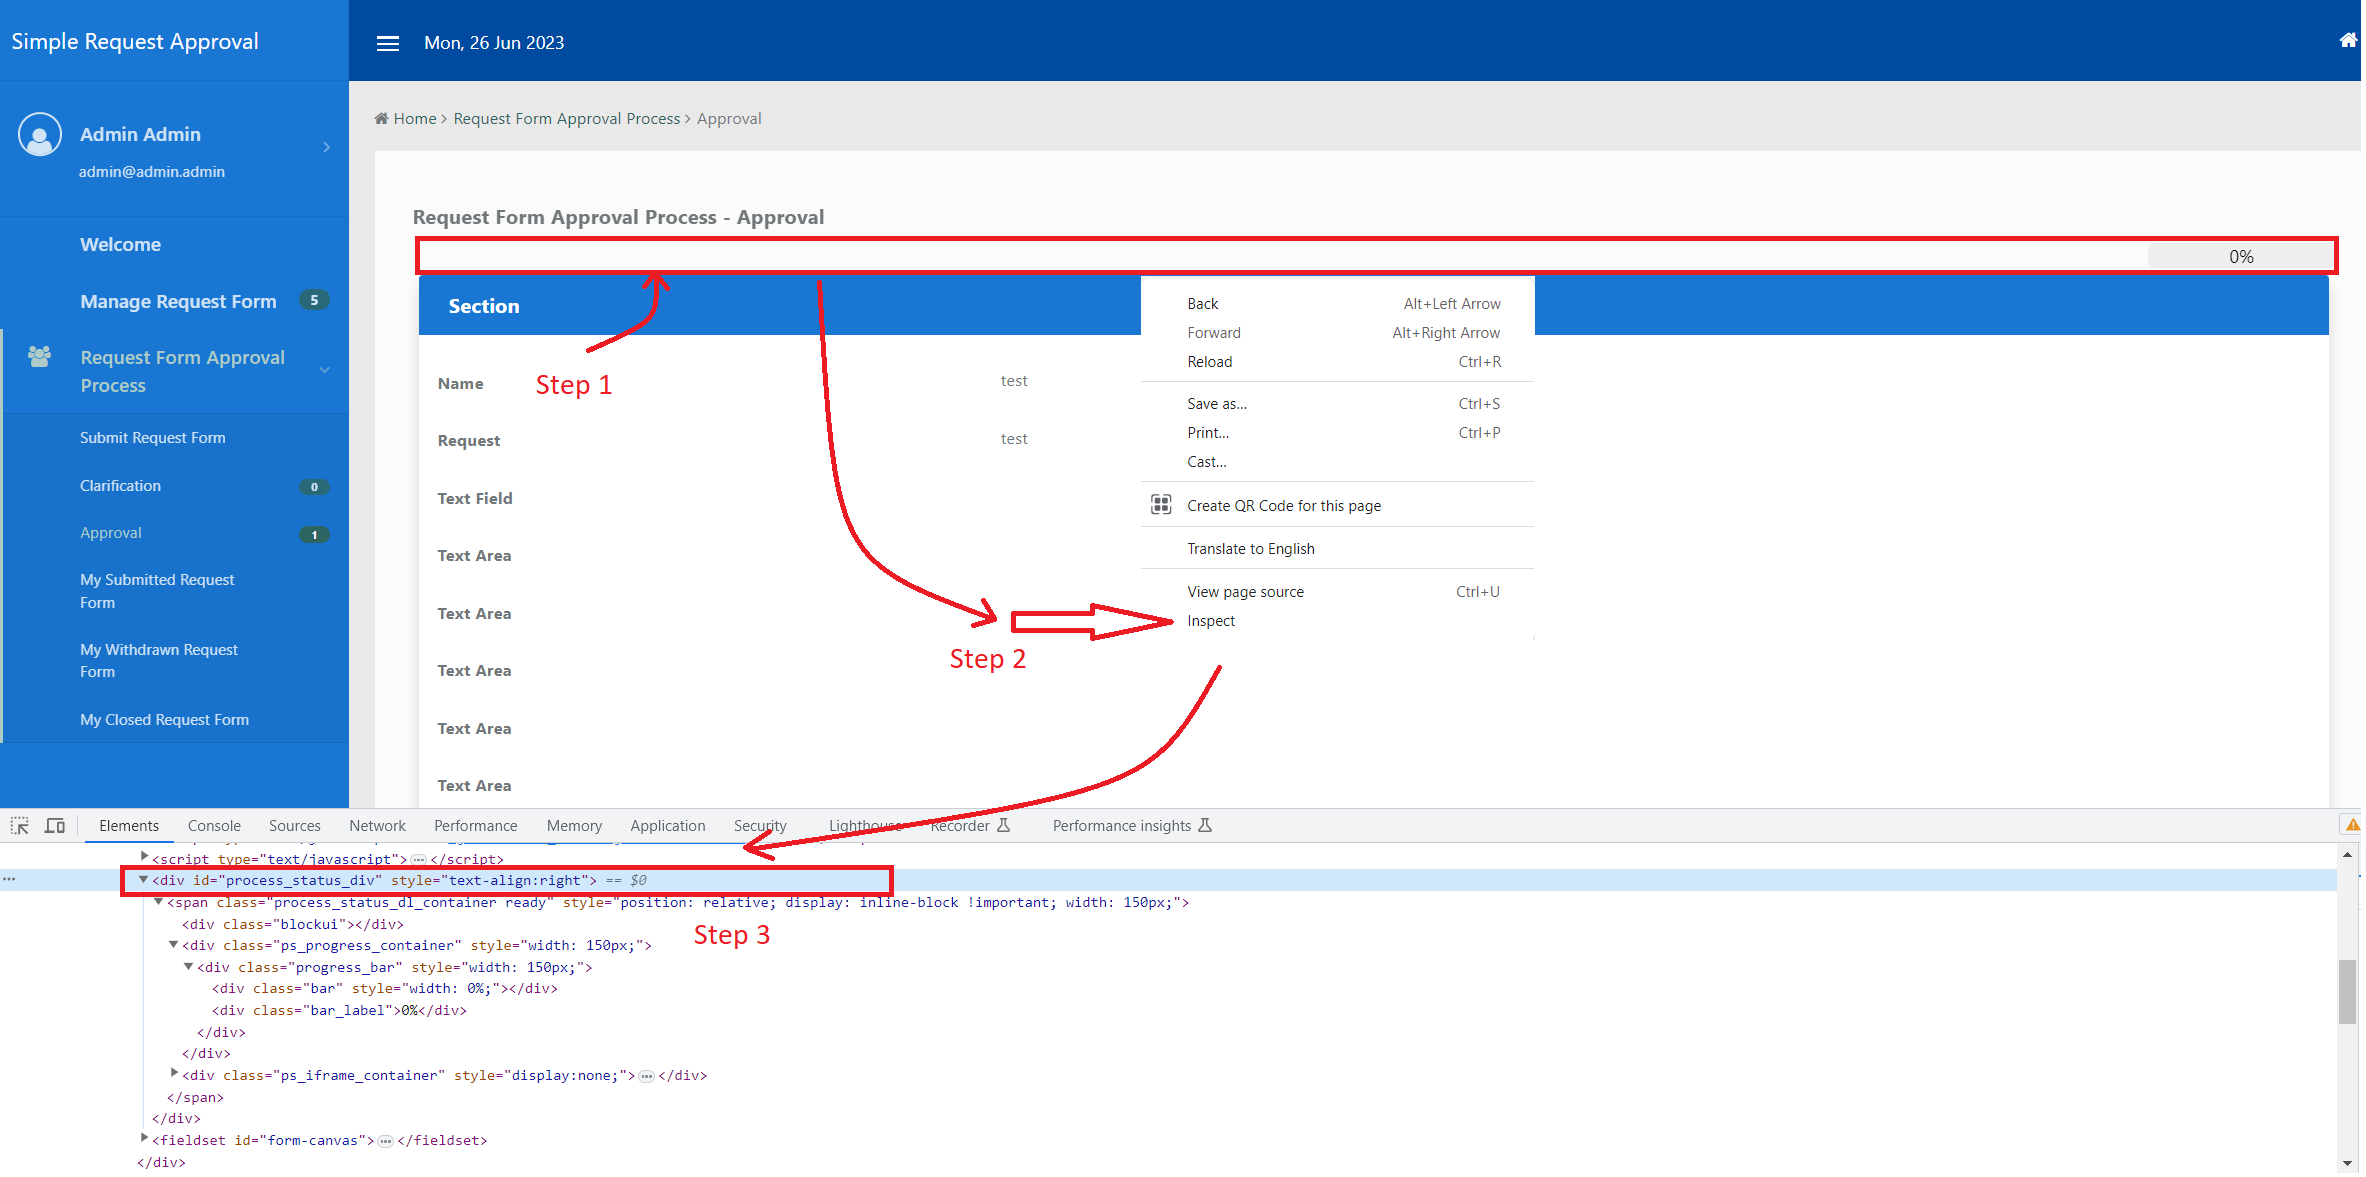
Figure 5
7) Navigate to UI Builder component. Go to Settings and then to Advanced option, navigate to Custom CSS. Enter CSS code below in the text area:
#process_status_div {
text-align: right;
position: sticky;
top: 108px;
z-index: 9999;
}
.progress_bar{
border-radius: 5px;
}
Figure 6
8) Click Save to save the custom CSS.
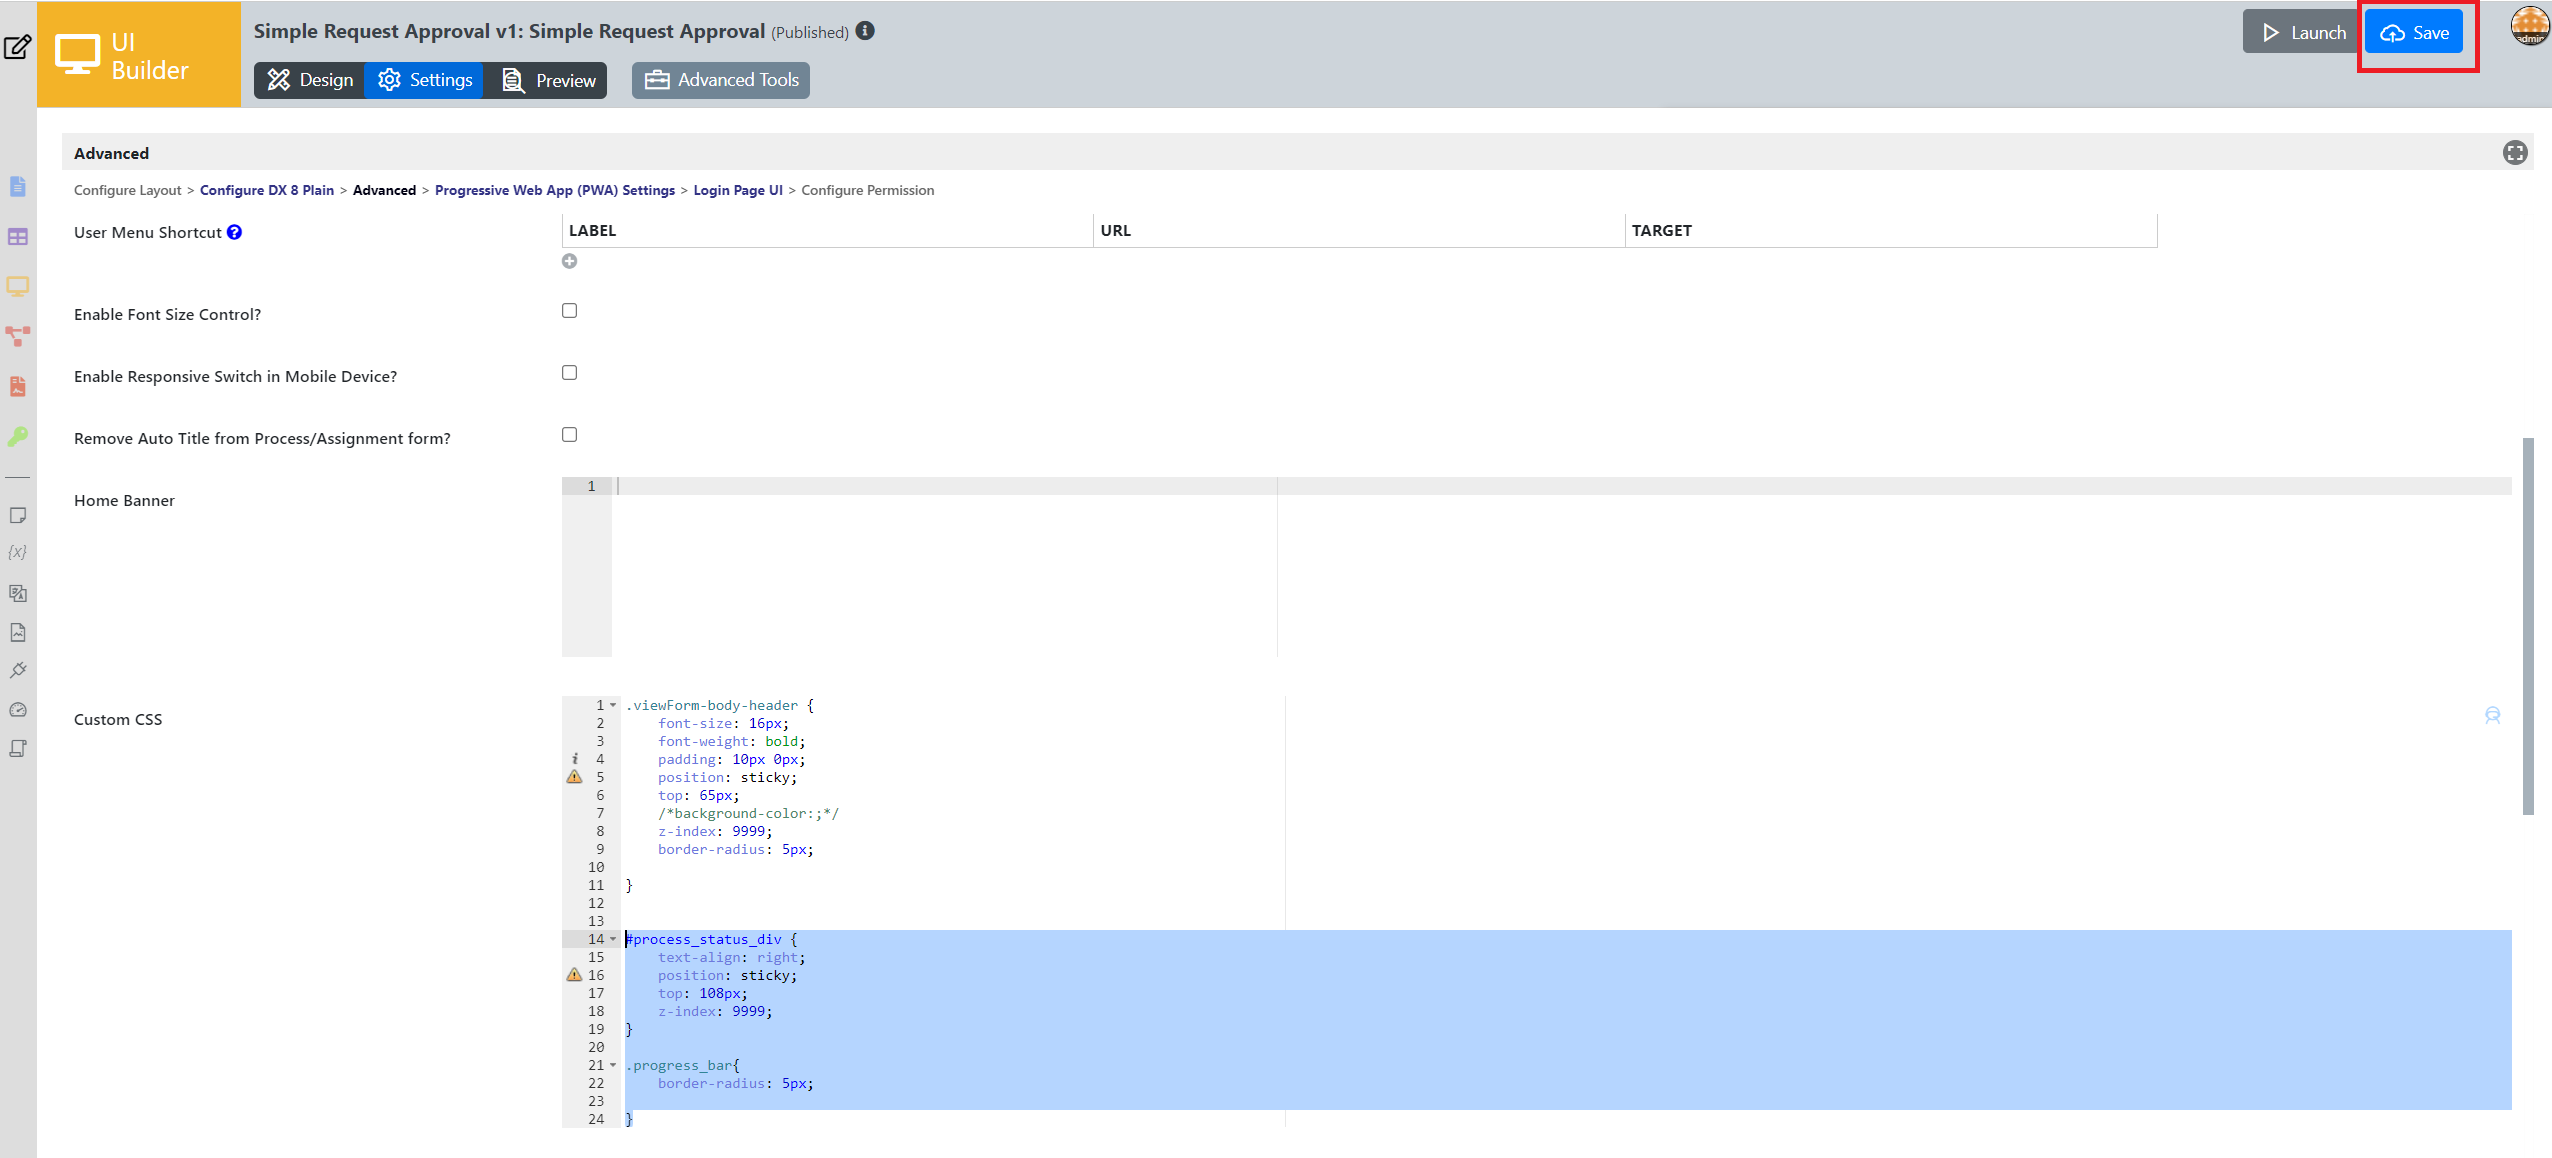
Figure 7
9) Preview the changes from runtime.
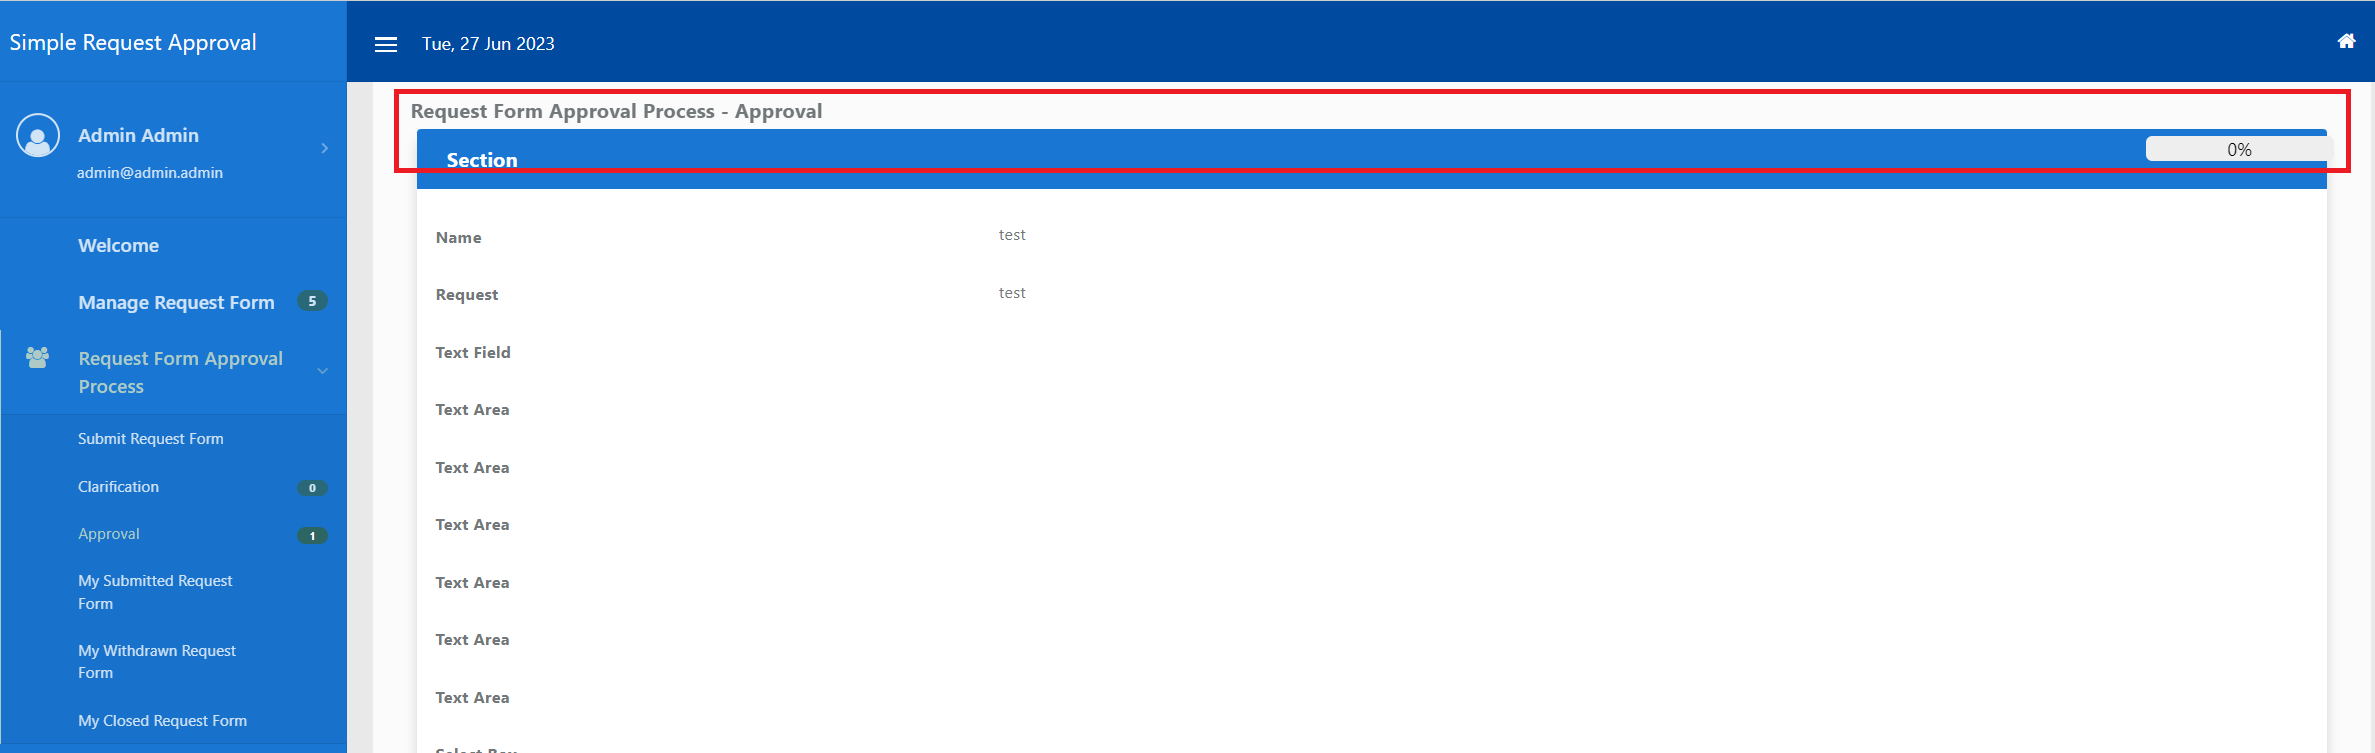
Figure 8