Introduction
In this tutorial, we will show the process of sending emails using Microsoft Graph API with Joget JSON Tool. The guideline will help you automate the process of sending emails, making it a more efficient and streamlined process. This article will provide a step-by-step guide to help set up and send emails using Microsoft Graph API and Joget JSON Tool.
Set Up Azure Application
Create Developer Account
First, You need to set up the Microsoft Graph API configurations, You have to create a Free Microsoft 365 Developer Tenant account from here to register your Azure account to get the tenant ID which is later required to send the email. After creating the account, copy the email address to use it to sign up to Azure.
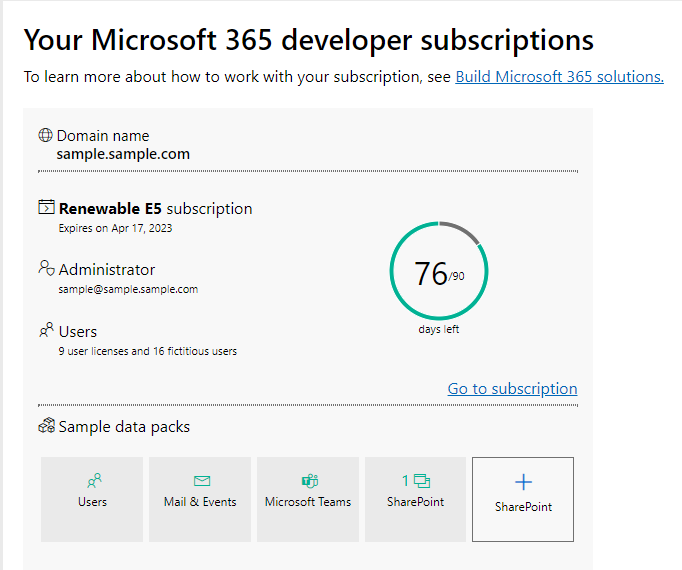
Figure 1: Create A Free Microsoft 365 Developer Tenant Account
Create Azure Account
Upon creating Microsoft 365 Developer Tenant account, sign up on Azure here using your given Microsoft 365 Developer Tenant email address in the previous step.

Use the email in the "Administrator" section to sign up for your Azure account and this time you will have full access to it.
Register Application
So now with the Azure account set up, we can begin registering an application.
To register an application go to:
- Azure Active Directory
- App Registrations
- New Registration
- Choose a name for the app
- Select your support type, for this guide, we will be using the third one
- And for this guide, ignore the redirect URI
- Register

After this you should see in the app's overview you have an "Application (client) ID" and a "Directory (tenant) ID", these two are important so that your API call will actually be using your app and your account.
Get Client Secret
Next up is to get your client secret.
To do this, from the app's overview page, go to:
- Certificates and Secrets
- New Client Secret
- Enter description and expire duration
- Add client secret
After doing so, you now should have a "value" and "ID", copy paste this "value" somewhere like a Notepad.
Client Secret Value
Make sure you secure this value before leaving or refreshing the page as the value will become hidden afterwards.
Add API Permissions
Last thing to do is to give the Azure app the permission to send emails via the Microsoft Graph API.
To do this, from the app's overview page, go to:
- API Permissions
- Add a Permission
- Microsoft Graph
- Application Permissions (for this guide we are using application permissions)
- Add "Mail.Send"
- Optionally, also add "User.Read.All" (this is for if you want to see the list of users who can use this Azure app, by default, Microsoft should give you a dozen dummy accounts when creating an Azure account)
- Add Permissions
- Press "Grant Admin Consent for MSFT"
And now your Azure app has the permission to send emails!
Using Joget JSON Tool to Call API
The Joget JSON Tool is a plugin for app processes that lets you issue JSON web service calls. In order to properly send an email with the MS Graph API, you will need in total 2 of these JSON tools. One to request for an access token and the other to actually send the email.
Requesting Access Token
Courtesy to Microsoft's documentation, to acquire the access token, you will need a POST request to the url:
https://login.microsoftonline.com/[TENANT ID HERE]/oauth2/v2.0/token
So, enter the appropriate information into your first JSON Tool and keep the Body Type as "Request Parameters".

Make sure to insert your own tenant ID
Next up is to give the request the appropriate parameters, this request will need 4 things:
- A client ID
- The client secret
- A grant type
- And a scope
Following the steps above, you should have the client ID and client secret with you, simply enter those two values with the name "client_id" and "client_secret".
For the grant type, in this guide we are using the client credentials authentication flow, we are using this for this guide so that we don't need to worry about logging the user in when getting an access token. Enter the value "client_credentials" with the name "grant_type".
And finally for the scope enter the link:
https://graph.microsoft.com/.default
Other authentications flow would let you be more specific with your scope, like entering "Mail.send" but for client credentials it must have a value with the "/.default" suffixed to the application ID URI, which by default is "https://graph.microsoft.com/". Enter the link to the value with the name "scope".

The result of this request takes form of a JSON object, if your request was successful, the JSON object should look something like this:
{
    "token_type": "Bearer",
    "expires_in": 3599,
    "ext_expires_in": 3599,
    "access_token": "412076657279206c6f6e67206a756d626c6564207069656365206f662074657874"
}
The "access_token" property of this JSON object is what we need for our second JSON tool, and for this guide, we will store this value in a workflow variable. You can create a workflow variable by going to the "Process Property", which in Joget DX8, is accessible via the pencil icon beside your process' name.

Add as many variables as you need and name them appropriately.
Back at your JSON tool, scroll down to the "Store to Workflow Variable" setting and enter the variable of your choice and give the JSON object name "access_token".

And with that, we have successfully requested and stored our access token for the second JSON tool.
Sending the Email
Courtesy to Microsoft's documentation and this Stackoverflow guide, to send an email, we will need another POST request with the link:
https://graph.microsoft.com/v1.0/users/{id | userPrincipalName}/sendMailor
https://graph.microsoft.com/v1.0/users/me/sendMail
For this guide, we will be using the first one, enter the appropriate information to your second JSON tool and make the Body Type as "Custom JSON Payload".

Getting userPrincipalName via Azure
This "id | userPrincipalName" refers to the ID or "principal name" of the user that will be sending the email. The format of an ID will be a 32 long random string separated into 5 sections, while the format of a principal name will look like an email address. Most emails and IDs will be invalid when placed in the request link, to see which emails are allowed, you can check it in your Azure profile.
From the Home screen go to:
- Azure Active Directory
- Users
And in that screen you can see a list of all the valid users, it should be filled with around a dozen dummy accounts and your account. Copy paste your or any of the "User Principal Name" in that list to your request link and this time the request will be valid.
Getting userPrincipalName and ID via GET Request (Optional)
Optionally, you can extract both the "User Principal Name" and their ID, by doing a GET request to the link,
https://graph.microsoft.com/v1.0/users
Feed this GET request with a non-expired access token and if the request is successful, you will be presented with an array of JSON objects that represents all of the user's information, including their "User Principal Name" and ID. It is also important to note, this is where that optional API permission "User.Read.All" is used. For this guide, this method will not be used.
The JSON Payload
After pasting the appropriate request link, time to feed it the JSON Payload
This JSON payload should consists of simply one JSON object called "message", in the documentation for this API, you could put many properties like custom HTMLs and file attachments. But the only properties that the JSON object must have is the property "toRecipients", everything else can be left blank or deleted and the request would still be valid, but of course that wouldn't send a proper email, so put the properties you would normally find in an email like a "subject" and "content".
{
  "message": {
    "subject": "#variable.message_subject#",
    "body": {
      "contentType": "Text",
      "content": "#variable.message#"
    },
    "toRecipients": [
      {
        "emailAddress": {
          "address": "#variable.recipient_email#"
        }
      }
    ],
    "ccRecipients": [
    ]
  },
  "saveToSentItems": "false"
 }
Enter the appropriate information for each property, you could either hard code the information in the JSON object, or use hash variables like in the code block above.
Request Headers
After the JSON payload, you will also need to insert the request headers. For this request, it needs two things for their header, "Content-type" and "Authorization".
"Content-type" is used so the request knows what type of payload is it using, which for our case is a JSON object, so enter the value "application/json".

"Authorization" as the name suggests is used to authorize the request, this is where you will use your access token, the value for this request header will be a string in the format "[TOKEN_TYPE] [TOKEN]", the type of token we are using will be a "Bearer" token and you can simply copy paste the token or use a hash variable to extract the token that was stored in the workflow variable.

Conclusion
And that's it! With a minimum of 2 JSON Tools, you will be able to send an email using the MS Graph API. By the end, the process of your application should look something like the picture below, 2 tools for requesting an access token and sending the email and any additional activity for automating some of the process, like for the demo app, it is for automating creating the message.

Demo App
Here is the demo app that showcases this guide, please do keep in mind all of the information related to the Azure app has been left empty since those should be filled with your own Azure app. Most of these empty information can be find in the process of the application.