In this article, we will demonstrate how to configure OpenID on Joget using the OpenID Connect Manager Plugin.
- Create an Auth0 account here.
- Use whatever tenant you have available, in my case it is "dev-hprpdb0led4su3pm", but yours will be different.
- From the dashboard, go to User Management > Users > Create User, and create a new user.
- Then, based on Okta documentation, we will need to go to the discovery URL to extract the necessary information. For my case, it is https://dev-hprpdb0led4su3pm.jp.auth0.com/.well-known/openid-configuration.
- From the discovery URL, copy the relevant values and paste it into the respective fields in Joget OpenID Connect Manager Plugin. First, set issuer to Custom.
- issuer → Issuer URL
- authorization_endpoint → Authorization Token Endpoint
- token_endpoint → Token Endpoint
- userinfo_endpoint → User Info Endpoint
- "openid profile email" → Scope
- From the Application, copy the relevant values and paste it into the respective fields in Joget OpenID Connect Manager Plugin
- Client ID → Client ID
- Client Secret → Client Secret
- From the Joget OpenID Connect Manager Plugin, copy the relevant values and paste it into the respective fields in the Application
- Callback URL → Allow Callback URLs
You may refer to the color coded images below to guide your configuration.

Figure 1: Plugin configuration

Figure 2: Discovery URL
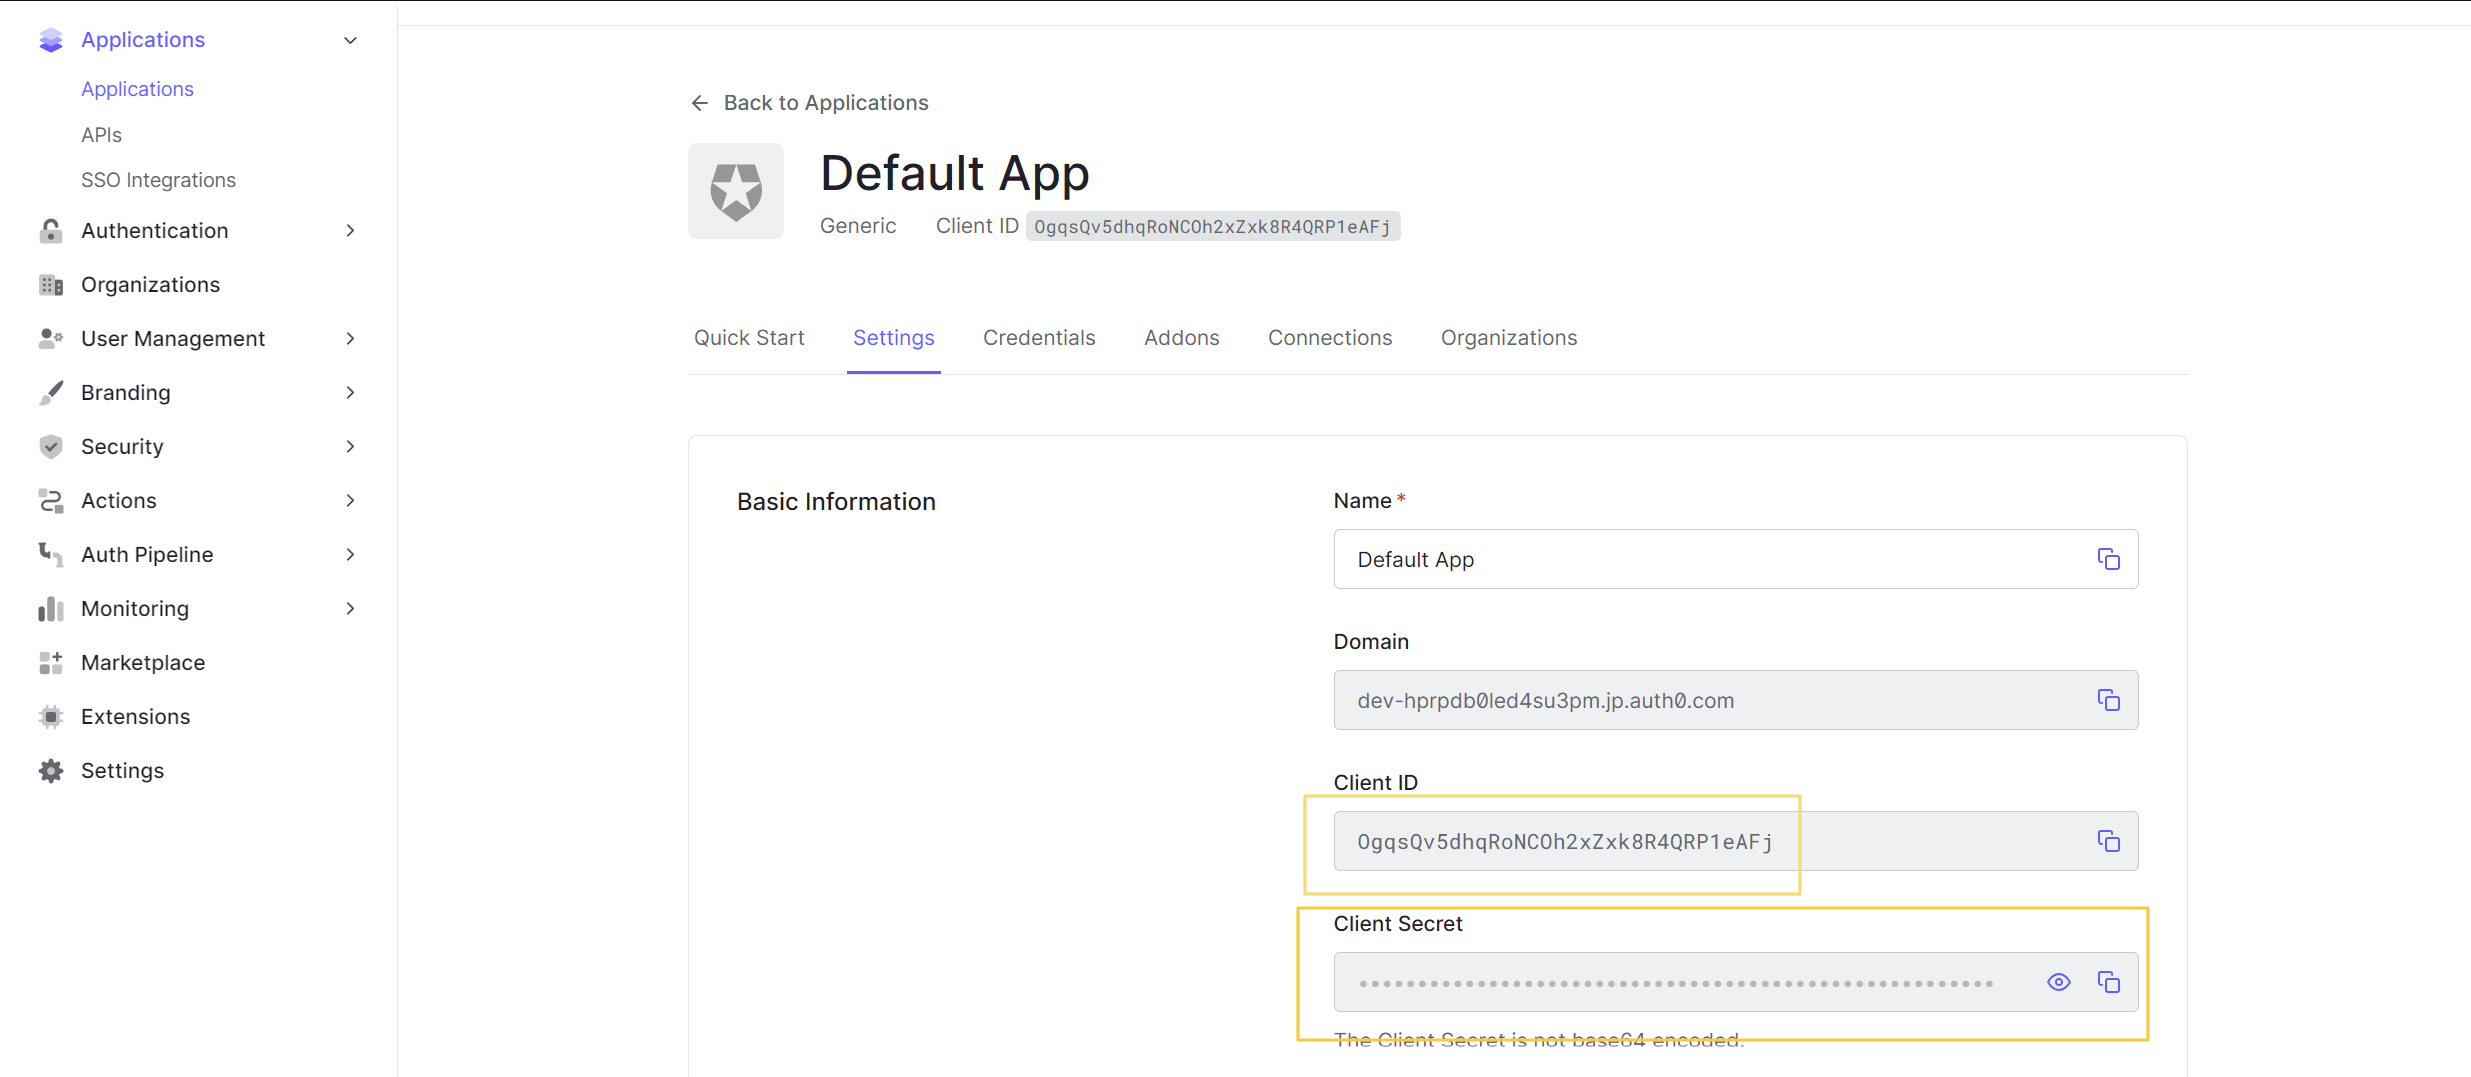
Figure 3: Application
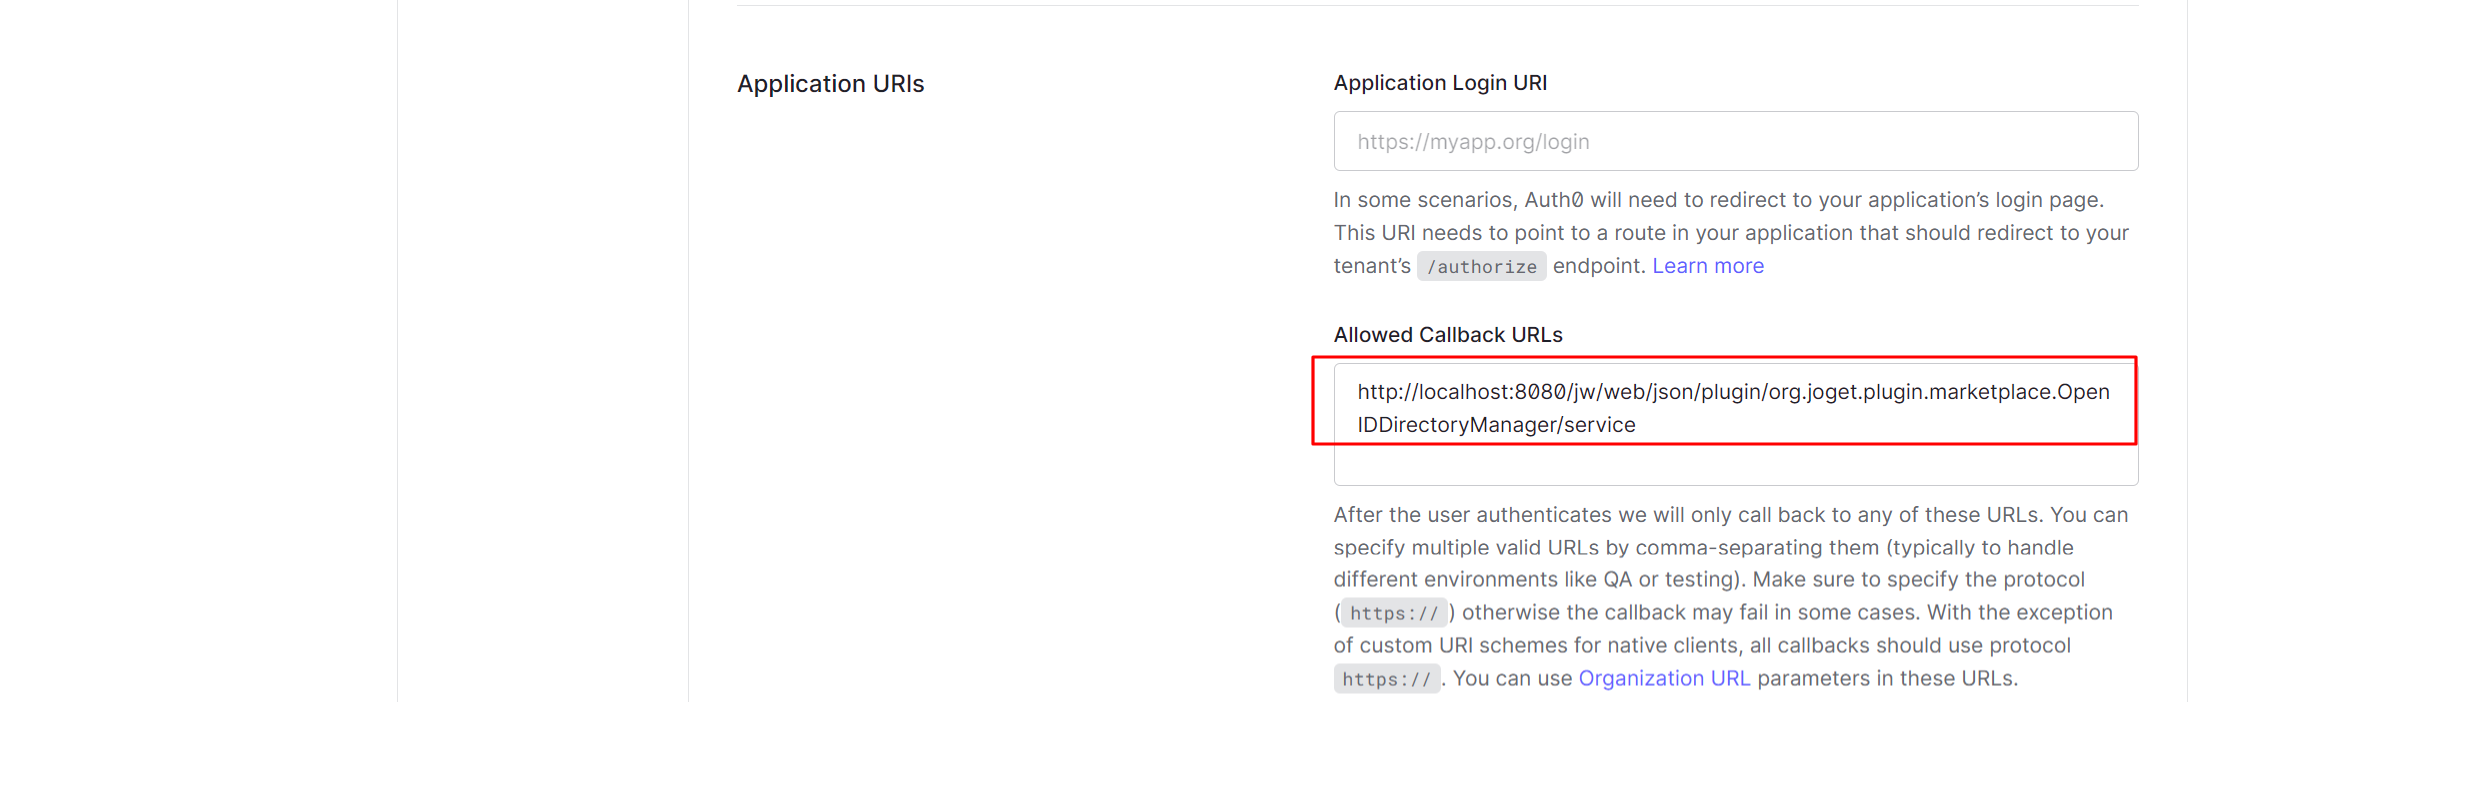
Figure 4: Callback URLs
Notes:
- If you are a free user, you maybe limited to 3 licensed users, if so you may have to delete other users to accommodate for the user login.
- In the Joget System Settings > General Settings, set API Domain Whitelist to * (IMPORTANT NOTE: If this is not set, you will get a 400 Forbidden error when performing the SSO).
- Download the plugin here.