...
- To test out sending from one account to another, do generate another account in the sample app by running the Generate Account Process.
We should end up with 2 accounts now.
- In the app design page, create a new form with the following details:
Form ID : sendTransaction
Form Name : Send Transaction
Table Name : cardano_send_test - After creating the form, using the Joget Form Builder, let's add a few necessary fields that a Cardano transaction requires:
a) Sender Account
Use a select box. Edit the element. For the Options Binder, select the Default Form Options Binder. For Form property, select the Account Details form. For Label Column property, simply select the "id" field.
b) Amount To Send (ADA)
Use a text field. Edit the element and go to Advanced Options tab, and select the Default Validator for the Validator property. Check the Mandatory property and select the Type property as Numeric.
c) Receiver Account
Use a select box. Edit the element. For the Options Binder, select the Default Form Options Binder. For Form property, select the Account Details form. For Label Column property, simply select the "id" field.
- Save the form.
- Once the form is saved, click on the Generate App button to use the App Generator.
Check the option for Generate Process - Approval Process, then click Generate.
Upon completing the generation, coming back to the app design page, we can see that the relevant components for an approval-type process have been generated accordingly, with a Send Transaction Approval Process automatically deployed for us.

- Now we just need to slightly modify the generated process design to incorporate the Cardano Send Transaction Tool plugin into the app. On the app design page, go to the Processes tab, select the Send Transaction Approval Process in the dropdown, and click on Design Process.|
- Now that we are in the Process Builder, edit the process properties, and add these additional workflow variables:
- txValidated
- txExplorerUrl
These workflow variables will be used by the Cardano Send Transaction Tool plugin later on to update the transaction validation status and store an auto-generated Cardano transaction explorer URL.
- For the process tool that is after the "Status == Approved" path, rename it to Send Transaction.
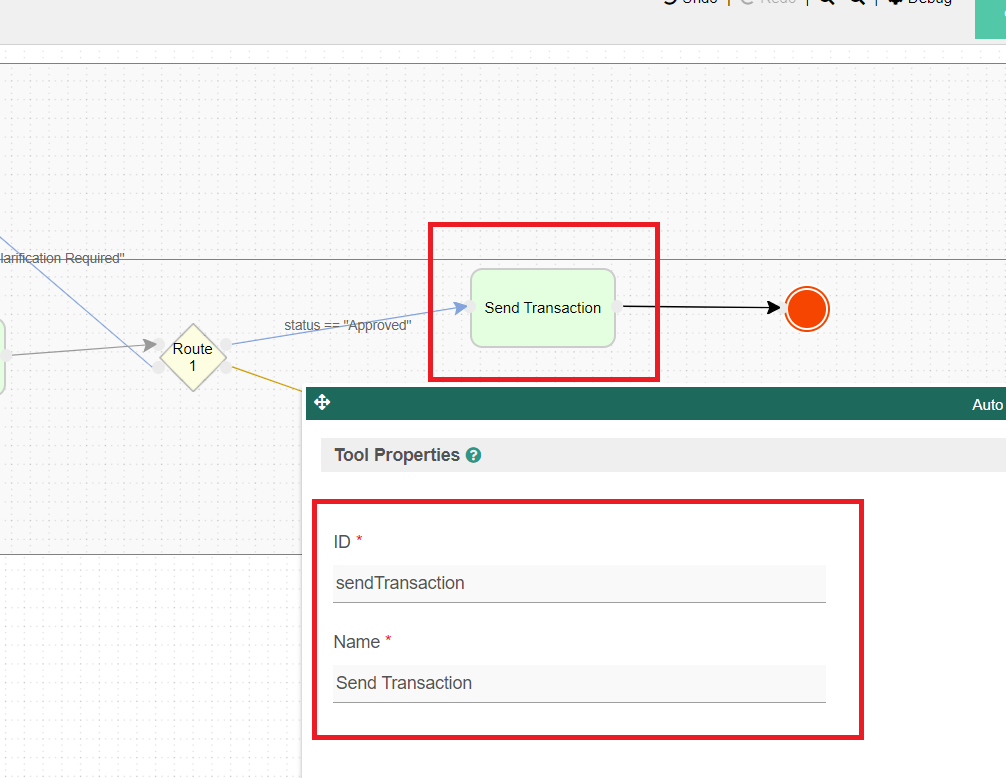
- We are done with the process design. Click on Deploy at the top right corner to deploy this modified process.
- Coming back to the app design page, go to Map Tools to Plugins tab, and remove all the unneeded email tools that were automatically mapped during the approval process generation just now.
- Add a plugin to the Send Transaction tool. Select Cardano Send Transaction Tool.

Configure the Cardano Send Transaction Tool accordingly by selecting the Testnet network, and keying in your Blockfrost testnet project's API Key that you have generated earlier, along with the necessary configurations.
To demonstrate the ability to embed form data into the transaction metadata, we will also check the Enable Transaction Metadata property and add these fields from the Send Transaction form:
- id
- dateCreated
- createdBy
You can also refer to the plugin's documentation.


Configure Cardano Send Transaction ToolProperty
Value
Network Type
Testnet
Blockfrost Project Key
(Your Blockfrost testnet project's API Key)
Transaction DetailsProperty
Value
Sender Address
#form.cardano_send_test.sender_account#
Sender Account Mnemonic Phrase
#form.cardano_accounts.mnemonic[{form.cardano_send_test.sender_account}]#
(This uses Form Data Hash Variable with Nested Hash Variable to dynamically point to the sender's account mnemonic phrase in reference to the Sender Address of the current form record.)
NOTE: Do not key in the plain-text mnemonic phrase here.
Receiver Address
#form.cardano_send_test.receiver_account#
Amount To Send (ADA)
#form.cardano_send_test.amount#
Enable Transaction Metadata
Yes
Form
Send Transaction
Metadata
id
dateCreated
createdBy
Store Response to Workflow VariableProperty
Value
Is Transaction Validated
txValidated
Transaction Explorer URL
txExplorerUrl
Save the plugin configuration.- And that's it! To try sending transactions, launch the app. Due to the approval process generation done earlier, we should see a new userview category that contains an Inbox Menu & Run Process Menu for the Send Transaction Approval Process.

Click on Submit Send Transaction to start the process, and follow through the process flow.
After doing so, the Cardano Send Transaction Tool will pick up these form field values and perform the transaction accordingly. To observe this, click on Monitor in the admin bar, and navigate to Completed Processes tab.
Here, simply select the account that you have funded previously as the sender account, specify the amount of ADA coins to send, and select the latter account that was just generated just now as the receiver account.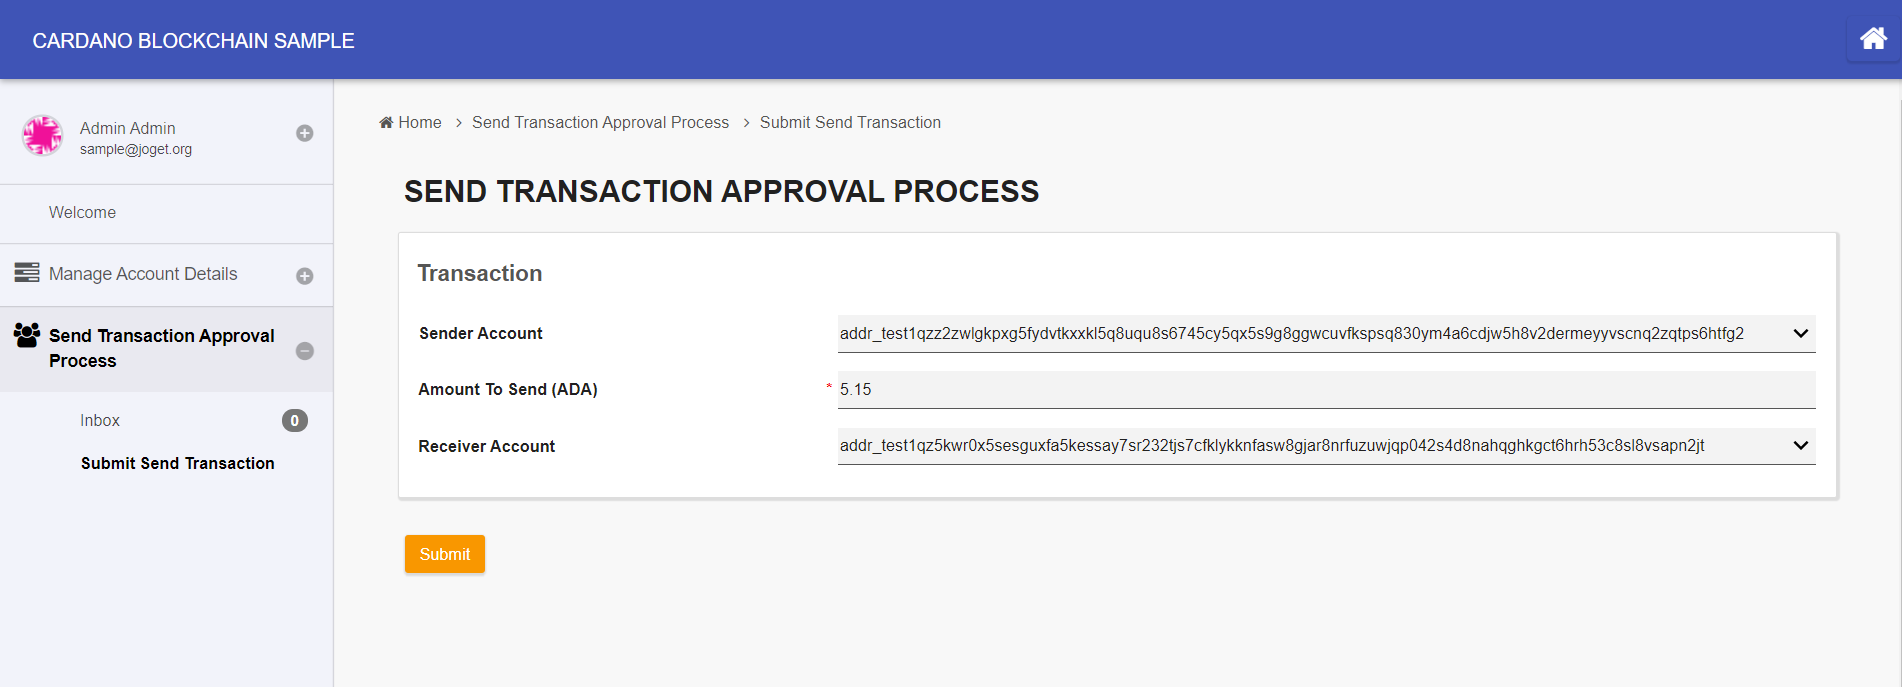
After submitting this activity, the process will flow to the Approval activity. Navigate to the Inbox Menu, select the Status as Approved, and submit this approval activity.

Upon inspection of the completed process instance, we can see that the Transaction Validation Flag (represented by txValidated workflow variable) is false. This is perfectly normal in the initial time period as transactions performed on the Cardano Blockchain undergo confirmation in order for the transaction to be accepted into the chain and become immutable. Transaction confirmations are usually completed in about 20 seconds, depending on the network load.
NOTE: Transaction confirmations and chain confirmations (sometimes referred to as block confirmations) are different concepts. Transaction confirmation is the point in time when a transaction is accepted into the chain and becomes immutable, whereas chain confirmation is the point beyond which the chain is guaranteed by protocol not to alter any further and is usually considered complete after 15-30 blocks deep.
Once the transaction is confirmed, it is considered confirmed and validated, and thus will later on be automatically set to true by the Cardano Send Transaction Tool.
Additionally, we can see that the Transaction Explorer URL (represented by txExplorerUrl workflow variable) contains a URL generated by the plugin. By navigating to this URL in your browser, it leads to the official Cardano blockchain explorer website and we can see this transaction there as a form of proof-of-existence, along with the form data embedded as the transaction metadata.
As a proof-of-existence of this transaction done from this tutorial, you can browser to this URL in your browser to see the transaction details here:
https://explorer.cardano-testnet.iohkdev.io/en/transaction?id=8b8717afc57a661aed0f9156e651a663cd78cfd58e30026bbb94edcc60aa023e
...